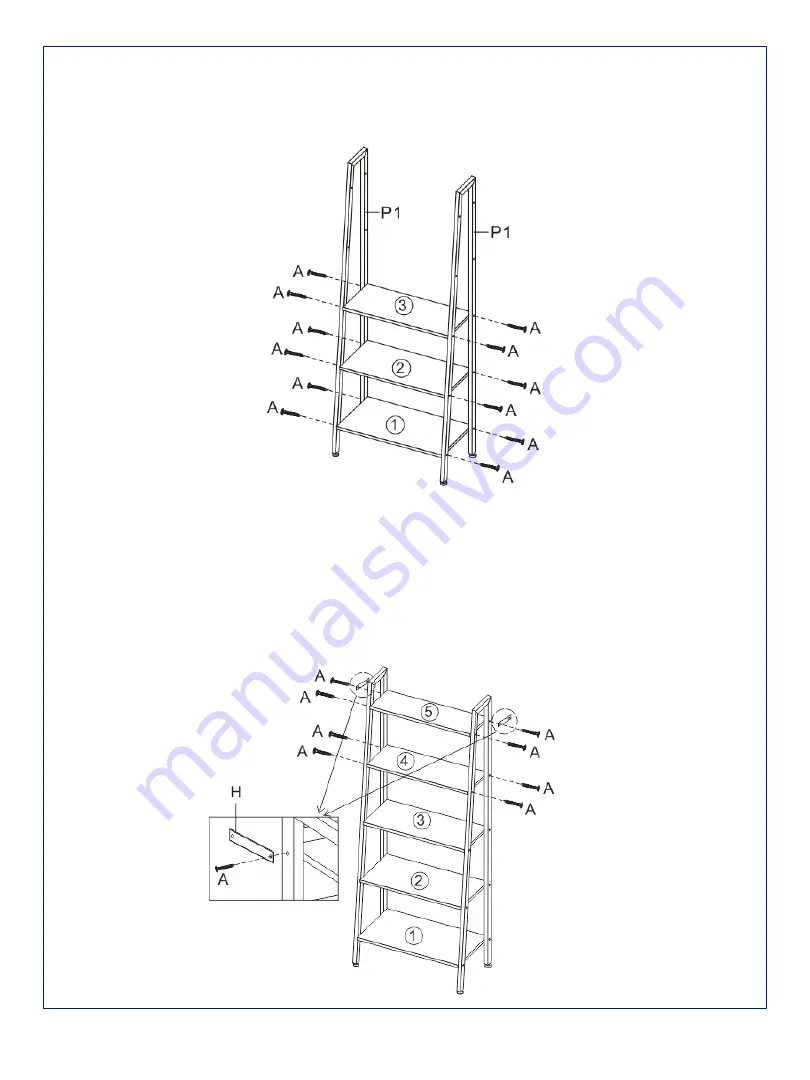
Fix 1, 2 and 3 panels on the P1 metal frame with part A.
STEP 3:
Fix panel 4 and panel 5 on the metal frame of P1 with partA. The fitting A at the back of panel 5 should be connected withthe fitting H.
STEP4:
5
Page 1: ...1 Imported by JWA Furniture Pty Ltd Qld Brisbane Australia For any assistance with assembly or for missing parts please refer to your receipt ASSEMBLY INSTRUCTION EDGAR ITEM CODE 68431 Bookcase...
Page 2: ...led as near as possible to the point of use 3 Ensure that you have all required contents for complete assembly 4 Always read the assembly instructions carefully before beginning assembly 5 Keep all ha...
Page 3: ...3 PARTS LIST 1 Panel 1 2 Panel 2 3 Panel 3 4 Panel 4 5 Panel 5 P1 Metal frame P2 Back connection pipe...
Page 4: ...Connect the metal pipes of P2 with fittings B2 and C 4 STEP 1 Install the accessory E at the bottom of the P1 metal frame STEP 2...
Page 5: ...1 2 and 3 panels on the P1 metal frame with part A STEP 3 Fix panel 4 and panel 5 on the metal frame of P1 with part A The fitting A at the back of panel 5 should be connected with the fitting H STEP...
Page 6: ...Use fitting B1 and D to fix P2 on the metal frame of P1 STEP 5 Use fitting F to pass through the fitting H and lock it into the wall rubber plug on the corresponding wall STEP 6 6...
Page 7: ...7 ASSEMBLY IS COMPLETE...
Page 8: ...ry you will need to acquire wall anchors 2 Attach the second Mounting Plate to the furniture frame with the Short Screws 3 Move the furniture to its final position Thread a Wall Strap through the both...
Page 9: ...mperature directly onto the surface of your furniture Clean up spills quickly Water left over a prolonged period of time may cause damage Alcohol perfume nail polishes aftershave and some medication m...