background image

13

General 

inf

o

rm

ation

s

English

General informations

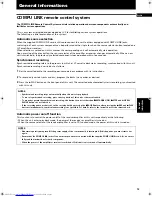
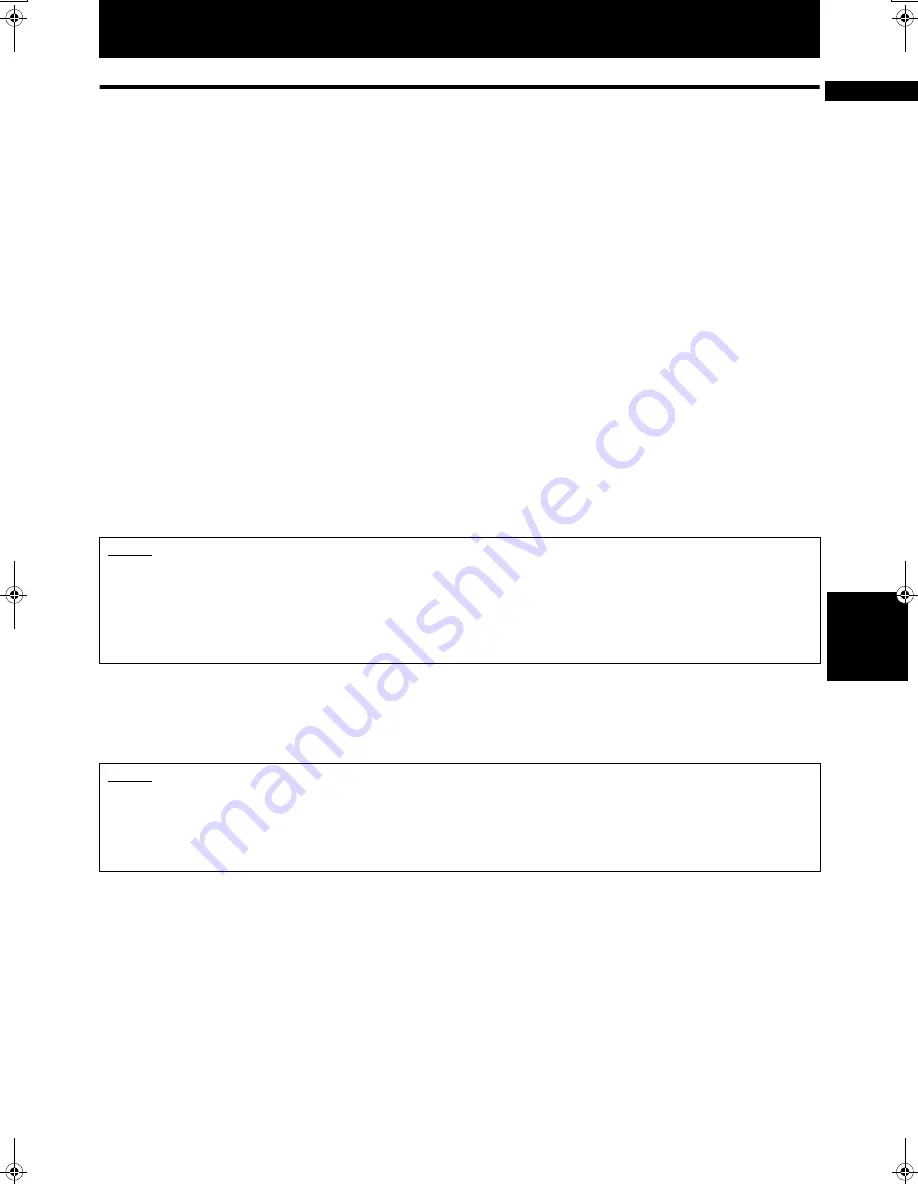
COMPU LINK remote control system

The COMPU LINK Remote Control System controls relative operations between components automatically and 
facilitates various operations.

This is a system originated and developed by JVC for facilitating various system operations.
The following is a brief explanation of this system:

Automatic source selection

When the supplied COMPU LINK cord is utilized to connect this unit to others equipped with COMPU LINK jacks, 
switching-in of each system component can be performed with a single touch on the source selector button located on a 
JVC amplifier or receiver.
When selection is carried out in this manner, the corresponding unit will automatically start operation.
Upon pressing of the play button, the source selector of the amplifier or receiver changes automatically. When a new 
unit is switched in, the previously selected component stops operation within five seconds.

Synchronized recording

Synchronized recording refers to the process in which a JVC cassette deck starts recording, synchronized with this unit. 
Synchronized recording is carried out as follows:

1

Set the cassette deck to the recording pause mode in accordance with its instructions.

2

To record only certain tracks or discs, program the tracks in any order, as desired.

3

Press the 

3

 PLAY button on the front panel of this unit. The cassette deck automatically starts recording, synchronized 

with this unit.

Automatic power on/off function

This function is to control the power on/off of the receiver/amplifier or this unit respectively as the following.
• When this unit enters playback mode, the power of the receiver or amplifier is turned on.
• When the source selector of the receiver/amplifier is set to CD function mode, the power of this unit is turned on.

NOTES

• Synchronized recording stops automatically when this unit stops playback.

• To cancel synchronized recording, press the stop button of this unit or the cassette deck.

• To properly operate the synchronized recording, the buttons/controls other than 

%

%

%

%

 STANDBY/ON, 

7

7

7

7

 STOP and 

0

 OPEN/

CLOSE buttons do not function.

• If the recording pause mode is set on the cassette deck by pressing the 

8

8

8

8

 PAUSE button after pressing the 

 REC and 

3

3

3

3

 PLAY 

buttons simultaneously, synchronized recording is not possible. For details, refer to the instructions for the cassette deck.

NOTES

• Abnormal operation may result if the power supply of the component(s) is interrupted. If this happens, you must start over 

again.

• Ensure that the COMPU LINK jacks of the each component are connected with the supplied COMPU LINK cord. Also, be sure to 

fully read the instructions for each component.

• When the power of the amplifier or receiver is switched off, this unit is also turned off automatically.

 # !" #!$$$%$&'

Summary of Contents for XL-FZ700

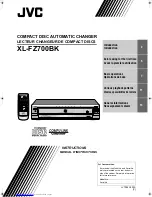
Page 1: ...SCSKIP STANDBY STANDBY ON PAUSE PLAY STOP OPEN CLOSE SKIP XL FZ700 COMPACT DISC AUTOMATIC CHANGER DISC 1 DISC 2 DISC 3 DISC 4 DISC 5 DISC 6 DISC 7 PLAY EXCHANGE 7 DISC EXCHANGE DISC SKIP CD R RW PLAYBACK 1BIT P E M D D CONVERTER Introduction 2 Before using for the first time 5 Basic operations 7 Various playback patterns 11 General informations 13 16758 7 216 ...

Page 2: ...LES CHOCS ELECTRIQUES INTRODUIRE LA LAME LA PLUS LARGE DE LA FICHE DANS LA BORNE CORRESPONDANTE DE LA PRISE ET POUSSER JUSQUAU FOND For Canada Pour le Canada THIS DIGITAL APPARATUS DOES NOT EXCEED THE CLASS B LIMITS FOR RADIO NOISE EMISSIONS FORM DIGITAL APPARATUS AS SET OUT IN THE INTERFERENCE CAUSING EQUIPMENTSTANDARDENTITLED DIGITALAPPARATUS ICES 003 OF THE DEPARTMENT OF COMMUNICATIONS CETAPPAR...

Page 3: ...tion 6 Basic operations Page 7 Basic functions for disc playback 7 Turning on the power of this unit 7 Remote control operation 7 Inserting and removing discs 7 Playing a disc 8 Stopping playback 8 Locating a point to start playback 9 Skipping to a desired disc during playback DISC SKIP 9 Changing to a desired disc during playback DISC 1 7 9 Skipping to a desired track during playback 9 Searching ...

Page 4: ... may not be picked up correctly Applicable discs This unit can only be used with compact discs bearing the marks below Never use discs of other types CD R and CD RW discs recorded with the Audio CD format can be played back though some may not be played back because of the disc characteristics or recording condition About this manual This manual covers the operating instructions for the compact di...

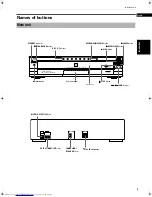
Page 5: ...SC SKIP CD R RW PLAYBACK 1BIT P E M D D CONVERTER RIGHT LEFT OUTPUT SYNCHRO COMPU LINK 3 DIGITAL OUT OPTICAL AC IN AC IN STANDBY ON button Display window DISC 1 7 buttons remote sensor STANDBY indicator COMPU LINK 3 SYNCHRO jacks 0 0 0 0 OPEN CLOSE button OUTPUT RIGHT LEFT jacks DIGITAL OUT OPTICAL jack AC IN connector 4 4 4 4 SKIP buttons 7 7 7 7 STOP button 3 3 3 3 PLAY button 8 8 8 8 PAUSE butt...

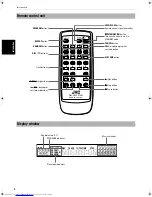
Page 6: ...k buttons STANDBY ON button Turns on the unit or puts it in STANDBY mode REPEAT button 4 4 4 4 skip buttons DISC SKIP button OPEN CLOSE button CANCEL button 3 3 3 3 Play button CALL displaying program contents button 8 8 8 8 Pause button 7 7 7 7 Stop button Remote control signal transmitter Display window EXCHANGE DISC TRACK TOTALTIME STEP REPEAT1 PROGRAM RANDOM 1 2 3 5 6 7 4 1 2 3 4 5 6 7 8 9 10 ...

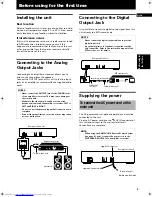
Page 7: ...s are complete to be continued NOTES Never connect the OUTPUT jacks to the PHONO jacks of the amplifier or receiver This may cause damage to the components Make sure that the same channels are connected between this unit and the amplifier or receiver LEFT to LEFT and RIGHT to RIGHT Do not connect the power plug until all connections are complete Connect the plugs firmly Loose connections may cause...

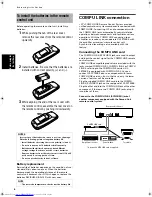
Page 8: ... input the control signal for the COMPU LINK remote control system COMPU LINK compatible products are provided with the jacks marked COMPU LINK 1 COMPU LINK 2 or COMPU LINK 3 referring to the COMPU LINK version XL FZ700BK is equipped with COMPU LINK 3 You can connect XL FZ700BK also to a component with lower COMPU LINK versions But in that case only the lower versions features will be available Pl...

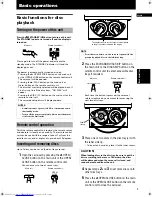
Page 9: ... access to two of seven trays 2 Press the EXCHANGE DISC SKIP button on the main unit or the DISC SKIP button on the remote control unit to select accessible disc trays if required Each time the button is pressed the carousel rotates clockwise by an amount for accessing the next two disc trays 3 Place one or two discs in the disc tray s with the label side up To insert an 8 cm disc place it in the ...

Page 10: ...ng tray as follows The circle of the DISC indicator will light if a disc is set in the corresponding disc tray The numbers 1 7 are always lit The circle is unlit if no disc is set in the corresponding disc tray About the music calendar When a disc to be played back is read the contents track numbers of the disc appear on the music calendar As the track is finished to play back or skipped the track...

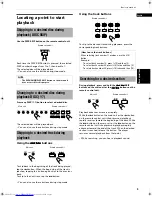
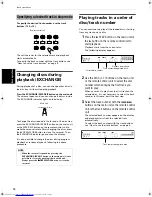
Page 11: ...button on the main unit or the 1 button on the remote control unit is kept pressed playback rapidly reverses toward the beginning of the track While the button on the main unit or the button on the remote control unit is kept pressed playback rapidly advances toward the end of the track When the desired section is reached release the button The player resumes normal playback from that point While ...

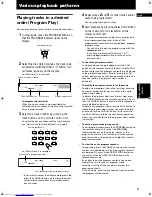
Page 12: ...n the main unit or the 3 button on the remote control unit to start playback Playback starts from the current disc The following display appears 2 Use the DISC 1 7 buttons on the main unit or the remote control unit to select the disc number which contains the first track you want to play When you want to play from the first track on the selected disc it is not necessary to select the track number...

Page 13: ... step number is blinking To modify the program contents in stop mode To add a new program step to the last step enter the new disc number and or track number referring to steps 2 and 3 above To delete the program step from the last step press the CANCEL button on the remote control unit Each time the CANCEL button is pressed the last program step is deleted one by one To delete any program step pr...

Page 14: ...hts on the display When playback starts all tracks of the disc being selected will be played repeatedly To select a desired disc see Playing a desired disc on page 8 You can use this function together with the program playback or random playback In program mode the programmed contents are played repeatedly In random mode all the tracks are played repeatedly in random order Press the REPEAT button ...

Page 15: ...e tracks in any order as desired 3 Press the 3 PLAY button on the front panel of this unit The cassette deck automatically starts recording synchronized with this unit Automatic power on off function This function is to control the power on off of the receiver amplifier or this unit respectively as the following When this unit enters playback mode the power of the receiver or amplifier is turned o...

Page 16: ...de stick paper to or use any adhesive on the surface Storage Make sure that discs are kept in their cases If discs are piled one on top of another without their protective cases they can be damaged Do not put discs in any location where they can be exposed to direct sunlight or in any place where humidity or temperature is high Avoid leaving discs in your car Maintenance of discs When there are fi...

Page 17: ...sc is scratched Replace the disc with a new one The remote control unit does not function Batteries are exhausted Replace both batteries There is an obstacle between remote control unit and the remote sensor of the main unit Remove the obstacle Direct sunlight shines on the remote sensor of the main unit Shade the unit from the direct sunlight General Format Compact disc digital audio Signal detec...

Page 18: ...rized servicer or visit our website at www JVC com Remember to retain your Bill of Sale for Warranty Service Do not service the television yourself Caution To prevent electrical shock do not open the cabinet There are no user serviceable parts inside Please refer to qualified service personnel for repairs Accessories To purchase accessories for your JVC product please call toll free 1 800 882 2345...

Page 19: ...ng 4 Damage that occurs in shipment due to act of God and cosmetic damage 5 Signal reception problems and failures due to line power surge 6 Video Pick up Tubes CCD Image Sensor Cartridge Stylus Needle are covered for 90 days from the date of purchase 7 Accessories 8 Batteries except that Rechargeable Batteries are covered for 90 days from the date of purchase There are no express warranties excep...

Page 20: ...VICTOR COMPANY OF JAPAN LIMITED EN J VC 0202AOMCREJEM ...

Page 21: ... SKIP XL FZ700 COMPACT DISC AUTOMATIC CHANGER DISC 1 DISC 2 DISC 3 DISC 4 DISC 5 DISC 6 DISC 7 PLAY EXCHANGE 7 DISC EXCHANGE DISC SKIP CD R RW PLAYBACK 1BIT P E M D D CONVERTER Introduction Introduction 2 Before using for the first time Avant la première utilisation 5 Basic operations Opérations de base 7 Various playback patterns Diverses possibilites de lecture 11 General informations Renseignem...

Page 22: ...LES CHOCS ELECTRIQUES INTRODUIRE LA LAME LA PLUS LARGE DE LA FICHE DANS LA BORNE CORRESPONDANTE DE LA PRISE ET POUSSER JUSQUAU FOND For Canada Pour le Canada THIS DIGITAL APPARATUS DOES NOT EXCEED THE CLASS B LIMITS FOR RADIO NOISE EMISSIONS FORM DIGITAL APPARATUS AS SET OUT IN THE INTERFERENCE CAUSING EQUIPMENTSTANDARDENTITLED DIGITALAPPARATUS ICES 003 OF THE DEPARTMENT OF COMMUNICATIONS CETAPPAR...

Page 23: ...tion 6 Basic operations Page 7 Basic functions for disc playback 7 Turning on the power of this unit 7 Remote control operation 7 Inserting and removing discs 7 Playing a disc 8 Stopping playback 8 Locating a point to start playback 9 Skipping to a desired disc during playback DISC SKIP 9 Changing to a desired disc during playback DISC 1 7 9 Skipping to a desired track during playback 9 Searching ...

Page 24: ... may not be picked up correctly Applicable discs This unit can only be used with compact discs bearing the marks below Never use discs of other types CD R and CD RW discs recorded with the Audio CD format can be played back though some may not be played back because of the disc characteristics or recording condition About this manual This manual covers the operating instructions for the compact di...

Page 25: ...SC SKIP CD R RW PLAYBACK 1BIT P E M D D CONVERTER RIGHT LEFT OUTPUT SYNCHRO COMPU LINK 3 DIGITAL OUT OPTICAL AC IN AC IN STANDBY ON button Display window DISC 1 7 buttons remote sensor STANDBY indicator COMPU LINK 3 SYNCHRO jacks 0 0 0 0 OPEN CLOSE button OUTPUT RIGHT LEFT jacks DIGITAL OUT OPTICAL jack AC IN connector 4 4 4 4 SKIP buttons 7 7 7 7 STOP button 3 3 3 3 PLAY button 8 8 8 8 PAUSE butt...

Page 26: ...k buttons STANDBY ON button Turns on the unit or puts it in STANDBY mode REPEAT button 4 4 4 4 skip buttons DISC SKIP button OPEN CLOSE button CANCEL button 3 3 3 3 Play button CALL displaying program contents button 8 8 8 8 Pause button 7 7 7 7 Stop button Remote control signal transmitter Display window EXCHANGE DISC TRACK TOTALTIME STEP REPEAT1 PROGRAM RANDOM 1 2 3 5 6 7 4 1 2 3 4 5 6 7 8 9 10 ...

Page 27: ... complete to be continued NOTES Never connect the OUTPUT jacks to the PHONO jacks of the amplifier or receiver This may cause damage to the components Make sure that the same channels are connected between this unit and the amplifier or receiver LEFT to LEFT and RIGHT to RIGHT Do not connect the power plug until all connections are complete Connect the plugs firmly Loose connections may cause nois...

Page 28: ... input the control signal for the COMPU LINK remote control system COMPU LINK compatible products are provided with the jacks marked COMPU LINK 1 COMPU LINK 2 or COMPU LINK 3 referring to the COMPU LINK version XL FZ700BK is equipped with COMPU LINK 3 You can connect XL FZ700BK also to a component with lower COMPU LINK versions But in that case only the lower versions features will be available Pl...

Page 29: ...ess to two of seven trays 2 Press the EXCHANGE DISC SKIP button on the main unit or the DISC SKIP button on the remote control unit to select accessible disc trays if required Each time the button is pressed the carousel rotates clockwise by an amount for accessing the next two disc trays 3 Place one or two discs in the disc tray s with the label side up To insert an 8 cm disc place it in the inne...

Page 30: ...ng tray as follows The circle of the DISC indicator will light if a disc is set in the corresponding disc tray The numbers 1 7 are always lit The circle is unlit if no disc is set in the corresponding disc tray About the music calendar When a disc to be played back is read the contents track numbers of the disc appear on the music calendar As the track is finished to play back or skipped the track...

Page 31: ...button on the main unit or the 1 button on the remote control unit is kept pressed playback rapidly reverses toward the beginning of the track While the button on the main unit or the button on the remote control unit is kept pressed playback rapidly advances toward the end of the track When the desired section is reached release the button The player resumes normal playback from that point While ...

Page 32: ...n the main unit or the 3 button on the remote control unit to start playback Playback starts from the current disc The following display appears 2 Use the DISC 1 7 buttons on the main unit or the remote control unit to select the disc number which contains the first track you want to play When you want to play from the first track on the selected disc it is not necessary to select the track number...

Page 33: ... step number is blinking To modify the program contents in stop mode To add a new program step to the last step enter the new disc number and or track number referring to steps 2 and 3 above To delete the program step from the last step press the CANCEL button on the remote control unit Each time the CANCEL button is pressed the last program step is deleted one by one To delete any program step pr...

Page 34: ...hts on the display When playback starts all tracks of the disc being selected will be played repeatedly To select a desired disc see Playing a desired disc on page 8 You can use this function together with the program playback or random playback In program mode the programmed contents are played repeatedly In random mode all the tracks are played repeatedly in random order Press the REPEAT button ...

Page 35: ...e tracks in any order as desired 3 Press the 3 PLAY button on the front panel of this unit The cassette deck automatically starts recording synchronized with this unit Automatic power on off function This function is to control the power on off of the receiver amplifier or this unit respectively as the following When this unit enters playback mode the power of the receiver or amplifier is turned o...

Page 36: ...de stick paper to or use any adhesive on the surface Storage Make sure that discs are kept in their cases If discs are piled one on top of another without their protective cases they can be damaged Do not put discs in any location where they can be exposed to direct sunlight or in any place where humidity or temperature is high Avoid leaving discs in your car Maintenance of discs When there are fi...

Page 37: ...ect position Load the disc according to the groove of the disc tray Moisture is condensed inside the unit Leave the unit turned on until the moisture evaporates Disc is not finalized Finalize the disc The reproduced sound includes noise Disc is dirty Wipe off the disc surface with a soft cloth Disc is warped Replace the disc with a new one The sound is intermittent Disc is scratched Replace the di...

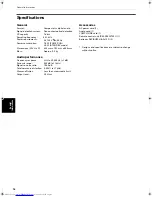
Page 38: ...Y mode Dimensions W x H x D 435 mm x 102 mm x 448 mm Mass Approx 5 5 k Audio performance Frequency response 2 Hz to 20 000 Hz 1 dB Dynamic range 98 0 dB at 1 kHz Signal to noise ratio 108 0 dB Total harmonic distortion 0 002 at 1 kHz Wow and flutter Less than measurable limit Output level 2 0 Vrms Accessories AC power cord 1 Audio cord 1 COMPU LINK cord 1 Remote control unit RM SXLFZ700J 1 Batteri...

Page 39: ...VICTOR COMPANY OF JAPAN LIMITED EN FR J VC 0202AOMCREJEM ...

Reviews: