E-30
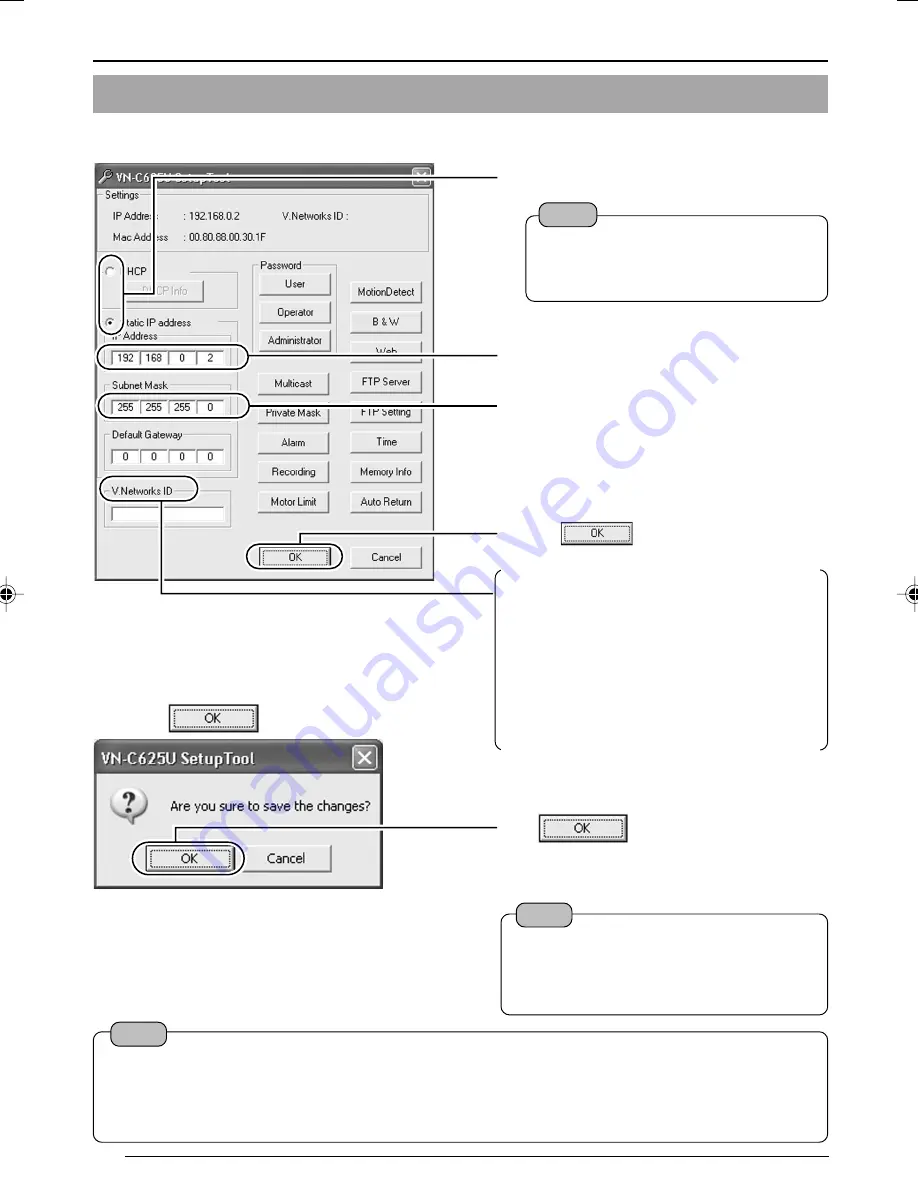
Settings (Step 2 Network Settings)
2.
Check settings.
3.
Click
.
4.
Start up the "V.Networks Controller".
(
☞
Page 31)
Click
.
[V.Networks ID] works as an identification
code set to VN-C625. Only alphanumeric
characters can be used.
This ID does not directly affect operation
by the user.
Normally, the ID is set as CAM00001,
CAM00002, etc.
(0 to 8 characters)
1
Select whether to use DHCP.
Note
The IP address of the DHCP server
and other information can be checked
when [DHCP] is selected.
2
Change the IP address to the one assigned
to or approved by the administrator.
3
Set Subnet mask to an appropriate value.
Ask the network administrator if necessary.
Note
Upon clicking OK, VN-C625 will be
automatically reset and the set values
will be enabled.
Note
In a system where more than 1 VN-C625 is used, turn on the power for a VN-C625 first, followed
by setting the camera until "2-3 Setting IP Address for this Camera Using the 'VN-C625U Setup
Tool' " is completed. Upon doing so, turn on a second camera and perform setting in the same
way. Perform the same procedure for subsequent cameras.
4
Click
.
2-3 Setting IP Address for this Camera Using the "VN-C625U Setup Tool" (Continued)
625 LWT0251-001A-H
05.3.25, 1:51 PM
30
Summary of Contents for V.NETWORKS VN-C625U
Page 39: ...BITTE ZUERST LESEN DOME TYPE NETWORK CAMERA VN C625 DEUTSCH ...
Page 76: ...A LIRE EN PREMIER DOME TYPE NETWORK CAMERA VN C625 FRANÇAIS ...
Page 113: ...LEAME PRIMERO DOME TYPE NETWORK CAMERA VN C625 ESPAÑOL ...
Page 150: ...LEGGIMI PER PRIMO DOME TYPE NETWORK CAMERA VN C625 ITALIANO ...


