63
䡵
Setting a mask area
1.
Select a MASK No., use the SELECTOR switch (
H
,
I
) to select
is selected, private mask will not
be displayed.)
The PRIVATE MASK EDIT screen is displayed.
2.
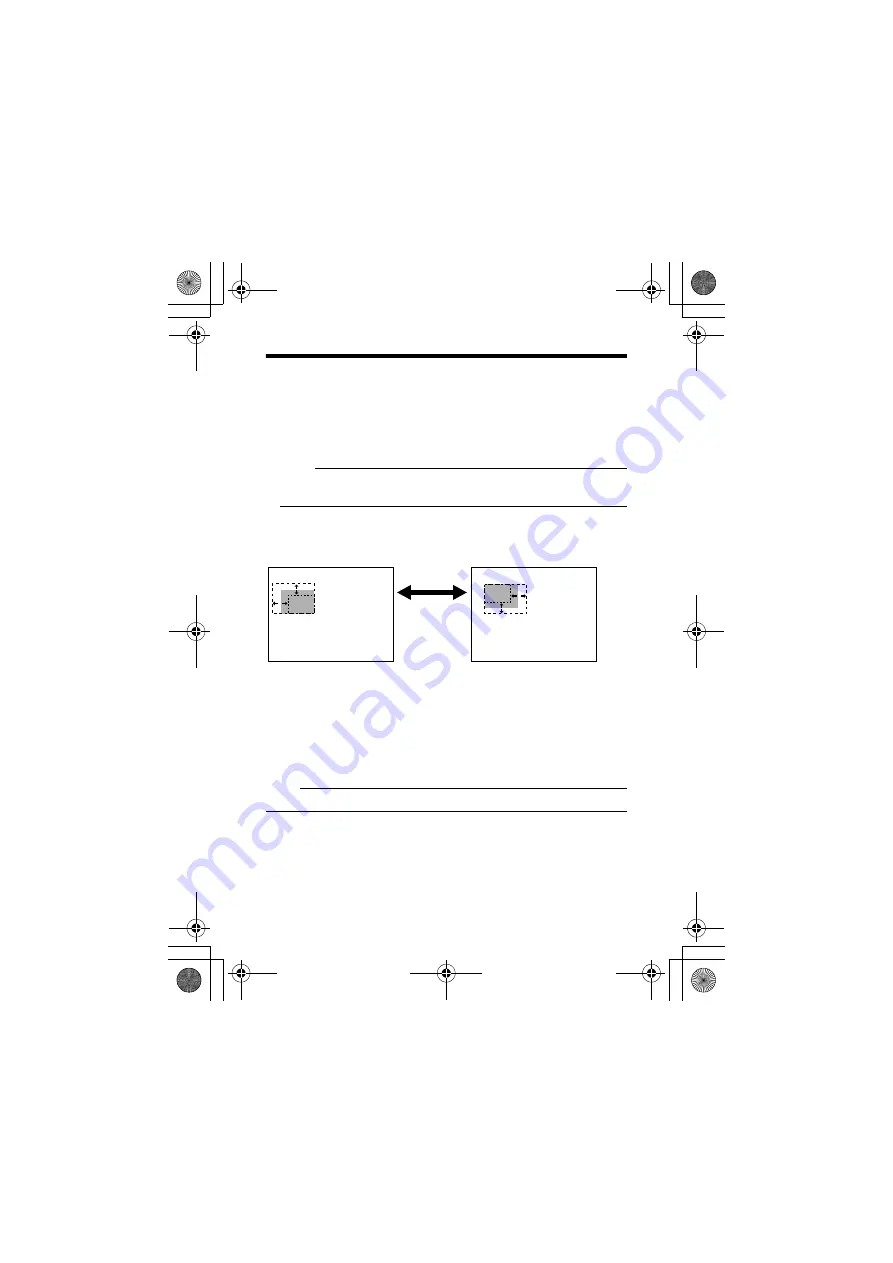
Editing the mask
Edit left/top or right/bottom of mask respectively.
Memo:
●
Use SET button to switch between left/top or right/bottom of editing of
mask.
●
Use the SELECTOR switch (
H
,
I
) to edit the left and right position
(horizontal width) of the mask.
●
Use the SELECTOR switch (
J
,
K
) to edit the top and bottom position
(height) of the mask.
●
䡵
Completion of mask setting
1.
Press the MENU button
The mask area of the selected number is saved and the screen returns to
the top menu (PRIVATE MASK screen).
Select a mask number and set the mask area in all the desired masks (from
MASK No.1 to MASK No.4).
Memo:
●
Maximum 4 masks can be set.
MASK EDIT
No. 1
<MENU>RETURN <SET>MODE
QN
MASK EDIT
No. 1
<MENU>RETURN <SET>MODE
PO
Use SET
button to
switch
TK-C1530_EN.book Page 63 Friday, August 24, 2007 9:29 AM


