


46
Movie clip
Transferring multiple clips on a CF memory card to a server
Multiple clips on a CF memory card can be transferred to a server at once via FTP.
Caution
●
Before using this function, it is necessary to set the destination, etc. of the clip using the FTP CLIENT SETUP menu on the LCD
screen or Web.
Operation
1.
Insert a pre-recorded CF memory card into the network pack. Then, connect the BR-DV6000 to the network using the LAN
terminal of the network pack.
2.
Turn on the power of BR-DV6000. Check to make sure the
C F
mark appears on the LCD screen. (When the power is first turned
on,
mark will flash during initialization.)
3.
Make sure the BR-DV6000 is not in operation.
4.
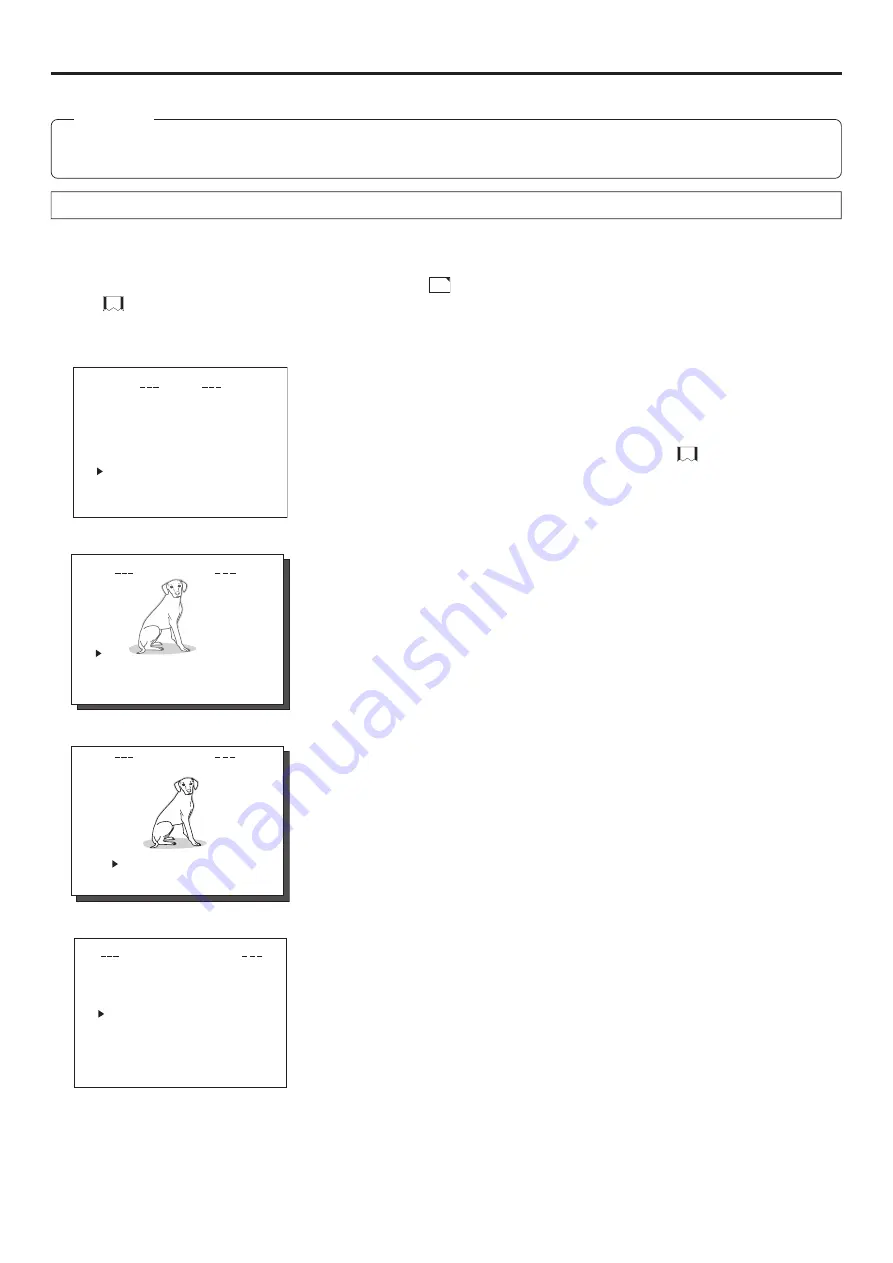
Display the MOVIE CLIP screen.
q
Press the MENU button to display the TOP MENU screen.
w
Press the DISP (
6
) or BLANK (
7
) button to select MOVIE CLIP and press the
SET button or (
t
) button.
●
The MOVIE CLIP screen appears.
●
During initialization of the network pack (while
mark is flashing), NET-
WORK PACK CONFIG will not appear.
5.
Select the clip to transfer to a server
q
Press the DISP (
6
) or BLANK (
7
) button to select the clip to transfer.
●
Use the [FF] button to move to the next page and the [REW] button to move to
the previous page.
●
Pressing the [FF] button for about 2 seconds will move to the page with the
latest clip.
●
Pressing the [REW] button for about 2 seconds will move to the page with the
oldest clip.
w
Press the SET button to display the CLIP FUNCTION screen of the selected
clip.
●
A still-image of the top screen of the selected clip and the FUNCTION LIST
will appear.
e
Press the DISP (
6
) or BLANK (
7
) button to set the cursor (
t
) to FTP SEND
SELECT OFF.
●
If already selected, FTP SEND SELECT ON will appear.
r
Press the SET button.
●
The display will change to FTP SEND SELECT ON.
t
To cancel the selection, set the cursor (
t
) to FTP SEND SELECT ON and
press the SET button.
●
The display will change to FTP SEND SELECT OFF.
y
Set the cursor (
t
) to PAGE BACK and press the SET button to return to the
MOVIE CLIP screen. Repeat steps from 5-
q
.
●
“ * ” will appear in front of the selected clips.
6.
Display the MOVIE CLIP SETUP screen.
q
In the MOVIE CLIP screen, set the cursor (
t
) to PAGE BACK and press the
SET button to return to the NETWORK PACK CONFIG screen.
w
Set the cursor (
t
) to MOVIE CLIP SETUP and press the SET button to display
the MOVIE CLIP SETUP screen.
7.
Transfer the selected clips to a server.
q
Set the cursor (
t
) to FILE SEND.
w
When the SET button is pressed, “WAIT A MINUTE PLEASE!” will appear and
transfer will start.
8.
When the transfer is completed, the “WAIT A MINUTE PLEASE!” display will dis-
appear.
●
If the transfer is unsuccessful, “FTP SEND ERROR!!” will appear. In this
case, check the settings of the FTP CLIENT SETUP screen or the used net-
work environment.
S Y S T EM . .
M E N U
REMO T E . .
AU D I O . .
V I D E O . .
T C / U B / C L OCK . .
D I S P L A Y S E T . .
.
.
E
MO V I
C L I P . .
NE TWOR K P AC K C ON F I G
E X I T
mc
mc
mc
mc
0 0 1 .
0
a s f
W
R /
I E
O V
M
C I P
L
1 0 2 5
/
0 2
/
0 9 0 0
:
0 0
:
0 0 2 .
0
a s f
W
R /
1 0 2 5
/
0 2
/
1 0 0 0
:
0 0
:
0 0 3 .
0
a s f
W
R /
1 0 2 5
/
0 2
/
1 1 0 0
:
0 0
:
0 0 4 .
0
a s f
W
R /
1 0 2 5
/
0 2
/
1 2 0 0
:
0 0
:
PAGE B ACK
I E
O V
M
C I P
L
mc 0 0 4 .
0
a s f
W
R /
R E V I E W
D E LE T E
P ROT E C T
PAGE B AC K
S E L EC T OF F
F T P SE N D
F T P SE N D
DE L E E
T
A L L
N CE L
C A
N CE
C A
F OR MAT
L
MODE
REPEAT
REPEAT
I E
O V
M
C I P
L
TU
S E
P
CA P T
I L E
R
U E . .
PAGE B ACK
F
S E ND
TOP MENU screen
MOVIE CLIP screen
CLIP FUNCTION screen
MOVIE CLIP SETUP screen


