background image

EN

MasterPage: Safety_Left

IMPORTANT SAFETY INSTRUCTIONS

1. Read these instructions.
2. Keep these instructions.
3. Heed all warnings.
4. Follow all instructions.
5. Do not use this apparatus near water.
6. Clean only with dry cloth.
7. Do not block any ventilation openings. Install in 

accordance with the manufacturer’s instructions.

8. Do not install near any heat sources such as radiators, 

heat registers, stoves, or other apparatus (including 
amplifiers) that produce heat.

9. Only use attachments/accessories specified by the 

manufacturer.

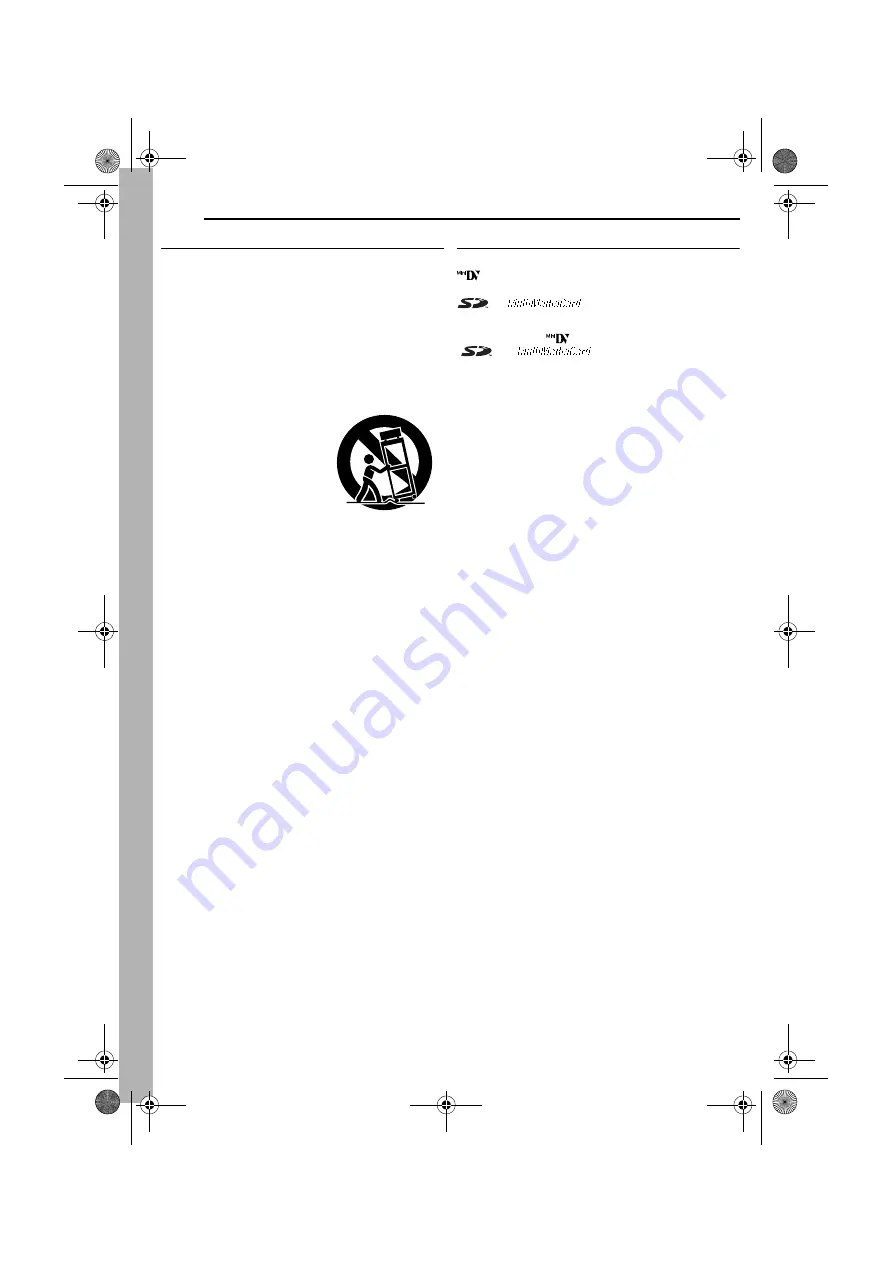
10. Use only with the cart, stand, 

tripod, bracket, or table 
specified by the manufacturer, 
or sold with the apparatus. 
When a cart is used, use 
caution when moving the cart/
apparatus combination to 
avoid injury from tip-over.

11. Unplug this apparatus during 

lightning storms or when 
unused for long periods of time.

12. Refer all servicing to qualified service personnel. 

Servicing is required when the apparatus has been 
damaged in any way, such as power-supply cord or plug 
is damaged, liquid has been spilled or objects have fallen 
into the apparatus, the apparatus has been exposed to 
rain or moisture, does not operate normally, or has been 
dropped.

Before Using This Camcorder

Make sure you only use cassettes with the Mini DV mark 

.

Make sure you only use memory cards with the mark 

 or 

.

This camcorder is designed exclusively for the digital video 
cassette, SD Memory Card and MultiMediaCard. Only 
cassettes marked “

” and memory cards marked 

” or “

” can be used with this unit.

Remember that this camcorder is not compatible with 
other digital video formats.

Remember that this camcorder is intended for private 
consumer use only.

Any commercial use without proper permission is prohibited. 
(Even if you record an event such as a show, performance or 
exhibition for personal enjoyment, it is strongly recommended 
that you obtain permission beforehand.)

Before recording important video, be sure to make a trial 
recording. 

Play back your trial recording to make sure the video and 
audio have been recorded properly.

We recommend cleaning your video heads before use.

If you haven’t used your camcorder for awhile, the heads may 
be dirty. We recommend periodically cleaning the video 
heads with a cleaning cassette (optional).

Be sure to store your cassette tapes and camcorder in 
the proper environment.

Video heads can become dirty more easily if your cassette 
tapes and camcorder are stored in a dusty area. Cassette 
tapes should be removed from the camcorder and stored in 
cassette cases. Store the camcorder in a bag or other 
container.

Use SP (Standard) mode for important video recordings.

LP (Long Play) mode lets you record 50% more video than 
SP (Standard) mode, but you may experience mosaic-like 
noise during playback depending on the tape characteristics 
and the usage environment. 
So, for important recordings, we recommend using SP mode.

It is recommended that you use JVC brand cassette 
tapes.

Your camcorder is compatible with all brands of commercially 
available cassette tapes complying with the MiniDV standard, 
but JVC brand cassette tapes are designed and optimized to 
maximize the performance of your camcorder.

Also read “CAUTIONS” on pages 52  54.

Microsoft

®

 and Windows

®

 are either registered trademarks 

or trademarks of Microsoft Corporation in the United States 
and/or other countries.

Macintosh is a registered trademark of Apple Computer, 
Inc.

QuickTime is a registered trademark of Apple Computer, 
Inc.

GR-DZ9_DZ7US.book  Page 4  Tuesday, May 18, 2004  10:15 AM

Summary of Contents for LYT1325-001A

Page 1: ...tp www jvc co jp english cyber http www jvc co jp english accessory INSTRUCTIONS GETTING STARTED 6 VIDEO RECORDING PLAYBACK 17 DIGITAL STILL CAMERA D S C RECORDING PLAYBACK 23 ADVANCED FEATURES 29 REFERENCES 48 TERMS Back cover DIGITAL VIDEO CAMERA For Customer Use Enter below the Model No and Serial No which is located on the bottom of the camcorder Retain this information for future reference Mo...

Page 2: ...GHT button brightens the image darkened by backlight 墌 pg 36 You can also select a spot metering area so that more precise exposure compensation is available 墌 pg 36 Spot Exposure Control Navigation Function The Navigation Function helps you check tape contents by making thumbnail images on a memory card 墌 pg 38 E Mail Clip Recording You can record video clips on the memory card as files which can...

Page 3: ...contains a small amount of mercury Disposal of these materials may be regulated in your community due to environmental considerations For disposal or recycling information please contact your local authorities or the Electronics Industries Alliance http www eiae org When the equipment is installed in a cabinet or on a shelf make sure that it has sufficient space on all sides to allow for ventilati...

Page 4: ...r use only Any commercial use without proper permission is prohibited Even if you record an event such as a show performance or exhibition for personal enjoyment it is strongly recommended that you obtain permission beforehand Before recording important video be sure to make a trial recording Play back your trial recording to make sure the video and audio have been recorded properly We recommend c...

Page 5: ... On Screen Display 25 ADDITIONAL FEATURES FOR D S C 26 E Mail Clip Recording 26 Dubbing Still Images Recorded On A Tape To A Memory Card 26 Resetting The File Name 26 Protecting Files 27 Deleting Files 27 Setting Print Information DPOF Setting 28 Initializing A Memory Card 28 ADVANCED FEATURES 29 MENUS FOR DETAILED ADJUSTMENT 29 Changing The Menu Settings 29 Recording Menus 29 Playback Menus 32 FE...

Page 6: ...N i j k l o p X Y O e U Q R S T Z a b u m V cW v d n To open the connector cover pull the bottom end of the cover then open it Bottom end ATTENTION Be careful not to cover m n and s during shooting Be careful not to cover j during playback GR DZ7US_04Start fm Page 6 Tuesday July 6 2004 9 24 AM ...

Page 7: ...itch 墌 pg 16 Connectors The connectors are located beneath the covers X USB Universal Serial Bus Connector 墌 pg 42 Y Microphone connector MIC 墌 pg 32 43 An optional microphone can be used during video recording and audio dubbing To stabilize the microphone use of an optional shoe adapter is recommended Z Digital Video Connector DV IN OUT i Link 墌 pg 41 42 i Link refers to the IEEE1394 1995 industr...

Page 8: ...x 480 墌 pg 32 b Focus Icon 墌 pg 23 Interval Shooting Icon 墌 pg 23 c Shooting Icon 墌 pg 23 Appears and blinks during shooting d Card Icon 墌 pg 23 Appears during shooting Blinks in white when a memory card is not loaded Blinks in yellow while the camcorder is reading the data in the memory card such as Navigation thumbnail images video clips still images etc e Picture Quality FINE and STANDARD in or...

Page 9: ...mbnail Storing Indicator 墌 pg 39 d Tape Speed 墌 pg 29 e U Playback 5 Fast Forward Shuttle Search 3 Rewind Shuttle Search 9 Pause 9 U Forward Frame By Frame Playback Slow Motion Y 9 Reverse Frame By Frame Playback Slow Motion D Audio Dubbing 9D Audio Dubbing Pause Appear while a tape is running f Sound Input For Audio Dubbing 墌 pg 43 g Battery Indicator 墌 pg 50 h Date Time 墌 pg 31 33 i VOLUME Volum...

Page 10: ...cables may be equipped with one or more core filter If a cable has only one core filter the end that is closest to the filter should be connected to the camcorder Make sure to use the provided cables for connections Do not use any other cables How To Attach The Lens Cap To protect the lens attach the provided lens cap to the camcorder as shown in the illustration NOTE To confirm the lens cap is on...

Page 11: ...n both ends of the core filter 2 Run the cable through the core filter leaving approx 3 cm of cable between the cable plug and the core filter USB cable and AC Adapter s cord Wind the cable cord once around the outside of the core filter as shown in the illustration Audio Extension cable Wind the cable twice around the outside of the core filter as shown in the illustration Wind the cable so that ...

Page 12: ...is worn out and needs to be replaced Please purchase a new one Since the AC Adapter processes electricity internally it becomes warm during use Be sure to use it only in well ventilated areas Using the optional AA V40 AC Power Adapter Charger you can charge the BN V408U V416U V428U V438U battery pack without the camcorder However it cannot be used as an AC Adapter After 5 minutes has elapsed in Re...

Page 13: ...y opening closing the LCD monitor or pulling out pushing in the viewfinder INFORMATION The following explanations in this manual supposes the use of LCD monitor in your operation If you want to use the viewfinder close the LCD monitor and pull out the viewfinder fully Operation Mode Lock Button MENU Power Switch POWER CHARGE lamp VIDEO MEMORY SET r Up t Down Power Switch Position A Full Auto Recor...

Page 14: ... 3 Adjust your thumb and fingers through the grip to easily operate the Recording Start Stop Button and Power Zoom Lever Be sure to fasten the velcro strip to your preference 1 Set the Power Switch to A or M while pressing down the Lock Button located on the switch 2 Make sure the LCD monitor is closed and locked Pull out the viewfinder fully and adjust it manually for best viewability 3 Turn the ...

Page 15: ...n the cassette holder resulting in injury or product damage Once the cassette holder is closed it recedes automatically Wait until it recedes completely before closing the cassette holder cover When the battery pack s charge is low you may not be able to close the cassette holder cover Do not apply force Replace the battery pack with a fully charged one or use AC power before continuing 3 Close th...

Page 16: ...ction tab on the side of the memory card in the direction of LOCK This prevents the memory card from being recorded over To record on this memory card slide the tab back to the position opposite to LOCK before loading it NOTES Some brands of memory cards are not compatible with this camcorder Before purchasing a memory card consult its manufacturer or dealer Before using a new memory card it is ne...

Page 17: ... connect optional headphone to the headphone connector Adjust the sound volume by sliding the Power Zoom Lever VOL 墌 pg 19 Tape Remaining Time Approximate tape remaining time appears on the display h m means the camcorder is calculating the remaining time When the remaining time reaches 2 minutes the indication starts blinking The time required to calculate and display the remaining tape length an...

Page 18: ...e subject This will not occur when TELE MACRO is set to ON 墌 pg 30 Journalistic Shooting In some situations different shooting angles may provide more dramatic results Hold the camcorder in the desired position and tilt the LCD monitor in the most convenient direction It can rotate 270 90 downward 180 upward Interface Shooting The person you shoot can view himself herself in the LCD monitor and yo...

Page 19: ... indication does not move smoothly The time code is displayed only when TIME CODE is set to ON 墌 pg 32 Recording From The Middle Of A Tape 1 Play back a tape or use Blank Search 墌 pg 20 to find the spot at which you want to start recording then engage the Still Playback mode 墌 pg 19 2 Set the Power Switch to A or M while pressing down the Lock Button located on the switch then start recording 12 3...

Page 20: ...n the camcorder searches in the forward direction If the beginning or end of the tape is reached during Blank Search the camcorder stops automatically A blank portion which is shorter than 5 seconds of tape may not be detected The detected blank portion may be located between recorded scenes Before you start recording make sure there is no recorded scene after the blank portion A Remote plug Not c...

Page 21: ... is directly exposed to sunlight or powerful lighting Buttons And Functions A Infrared beam transmitting window Transmits the beam signal The following buttons are available only when the camcorder s Power Switch is set to PLAY B PAUSE Button Pauses the tape 墌 pg 22 Up Button 墌 pg 22 C SLOW Rewind Button 墌 pg 22 D REW Button Rewind Reverse Shuttle Search on a tape 墌 pg 20 Displays previous file in...

Page 22: ... press the Zoom Button W 3 You can move the image on the screen around to find a particular portion of the picture While holding down SHIFT press Left Right Up and Down To end zoom press and hold W until magnification returns to normal Or press STOP 8 and then press PLAY U during video playback NOTES Zoom can also be used during slow motion and still playback Due to digital image processing the qu...

Page 23: ... SHOT to ON 墌 pg 29 32 INTERVAL and appear 2 Set INT TIME to the desired shooting interval 墌 pg 29 32 3 Set the Power Switch to A or M while pressing down the Lock Button located on the switch 4 Press SNAPSHOT First shot is taken after 2 seconds The O indicator appears while the snapshot is being taken The clock icon turns while waiting for the next shot is being taken The next shot is being taken...

Page 24: ... Perform steps 1 5 in Normal Playback Of Images 2 Press 4 9 to start Auto Playback If you press 3 during Auto Playback files are displayed in descending order If you press 5 during Auto Playback files are displayed in ascending order 3 To end Auto Playback press 8 You can view video clips 墌 pg 26 stored in the memory card 1 Perform steps 1 3 in Normal Playback Of Images 2 If the image playback IMA...

Page 25: ...ity IMAGE only TIME Playback time E MAIL CLIP only PROTECT When set to ON the file is protected from accidental erasure 墌 pg 27 Press the INFO Button again to close the Information Screen NOTE With images shot with other devices or processed on a PC QUALITY will be displayed 1 Display the playback screen of normal images 墌 pg 24 2 Press MENU The Menu Screen appears 3 Press r or t to select DISPLAY...

Page 26: ...Some MPEG4 files stored with other devices cannot be played back with this camcorder Still images can be dubbed from a tape to a memory card 1 Load a cassette 墌 pg 15 2 Load a memory card 墌 pg 16 3 Set the VIDEO MEMORY Switch to VIDEO 4 Set the Power Switch to PLAY while pressing down the Lock Button located on the switch 5 Set COPY to ON 墌 pg 29 32 6 Press 4 9 to start playback 7 At the point you...

Page 27: ... files stored in the memory card 4 Press r or t to select CANC ALL and press SET The PROTECT screen appears 5 Press r or t to select EXECUTE and press SET To cancel selection select RETURN Previously stored files can be deleted either one at a time or all at once 1 To delete the file for images display its playback screen 墌 pg 24 for video clips display its playback screen 墌 pg 24 2 Press MENU The...

Page 28: ...e SAVE appears If you did not change any settings in step 3 through 5 the Menu Screen reappears 7 Press r or t to select EXECUTE to save the setting you have just made and press SET To cancel selection select CANCEL To Reset The Number Of Prints 1 Perform steps 1 3 in To Print All Still Images One Print For Each 2 Press r or t to select RESET and press SET The DPOF screen appears 3 Press r or t to...

Page 29: ...esired parameter 3 Press SET Selection is complete Repeat the procedure if you wish to set other function menus 4 Press SET The Menu Screen returns Repeat the procedure if you wish to set other function menus 5 Press SET The Menu Screen closes CAMERA The m CAMERA settings are effective when the Power Switch is set to both A and M However the menu settings can be changed only when the Power Switch ...

Page 30: ...C 15SEC 30SEC 60SEC The captured image is stored in the memory card as a thumbnail image when the recording time is over the navigation time For example 5SEC is suitable to record short scenes with the thumbnail images 墌 pg 38 However the stored thumbnail images may take up a lot of memory In this case using the memory card with large capacity is recommended OFF Disables the function The indicator...

Page 31: ...tarts in the following cases When the Menu Screen is closed after DEMO MODE is turned ON With DEMO MODE set to ON if there is no operation for about 3 minutes after the Power Switch is set to A or M Performing any operation during the demonstration stops the demonstration temporarily If no operation is performed for more than 3 minutes after that the demonstration will resume NOTES If a cassette i...

Page 32: ... Factory preset SOUND MODE and NARRATION During tape playback the camcorder detects the sound mode in which the recording was made and plays the sound back Select the type of sound to accompany your playback picture According to the menu access explanation on page 29 select SOUND MODE or NARRATION from the Menu Screen and set it to the desired parameter STEREO Sound is output on both L and R chann...

Page 33: ...ash automatically fires if it is dark appears When the Power Switch is set to M you can select the flash setting Press FLASH repeatedly to select the desired mode OFF No indicator Will not fire 0A Fires automatically if it is dark C 0A Fires automatically if it is dark and reduces the Red Eye effect in the subject s eyes 0 Always fires Factory preset If C 0A is selected The C Red Eye reduction ind...

Page 34: ...ips to keep the action moving This function is available only for video recording 1 Set 5S to 5S 墌 pg 30 The 5S indicator appears 2 Press the Recording Start Stop Button to start recording and after 5 seconds the camcorder enters Record Standby mode automatically Even if you press the Recording Start Stop Button again within 5 seconds after recording starts Record Standby mode is not engaged 3 To ...

Page 35: ... Manual focus is recommended in situations listed below When two subjects overlap in the same scene When illumination is low When the subject has no contrast difference in brightness and darkness such as a flat one color wall or a clear blue sky When a dark object is barely visible in the LCD monitor or the viewfinder When the scene contains minute patterns or identical patterns that are regularly...

Page 36: ...ht compensation feature brightens the dark subject portion by increasing the exposure 1 Set the Power Switch to M 2 Press BACK LIGHT so that the Backlight Compensation indicator appears To cancel Backlight Compensation Press BACK LIGHT twice so that the indicator disappears NOTE Using Backlight Compensation may cause the light around the subject to become too bright and the subject to become white...

Page 37: ...epoweristurnedofforthebatteryremoved These effects let you make pro style scene transitions Use them to spice up the transition from one scene to the next Wipe or Fader works when video recording is started or stopped 1 Set the VIDEO MEMORY Switch to VIDEO 2 Set the Power Switch to M 3 Set v to the desired mode 墌 pg 29 The WIPE FADER menu disappears and the effect is reserved The selected effect i...

Page 38: ...ite Balance 墌 pg 37 is automatically set to but can be changed to your desired setting When Twilight is chosen the camcorder automatically adjusts the focus from approx 10 m 32 ft to infinity From less than 10 m adjust the focus manually The flash does not fire in this mode SEPIA Recorded scenes have a brownish tint like old photos Combine this with the Cinema mode for a classic look MONOTONE Like...

Page 39: ...images cannot be deleted during video playback CAUTION Do not remove the memory card or perform any other operation such as turning off the camcorder during deletion Also be sure to use the provided AC Adapter as the memory card may be corrupted if the battery becomes exhausted during deletion If the memory card becomes corrupted initialize it NOTES Be sure to always use the same tape and memory c...

Page 40: ...ation Time code Set TIME CODE to OFF or ON 墌 pg 29 33 Indications other than date time and time code Set ON SCREEN to OFF LCD or LCD TV 墌 pg 29 33 To use this camcorder as a recorder 1 Following the illustrations connect the camcorder and the VCR s output connectors 2 Set REC MODE to SP or LP 墌 pg 29 3 Set the camcorder s Power Switch to PLAY 4 Set S AV INPUT to A V IN or S IN 墌 pg 29 32 Select S ...

Page 41: ...ts 墌 pg 22 is attempted or SNAPSHOT is pressed during playback only the original playback image recorded on the tape is output from the DV IN OUT connector When using a DV cable be sure to use the optional JVC VC VDV204U DV cable To use this camcorder as a recorder 1 Make sure all units are turned off 2 Connect this camcorder to a video unit equipped with a DV output connector using a DV cable as ...

Page 42: ...amcorder via the USB cable is not powered the camcorder does not enter the USB mode The date time information cannot be captured into the PC Refer to the instruction manuals of the PC and Software The still images can also be transferred to a PC with a DV connector equipped capture board The system may not work properly depending on the PC or capture board you are using Connection To A Personal Co...

Page 43: ... microphone is disabled To perform Audio Dubbing with a video unit connected to the camcorder s S AV connector first set S AV INPUT to A V IN or S IN in VIDEO Menu 墌 pg 29 32 The AUX indication appears instead of MIC You can record a new scene into a previously recorded tape replacing a section of the original recording with minimal picture distortion at the in and outpoints The original audio rem...

Page 44: ...d functions NOTES If the VCR s power does not come on in step 1 try another code from the VCR CODE LIST Some brands of VCR do not come on automatically In this case turn the power on manually and try step 2 If the remote control is not able to control the VCR use the controls on the VCR When the remote control s batteries run out the VCR brand you have set will be erased In that case replace the o...

Page 45: ...ether or not the following displays appear on the connected TV Date time Set DATE TIME to AUTO ON or OFF 墌 pg 29 33 Or press DISPLAY on the remote control to turn on off the date indication Time code Set TIME CODE to OFF or ON 墌 pg 29 33 Indications other than date time and time code Set ON SCREEN to OFF LCD or LCD TV 墌 pg 29 33 When editing on a VCR equipped with a DV input connector an optional ...

Page 46: ...gistered Edit In and Edit Out points If you select Sepia or Monotone mode from Program AE with special effects you cannot use the Black White Fader In this case the Black White indicator begins blinking Once the next Edit In point is registered the effect is turned off To combine these effects use Sepia or Monotone during recording then use the Black White Fader during Random Assemble Editing It i...

Page 47: ... the scene you tried to dub starts in progress the VCR is slow to start recording Adjustment Of VCR Camcorder Timing 4 Press R A EDIT ON OFF to make the Random Assemble Editing menu disappear then press MENU The Menu Screen appears 5 Press SET to select t The VIDEO Menu appears 6 Press r or t to select SYNCHRO and press SET The value for SYNCHRO is highlighted Factory preset 0 0 7 Based on the dia...

Page 48: ...29 31 The light source or the subject does not include white Or there are various different light sources behind the subject HFind a white subject and compose your shot so that it also appears in the frame 墌 pg 23 35 Shooting was performed under backlit conditions HPress BACK LIGHT 墌 pg 36 The subject is too bright HSet r to SPOTLIGHT 墌 pg 38 The Sepia SEPIA or Monotone MONOTONE mode is activated ...

Page 49: ...LCD monitor become dark HConsult your nearest JVC dealer The LCD monitor and the viewfinder are made with high precision technology However black spots or bright spots of light red green or blue may appear constantly on the LCD monitor or the viewfinder These spots are not recorded on the tape This is not due to any defect of the unit Effective dots more than 99 99 The battery s charge is low HIns...

Page 50: ...E 墌 pg 43 Appears if Insert Editing is attempted on a blank portion of a tape 墌 pg 43 Appears if Insert Editing is attempted on a blank portion of a tape Appears if Insert Editing is attempted on a tape recorded in the LP mode 墌 pg 43 Appears if INSERT I on the remote control is pressed when the erase protection tab is set to SAVE 墌 pg 43 Appears when the memory card s memory is full and shooting ...

Page 51: ... an error indication appears the camcorder turns off automatically Eject the cassette once and re insert it then check if the indication clears When it does you can resume using the camcorder If the indication remains consult your nearest JVC dealer NO E MAIL CLIP STORED CARD ERROR UNSUPPORTED FILE CHECK CARD S WRITE PROTECTION SWITCH E01 E02 or E06 UNIT IN SAFEGUARD MODE REMOVE AND REATTACH BATTE...

Page 52: ...n 0 C to 40 C 32 F to 104 F Storage 20 C to 50 C 4 F to 122 F The lower the temperature the longer recharging takes Charging times are for a fully discharged battery pack Cassettes To properly use and store your cassettes be sure to read the following cautions During use make sure the cassette bears the Mini DV mark be aware that recording onto prerecorded tapes automati cally erases the previousl...

Page 53: ...secutively damage to the video heads may result After the camcorder plays back for about 20 seconds it stops automatically Also refer to the cleaning cassette s instructions If after using the cleaning cassette the problems still exist consult your nearest JVC dealer Mechanical moving parts used to move the video heads and video tape tend to become dirty and worn out over time In order to maintain...

Page 54: ...llation This equipment generates uses and can radiate radio frequency energy and if not installed and used in accordance with the instructions may cause harmful interference to radio communications However there is no guarantee that interference will not occur in a particular installation If this equipment does cause harmful interference to radio or television reception which can be determined by ...

Page 55: ...te Mini DV cassette Tape speed SP 18 8 mm s LP 12 5 mm s Maximum recording time using 80 min cassette SP 80 min LP 120 min Storage media SD Memory Card MultiMediaCard Compression system Still image JPEG compatible Moving image MPEG4 compatible File size Still image 4 modes 1600 x 1200 pixels 1280 x 960 pixels 1024 x 768 pixels 640 x 480 pixels Moving image 3 modes 352 x 288 pixels 240 x 176 pixels...

Page 56: ... Card 28 Insert Editing 43 Iris Lock 36 L LCD Monitor and Viewfinder 14 17 Loading A Cassette 15 Loading A Memory Card 16 M Manual Focus 35 Memory Card 16 52 Motor Drive Mode 35 N Navigation 30 38 Night Alive 34 P Picture Quality 32 Playback Sound 32 Playback Special Effects 22 Power Linked Operation 13 Program AE With Special Effects 38 R Random Assemble Editing 44 47 Recording Capacity Memory Ca...

Reviews: