


Introduction
75
Handling Discs/MDs/Cassette Tapes
• Do not put adhesive tape or stickers, or write on
a disc.
• Do not bend a disc.
• Be sure not to use heart/flower shaped discs or
other irregularly shaped discs. The use of such
discs damages the main unit.
• Be sure not to use thinners, benzenes, cleaners
for analog records, or other chemical agents.
• A write protect knob is attached to an MD for
preventing accidental erasure of recorded
sound.
NOTE
• Do not put labels such as those indicating CD/track
titles or other notes on any part of an MD other than
the specified position. If you insert an MD with a
label extending beyond the specified area, a label
that is peeling off, or any other improperly attached
label, it may damage the main unit.
• Clean the head, pinch rollers and capstans
approximately every 10 hours of playback time
before the volume falls or sound quality
deteriorates
• Gently dust the cabinet surface with a soft dry
cloth. When the cabinet is very dirty, dampen the
cloth with a neutral detergent diluted with water,
wring out the cloth well, and then wipe the cabi-
net with the dampened cloth followed by a soft
dry cloth.
• Do not wipe the cabinet with thinners or ben-
zenes. Wiping it with these agents may cause
discoloration of the cabinet or removal of the
paint. Do not spray insecticides or other highly
volatile agents onto the cabinet. Do not leave
pieces of rubber or plastic on the cabinet for a
long period.
Handling discs
Cleaning discs
Signal surface
Wipe a disc from the
center outward with a
soft cloth.
Scratches concentrated
on a certain part cause
sound dropout.
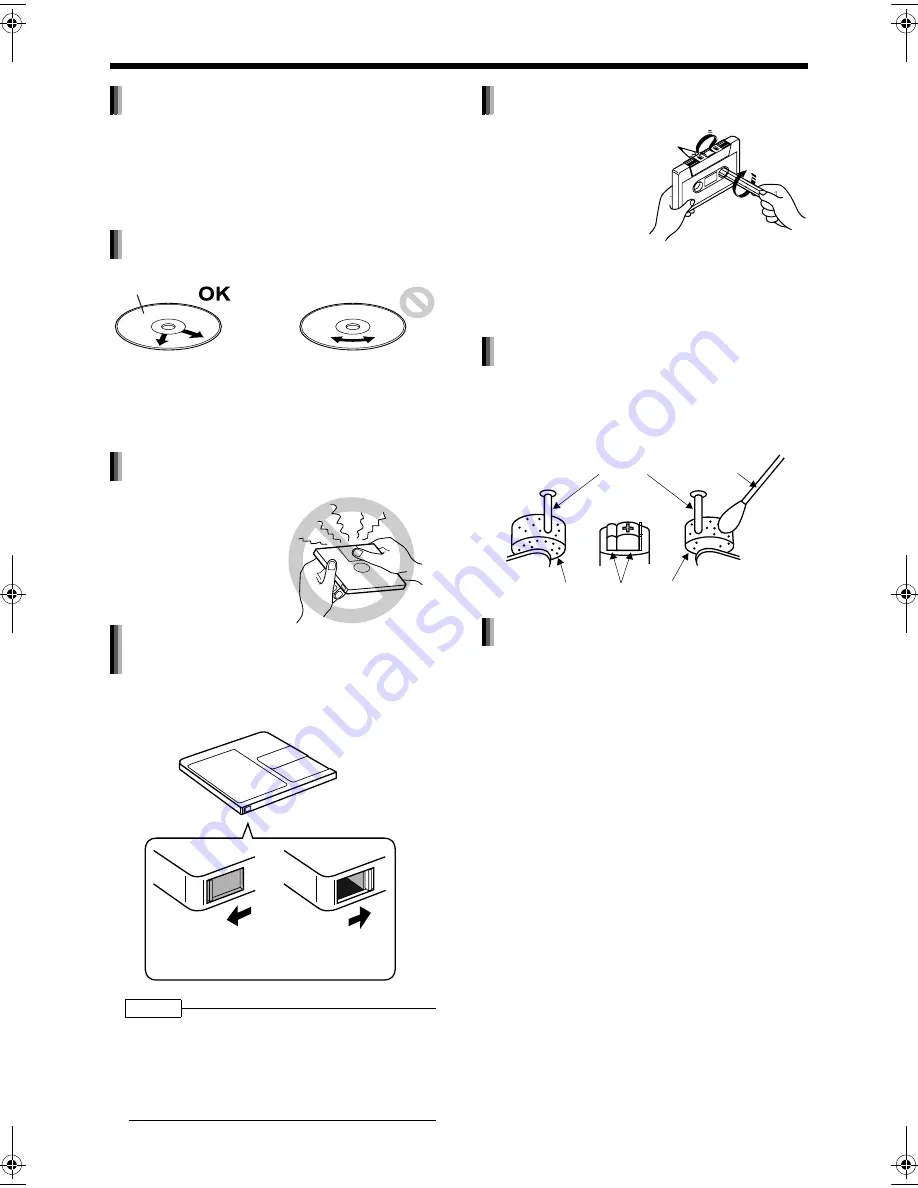
Handling MDs
• Do not open the shut-
ter. Forcibly opening
the shutter will break
the MD.
Preventing the loss of important
recorded sound
Write protect knob
Close the write
protect knob before
recording or editing.
Open the write
protect knob to avoid
erasing sound.
Handling cassette tapes
• A slack tape may become
caught in the inner part of
the main unit and dam-
age the main unit.
Before using a cas-
sette tape, wind up
any slack in the cas-
sette tape as shown
on the right. Do not pull out the tape
or touch the tape's surface.
Cleaning the tape deck head
Capstans
Cotton-tipped
swab moistened
with alcohol
Pinch roller
Head
Pinch roller
Cleaning the main unit cabinet
UX-QD7[UB].book 75 ページ 2004年9月3日 金曜日 午後2時43分