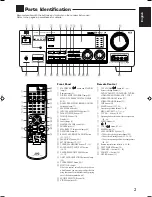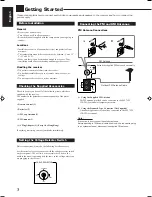
4
English
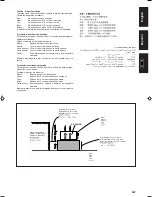
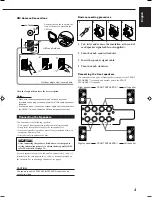
Basic connecting procedure
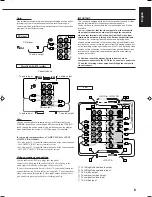
1 Cut, twist and remove the insulation at the end of
each speaker signal cable (not supplied).
2 Turn the knob counterclockwise.
3 Insert the speaker signal cable.
4 Turn the knob clockwise.
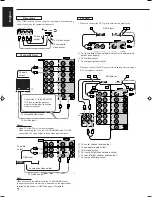
Connecting the front speakers
You can connect two pairs of front speakers (one pair to the FRONT
SPEAKERS
1
terminals, and another pair to the FRONT
SPEAKERS
2
terminals).
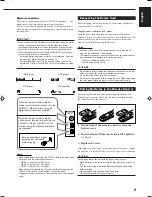
AM Loop Antenna
Snap the tabs on the loop into the
slots of the base to assemble the
AM loop.
Outdoor single vinyl-covered wire
Turn the loop until you have the best reception.
Notes:
• Make sure the antenna conductors do not touch any other
terminals, connecting cords and power cord. This could cause poor
reception.
• If reception is poor, connect an outdoor single vinyl-covered wire to
the AM EXT terminal. (Keep the AM loop antenna connected.)
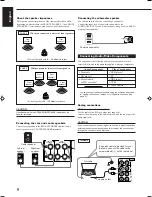
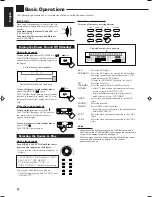
Connecting the Speakers
You can connect the following speakers:
• Two pairs of front speakers to produce normal stereo sound.
• One pair of rear speakers to enjoy the surround effect.
• One center speaker to produce more effective surround effect (to
emphasize human voices).
• One subwoofer to enhance the bass.
IMPORTANT:
After connecting the speakers listed above, set the speaker
setting information properly to obtain the best possible DSP
effect. For details, see page 14.
For each speaker (except for a subwoofer), connect the (–) and (+)
terminals on the rear panel to the (–) and (+) terminals marked on
the speakers. For connecting a subwoofer, see page 5.
ANTENNA
AM
EXT
AM
LOOP
FM 75
COAXIAL
2
3
1
RIG
HT
1
2
1
RIG
HT
1
3
RIG
HT
1
4
+
–
+
–
RIGHT
LEFT
1
2
1
2
FRONT SPEAKERS
FRONT SPEAKERS
1
Left speaker
Right speaker
CAUTION:
Use speakers with the SPEAKER IMPEDANCE indicated by the
speaker terminals.
FRONT SPEAKERS
2
Left speaker
Right speaker
AM Antenna Connections
EN01-08.RX-889P[US, UB]/f
99.4.12, 5:29 PM
4

