


27
Menu system instruction
Menu system instruction
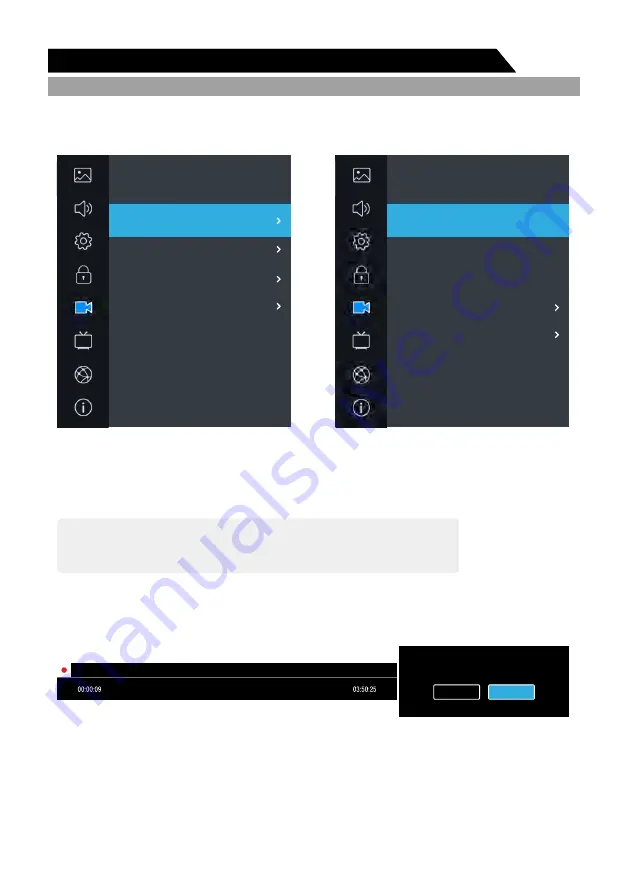
PVR Option
1. Press
key to display the main menu on the screen.
2. Press / key to select " VR Option" option.
3. Press key to enter " VR Option" submenu.
MENU
PVR File System
1
/
. Press
key to select “PVR File System” option.
2. Press
or key to enter submenu
.
ENTER
in DTV mode
Connect the USB disk to the standard USB port before using PVR.
Select Disk: Press OK” button to enter submenu and press
choose the disk for PVR.
Time Shift Size: Display the buffer used for PVR.
Format Start: Press “OK” button to enter format submenu.
Speed: Display the disk writing/reading speed.
Warning:
The disk must be formatted when first used for PVR, so backup the original data in the disk.
It`s suggested use a special disk for PVR. Don’t modify the PVR file in PC.
Start Record
ENTER
P
P
/
“
“
” to
Press / key to select “Start Record”. If the storage device is ready, press “
” key to
start record.
The recording menus will disappear in 5 seconds, press “MENU” key to recall them out.
When recording, press “ ” key again, then you can choose to stop recording or continue:
▲ ▼
●
PVR Option
Picture
Sound
Setting
Lock
Program
Network
About
PVR Option
PVR Flie System
Start Record
Start Timeshift
Record Files
PVR Option
Picture
Sound
Setting
Lock
Program
Network
About
PVR Option
Select Disk
Select Partition
Time Shift Size
Format
Speed
PVR File System
USB:1
1
512M
Start
check
Are you sure want to stop PVR?
Yes
No
CH 9 Nine Digital
Note: The recorded PVR file will be in encrypted form. It can only be viewed on the TV.
Summary of Contents for LT-32N3105A
Page 1: ...LT 32N3105A Q MENU MENU INPUT HOME EXIT BACK INFO SUBTITLE Pg Dn RECALL GUIDE ...
Page 2: ......
Page 3: ...1 ...
Page 4: ...2 ...
Page 5: ...3 6 3 5mm to L R Audio Cable x 1 7 3 5mm to Y V Pb Pr Video Cable x 1 ...
Page 41: ......