background image

XV-C3SL / LET0213-001A / 

Cover

Introduction

2

Preliminary knowledge

5

Getting started

13

Basic operations

21

Advanced operations

25

MP3 disc playback

40

Initial settings

45

Additional information

52

For Customer Use:

Enter below the Model No. and Serial 
No. which are located on the rear, bottom 
or side of the cabinet. Retain this 
information for future reference.

Model No.                                                                  

Serial No                                                                    

LET0213-001A

[B]

INSTRUCTIONS

OPEN/

CLOSE

STANDBY/ON
               DVD

TV1

1

2

3

4

5

6

7

8

9

10

0

+10

TV2

TV3

TV4

TV5

TV6

TV7

SUB TITLE

AUDIO

THEATER
POSITION

DIGEST

ANGLE

ZOOM

AMP VOL

-

+

3D

PHONIC

TV8

TV9

TV  

PREVIOUS

CLEAR

SELECT

STROBE

NEXT

RETURN

VOL-

SLOW-

SLOW+

VOL+

TV/VIDEO

CANCEL

TV0

ENTER

MUTING

TV

DVD

RM-SXV004A

REMOTE CONTROL

DIS

PL

AY

ME

NU

T

O

P

ME

NU

C

HO

ICE

TV

PLAY

MODE

CH

+

CH

-

XV-C3

STANDBY

STANDBY/ON

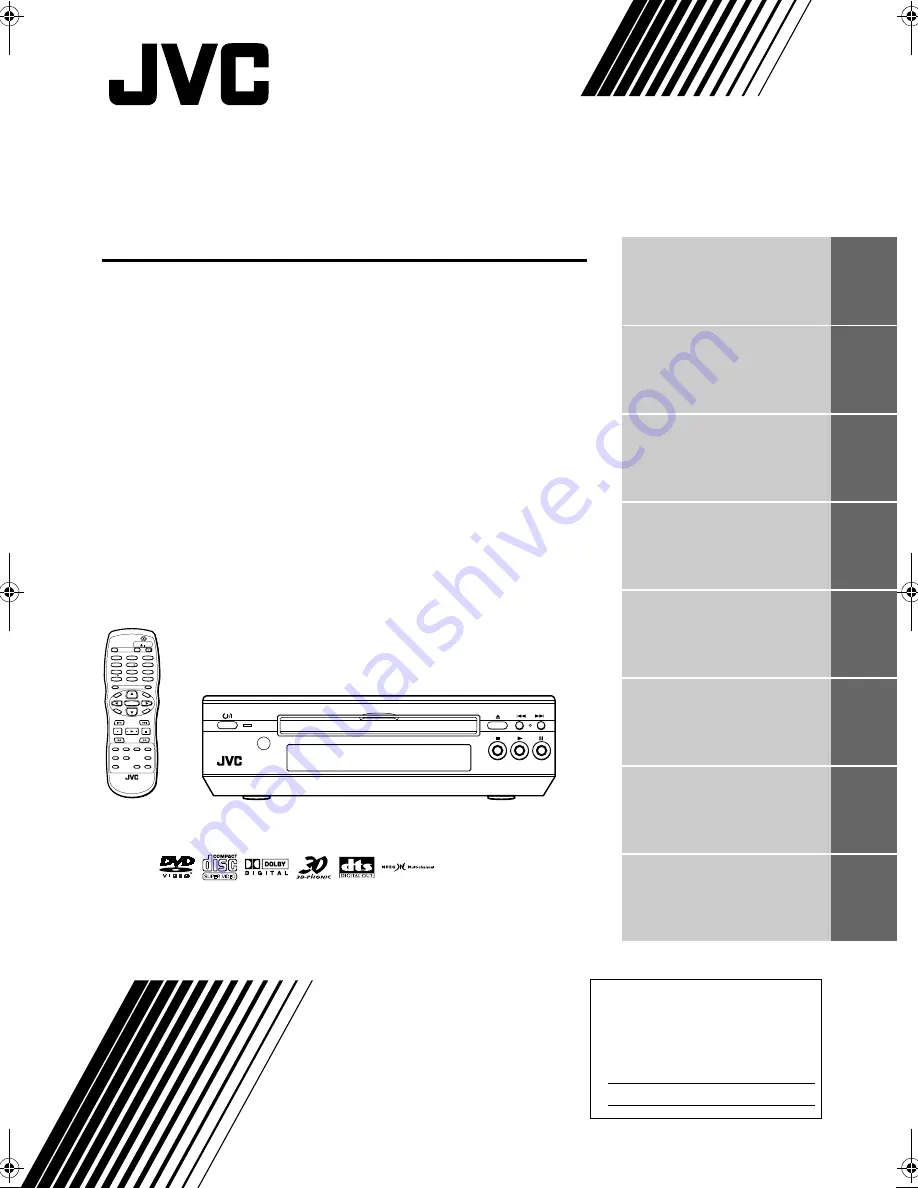
DVD VIDEO PLAYER

XV-C3SL

  !"##""$%

Summary of Contents for LET0213-001A

Page 1: ...inet Retain this information for future reference Model No Serial No LET0213 001A B INSTRUCTIONS OPEN CLOSE STANDBY ON DVD TV1 1 2 3 4 5 6 7 8 9 10 0 10 TV2 TV3 TV4 TV5 TV6 TV7 SUB TITLE AUDIO THEATER POSITION DIGEST ANGLE ZOOM AMP VOL 3D PHONIC TV8 TV9 TV PREVIOUS CLEAR SELECT STROBE NEXT RETURN VOL SLOW SLOW VOL TV VIDEO CANCEL TV0 ENTER MUTING TV DVD RM SXV004A REMOTE CONTROL DISPLAY MENU T O P...

Page 2: ...approved type as originally fitted If nonetheless the mains plug is cut off ensure to remove the fuse and dispose of the plug immediately to avoid a possible shock hazard by inadvertent connection to the mains supply If this product is not supplied fitted with a mains plug then follow the instructions given below IMPORTANT DO NOT make any connection to the terminal which is marked with the letter ...

Page 3: ...locate a desired scene from the display DIGEST 28 Special picture playback 29 To advance a still picture frame by frame 29 To display continuous still pictures STROBE 29 To playback in slow motion SLOW 30 To zoom a scene ZOOM 30 Changing the playback order 31 To playback in the desired order PROGRAM 31 To playback in random order RANDOM 32 Repeat playback 32 To repeat the current selection or all ...

Page 4: ...sound with your 2 channel system Multi language subtitles and sound You can select a subtitle or sound language from those recorded on the DVD VIDEO disc Multi disc playback You can enjoy Audio CD Video CD and SVCD discs as well as DVD VIDEO discs In addition you can also enjoy MP3 discs Operation from the on screen display User friendly on screen displays allow you to operate the unit easily Func...

Page 5: ...3 starts random playback again To quit random playback press 7 again while stopped The RANDOM indicator in the display window turns off To playback in random order RANDOM NOTE Some DVD VIDEO discs may not be played back correctly in the random mode REPEAT PROGRAM RANDOM These symbols indicate the types of discs which the operation can be used for The number indicates the following procedural step ...

Page 6: ...to direct sunlight or place it nearby a heating device When you are away When you are away on travel or otherwise for an extended period of time remove the plug from the wall outlet Do not insert foreign objects into the unit Do not insert wires hairpins coins etc into the unit Do not block the vents Blocking the vents may damage the unit Care of the cabinet When cleaning the unit use a soft cloth...

Page 7: ...dow below Indicates the current status of the unit 97 STOP button 23 41 Stops playback 03 PLAY button 22 41 Starts playback Also used as a SELECT button for PBC of Video CDs SVCDs 8 PAUSE button 23 41 Pauses playback Also used to display nine continuous still pictures STROBE function Display window 1Disc indicator Indicates the type of the disc set in the disc tray When a DVD VIDEO disc is set DVD...

Page 8: ...enu or on screen display or to change the setting of an on screen display item In this case we call them CURSOR 5 buttons in this manual When the TV DVD switch is set to TV they are used to select a TV channel 6CURSOR 2 2 2 2 Left 3 3 3 3 Right VOL buttons When the TV DVD switch is set to DVD these buttons are used to select an item from a menu or on screen display or to change the setting of an o...

Page 9: ...meric cursor and TV VIDEO CANCEL buttons are used to control your TV When setting it to DVD these buttons are used to control the unit DVD STANDBY ON button 21 Turns the unit on or off standby TV VIDEO CANCEL button 19 Switches the TV input mode when the TV DVD switch is set to TV Cancels the last selection of the program when the TV DVD switch is set to DVD MENU button 25 Displays a DVD menu on t...

Page 10: ... details 5S VIDEO jack 13 Outputs S video signals Note that this jack does not feed correct signals when you make the unit feed the RGB signals See To connect to a TV with the SCART connector on page 15 for details 6VIDEO jack 13 Outputs a composite video signal 7VIDEO OUT SELECT switches 14 15 You can select the video signal type by the COMP RGB Y C switch and the RGB S VIDEO AND VIDEO switch 8AV...

Page 11: ...are four pages LANGUAGE AUDIO DISPLAY and SYSTEM as shown on the right See page 45 for detailed information PARENTAL LOCK display When no disc is inserted or a DVD VIDEO disc is stopped pressing the ENTER button while holding down the 7 button brings up the PARENTAL LOCK display in which you can set the level for limiting playback See page 49 for detailed information On screen displays NOW READING...

Page 12: ... Pressing any button on the unit or the remote control unit will release the screen saver function and return to the previous display You can select one of several screen saver modes available see page 48 The screen saver function is not activated during Audio CD playback or after stopping Audio CD playback Also it is not activated during MP3 disc playback To prevent the monitor from burning out S...

Page 13: ...een Operations are occasionally unacceptable even if is not displayed Note that some operations may not be accepted For example some discs may not allow rapid advance reverse or slow motion playback How to use numeric buttons To select a track title number To select a number between 1 and 10 Press the corresponding button for the number To select a number higher than 10 Use the 10 button Examples ...

Page 14: ...s listed as Non playable discs above may generate noise and damage speakers This unit can play back audio recorded in CD G CD EXTRA and CD TEXT discs A DVD VIDEO disc is comprised of titles while an Audio CD Video CD or SVCD is comprised of tracks Each title may be divided into some chapters For example if a DVD VIDEO disc contains some movies each movie may have its own title number and each movi...

Page 15: ...lowing pages Connect the unit to a TV equipped with stereo audio input and video input jacks using the supplied audio video cables If your TV has a monaural audio input instead of stereo you need to use an optional audio cable which converts stereo audio output to monaural If your TV has an S video input you should connect it with the S VIDEO output of the unit using the S video cable optional in ...

Page 16: ...witch position while the unit is stopped or the unit power is off on standby with the DVD removed Otherwise the changed setting is not effective For your TV connection you can use either the S video output or the RGB output from the SCART connector at a time When you use the S video output for your TV be sure that the SCART connector VIDEO OUT AV connector is not used NOTES Connect VIDEO OUT of th...

Page 17: ...switch to COMP RGB Also at the same time you need to set the RGB S VIDEO AND VIDEO switch to RGB Then RGB appears on the display window for a few seconds If the RGB S VIDEO AND VIDEO switch is set to S VIDEO AND VIDEO unwanted phenomenon such as abnormal TV image color will occur To connect to a TV with the SCART connector IMPORTANT Note that you must change the switch position while the unit is s...

Page 18: ...a digital input NOTES When you connect the unit s DIGITAL OUT to digital audio equipment before using make the DIGITAL AUDIO OUTPUT setting in the AUDIO page of the preference display correctly according to the connected audio equipment If the DIGITAL AUDIO OUTPUT is not set correctly loud noise may be generated from speakers causing damage to your speakers See DIGITAL AUDIO OUTPUT on page 46 With...

Page 19: ...ore cleaning the unit Disconnect the power cord before moving the unit Do not connect or disconnect the power cord with wet hands Do not pull the power cord when disconnecting it as this may damage the cord and cause fire electric shock or other accidents Warning Warning Do not damage alter twist or pull the power cord as this may cause fire electric shock or other accidents Do not put anything he...

Page 20: ... with normal use If the functions of the remote control become erratic replace the batteries See below for more information Precautions for the safe use of batteries Observe the following precautions for the safe use of batteries If they are used improperly their life will be shortened they may burst or their contents may leak Precautions Remove the batteries from the remote control if it is not g...

Page 21: ...anufacturer No Manufacturer No Manufacturer 01 JVC 15 GRADIENTE 29 MIVAR 02 PHILIPS CCE MAGNAVOX 16 SANYO 30 FINLUX 03 MITSUBISHI 17 PHILCO DAEWOO 31 NOKIA 04 PANASONIC 18 LG GOLDSTAR 32 FUNAI 05 RCA 19 GRUNDIG 33 SAMSUNG 06 SHARP 20 NEC GRADIENTE 34 SAMSUNG PEONY CHANGHONG 07 SONY 21 PHILCO 35 SAMSUNG 08 TOSHIBA 22 BEIJING NOBLEX 36 AIWA 09 ZENITH 23 JVC ONWA 37 DAEWOO 10 PHILCO HITACHI 24 JVC ON...

Page 22: ... channels directly For some TVs pressing 10 functions as the 100 while 10 functions as the ENTER button if your TV requires pressing the ENTER button after selecting a channel number Mutes the TV sound Changes the TV channels Adjusts the TV volume NOTES The remote control unit is initially set for operating a JVC TV If there is more than one code listed for the manufacturer of your TV try them one...

Page 23: ...unit starts playback if the disc is set in the disc tray If no disc is set NO DISC appears on the display window You can turn on the unit by pressing the 0 OPEN CLOSE button on the front panel OPEN CLOSE STANDBY ON DVD TV1 1 2 3 4 5 6 7 8 9 10 0 10 TV2 TV3 TV4 TV5 TV6 TV7 TV8 TV9 TV TV VIDEO TV0 MUTING TV DVD TV TV DVD switch TV OPEN CLOSE STANDBY ON DVD TV1 1 2 3 4 5 6 7 8 9 10 0 10 TV2 TV3 TV4 T...

Page 24: ...e disc tray be sure to position the disc inside the recess Otherwise the disc may be damaged when the disc tray is closed and the disc may not be removed from the unit To start playback NOTES When the resume point is memorized pressing 3 3 3 3 starts playback from that point instead of the beginning See page 24 and 49 During playback the display window shows the title chapter or track number being...

Page 25: ... period of time Releasing the button returns the unit to normal playback During playback Press 4 or Press 4 to locate the beginning of the current chapter title or track and press to locate the beginning of the next chapter title or track To stop playback completely To stop playback temporarily To advance or reverse playback rapidly while monitoring NOTE When you play a DVD VIDEO Video CD or SVCD ...

Page 26: ...sc you interrupt playback last time is still in the disc tray Press 3 The unit starts playback from the position where you interrupted playback last time To clear the resume position memory Carry out one of the followings Take out the disc from the disc tray Press 7 while stopped Turn on the unit by pressing DVD STANDBY ON on the remote control or STANDBY ON on the front panel To memorize the inte...

Page 27: ... which may cause the unit to automatically start playback Some Video CD SVCD discs supports the PBC function PBC is an abbreviation of PlayBack Control A Video CD SVCD disc recorded with PBC has its own menus such as a list of the songs of the disc You can locate a specific scene by using the menu When a Video CD SVCD disc with PBC is stopped 1 Press 3 A disc menu appears on the TV screen The PBC ...

Page 28: ... 11 for details about how to use the numeric buttons For DVD VIDEO At any time except menu is displayed For Audio CD At any time For Video CD SVCD During playback without PBC function 1 Press 4 or With an Audio CD Video CD or SVCD pressing the button skips a track With a DVD VIDEO disc pressing the button skips a chapter or title depending on the disc configuration The selection number appears in ...

Page 29: ...rk with some DVD VIDEO discs This function does not work during Video CD SVCD playback with PBC function To locate a desired scene by specifying the chapter number CHAP SEARCH OPEN CLOSE STANDBY ON DVD TV1 1 2 3 4 5 6 7 8 9 10 0 10 TV2 TV3 TV4 TV5 TV6 TV7 AUDIO THEATER POSITION DIGEST ANGLE ZOOM AMP VOL 3D PHONIC TV8 TV9 TV CLEAR SELECT STROBE NEXT RETURN VOL SLOW SLOW VOL TV VIDEO CANCEL TV0 ENTE...

Page 30: ...For Video CD SVCD While stopped or during playback without PBC function GO TO 2 3 4 0 0 DVD CONTROL REPEAT A B REPEAT TIME SEARCH CHAP SEARCH CD CONTROL REPEAT A B REPEAT TIME SEARCH GO TO 0 2 3 4 for DVD VIDEO Selected time for Audio CD Selected time VCD CONTROL REPEAT A B REPEAT TIME SEARCH PBC CALL GO TO 0 2 3 4 for Video CD SVCD Selected time GO TO _ _ _ _ _ GO TO 2 _ _ _ _ GO TO 2 3 _ _ _ GO ...

Page 31: ...n the TV screen will return to the previous page 3 Press ENTER The unit starts playback from the selected scene Special picture playback The unit provides special picture playback functions including Frame by frame Strobe Slow motion and Zoom While paused still 1 Press 8 Each time you press 8 the still picture advances to the next frame Pressing 3 returns to normal playback During playback 1 At th...

Page 32: ...OM again NOTE If you press and hold 8 for more than 1 second during playback nine still pictures also appear but they advance in normal playback speed To playback in slow motion SLOW NOTES The sound is muted during slow motion playback Reverse slow motion playback is not possible for a Video CD SVCD OPEN CLOSE STANDBY ON DVD TV1 1 2 3 4 5 6 7 8 9 10 0 10 TV2 TV3 TV4 TV5 TV6 TV7 AUDIO THEATER POSIT...

Page 33: ...in the display window turns off Note that the program remains To clear the program press 7 while the program table is shown on the TV screen While stopped and the play mode menu is displayed on the TV screen by moving to PROGRAM and pressing ENTER the program mode quits Note that the program remains To playback in the desired order PROGRAM OPEN CLOSE STANDBY ON DVD TV1 1 2 3 4 5 6 7 8 9 10 0 10 TV...

Page 34: ...menu appears on the TV screen 2 Use CURSOR 2 3 to move to REPEAT then press ENTER Each time you press ENTER the repeat mode changes as follows depending on the disc type and unit s status During DVD VIDEO playback To playback in random order RANDOM NOTE Some DVD VIDEO discs may not be played back correctly in the random mode OPEN CLOSE STANDBY ON DVD TV1 1 2 3 4 5 6 7 8 9 10 0 10 TV2 TV3 TV4 TV5 T...

Page 35: ...the middle of the disc Repeat playback function cannot be used during Video CD SVCD playback with PBC function To turn off the play mode menu display Press PLAY MODE REPEAT ALL all track repeat REPEAT 1 current track repeat No indication off REPEAT ALL CD CONTROL REPEAT A B REPEAT TIME SEARCH REPEAT ALL VCD CONTROL REPEAT A B REPEAT TIME SEARCH PBC CALL for Audio CD Selected repeat mode for Video ...

Page 36: ...n display appears on the TV screen 2 Use ANGLE or CURSOR 2 3 to select the desired angle Each time you press ANGLE or CURSOR 2 3 the angle changes NOTES To turn off the play mode menu Press PLAY MODE If appears when pressing ENTER in step 2 during DVD SVCD playback You cannot repeat the selected portion because of the disc contents The A B REPEAT function cannot be used during program playback To ...

Page 37: ...anually press ENTER When appears on the TV screen The current scene is not recorded from multiple angles To select a scene angle from the angle list display ANGLE NOTES When appears on the TV screen in step 1 The current scene is not recorded from multiple angles During the operation above audio is muted OPEN CLOSE STANDBY ON DVD TV1 1 2 3 4 5 6 7 8 9 10 0 10 TV2 TV3 TV4 TV5 TV6 TV7 AUDIO THEATER ...

Page 38: ... for 10 seconds To turn off the Subtitle selection display manually press ENTER When appears on the TV screen You cannot select the subtitle To change the audio language or sound AUDIO OFF 4 1 4 3 4 4 4 2 4 Example OPEN CLOSE STANDBY ON DVD TV1 1 2 3 4 5 6 7 8 9 10 0 10 TV2 TV3 TV4 TV5 TV6 TV7 AUDIO THEATER POSITION DIGEST ANGLE ZOOM AMP VOL 3D PHONIC TV8 TV9 TV CLEAR SELECT STROBE NEXT RETURN VOL...

Page 39: ...ar if you do not change the theater position for 5 seconds To turn off the theater position display manually press ENTER OPEN CLOSE STANDBY ON DVD TV1 1 2 3 4 5 6 7 8 9 10 0 10 TV2 TV3 TV4 TV5 TV6 TV7 AUDIO THEATER POSITION DIGEST ANGLE ZOOM AMP VOL 3D PHONIC TV8 TV9 TV CLEAR SELECT STROBE NEXT RETURN VOL SLOW SLOW VOL TV VIDEO CANCEL TV0 ENTER MUTING TV DVD RM SXV004A REMOTE CONTROL DISPLAY MENU ...

Page 40: ... function works correctly when playing back discs recorded in the Dolby Surround or Dolby Digital 5 1 CH format It also works when playing back discs other than those above but does not provide the correct effect The 3D PHONIC function does not affect the DTS or Dolby Digital bitstream signal from the DIGITAL OUT jack The sound effect will not be set or operate even if 3D PHONIC is pressed for the...

Page 41: ...y window brighter press CURSOR 5 To check the DVD function status OPEN CLOSE STANDBY ON DVD TV1 1 2 3 4 5 6 7 8 9 10 0 10 TV2 TV3 TV4 TV5 TV6 TV7 AUDIO THEATER POSITION DIGEST ANGLE ZOOM AMP VOL 3D PHONIC TV8 TV9 TV CLEAR SELECT STROBE NEXT RETURN VOL SLOW SLOW VOL TV VIDEO CANCEL TV0 ENTER MUTING TV DVD RM SXV004A REMOTE CONTROL DISPLAY MENU T O P MENU CHOICE TV PLAY MODE SUB TITLE PREVIOUS CH CH...

Page 42: ... MP3 disc using a CD R CD RW disc Select ISO 9660 as the disc format Do not select the multi session recording Finalize the disc NOTES Because of the disc characteristics or recording condition some discs may not be played back or it takes time to start playback The unit does not support packet writing discs If there are any Tracks files which are stored on a disc directly and do not belong to any...

Page 43: ... Track using this method Example To specify Track 5 press 0 0 and 5 To specify Track 25 press 0 2 and 5 Basic operations using the basic control buttons Buttons Functions 3 3 3 3 Starts playback 7 7 7 7 Stops playback completely 8 8 8 8 Pauses playback temporarily 4 4 4 4 Skips back or forward a Track 1 1 1 1 Skips back or forward a Group NOTES The current Group and Track numbers are shown on the ...

Page 44: ...M indicator in the display window turns off Note that the program remains To clear the program press 7 while the program table is shown on the TV screen While stopped and the play mode menu is displayed on the TV screen by moving to PROGRAM and pressing ENTER the program mode quits Note that the program remains Program playback OPEN CLOSE STANDBY ON DVD TV1 1 2 3 4 5 6 7 8 9 10 0 10 TV2 TV3 TV4 TV...

Page 45: ...EPEAT1 mode the unit stops playback but remains in the mode To quit repeat playback With pointed at REPEAT press ENTER repeatedly until the mode is set to off Random playback NOTES Tracks in a Group are played back in the regular order Pressing the 4 4 4 4 button while random playback skips forward or back a track OPEN CLOSE STANDBY ON DVD TV1 1 2 3 4 5 6 7 8 9 10 0 10 TV2 TV3 TV4 TV5 TV6 TV7 AUDI...

Page 46: ...3 TV4 TV5 TV6 TV7 AUDIO THEATER POSITION DIGEST ANGLE ZOOM AMP VOL 3D PHONIC TV8 TV9 TV CLEAR SELECT STROBE NEXT RETURN VOL SLOW SLOW VOL TV VIDEO CANCEL TV0 ENTER MUTING TV DVD RM SXV004A REMOTE CONTROL DISPLAY MENU T O P MENU CHOICE TV SUB TITLE PREVIOUS CH CH 1 PLAY MODE MP3 11 1 00 08 GROUP TRACK TIME 128 BITRATE kbps Disc type Current group number Current track number Time mode Current track ...

Page 47: ...s initially set to ENGLISH Each time you press CURSOR 3 the language setting changes in the following order ENGLISH SPANISH FRENCH CHINESE GERMAN ITALIAN JAPANESE language code from AA to ZU See Appendix A Table of languages and their abbreviations at the end of this manual Pressing CURSOR 2 changes the language setting in the reverse order of the above If the selected language is not recorded the...

Page 48: ...of other audio equipment STREAM PCM When you connect to the digital input of an amplifier to a built in DTS Dolby Digital or MPEG multichannel decoder DOLBY DIGITAL PCM When you connect to the digital input of a Dolby Digital decoder or an amplifier with a built in Dolby Digital decoder The following chart shows the relationship between types of playback discs and output signals MENU LANGUAGE ENGL...

Page 49: ...signals from your speakers Never use the unit s analog output jacks which output incorrect signals that may damage your speakers If you connect the analog outputs and digital outputs simultaneously be sure to select the source of the amplifier correctly or set the level control of the amplifier connected to the analog outputs to minimum NOTES The DOWN MIX function does not work when the 3D PHONIC ...

Page 50: ...reen saver function if a static picture such as an on screen display or menu is displayed for over 5 minutes SCREEN SAVER is initially set to MODE 2 MODE 1 The current picture gets dark MODE 2 The screen saver picture appears and its brightness changes OFF The screen saver function is off ON SCREEN GUIDE The unit can display on screen guide icons or characters on the picture which show what is hap...

Page 51: ...is inserted 1 Press ENTER while holding down 7 on the remote control unit The Parental Lock on screen display appears on the TV screen points Country Code 2 While points Country Code use CURSOR 2 3 to select the country code The country code whose standards were applied to rate the DVD VIDEO disc should be selected See Appendix B Country Area code list for parental lock See page 57 3 Press ENTER m...

Page 52: ... 4 digit password using the numeric buttons 0 to 9 and press ENTER moves to Country Code if you enter the correct password If you enter the wrong password WRONG RETRY appears on the TV screen and you cannot go to next step 3 To change the country code use CURSOR 2 3 to select the desired country code and press ENTER moves to Set Level When you change the country code you must select the parental l...

Page 53: ...d or not 1 Use the CURSOR 5 to move to YES then press ENTER moves to the PASSWORD field When selecting NO press OPEN CLOSE to remove the disc 2 Enter your 4 digit password using the numeric buttons 0 to 9 If you enter the wrong password WRONG RETRY appears on the TV screen Enter the correct password The Parental lock is released and the unit starts playback NOTES When you enter the wrong password ...

Page 54: ...on top of one another without their protective cases they can be damaged Do not put discs in a location where they may be exposed to direct sunlight or in a place where the humidity or temperature is high Avoid leaving discs in your car Maintenance of discs If there are fingerprints or other dirt adhering to a disc wipe with a soft dry cloth moving from the center outwards If a disc is difficult t...

Page 55: ... Use a playable disc see page 12 Picture is not normal when using the S VIDEO jack The unit is set to feed the RGB signals instead of the S video signals Make the unit feed the S video signals see pages 13 and 15 Picture is noisy The unit is connected to a VCR directly and the copyguard function is activated Connect the unit so that the picture signal flows directly to the TV No audio is reproduce...

Page 56: ...ting It cannot be played Specific files tracks are not played Files other than MP3 are included They cannot be played Files tracks are not played in the recorded order This system plays the files in the alphabetic order So the playback order can vary Particular function does not work On MP3 disc some functions do not work For unavailable functions see page 40 ...

Page 57: ...ck Y Output 1 0 Vp p 75 Ω C Output 286 mVp p 75 Ω RGB out 0 700 mV 75 Ω Horizontal resolution 500 Lines Audio outputs ANALOG OUT pin jack 2 0 Vrms 10 kΩ DIGITAL OUT COAXIAL 0 5 Vp p 75 Ω termination Audio characteristics Frequency response CD sampling frequency 44 1 kHz 2 Hz to 20 kHz DVD sampling frequency 48 kHz 2 Hz to 22 kHz DVD sampling frequency 96 kHz 2 Hz to 44 kHz Dynamic range 16 bit Mor...

Page 58: ...urdish SO Somali BO Tibetan KY Kirghiz SQ Albanian BR Breton LA Latin SR Serbian CA Catalan LN Lingala SS Siswati CO Corsican LO Laothian ST Sesotho CS Czech LT Lithuanian SU Sundanese CY Welsh LV Latvian Lettish SV Swedish DA Danish MG Malagasy SW Swahili DZ Bhutani MI Maori TA Tamil EL Greek MK Macedonian TE Telugu EO Esperanto ML Malayalam TG Tajik ET Estonian MN Mongolian TH Thai EU Basque MO ...

Page 59: ... KG Kyrgyzstan KH Cambodia KI Kiribati KM Comoros KN Saint Kitts and Nevis KP Korea Democratic People s Republic of KR Korea Republic of KW Kuwait KY Cayman Islands KZ Kazakhstan LA Lao People s Democratic Republic LB Lebanon LC Saint Lucia LI Liechtenstein LK Sri Lanka LR Liberia LS Lesotho LT Lithuania LU Luxembourg LV Latvia LY Libyan Arab Jamahiriya MA Morocco MC Monaco MD Moldova Republic of ...

Page 60: ...ve equipment switched on when it is unattended unless it is specifically stated that it is designed for unattended operation or has a standby mode Switch off using the switch on the equipment and make sure that your family know how to do this Special arrangements may need to be made for infirm or handicapped people DON T use equipment such as personal stereos or radios so that you are distracted f...

Page 61: ...eler op de juiste wijze instellen Voor meer details raadpleeg pagina s 13 t m 15 van de GEBRUIKSAANWIJZING ESPAÑOL Ajuste del conmutador selector VIDEO OUT Cuando inserte el conector AV SCART o la salida S VIDEO de la unidad a un televisor necesitará fijar el selector S VIDEO AND VIDEO RGB y el selector COMP RGB Y C del panel posterior de la unidad Para más detalles consulte las páginas 13 a 15 de...

Page 62: ...itää olla oikeassa asennossa Katso lisätietoja KÄYTTÖHJE sivuilta 13 15 DANSK Indstilling af VIDEO OUT vælger Når du forbinder systemets AV stik SCART stikket eller S VIDEO udgang til et tv skal du sørge for at indstille vælgerne S VIDEO AND VIDEO RGB og COMP RGB Y C på bagpanelet korrekt Se side 13 15 i INSTRUKTIONSBOG IMPORTANTE Tenere presente che è necessario cambiare la posizione del selettor...

Reviews: