Installation and Connection (continued)
16
Before connection, be sure to turn off both this unit and the device to be connected.
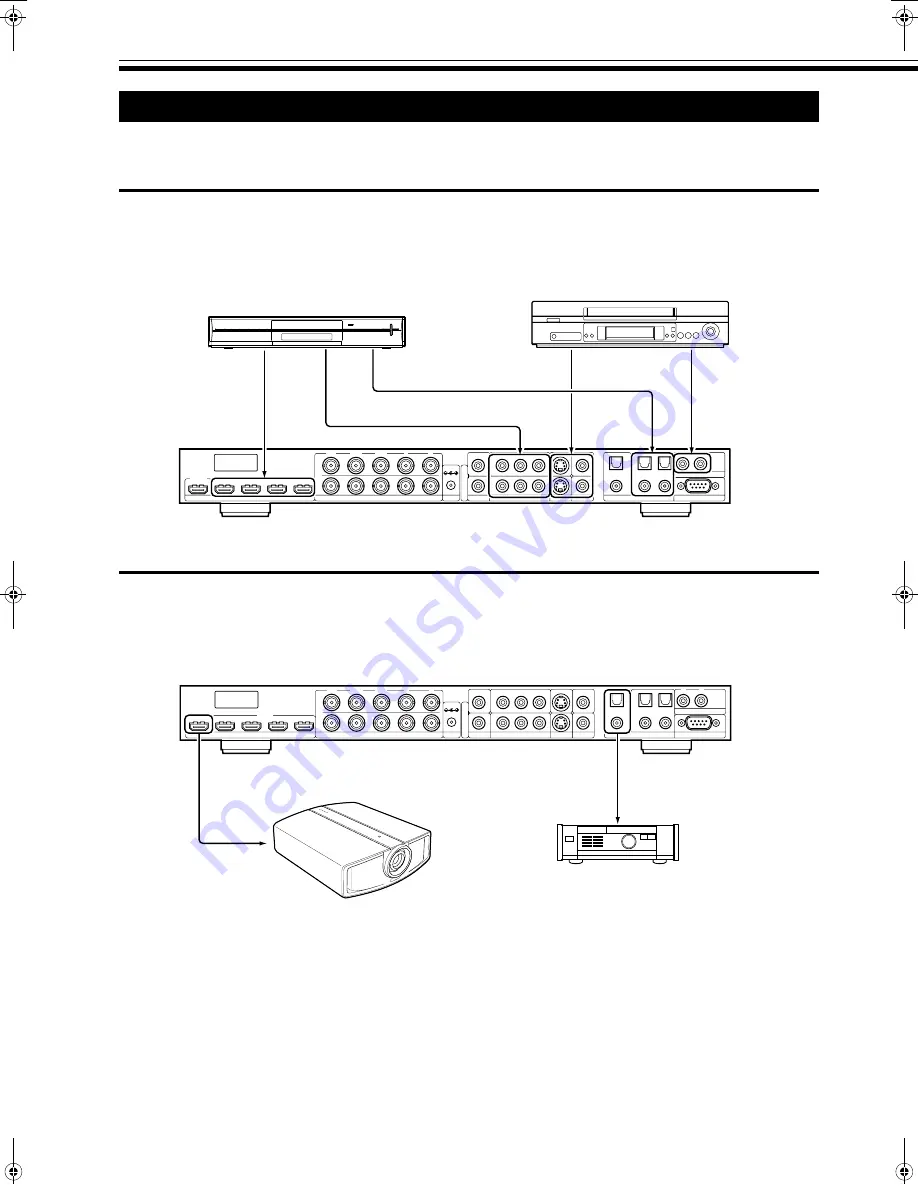
Connecting to Input Devices
●
Exclusive connection cables and adapters may be required for the connection of some devices. Refer to the instruction
manual on the device to be connected for details.
●
See below for an illustration of the devices used and method of connection.
Connecting to the Projector and Amplifier
●
Read the manual that is supplied with the projector to be connected thoroughly.
●
Use the HDMI
-
DVI cable supplied with this unit. The use of a split system or optical fiber cable is recommended when
using a cable longer than that supplied.
●
Depending on the capability of the cable used, signals may attenuate or video images may become unstable.
Connecting to Devices
SERIAL PORT
D I G I TA L AU D I O
VIDEO
S-VIDEO
COMPONENT
SYNC
POWER
A N A L O G V I D E O
H D M I
ANALOG AUDIO INPUT
INPUT
OUTPUT
L
R
2
1
1
2
1
2
1
2
1
2
4
3
Pb(B)
Pr(R)
Y(G)
V
H
Pr(R)
Pb(B)
Y(G)
I
N
P
U
T
S
I
N
P
U
T
O
U
T
P
U
T
OUTPUT
INTPUT
1
2
3
4
SDI
INPUT
DC In
+6V @5A
Rear View
HDD/DVD Recorder,
Digital Tuner, etc.
Video Deck, etc.
HDMI
Digital Audio (Optical/Coaxial)
Component Video
Analog Audio
Video/S-Video
SERIAL PORT
DIGITAL AUDIO
VIDEO
S-VIDEO
COMPONENT
SYNC
POWER
ANALOG VIDEO
HDMI
ANALOG AUDIO INPUT
INPUT
OUTPUT
L
R
2
1
1
2
1
2
1
2
1
2
4
3
Pb(B)
Pr(R)
Y(G)
V
H
Pr(R)
Pb(B)
Y(G)
I
N
P
U
T
S
I
N
P
U
T
O
U
T
P
U
T
OUTPUT
INTPUT
1
2
3
4
SDI
INPUT
DC In
+6V @5A
Rear View
Digital Audio
(Optical/Coaxial)
AV Amplifier, etc.
DLA-HD10KU/E Series
HDMI
Y
DVI-D
(Supplied)
LD-HD1K.book Page 16 Tuesday, December 27, 2005 2:02 AM


