background image

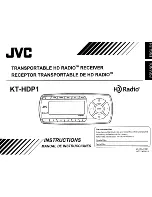
Summary of Contents for KT-HDP1 - HD Radio Tuner

Page 1: ...LE DE HD RADIO KT HDP1 INSTRUCTIONS MANUAL DE INSTRUCCIONES For customer Use Enter below the Model No and Serial No which are located on the top or bottom of the cabinet Retain this information for future reference Model No Serial No 49 HPAJV OOl LVT1796 001A ...

Page 2: ...in a residential installation This equipment generates uses and can radiate radio frequency energy and if 1 not installed and used in accordance with the instructions may cause harmful interference to radio communications However there is no guarantee that interference will not occur in a particular installation If this equipment does cause harmful interference to radio or television reception whi...

Page 3: ...r extreme temperature fluctuations can degrade the performance of the LCD display screen and possibly damage it Cleaning and Maintenance If the receiver or accessories become dirty turn the power off and wipe it clean with a soft cloth Do not use hard cloths strong cleaning fluids paint thinner alcohol or other volatile solvents to clean These may cause damage to the receiver Changes or modificati...

Page 4: ...sh your mouth thoroughly with water Drink large quantities of water and induce vomiting Seek 3 medical care Safety Precautions Be sure to observe the following warnings Failure to follow these safety instructions and warnings may result in a serious accident Do not operate the receiver in a way that might divert your attention from driving safely As a driver you alone are responsible for safely op...

Page 5: ...r accessories emits smoke or unusual odors turn the power off immediately and disconnect the receiver from any power source Do not drop the receiver or subject it to strong shocks If the receiver doesn t seem to be working properly turn the receiver off wait 10 seconds replace the battery and then turn it on again The installation and use suggestions contained in this manual are subject to any res...

Page 6: ...al Installation 12 Do it Yourself Installation 15 Installation for Home Use 18 Connecting the Cigarette Lighter Adapter 19 Controls 20 Getting to Know Your HD Radio Receiver 20 Getting to Know Your Remote ControL 23 On Screen Information 26 During HD Radio Mode 26 During FM AM Mode 27 Menu Options 28 5 ...

Page 7: ...Loudness 33 Factory DefauIt 34 Specifications 35 29 32 31 33 29 30 34 32 Equalizer Tone Control Balance Software Version Operations FM Transmitter Display Options Audio Control 6 ...

Page 8: ...CD This product contains a CR Coin Cell Lithium Battery which contains Perchlorate Material special handling may apply See www dtsc ca gov hazardouswaste perchlorate 3 Remote control with battery 1 HD Radio receiver Package Contents 2 Cigarette lighter adapter 7 ...

Page 9: ...rom over heating cracking or starting a fire Do not recharge short disassemble heat the battery or dispose of it in fire Do not leave the battery with other metallic materials Do not poke the battery with tweezers or similar tools Wrap the battery with tape and insulate when throwing away or saving it Note You will need to purchase an additional Home or Car installation kit to use your KT HDP1 8 ...

Page 10: ...Optional Accessories Sold Separately 1 Car Kit KV K1017 Professional Installation Kit Optional a Cable clip _7 7 7 7 7 7 7 7 7 I 7 7 7 7 I 7 7 lm b Connection unit 9 c Dash mount d Audio cable ...

Page 11: ...2 Car Kit KV K1018 Do it Yourself Installation Kit Optional o a Input antenna Sleeve type b Output antenna Sleeve type c Cable clip I 1 1 I I I I nn d Suction cup e Audio cable 10 ...

Page 12: ...3 Home Kit KV K1019 Optional a Home Input antenna b AC adapter 11 c Cable clip ill I I I I I I I I I I I I I I I I d Home stand e Audio cable ...

Page 13: ...o install this product in your vehicle and provides advice for selecting a suitable mounting location installation of the antenna and routing all the necessary wires and cables Professional Installation Type A Professional installation type A is for car radios with an AUX IN audio input function Please locate the AUX IN audio input s location and determine whether it is in front or rear of the car...

Page 14: ...ote Some motorized vehicle antennas will automatically retract down when AUX IN mode is selected Under the mentioned circumstances signal reception will become poor and the sound quality will be poor Vehicles equipped with a built in windshield antenna will automatically turn off when switching the car radio to AUX IN mode 13 ...

Page 15: ... ANT OUT IN ANT ProfessionallnstaUationB Connection unit Vehicle antenna Professional Installation Type B Professional installation type 8 is for car radios without Aux in audio input and is using wired FM Transmitter s function ...

Page 16: ... in convenient and quick ways Do it Yourself Installation Type A Do it Yourself installation type A is for car radios with Aux in audio input connection Do it Yourself Installation A Input antenna Sleeve type udio AUX Input 12V CLA IN ANT I I AUDIO 5 r r 12V DC Car radio Dr 81 A J o JW I r I 15 ...

Page 17: ...ANT Output antenna Sleeve type I A I GJANT QUT Do it Yourself Installation Type 8 Do it Yourself installation type 8 is for car radios without Aux in audio input and uses a wired FM Transmitter connection Do it Yourself installation type 8 uses a sleeve type of antenna for FM signal reception ...

Page 18: ...t Yourself installation type C takes advantage of receiver s internal antenna and uses a wireless FM Transmitter for linking to the car radio Do it Yourself Installation C Input antenna Sleeve type IN ANT SS ___ TT 12V DC Car radio 12V CLA 17 ...

Page 19: ...Installation for Home Use Your transportable HD Radio receiver can be also used while at home Home Use Installation Home antenna IN ANT Audio cable 12V DC Adapter IO DDDOOD o c I J J I I 0 c J CJfml 18 ...

Page 20: ...ng the Cigarette Lighter Adapter Connect the provided cigarette lighter adapter 12V CLA to the 12V DC connection at the side of the receiver Changing Fuse Replace the fuse with one of the specified rating 2A 19 ...

Page 21: ...Controls Getting to Know Your HD Radio Receiver CD 20 ...

Page 22: ...n Select menu and configuration options Once the menu options are displayed use this button to return to the previous menu screen or station display To return from any menu screen to the station display press and hold the menu button 6 Screen Indicates information of Artist Category Song Title etc 7 Preset Button Holds your favorite radio stations in memory Once a preferred station is tuned press ...

Page 23: ...her information is too long to fit on the display use this function to display the additional information 2 In Menu settings mode selects the option high lighted on the screen Once an option is selected this button functions as Save and Exit 3 In seek mode stops the Seek operation 10 Seek Button Seeks radio station downward upward Press and hold will tune radio frequency up down 22 ...

Page 24: ...w Your Remote Control CD D G HD CD G f VOL HD c J G Ea MENU CJ CJ DISP CJ OJ o J CD BAND CJ 4 CDCD JVC 1 POWER Button Turns the receiver On or Off 2 VOL Volume Button Adjusts the volume down or up of the receiver 23 ...

Page 25: ...ward 7 Seek Button Seeks radio station downward upward Press and hold will tune radio frequency up down 8 ENTER Button 1 In the station display mode enables information scrolling feature Press the ENTER button to scroll and view additional information characters If song artist or any other information is too long to fit on the display use this function to display the additional information 2 In Me...

Page 26: ...een or station display To return from any menu screen to the station display press and hold the menu button 10 Preset Button Holds your favorite radio stations in memory Once a preferred station is tuned press and hold one of the six preset keys 1 6 to set the station into memory To recall the preset stations press a preset key 1 6 once 25 ...

Page 27: ... digital HD Radio signal the following information is indicated 4_ I I t t _ L u f 26 Artist Program Type Song title Digital signal indicator I Preset radio station HD indicator Station name Equalizer Iii Iii It IiI a tl Source indicator I On Screen Information ...

Page 28: ... FM AM Mode When your HD Radio receiver receives a stereo or analog signal the following information is indicated Source indicator Stereo ST _a _ _ Frequency _ e 1 _ f i i n J i Equalizer Preset radio station ...

Page 29: ...u Options list will be displayed To select a menu option use the HD Radio up and down CUbuttons to highlight the option you wish to adjust 28 I t I I 0 0 0 0 0 ro i 5 _ _ i I i II a i i i It i 1 1 I _ 1 _ 1 _ E I_I _ C _ _ r 5_ i I L i_I i_ai_ f i _ r _i l r d h d r I r 1 i _ I I I I I J i h r 1 1 _ II _ t _ I _I 1 1 _ _1 Z I I t I _ Ii i5 i 1 i I i i I 1 3 r 1 i __ _ _ _ _ i it I I I i i _11_ I I...

Page 30: ...g to unused FM station frequency You can also turn the FM transmitter On and Off FM AM reception of adjacent frequency 0 2 MHz could cause interference ie No sounds or having noise when you set the FM transmitter at a certain frequency If interference is experienced set the FM Transmitter to a different frequency setting nl I _ I i 5 i I _1 I II i rIo i iie I i i IE _ 1 I I I J e _ i 5 ...

Page 31: ...t and LCD type using the Display Options II I I I I II IIIID I IIIID Brightness adjusts the overall intensity of the LCD display to help with viewing in different lighting conditions Contrast adjusts the relationship between the background and the text on the LCD display Use the Seek buttons 0 or 8 to adjust the brightness contrast The bar graph will move to indicate the change ...

Page 32: ...he level of the audio output of the receiver To adjust the audio level use the Seek buttons 0 or 8 to change the audio level The bar graph will move to indicate the change I i 5 r i 5 S 5 The Audio Level setting can also adjust Equalizer Tone Control Balance and Loudness 31 ...

Page 33: ...l d r I II Equalizer While choosing User users can define the equalizer level between 7 and 3 The default value is O Tone Control You can adjust Bass and Treble for Tone Control settings Use the Seek buttons Oor 8 to change Bass or Treble level The bar graph will move to indicate the change ...

Page 34: ... 111111111111 111111111111 i Balance Use the Seek buttons Oor 8 to change Balance level The bar graph will move to indicate the change Lo c Loudness You can set Loudness On or Off i_ 1 e Ji I i i i i 33 ...

Page 35: ...ings or select No to leave them as present and return to the Menu Options Once you select Yes a message Are You Sure indicates on the screen to ask for final confirmation II I i I I It i_ f L_ _ J I 34 I L J 1 1 J I 1 1 P i i i i J a I _ _ i s I I 1 1 1 1 I_I J II 1 1 _1 r _ J T t D 1 1 1 1 1 1 I1 i I r C 1 L I I L r 1 J i 5 1 f _ L I I I I 1 Software Version The latest software version will be in...

Page 36: ...W x H x D 2 x 3 9 16 x 3 8 W x H x D FM Receiving Frequencies 87 9 107 9MHz AM Receiving Frequencies 530 171 OKHz FM Hybrid 88dBm FM All Digital 108dBm AM Hybrid 90dBm AM All Digital 105dBm Input 2 5 mm Jack FM Transmission Output Interface 2 1 mm Jack Audio Output Interface 3 5 mm Stereo Jack Audio Output 2 8V Peak to Peak maXimUrTi Digital Audio Total Harmonic Distortion THO 0 1 0 0 Digital Audi...

Page 37: ...io Technology Manufactured Under License From iBiquity Digital Corporation iBiquity Digital and the HD Radio and HD Symbols are registered trademarks of iBiquity Digital Corporation U S and Foreign Patents 36 ...

Page 38: ...fO Having TROUBLE with operation USA ONLY Call 1 800 252 5722 http www jvc com We can help you Ive _ EN SP 2007 Victor Company of Japan Limited ...

Page 39: ... FIRST CLASS STAMP HERE 1 111111I11 1111I1111 1 11 1 1 1 1111 11 1 1 11 11 1 11 PRODUCT REGISTRATION CARD QUESTIONNAIRE I us CUSTOMERS ONLY I Registering your product will allow us to contact you in the unlikely event a product safety notification is required This form is for Product Registration purposes only Failure to return this form does not diminish your rights during the warranty period THA...

Page 40: ...addition to a similar product you are still using 3 What factors most influenced your decision to purchase this product JVC brand reputation Previous experience with JVC products Price Specific product f9atur9b Style appearance Salesperson s recommendation Friend relative s recommendation Warranty coverage Other 4 How did you learn about this product Magazine Advertisement Newspaper Advertisement ...

Page 41: ...RVICE CENTER LIKE TO PURCHASE ACCESSORIES JVC IS HERETO HELP TOLL FREE 1 800 252 5722 http www jvc com Remember to retain your Bill of Sale for Warranty Service Do not attempt to service the product yourself Caution To prevent electrical shock do not open the cabinet There are no user serviceable parts inside Please refer to qualified service personnel for repairs BT 51 035 4 0306 Printed in Taiwa...

Page 42: ...onal adjustments covered in the Owner s Manual normal maintenance video and audio head cleaning t 4 Damage that occurs in shipment due to act of God and cosmetic damage 5 Signal reception problems and failures due to line power surge 6 User Removal Memory DeviceNideo Pickup up Tubes CCD Image Sensors are covered for 90 days from the date of purchase 7 Accessories 8 Batteries except that Rechargeab...

Reviews: