1-6 (No.MA098)
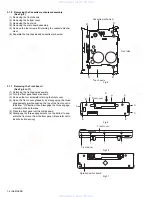
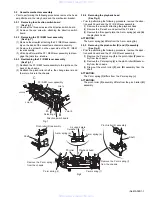
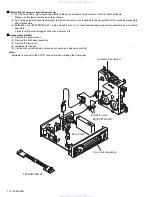
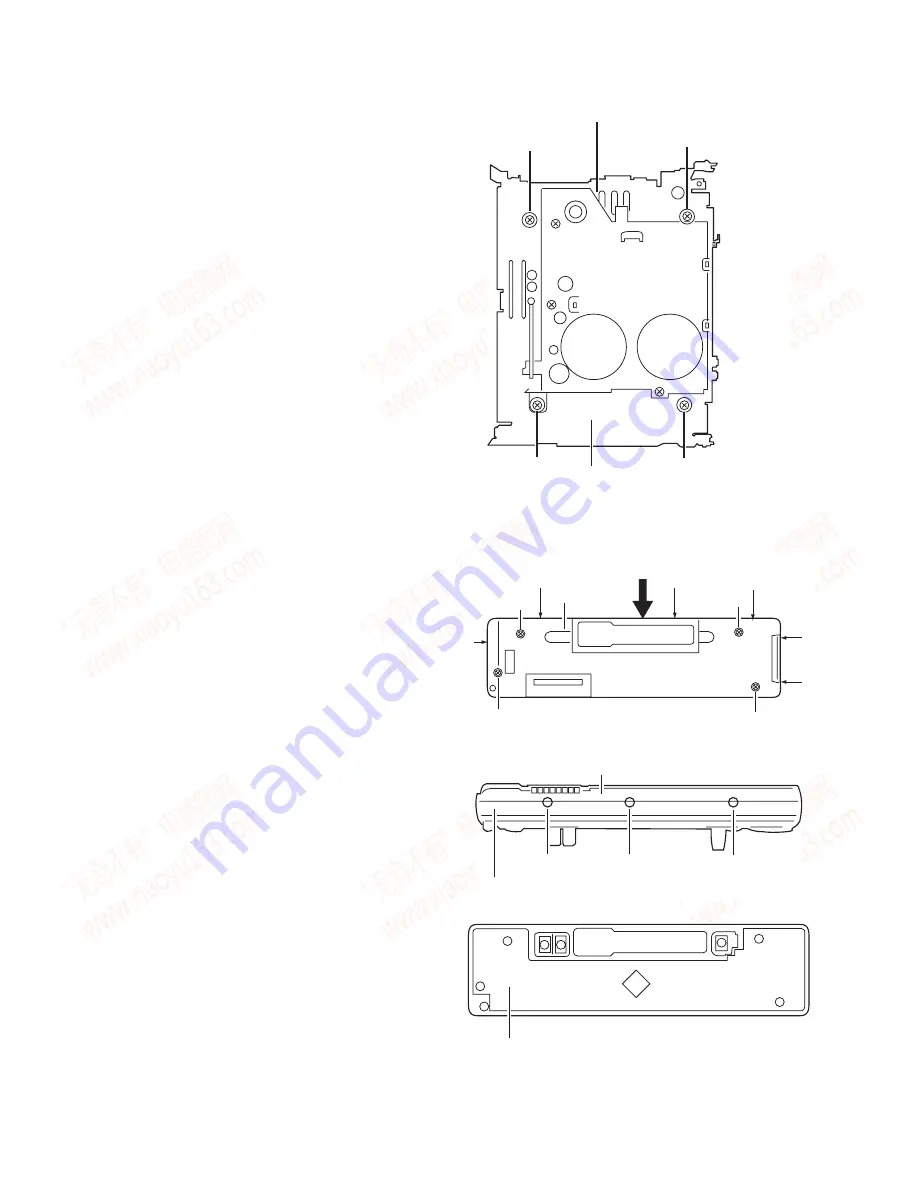
3.1.6 Removing the Cassette mechanism assembly
(See Fig.8)
(1) Removing the front chassis.
(2) Removing the bottom cover.
(3) Removing the heat sink.
(4) Removing the main board assembly.
(5) Remove the four screws
D
retaining the cassette mecha-
nism.
(6) Separate the top chassis and cassette mechanism.
Fig.8
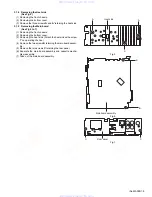
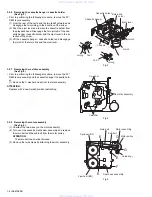
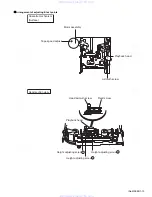
3.1.7 Removing the Front board
(See Fig.9 to 11)
(1) Detaching the front panel assembly.
(2) Turn the front panel back side down.
(3) Remove the four screws
E
retaining the front cover.
(4) Open the front cover gradually by disengaging the three
engagements
g
while pushing the top of the front cover in
the arrow "A" direction, then disengage the three engage-
ments
h
on the both sides.
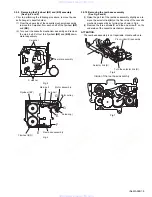
(5) Place the front panel unit front side down.
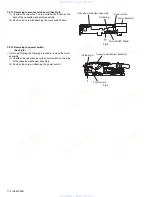
(6) Disengage the three engagements
i
on the bottom to sep-
arate the front cover from the front panel. (Be careful not to
lose the button spring)
Fig.9
Fig.10
Fig.11
Cassette mechanism
Front side
Top chassis
D
D
D
D
Front cover
E
E
E
E
g
h
h
h
g
g
A
Front panel
Front cover
i
i
i
Opration switch board
www. xiaoyu163. com
QQ 376315150
9
9
2
8
9
4
2
9
8
TEL 13942296513
9
9
2
8
9
4
2
9
8
0
5
1
5
1
3
6
7
3
Q
Q
TEL 13942296513 QQ 376315150 892498299
TEL 13942296513 QQ 376315150 892498299

