background image

22

ENGLISH

1

3

Factory-preset
settings

See
page

2

Set.

Back

Advance

Select.

Advance

Back

1:00

20

SEL

SEL

AUTO

AUTO

EXTRA

VIDEO

TAPE

MD

TV

23

23

OFF

ONCE

24

AREA EU

OFF

ON

ON

ON

ON

24

EXTRA

25

AREA US

AREA US

25

ONCE

OFF

AUDIO

AUDIO

23

ON

OFF

AUTO

OFF

CLOCK H

Hour adjustment

CLOCK M

Minute adjustment

CLOCK

Clock display

LEVEL

Level display

DIMMER

Dimmer

BEEP *

Key-touch tone

SCROLL

Name display

AUX

Auxiliary component

AREA

Channel interval

• Press SEL (Select) when the setting is complete.

ONLY FOR KD-SX949

EN20-27.KD-SX949/SX940[J]/F

98.12.7, 6:14 PM

22

Summary of Contents for KD-SX940

Page 1: ...0 632 J ESPAÑOL FRANÇAIS CD RECEIVER KD SX949 KD SX940 RECEPTOR CON CD KD SX949 KD SX940 RECEPTEUR CD KD SX949 KD SX940 For customer Use Enter below the Model No and Serial No which are located on the top or bottom of the cabinet Retain this information for future reference Model No Serial No KD SX949 KD SX940 For installation and connections refer to the separate manual Para la instalación y las ...

Page 2: ...IMPORTANT FOR LASER PRODUCTS For USA only Precautions 1 CLASS 1 LASER PRODUCT 2 DANGER Invisible laser radiation when open and interlock failed or defeated Avoid direct exposure to beam 3 CAUTION Do not open the top cover There are no user serviceable parts inside Leave all servicing to qualified service personnel 4 CAUTION This CD player uses invisible laser radiation however is equipped with saf...

Page 3: ...g CD playback modes 13 Playing a CD Text 15 Prohibiting CD ejection 15 SOUND ADJUSTMENTS 16 Turning on off the BBE function 16 Selecting preset sound modes 17 Adjusting the sound 18 Storing your own sound adjustments 19 OTHER MAIN FUNCTIONS 20 Setting the clock 20 Changing the general settings PSM 21 Basic Procedure 21 Selecting the clock display 23 Selecting the level display 23 Selecting the dim...

Page 4: ...NGLISH CD CHANGER OPERATIONS 31 Playing CDs 31 Selecting CD playback modes 33 EXTERNAL COMPONENT OPERATIONS 34 MAINTENANCE 35 Handling CDs 35 How to Reset your unit 35 TROUBLESHOOTING 36 SPECIFICATIONS 37 ...

Page 5: ...y while listening to any source ATT starts flashing on the display and the volume level will drop in a moment To resume the previous volume level press the button briefly again To turn off the power Press for more than 1 second Note on One Touch Operation When you select a source in step 2 below the power automatically comes on You do not have to press this button to turn on the power I ATT SEL CA...

Page 6: ...ed for searching To tune in a particular frequency without searching 1 Press FM AM repeatedly to select the band FM or AM 2 Press and hold or 4 until MANU manual starts flashing on the display Now you can manually change the frequency while MANU is flashing 3 Press or 4 repeatedly until the frequency you want is reached If you hold down the button the frequency keeps changing until you release the...

Page 7: ...cy to No 6 highest frequency When automatic preset is over the station stored in number button 1 will be automatically tuned in Storing stations in memory You can use one of the following two methods to store broadcasting stations in memory Automatic preset of FM stations SSM Strong station Sequential Memory Manual preset of both FM and AM stations FM station automatic preset SSM You can preset 6 ...

Page 8: ...set station is erased when a new station is stored in the same preset number Preset stations are erased when the power supply to the memory circuit is interrupted for example during battery replacement If this occurs preset the stations again Manual preset You can preset up to 6 stations in each band FM1 FM2 FM3 and AM manually EXAMPLE Storing an FM station of 88 3 MHz into the preset number 1 of ...

Page 9: ...tune into a preset station Remember that you must store stations first If you have not stored them yet see pages 7 and 8 1 Select the band FM1 FM2 FM3 or AM you want 2 Select the number 1 6 for the preset station you want FM AM 1 2 F1 FM1 F2 FM2 F3 FM3 AM ...

Page 10: ...ng FM reception sound When an FM stereo broadcast is hard to receive Press MO RND Mono Random while listening to an FM stereo broadcast The MO Mono indicator lights up on the display The sound you hear becomes monaural but reception will be improved To restore the stereo effect press the same button again When using this unit in an area other than North or South America You need to change the AM F...

Page 11: ...e the source to FM AM CD changer or external component the CD play also stops without ejecting the CD this time If the ejected disc is not removed for about 15 seconds the disc is automatically inserted again into the loading slot to protect it from dust CD play will not start this time You can eject the CD even when the unit is turned off Notes When a CD is inserted up side down PLEASE EJECT appe...

Page 12: ... track is located and played back Press 4 briefly while playing a CD to go back to the beginning of the current track Each time you press the button consecutively the beginning of the previous track is located and played back To go to a particular track directly Press the number button corresponding to the track number to start its playback To select a track number from 1 6 Press 1 7 6 12 briefly ...

Page 13: ...he RND indicator lights up on the display and a track randomly selected starts playing To play back tracks repeatedly Repeat Play You can play back the current track repeatedly Each time you press RPT Repeat while playing a CD CD repeat play mode turns on and off alternately When the repeat mode is turned on the RPT indicator lights up on the display Selecting CD playback modes MO RND Track number...

Page 14: ...ile playing a CD CD intro scan mode turns on and off alternately When the intro scan mode is turned on INT appears on the display for 5 seconds and the track number flashes The first 15 seconds of each track are played sequentially KD SX949 INT INT SCAN KD SX940 INT SCAN KD SX949 INT KD SX940 Track number of the currently playing track ...

Page 15: ...cters or symbols will not be shown and be blanked on the display Ex ABCå d ABCA D When you press DISP while playing a conventional CD NO NAME appears for the disc tittle performer and the track title DISP DISP Disc Title Performer Track Title Current track and Elapsed playing time You can prohibit CD ejection and can lock a CD in the loading slot While pressing CD press and hold for more than 2 se...

Page 16: ...e low mid and high frequencies by adding a progressively longer delay time to the low and mid frequencies so that all frequencies reach the listener s ears at the proper time In addition the BBE function boosts low and high frequencies which loudspeakers tend to be less efficient in reproducing through dynamic program driven augmentation When combined with the phase compensation feature the result...

Page 17: ...SCM OFF Flat sound 00 00 On BEAT Rock or disco music 02 00 On SOFT Quiet background music 01 03 Off POP Light music 04 01 Off Notes You can adjust the preset sound control mode to your preference and store in memory If you want to adjust and store your original sound control mode see Storing your own sound adjustments on page 19 To adjust only the bass and treble reinforcement levels to your prefe...

Page 18: ...eble FAD Adjust the front and rear speaker R06 rear only F06 front only Fader balance BAL Adjust the left and right speaker L06 left only R06 right only Balance balance VOL Adjust the volume 00 min 50 max Volume Note If you are using a two speaker system set the fader level to 00 2 Adjust the level Note Normally the control dial works as the volume control So you do not have to select VOL to adjus...

Page 19: ...lected flashes on the display Your setting is stored in memory 4 Repeat the same procedure to store other settings To reset to the factory settings Repeat the same procedure and reassign the preset values listed in the table on page 17 Storing your own sound adjustments You can adjust the sound control modes BEAT SOFT POP see page 17 to your preference and store your own adjustments in memory With...

Page 20: ...y 2 Set the hour 1 Select CLOCK H Hour if not shown on the display 2 Adjust the hour 3 Set the minute 1 Select CLOCK M Minute 2 Adjust the minute 4 Start the clock To check the current clock time while the unit is turned off press DISP The power turns on the clock time is shown for 5 seconds then the power turns off SEL 1 SEL 2 1 SEL 2 SEL 2 3 1 4 2 3 ...

Page 21: ...e control Basic Procedure Changing the general settings PSM 1 Press and hold SEL Select for more than 2 seconds so that one of the PSM items appears on the display 2 Select the PSM item you want to adjust See page 22 3 Select or adjust the PSM item selected above 4 Finish setting 3 2 1 4 SEL SEL SEL ...

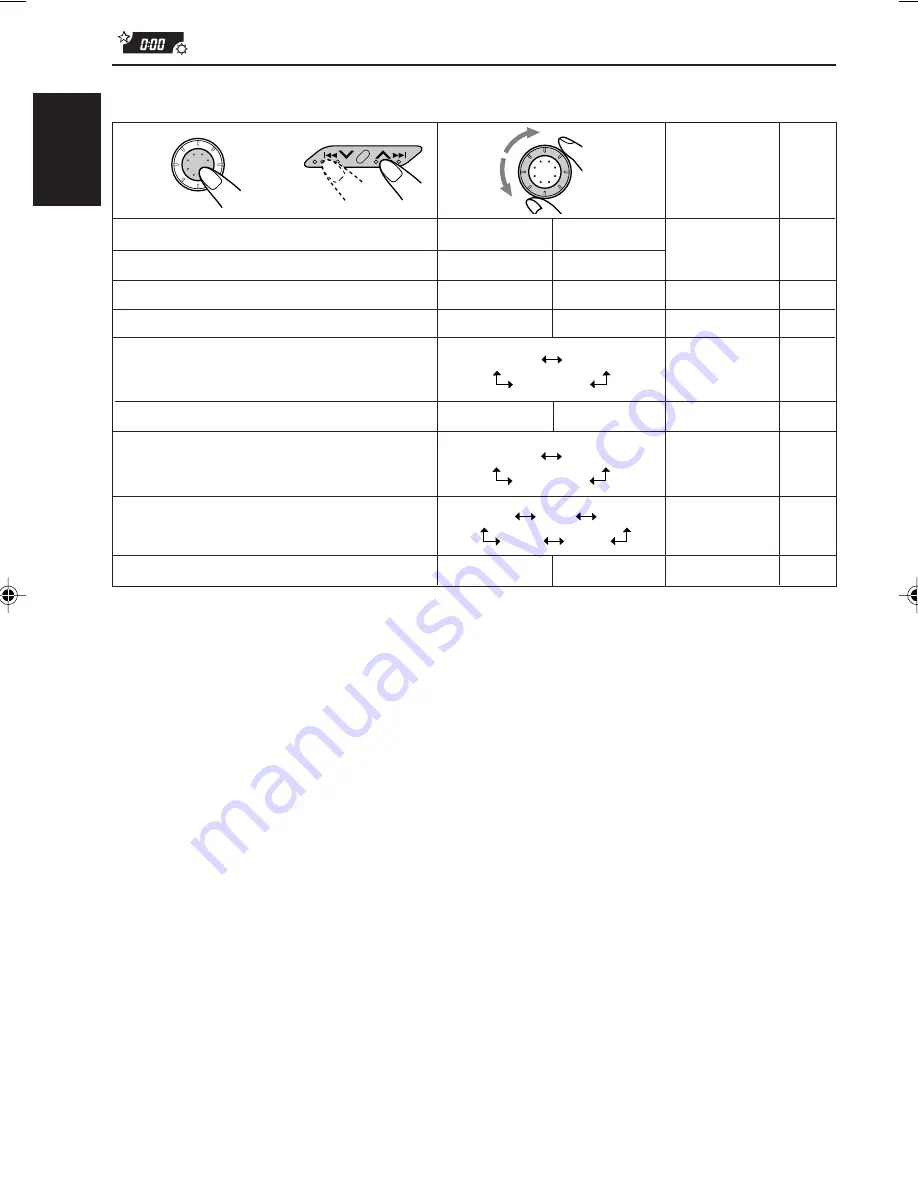
Page 22: ... 24 AREA EU OFF ON ON ON ON 24 EXTRA 25 AREA US AREA US 25 ONCE OFF AUDIO AUDIO 23 ON OFF AUTO OFF CLOCK H Hour adjustment CLOCK M Minute adjustment CLOCK Clock display LEVEL Level display DIMMER Dimmer BEEP Key touch tone SCROLL Name display AUX Auxiliary component AREA Channel interval Press SEL Select when the setting is complete ONLY FOR KD SX949 ...

Page 23: ...n the display shows the audio level AUDIO Audio level indicator OFF Volume level indicator 1 Press and hold SEL Select for more than 2 seconds so that one of the PSM items appears on the display 2 Select LEVEL with or 4 3 Select the desired mode with the control dial The level display setting alternates between AUDIO and OFF AUDIO OFF Selecting the dimmer mode When you turn on the car head lights ...

Page 24: ...tone alternates between on and off Selecting the scroll mode You can select the scroll mode for the name display and disc information if it consists of more than 8 characters When shipped from the factory Auto Scroll mode is set to ONCE ONCE Scrolls only once AUTO Repeats the scroll 5 second intervals in between OFF Cancels Auto Scroll 1 Press and hold SEL Select for more than 2 seconds so that on...

Page 25: ...M channel intervals When this unit is shipped from the factory the channel intervals are set to 10 kHz for AM and 200 kHz for FM AREA US settings You will have to change the channel intervals when using this unit in an area other than North America and South America AREA EU Select this when using this unit in an area other than North and South America 9 kHz for AM and 50 kHz for manual tuning 100 ...

Page 26: ...r car Each time you press the button the Audio Cruise mode changes as follows CRUISE 1 Select this if your car is relatively quiet CRUISE 2 Select this if your car is relatively loud The volume increase rate is twice as much as that of the CRUISE 1 setting OFF Cancels Audio Cruise When this function is turned on the CRUISE indicator lights up on the display the proper volume level is automatically...

Page 27: ...mory to make Audio Cruise function correctly NOTICE that a number of factors such as electric power steering wipers power windows air conditioner etc do generate noises and as a result may cause Audio Cruise not to function correctly If this is the main cause of malfunction connect the memory backup lead yellow lead directly to the car battery to prevent these noises from affecting Audio Cruise 1 ...

Page 28: ...left side of the control panel to fix it to the panel holder Note on cleaning the connectors If you frequently detach the control panel the connectors will deteriorate To minimize this possibility periodically wipe the connectors with a cotton swab or cloth moistened with alcohol being careful not to damage the connectors Connectors Detaching the control panel You can detach the control panel when...

Page 29: ...e controller decreases replace the batteries For KD SX949 WARNING Store the batteries in a place which children cannot reach If a child accidentally swallows the battery immediately consult a doctor Do not recharge short disassemble or heat the batteries or dispose of in a fire Doing any of these things may cause the batteries to give off heat crack or start a fire Do not leave the batteries with ...

Page 30: ...er increases and the selected station is tuned in Functions as the DISC button while listening to the CD changer Each time you press the button the disc number decreases and the selected disc starts playing 4 Functions the same as the control dial on the main unit Note This button does not function for the preferred setting mode adjustment 5 Select the source Each time you press FUNC function the ...

Page 31: ... and set the discs correctly If RESET 1 RESET 8 appears on the display something is wrong with the connection between this unit and the CD changer If this happens check the connection connect the connecting cord s firmly if necessary then press the reset button of the CD changer Select the CD automatic changer Each time you press the button you can select the CD automatic changer and the external ...

Page 32: ...riefly while playing a CD to go back to the beginning of the current track Each time you press the button consecutively the beginning of the previous track is located and played back To go to a particular disc directly Press the number button corresponding to the disc number to start its playback while the CD changer is playing To select a disc number from 1 6 Press 1 7 6 12 briefly To select a di...

Page 33: ...play mode changes as follows Mode RPT Indicator Plays repeatedly RPT1 Lights The current track or specified track RPT2 Flashes All tracks of the current disc or specified disc To play back only intros Intro Scan KD SX949 Each time you press INT SCAN Intro Scan briefly while playing a CD CD intro scan mode changes as follows KD SX940 Each time you press INT Intro briefly while playing a CD CD intro...

Page 34: ... auxiliary input jack on the front panel you can select the component as the sound source Note on One Touch Operation When you press CD CH AUX the power automatically comes on You do not have to press to turn on the power Note When selecting an external component as the source what appears on the upper part of the display depends on the AUX setting see page 25 AUX or clock time see page 23 appears...

Page 35: ...f such a CD is used this unit may reject the CD To remove these rough spots rub the edges with a pencil or ball point pen etc Moisture condensation Moisture may condense on the lens inside the CD player in the following cases After starting the heater in the car If it becomes very humid inside the car Should this occur the CD player may malfunction In this case eject the CD and leave the unit turn...

Page 36: ...ic noise while listening to the radio NO DISC appears on the display RESET 8 appears on the display RESET 1 RESET 7 appears on the display CD can be neither played back nor ejected This unit does not work at all The CD changer does not work at all Remedies Insert the CD correctly Stop CD play while driving on rough roads Change the CD Check the cords and connections Adjust it to the optimum level ...

Page 37: ...er Usable Sensitivity 11 3 dBf 1 0 µV 75 Ω 50 dB Quieting Sensitivity 16 3 dBf 1 8 µV 75 Ω Alternate Channel Selectivity 400 kHz 65 dB Frequency Response 40 to 15 000 Hz Stereo Separation 35 dB Capture Ratio 1 5 dB AM Tuner Sensitivity 20 µV Selectivity 35 dB SPECIFICATIONS CD PLAYER SECTION Type Compact disc player Signal Detection System Non contact optical pickup semiconductor laser Number of c...

Page 38: ...N SP FR J VC VICTOR COMPANY OF JAPAN LIMITED Having TROUBLE with operation Please reset your unit Refer to page of How to Reset Still having trouble USA ONLY Call 1 800 252 5722 http www jvcservice com We can help you ...

Reviews: