JVC KD-R480 Instruction Manual Download Page 17

ENGLISH

17

TEXT SCROLL

 *

2

SCROLL ONCE

: Scrolls the display information once. ; 

SCROLL 

AUTO

: Repeats scrolling at 5-second intervals. ; 

SCROLL OFF

: Cancels.

COLOR

 (for 

KD-R680S

)

PRESET

Select a color for buttons illumination.
• 

COLOR 01

 to 

COLOR 49 [COLOR 08]

• 

USER

: The color you have created for 

[DAY COLOR]

 or 

[NIGHT COLOR]


is shown.

• 

COLOR FLOW01

 to 

COLOR FLOW03

: Color changes at different speeds.

DAY COLOR

Store your own day and night colors for buttons illumination.
Default color: 

[RED 00]

[GREEN 05]

[BLUE 31]

1


RED

/

GREEN

/

BLUE

: Select a primary color.

2


00

 to 

31

: Select the level. 

Repeat steps 

1

 and 

2

 for all the primary colors.

•  Your setting is stored to 

[USER]

 in 

[PRESET]

.

• 

[NIGHT COLOR]

 or 

[DAY COLOR]

 is changed by turning on or off your 

car’s headlight.

NIGHT COLOR

MENU COLOR

ON

: The color of buttons illumination changes to white color when 

in menu mode or when selecting a music file from a folder/list.


OFF

:


Cancels.

*

1

  The illumination control wire connection is required. 

(  25)

*

2

  Some characters or symbols will not be shown correctly (or will be blanked).
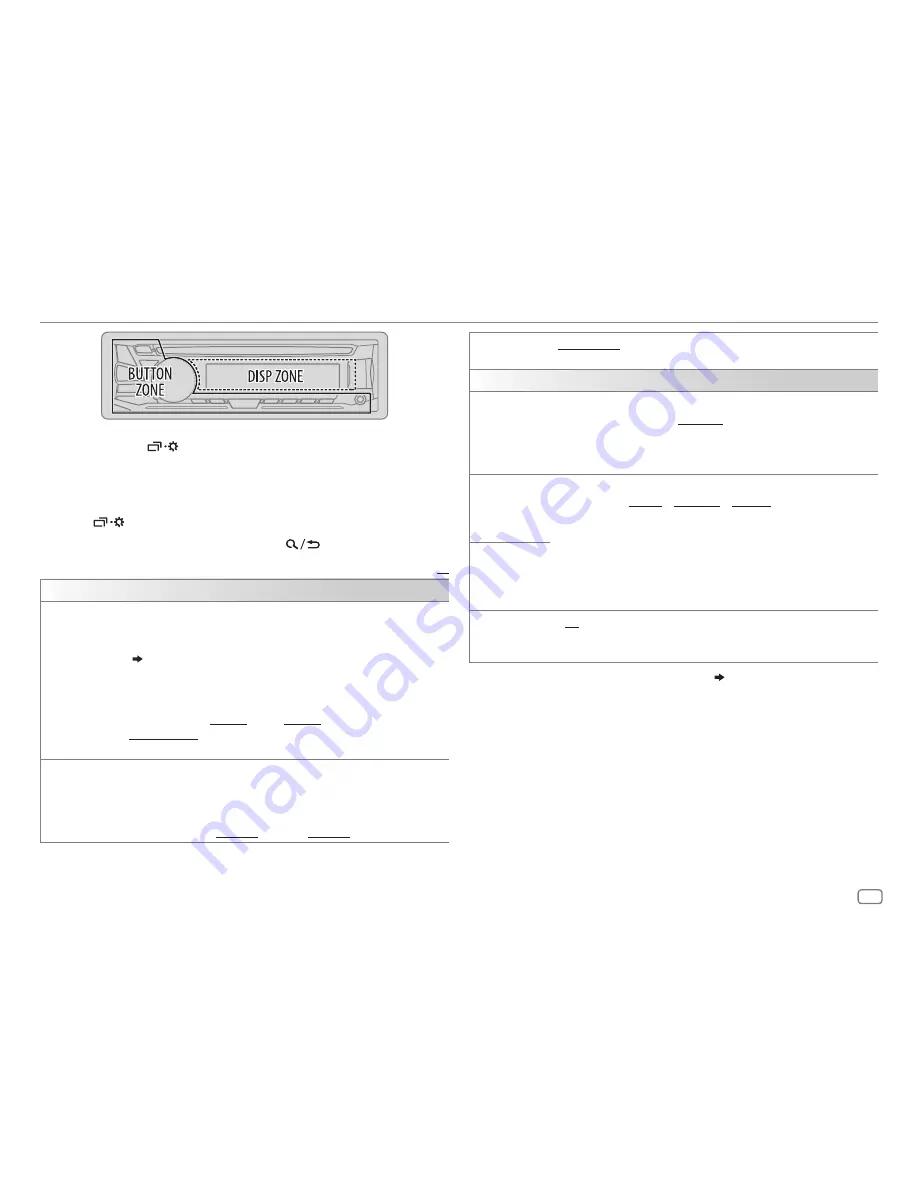
Press and hold 

.

Turn the volume knob to select an item (see the following table), 
then press the knob.

Repeat step 

2

 until the desired item is selected/activated or follow 

the instructions stated on the selected item.

Press 

 to exit.

To return to the previous setting item, press 

.

Default: 

XX

DISPLAY

DIMMER

Dim the illuminations.

OFF

: Dimmer is turned off. Brightness changes to 

[DAY]

 setting.

ON

: Dimmer is turned on. Brightness changes to 

[NIGHT]

 setting. 

(  [BRIGHTNESS])
DIMMER TIME

: Set the dimmer on and off time.

1

  Turn the volume knob to adjust the 

[ON]

 time, then press the knob.

2

  Turn the volume knob to adjust the 

[OFF]

 time, then press the knob.

 (Default: 

[ON]

PM6:00

 ; 

[OFF]

AM6:00

)

DIMMER AUTO

: Dimmer turns on and off automatically when you turn off 

or on the car headlights. *

1

BRIGHTNESS

Set the button and display brightness for day and night separately.

1


DAY

/

NIGHT

: Select day or night.

2

  Select a zone.

3


LEVEL 00

 to 

LEVEL 31

: Set the brightness level.

 (Default: 

[DAY]

LEVEL 31

 ; 

[NIGHT]

LEVEL 15

)

DISPLAY SETTINGS

JS_JVC_KD_R680S_KD_R480_K_EN_7.indd   17

29/7/2016   5:14:26 PM

Summary of Contents for KD-R480

Page 1: ...R CD MANUEL D INSTRUCTIONS RECEPTOR CON CD MANUAL DE INSTRUCCIONES For customer Use Enter below the Model No and Serial No which are located on the top or bottom of the cabinet Retain this information for future reference Model No Serial No JS_JVC_KD_R680S_KD_R480_K_C indd 1 21 7 2016 5 13 26 PM ...

Page 2: ...ke sure all important data has been backed up We shall bear no responsibility for any loss of recorded data Never put or leave any metallic objects such as coins or metal tools inside the unit to prevent a short circuit If a disc error occurs due to condensation on the laser lens eject the disc and wait for the moisture to evaporate Remote control RM RK52 Do not leave the remote control in hot pla...

Page 3: ...Press again to cancel Select a source Press repeatedly Press then turn the volume knob within 2 seconds Press SOURCE repeatedly Change the display information Press repeatedly 19 Not available Attach How to reset Detach Your preset adjustments will be erased except stored radio stations Remote control RM RK52 Faceplate Volume knob Loading slot Detach button Display window KD R480 How to replace th...

Page 4: ...Day Month Year 9 Press to exit To return to the previous setting item press 1 2 Set the basic settings 1 Press and hold 2 Turn the volume knob to select an item see the following table then press the knob 3 Repeat step 2 until the desired item is selected or activated 4 Press to exit To return to the previous setting item press Default XX SYSTEM KEY BEEP ON Activates the keypress tone OFF Deactiva...

Page 5: ...ation 1 Press repeatedly to select FM or AM 2 Press or press on the remote control to search for a station automatically or Press and hold or press and hold on the remote control until M flashes then press repeatedly to search for a station manually Settings in memory You can store up to 18 stations for FM and 6 stations for AM Store a station While listening to a station Press and hold one of the...

Page 6: ... store the following 12 stations IF BAND AUTO Increases the tuner selectivity to reduce interference noises from adjacent FM stations Stereo effect may be lost WIDE Subjects to interference noises from adjacent FM stations but sound quality will not be degraded and the stereo effect will remain MONO SET 3 ON Improves the FM reception but the stereo effect will be lost OFF Cancels AREA US For North...

Page 7: ...OID 1 Do not leave the cable inside the car when not using 2 When connecting an Android device Press VIEW to install JVC MUSIC PLAY APP is shown Follow the instructions to install the application You can also install the latest version of JVC MUSIC PLAY application on your Android device before connecting For more information visit http www jvc net cs car 3 For ANDROID Applicable only when AUTO MO...

Page 8: ...n HEAD MODE AUTO MODE is selected 1 Press 2 Turn the volume knob to select a folder list then press the knob 3 Turn the volume knob to select a file then press the knob Quick Search applicable only for CD USB and ANDROID source If you have many files you can search through them quickly Turn the volume knob quickly to browse through the list quickly Alphabet search applicable only for iPod and ANDR...

Page 9: ...olume knob to select NEW STATION then press the knob 3 Turn the volume knob to select FROM TRACK or FROM ARTIST then press the knob A new station is created based on the current song or artist 4 Press and hold one of the number buttons 3 4 5 or 6 to store To select a stored station Press one of the number buttons 3 4 5 or 6 Search for a registered station 1 Press 2 Turn the volume knob to select a...

Page 10: ...r live station Press 3 Not available Scan for live station Press 4 Not available 1 Do not leave the cable inside the car when not using 2 If thumbs down is selected the current track is skipped Search for a station 1 Press 2 Turn the volume knob to select a category then press the knob 3 Turn the volume knob to select the desired station then press the knob When a city list appears you can skip ci...

Page 11: ...ress 2 Turn the volume knob to select PRESET then press the knob 3 Turn the volume knob to select a preset number then press the knob or Press on the remote control Only SiriusXM brings you more of what you love to listen to all in one place Get over 140 channels including commercial free music plus the best sports news talk comedy and entertainment Welcome to the world of satellite radio A Sirius...

Page 12: ...to 3 of cancelling SmartFavorites channels appears at the last character SiriusXM Replay While listening to a channel 1 Press the volume knob lights up and the unit memorizes this paused position 2 Press the volume knob to start Replay Replay starts from the paused position in step 1 During Replay To On the faceplate On the remote control Playback pause Press the volume knob Press Skip the current...

Page 13: ... 1 Press the volume knob to enter NEW CODE 2 Turn the volume knob to select a number 3 Press to move to the entry position 4 Repeat steps 2 and 3 to enter a new 4 digit pass code 5 Press the volume knob to confirm 6 Repeat steps 2 to 5 to reconfirm the pass code Make a note of the new pass code to enter channel lock settings for next time LOCK SETTING MATURE CH Selects the SiriusXM defined lock se...

Page 14: ...1 Press and hold 2 Turn the volume knob to select an item 15 then press the knob 3 Repeat step 2 until the desired item is selected activated or follow the instructions stated on the selected item 4 Press to exit To return to the previous setting item press Use a portable audio player 1 Connect a portable audio player commercially available 2 Select ON for BUILT IN AUX in SOURCE SELECT 4 3 Press r...

Page 15: ...et to SUB W SUB W 16 3 Displayed only when SPK PRE OUT is set to REAR SUB W or SUB W SUB W 16 4 Selectable only if a setting other than FRQ THROUGH is selected for SUBWOOFER LPF 5 This adjustment will not affect the subwoofer output AUDIO SETTINGS Default XX EQ SETTING PRESET EQ Select a preset equalizer suitable to the music genre Select USER to use the settings made in EASY EQ or PRO EQ FLAT DRV...

Page 16: ...select the source you want to adjust VOL ADJ FIX appears if FM is selected AMP GAIN LOW POWER Limits the maximum volume level to 25 Select if the maximum power of each speaker is less than 50 W to prevent damaging the speakers HIGH POWER The maximum volume level is 35 D T EXPANDER Digital Track Expander ON Creates realistic sound by compensating the high frequency components and restoring the rise...

Page 17: ...required 25 2 Some characters or symbols will not be shown correctly or will be blanked 1 Press and hold 2 Turn the volume knob to select an item see the following table then press the knob 3 Repeat step 2 until the desired item is selected activated or follow the instructions stated on the selected item 4 Press to exit To return to the previous setting item press Default XX DISPLAY DIMMER Dim the...

Page 18: ...ble files Playable audio file For disc MP3 mp3 WMA wma For USB mass storage class device MP3 mp3 WMA wma WAV wav FLAC flac Playable disc media CD R CD RW CD ROM Playable disc file format ISO 9660 Level 1 2 Joliet Long file name Playable USB device file system FAT12 FAT16 FAT32 Even when audio files comply with the standards listed above playback may be impossible depending on the types or conditio...

Page 19: ...ion is unavailable or not recorded NO TEXT NO NAME or other information eg station name appears Source name Display information FM or AM Frequency Date Clock For FM Radio Broadcast Data System stations only Station name PS Program type PTY Date Clock Radio text Date Clock Radio text Date Clock Song title Artist Song title Date Clock Frequency Date Clock back to the beginning CD or USB For CD DA Tr...

Page 20: ...OUBLESHOOTING Symptom Remedy CD USB iPod The iPod iPhone does not turn on or does not work Check the connection between this unit and iPod iPhone Detach and reset the iPod iPhone using hard reset Correct characters are not displayed This unit can only display uppercase letters numbers and a limited number of symbols Depending on the display language you have selected 5 some characters may not be d...

Page 21: ...CRIPTION UPDATED PRESS ENTER TO CONTINUE Your subscription is updated Press the volume knob to continue Symptom Remedy Pandora ADD ERROR New station creation is unsuccessful CHK DEVICE Check the Pandora application on your device NO SKIPS The skip limit has been reached NO STATIONS No stations are found STATION LMT The number of registered stations has reached its limit Retry after deleting unnece...

Page 22: ...eed 500 rpm 200 rpm CLV Wow Flutter Below measurable limit Frequency Response 1 dB 20 Hz 20 kHz Total Harmonic Distortion 1 kHz 0 01 Signal to Noise Ratio 1 kHz 105 dB Dynamic Range 90 dB Channel Separation 85 dB MP3 Decode Compliant with MPEG 1 2 Audio Layer 3 WMA Decode Compliant with Windows Media Audio Symptom Remedy SiriusXM Radio CODE ERROR Make sure you have entered the correct pass code 13...

Page 23: ...is again after installation Caution For safety s sake leave wiring and mounting to professionals Consult the car audio dealer Install this unit in the console of your vehicle Do not touch the metal parts of this unit during and shortly after use of the unit Metal parts such as the heat sink and enclosure become hot Do not connect the wires of speakers to the car chassis or Ground wire black or con...

Page 24: ...oth sides with the vehicle mounting bracket and secure the unit with screws commercially available Use only the specified screws Using wrong screws might damage the unit Installing the unit in dash mounting Do the required wiring 25 Bend the appropriate tabs to hold the sleeve firmly in place Hook on the top side Orientate the trim plate as illustrated before fitting Dashboard of your car INSTALLA...

Page 25: ...gether Red Ignition 12 V Orange white Illumination Brown not used Blue white Remote 200 mA max Wiring connection Green Rear speaker left 2 Green black 2 KD R680S Expansion port 12 V 500 mA To the optional SiriusXM Vehicle Tuner commercially available 11 1 Firmly connect the ground wire of the amplifier to the car s chassis to avoid damaging the unit 2 KD R480 You can also connect a subwoofer speak...

Page 26: ...productions oflabelson orinsidetheproductrelatingtolaserproductsafety JVCKENWOODCorporation 2967 3 ISHIKAWA MACHI HACHIOJI SHI TOKYO JAPAN THISPRODUCTCOMPLIESWITHDHHSRULES21CFR SUBCHAPTERJINEFFECTATDATEOFMANUFACTURE Location TopPlate FCC WARNING Thisequipmentmaygenerateoruseradiofrequencyenergy Changes ormodificationstothisequipmentmaycauseharmfulinterference unlessthemodificationsareexpresslyappr...

Page 27: ......

Page 28: ......

Reviews: