background image

LVT1008-001A

 [E/EX]

ENGLISH

DEUTSCH

FRANÇAIS

PIM176500

[E/EX]

INSTRUCTIONS

BEDIENUNGSANLEITUNG

MANUEL D’INSTRUCTIONS

GEBRUIKSAANWIJZING

PASSWORD:

For Customer Use:

Enter below the password you
have entered for your security
lock.
Retain this password for future
reference.

NEDERLANDS

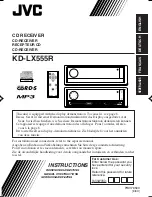
CD RECEIVER

CD-RECEIVER
RECEPTEUR CD
CD-RECEIVER

KD-LX555R

For installation and connections, refer to the separate manual.
Angaben zu Einbau und Verkabelung entnehmen Sie bitte der gesonderten Anleitung.
Pour l’installation et les raccordements, se référer au manuel séparé.
Zie de afzonderlijke handleiding voor details aangaande het installeren en verbinden van het
toestel.

This unit is equipped with the display demonstration. To cancel it, see page 8.
Dieses Gerät ist mit einer Demonstrationsfunktion für das Display ausgestattet. Auf

Seite 8 wird beschrieben, wie Sie diese Demonstrationsfunktion deaktivieren können.

Cet appareil est équipé d’une démonstration des affichages. Pour l’annuler, référez-

vous à la page 8.

Dit toestel heeft een display-demonstratiefunctie. Zie bladzijde 8 voor het annuleren

van deze functie.

S

KD-LX555R

SSM

10

7

8

9

11

12

OFF

S

T

D

M

MODE

BAND

TP/PTY

DISP

SEL

INT

RPT

RND

MONO

EQ

 ATT

SOURCE

COVER_KD-LX555R[E_EX].p65

02.12.12, 9:47

3

Summary of Contents for KD-LX555R

Page 1: ... raccordements se référer au manuel séparé Zie de afzonderlijke handleiding voor details aangaande het installeren en verbinden van het toestel This unit is equipped with the display demonstration To cancel it see page 8 Dieses Gerät ist mit einer Demonstrationsfunktion für das Display ausgestattet Auf Seite 8 wird beschrieben wie Sie diese Demonstrationsfunktion deaktivieren können Cet appareil e...

Page 2: ...ease in the output level Therefore lower the volume before playing a disc and adjust it as required during playback Note For security reasons a numbered ID card is provided with this unit and the same ID number is imprinted on the unit s chassis Keep the card in a safe place as it will help the authorities to identify your unit if stolen How to reset your unit Press the reset button on the front p...

Page 3: ... SOUND ADJUSTMENTS 29 Adjusting the sound 29 Selecting preset sound modes iEQ i equalizer 29 Storing your own sound adjustments 30 OTHER MAIN FUNCTIONS 31 Changing the general settings PSM 31 Assigning names to the sources 35 Using the security lock 36 CD CHANGER OPERATIONS 38 Playing discs 38 Selecting the playback modes 40 EXTERNAL COMPONENT OPERATIONS 42 Playing an external component 42 DAB TUN...

Page 4: ...e button 8 DISP D display button Also functions as SSM buttons when pressed together with the BAND MODE M button Control panel How to use the BAND MODE M button After pressing BAND MODE M the number buttons and 4 buttons work as different function buttons while MODE remains on the display To use these buttons as number buttons after pressing BAND MODE M wait for 5 seconds without pressing any numb...

Page 5: ...folder and start playing the first file While playing an MP3 disc on an MP3 compatible CD changer Skips to the next disc if pressed briefly Skips to the next folder if pressed and held Note While playing a CD on a CD changer this always skips to the next disc 6 Selects the source Each time you press the button the source changes 7 Functions the same as the control dial on the main unit Note This b...

Page 6: ...ar a clicking sound WARNING Store the battery in a place where children cannot reach If a child accidentally swallows the battery consult a doctor immediately Do not recharge short disassemble or heat the battery or dispose of it in a fire Doing any of these things may cause the battery to give off heat crack or start a fire Do not leave the battery with other metallic materials Doing this may cau...

Page 7: ...he volume To decrease the volume Turning on the power 1 Turn on the power The display illuminates and the control panel and control dial come out 2 Select the source Each time you press the button the source changes as follows FM DAB tuner 1 CD 2 CD changer 1 or External component 3 AM back to the beginning 1 Without connecting the CD changer and or the DAB tuner you cannot select it as the source...

Page 8: ...time is shown for 5 seconds Canceling the demonstration When shipped from the factory demonstration has been activated and starts automatically when no operations are done for about 20 seconds It is recommended to cancel the demonstration before you use the unit for the first time To cancel the demonstration follow the procedure below 1 Press and hold SEL S for more than 2 seconds so that one of t...

Page 9: ... one of them to listen to an FM broadcast 2 Start searching a station When a station is received searching stops To stop searching before a station is received press the same button you have pressed for searching Searching a station manually Manual search 1 Select the band 1 Press SOURCE ATT to select FM or AM as the source 2 If necessary press and hold BAND MODE M to select the FM band number FM1...

Page 10: ...n stored in number button 1 will be automatically tuned in 2 Press and hold or 4 until M manual starts flashing on the display 3 Tune in to a station you want while M is flashing If you release your finger from the button the manual mode will automatically turn off after 5 seconds If you hold down the button the frequency keeps changing 50 kHz intervals for FM and 9 kHz intervals for AM MW LW unti...

Page 11: ...e Storing stations in memory on pages 10 and 11 1 Select the band 1 Press SOURCE ATT to select FM or AM as the source 2 If necessary press and hold BAND MODE M to select the FM band number FM1 FM2 or FM3 Each time you press and hold the button the FM band changes as follows 2 Select the number 1 6 for the preset station you want If the sound quality decreases and the stereo effect is lost while li...

Page 12: ...o listen to the same programme in its finest reception no matter where you drive See the illustration on page 18 Two types of the RDS data are used to make Network Tracking Reception work correctly PI Programme Identification and AF Alternative Frequency Without receiving these data correctly from the RDS station you are listening to Network Tracking Reception will not operate To use Network Track...

Page 13: ...FM the TP indicator either lights up or flashes If the TP indicator lights up TA Standby Reception is activated If a station starts broadcasting a traffic announcement TRAFFIC appears on the display and this unit automatically tunes in to the station The volume changes to the preset TA volume level see page 17 and the traffic announcement can be heard If the TP indicator flashes TA Standby Recepti...

Page 14: ... the PTY indicator either lights up or flashes If the PTY indicator lights up PTY Standby Reception is activated If a station starts broadcasting the selected PTY programme this unit automatically tunes in to the station If the PTY indicator flashes PTY Standby Reception is not yet activated since the station being received does not provide the signals used for PTY Standby Reception To activate PT...

Page 15: ...amme types 1 Press and hold TP PTY T for more than 2 seconds 2 Select one of the twenty nine PTY codes See page 18 Selected code name appears on the display 3 Press and hold the number button for more than 2 seconds to store the PTY code selected into the preset number you want 4 Press and hold TP PTY T for more than 2 seconds to exit from this mode The last selected PTY code appears TP PTY T POP ...

Page 16: ... happen If the signals from that preset station are not sufficient for good reception this unit using the AF data tunes in to another frequency broadcasting the same programme as the original preset station is broadcasting Programme search The unit takes some time to tune in to another station using programme search To activate programme search follow the procedure below See also Changing the gene...

Page 17: ... hold SEL S for more than 2 seconds so that one of the PSM items appears on the display 2 Press or 4 to select TA VOL volume 3 Turn the control dial to set to the desired volume You can set it from TA VOL 00 to TA VOL 50 4 Press SEL S to finish the setting Automatic clock adjustment When shipped from the factory the clock built in this unit is set to be readjusted automatically using the CT Clock ...

Page 18: ...N Programmes dealing with any aspect of belief or faith or the nature of existence or ethics PHONE IN Programmes where people can express their views either by phone or in a public forum TRAVEL Programmes about travel destinations package tours and travel ideas and opportunities LEISURE Programmes concerned with recreational activities such as gardening cooking fishing etc JAZZ Jazz music COUNTRY ...

Page 19: ...loading slot The unit draws in a disc the display panel moves up and disc play starts automatically All tracks will be played repeatedly until you stop playback Notes When a CD is in the loading slot selecting CD as the source by pressing SOURCE ATT to starts CD play When a CD is inserted upside down the CD automatically ejects When you play a CD Text the disc title and performer appear on the dis...

Page 20: ...andomly selected starts playing To play back tracks repeatedly Track Repeat Play You can play back the current track repeatedly 1 Press BAND MODE M while playing a CD MODE appears on the display 2 Press RPT repeat while MODE is still on the display so that the RPT indicator lights up on the display Each time you press the button track repeat play mode turns on and off alternately When track repeat...

Page 21: ... display Each time you press the button track intro scan mode turns on and off alternately When track intro scan mode is turned on the INT indicator lights up on the display Prohibiting disc ejection You can prohibit disc ejection and can lock a disc in the loading slot While pressing SOURCE ATT press and hold OFF 0 for more than 2 seconds NO EJECT flashes on the display for about 5 seconds and th...

Page 22: ...t A playlist is a simple text file used on a PC which enables users to make their own playback order without physically rearranging the files What is MP3 MP3 is an abbreviation of Motion Picture Experts Group or MPEG Audio Layer 3 MP3 is simply a file format with a data compression ratio of 1 10 128 Kbps That means by using MP3 format one CD R or CD RW can contain 10 times as much data volume as a...

Page 23: ...s indicate the playback order and search order of the folders on an MP3 disc Normally this unit plays back MP3 files in the folders in the recorded order Note There is no limit on the number of the hierarchy levels nested folders However it is recommended to limit the numbers of hierarchy levels up to 8 for stable operations 13 12 18 19 17 23 22 24 11 10 21 20 1 2 5 6 3 4 02 04 ROOT 15 16 14 06 07...

Page 24: ...cally appears See also page 25 If you change the source or turn the power off disc playback stops without ejecting the disc Next time you select disc play as the source or turn the power on disc playback starts from where playback has been stopped previously MP3 OPERATIONS When you insert a disc the display changes to show the following Ex When the disc contains 19 folders and 144 MP3 files Total ...

Page 25: ... can change MP3 disc information shown on the display Select text display mode while playing a MP3 disc Each time you press DISP D the display changes to show the following When TAG DISP is set to TAG ON initial setting see page 34 Album name performer folder name TAG lights up on the display Track title file name TAG lights up on the display Elapsed playing time with track No Folder name lights u...

Page 26: ... after you have selected a folder it means that the folder does not contain any MP3 files You cannot directly select a folder with a number greater than 12 To select a particular file in a folder press or 4 after selecting the folder Press briefly while playing to skip ahead to the beginning of the next file Each time you press the button consecutively the beginning of the next files is located an...

Page 27: ...ndom indicator FLDR RND and RND All files of the indicators current folder then light up files of the next folder and so on DISC RND and RND All files on the disc indicators light up To skip to the next or previous folder 1 Press BAND MODE M to enter the functions mode while playing an MP3 disc MODE appears on the display 2 Press or 4 while MODE is still on the display Note If the folder does not ...

Page 28: ...edly 1 Press BAND MODE M to enter the functions mode while playing an MP3 disc MODE appears on the display 2 Press RPT repeat while MODE is still on the display so that TRK RPT or FLDR RPT appears on the display Each time you press the button the repeat play mode changes as follows and RPT indicators Ex When you select FLDR RPT Mode Active Plays repeatedly indicator TRK RPT RPT indicator The curre...

Page 29: ... page 49 Adjusting the sound You can adjust the sound characteristics to your preference 1 Select the item you want to adjust Each time you press the button the adjustable items change as follows Indication To do Range FAD 1 Adjust the front R06 Rear only and rear speaker balance F06 Front only BAL Adjust the left L06 Left only and right speaker balance R06 Right only S BASS 2 Adjust the bass 00 m...

Page 30: ...nning FREQ LOW MID HIGH Select the center frequency to adjust WIDTH LOW MID Select the band width level Q LEVEL LOW MID HIGH Adjust the enhancement level Ex If you have selected JAZZ M BAND MODE 1 7 EQ By pressing or 4 you can directly move as follows 5 Adjust the selected sound element Refer to the table below for adjusting the selected sound element 6 Repeat steps 4 and 5 to adjust the other sou...

Page 31: ...want to adjust See below 3 Adjust the PSM item selected above 4 Repeat steps 2 and 3 to adjust the other PSM items if necessary 5 Finish the setting OTHER MAIN FUNCTIONS Back Advance Back Advance 8 0 00 Factory preset settings See page DEMO ON 8 DEMO OFF DEMO ON Indications DEMO MODE Demo mode CLOCK HOUR Hour adjustment CLOCK MIN Minute adjustment 24H 12H 24 12 hour time display AUTO ADJ Automatic...

Page 32: ...nent FLAT PANEL Flat panel IF FILTER Intermediate frequency filter TAG DISP Tag display MUTING OFF 33 BEEP OFF BEEP ON BEEP ON 33 CONTRAST 1 10 CONTRAST 5 33 OFF AUTO ONCE ONCE 33 CD CHANGER 33 LINE INPUT CD CHANGER FLAT OFF FLAT OFF 34 FLAT ON 34 WIDE AUTO AUTO MUTING OFF MUTING 1 MUTING 2 2 Displayed only when the DAB tuner is connected DAB VOL 12 to 12 DAB VOL 00 46 Factory preset settings See ...

Page 33: ...connecting the Line Input Adapter KS U57 and the external component refer to the Installation Connection Manual separate volume CONTINUED ON THE NEXT PAGE To select the dimmer mode DIMMER When you turn on the car head lights the display automatically dims Auto Dimmer When shipped from the factory Auto Dimmer mode is activated AUTO Activates Auto Dimmer OFF Cancels Auto Dimmer ON Always dims the di...

Page 34: ... the factory AUTO When this type of interference occurs this unit automatically increases the tuner selectivity so that interference noise will be reduced But the stereo effect will also be lost WIDE Subject to the interference from adjacent stations but sound quality will not be degraded and the stereo effect will not be lost To turn the tag display on or off TAG DISP An MP3 file can contain file...

Page 35: ...e assignment When the CD changer is connected you can assign names to CDs in the CD changer These names can also be shown on the display if you insert the CDs in this unit Assigning names to the sources You can assign names to CDs and the external component After assigning a name it will appear on the display when you select the source Sources Maximum number of the characters CDs and Up to 32 char...

Page 36: ...ters for your password You can use the following characters Capital letters A Z small letters a z and numbers 0 9 Symbols cannot be used as your password 1 Press and hold both buttons for more than 2 seconds The unit enters password entry mode 2 Select the character set you want to use Each time you press the button the character set changes as follows 3 Select a letter 4 Move the character entry ...

Page 37: ... want 2 Turn the control dial to enter a character 3 Press or 4 to move the character entry position 4 Repeat steps 1 to 3 to enter the entire password 4 letters correctly then press SEL S If you enter the correct password the security lock is canceled and you can use the unit normally In the following cases the security lock is not canceled NOT ACCEPT appears on the display then the unit turns of...

Page 38: ...ries CD changers except CH X99 and CH X100 However they are not compatible with MP3 discs so you cannot play back MP3 discs You cannot use the KD MK series CD changers with this unit Before operating your CD changer Refer also to the Instructions supplied with your CD changer If no discs are in the magazine of the CD changer or the discs are inserted upside down NO DISC will appear on the display ...

Page 39: ...r more than one second To fast forward or reverse the track file To go to the next or previous tracks files Press and hold 4 during play to reverse the track file Press briefly during play to skip ahead to the beginning of the next track file Each time you press the button consecutively the beginning of the next tracks files is located and played back Press 4 briefly during play to skip back to th...

Page 40: ...ip to the next or previous folder Only for MP3 discs 1 Press BAND MODE M to enter the functions mode while playing an MP3 disc MODE appears on the display 2 Press or 4 while MODE is still on the display Note If the folder does not contain any MP3 files it is skipped To show the disc information for CD Text and MP3 discs This is possible only when connecting a JVC CD changer equipped with CD Text a...

Page 41: ... indicators M BAND MODE RPT 11 5 Canceled DISC RPT TRK RPT To play back only intros Track Intro Scan Folder Intro Scan Disc Intro Scan 1 Press BAND MODE M to enter the functions mode during play MODE appears on the display 2 Press INT intro while MODE is still on the display Each time you press the button the intro scan mode changes as follows For MP3 discs For CDs Note MP3 indicator also lights u...

Page 42: ...ct the external component to use EXT INPUT on page 33 1 Select the external component LINE INPUT Each time you press the button the source changes as described on page 7 If LINE INPUT does not appear on the display see page 33 and select the external input LINE INPUT 2 Turn on the connected component and start playing the source 3 Adjust the volume 4 Adjust the sound characteristics you want See p...

Page 43: ...f the services A typical ensemble has 6 or more programmes services broadcast at the same time After tuning in to an ensemble you can select a service you want to listen to 1 Select the DAB tuner DAB1 3 Each time you press the button the source changes as described on page 7 2 Select the DAB band DAB1 DAB2 or DAB3 Each time you press and hold the button the DAB band changes as follows Note This re...

Page 44: ...you hold down the button the ensemble keeps changing until you release the button 5 Select a service you want to listen to 1 Press BAND MODE M MODE appears on the display 2 Press or 4 to select a service you want while MODE is still on the display Storing DAB services in memory You can preset up to 6 DAB services in each DAB band DAB1 DAB2 and DAB3 manually 1 Select the DAB tuner DAB1 3 1 Press SO...

Page 45: ... the DAB services again Tuning in to a preset DAB service You can easily tune in to a preset DAB service Remember that you must store services first If you have not stored them yet see page 44 1 Select the DAB tuner DAB1 3 1 Press SOURCE ATT to select DAB tuner as the source 2 If necessary press and hold BAND MODE M repeatedly to select the DAB band number DAB1 DAB2 or DAB3 Each time you press and...

Page 46: ...o adjust the volume level each time you change the source When shipped from the factory DAB volume level is set at 00 See also Changing the general settings PSM on page 31 1 Press and hold SEL S for more than 2 seconds so that one of the PSM items appears on the display 2 Press or 4 to select DAB VOL volume 3 Turn the control dial to set to the desired volume You can set it from 12 to 12 4 Press S...

Page 47: ... when ejecting Causes The volume level is set to the minimum level Connections are incorrect Security lock is in use There is something blocking the mechanical movement Ex You have used a longer screws than specified The built in microcomputer may have functioned incorrectly due to noise etc Signals are too weak The antenna is not connected firmly Disc is inserted upside down CD R CD RW is not fin...

Page 48: ...file names MP3 files are not recorded in the format compliant with ISO 9660 Level 1 Level 2 or Joliet The file played back is not an MP3 file although it has the extension code mp3 Readout time varies due to the complexity of the folder file configuration Playback order is determined when the files are recorded This sometimes occurs during play This is caused by how the files are recorded on the d...

Page 49: ... 8 appears on the display RESET 1 RESET 7 appears on the display The CD changer does not work at all CD Changer Indication Preset equalizing values FREQ WIDTH LOW LEVEL FREQ WIDTH MID LEVEL FREQ HIGH LEVEL FLAT 50 Hz 1 00 700 Hz 1 00 8 kHz 00 Hard Rock 80 Hz 2 03 700 Hz 1 00 8 kHz 02 R B 80 Hz 3 03 2 kHz 2 01 12 kHz 03 POP 120 Hz 1 02 2 kHz 2 01 12 kHz 02 JAZZ 80 Hz 1 03 1 kHz 1 01 8 kHz 03 DanceM...

Page 50: ...ad their instructions or cautions carefully Use only finalized CD Rs or CD RWs Some CD Rs or CD RWs may not play back on this unit because of their disc characteristics and for the following reasons Discs are dirty or scratched Moisture condensation on the lens inside the unit The pickup lens inside the unit is dirty CD RWs may require a longer readout time since the reflectance of CD RWs is lower...

Page 51: ...0 kHz 65 dB Frequency Response 40 Hz to 15 000 Hz Stereo Separation 30 dB Capture Ratio 1 5 dB MW Tuner Sensitivity 20 µV Selectivity 35 dB LW Tuner Sensitivity 50 µV CD PLAYER SECTION Type Compact disc player Signal Detection System Non contact optical pickup semiconductor laser Number of channels 2 channels stereo Frequency Response 5 Hz to 20 000 Hz Dynamic Range 98 dB Signal to Noise Ratio 102...

Page 52: ... Ihr Gerät zurück Siehe Seite Zurücksetzen des Geräts Vous avez des PROBLÈMES de fonctionnement Réinitialisez votre appareil Référez vous à la page intitulée Comment réinitialiser votre appareil Hebt u PROBLEMEN met de bediening Stel het apparaat terug Zie de pagina met de paragraaf Het apparaat terugstellen 1202MNMMDWTKR EN GE FR NL 2002 VICTOR COMPANY OF JAPAN LIMITED J VC ...

Page 53: ...désengagé les verrous de manchon 3 Retirer le manchon Remarque S assurer de garder les poignées pour une utilisation ultérieur après l installation de l appareil 3 Attachez la plaque d assemblage 4 Installer le manchon dans le tableau de bord Après installation correcte du manchon dans le tableau de bord plier les bonnes pattes pour maintenir fermement le manchon en place comme montré 5 Monter le ...

Page 54: ...sis de la voiture voir le diagramme de raccordement en utiliscant des cordons les plus gros et les plus courts possibles telle qu une barre de cuivre ou une tresse Si le bruit persiste consulter votre revendeur d autoradios JVC La puisscance admissible des enceintes devrait supérieure à 50 W à l arrière et à 50 W l avant avec une impédance de 4 Ω à 8 Ω S assurer de raccorder la mise à la masse de ...

Page 55: ... ISO connector Den ISO Stecker abscheiden Coupez le connecteur ISO Knip de connector ISO From the car body Von der Karosserie De la carrosserie de la voiture Vanaf de auto ISO connector of the supplied power cord ISO Stecker am Stromkabel Connecteur ISO pour le cordon d alimentation fourni ISO connector van het meegeleverde snoer For some VW Audi or Opel Vauxhall automobile Für manche VW Audi oder...

Page 56: ...altung entsprechend der obigen Darstellung anzuschließen Vous pouvez connecter les deux appareils en série comme montré ci dessus Beide apparaten zijn volgens bovenstaande illustratie in serie aan te sluiten JVC DAB tuner DAB Tuner von JVC Tuner DAB JVC JVC DAB tuner JVC CD changer CD Wechsler von JVC Changeur CD JVC JVC CD wisselaar KD LX555R CAUTION VORSICHT PRECAUTION LET OP Before connecting t...

Page 57: ... Choisissez DEMO MODE s il n apparaît pas sur l affichage 3 Choisissez DEMO OFF 4 Terminez le réglage Pour mettre de nouveau la démonstration en service répétez la même procédure et choisissez DEMO ON à l étape 3 OL e expide de fábrica con la demostración a que se inicie automáticamente tras un nactividad de 20 segundos ienda cancelar la demostración antes de idad por primera vez lar la demostraci...

Page 58: ...ge N APPUYEZ PAS sur le panneau partie ombrée surl illustration sinon le panneau risque de ne pas pouvoir s ouvrirou se fermer AÑOL alar esta unidad en primer lugar fije de guarnición en la unidad y en la manga de montaje ndo las cuatro esquinas de la placa ción one el panel rayado en la n pues podría suceder que sea abrirlo o cerrarlo después ITALIANO Per installare l apparecchio per prima cosa f...

Reviews: