background image

2-7

SHEET 1

Parts are safety assurance parts.
When replacing those parts make
sure to use the specified one.

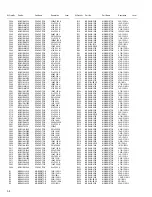
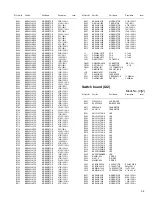
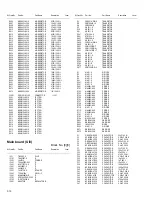
C312

IC801

IC901

R738

R808

R773

C711

R739

R740

C311

C165

R734

L1

IC161

R7

C851

R5

R4

R6

CN701

R735

R736

IC701

R743

C177

R744

R745

R807

C178

C179

IC31

Q31

C170

C180

C902

R803

R804

R805

R806

C50

R810

R809

R801

C801

SI

SCK

C91

R81

R91

SO

R774

C802

Q902

D331

Q241

D321

R776
R775

R979

R772

R332

R322

R331

R321

R765

L701

R182

C36

C35

C46

R181

C161

C162

D851

C171

C163

D240

D852

R746

C39

C47

R708

R852

R171

R161

R759

R777

R778

IC702

R771

R760

R717

R767

R766

C771

C772

VSS

R720

R719

VDD

R758

C357

VPP

C95

TU1

R34

C32

C8

C49

X1

C706

R37

R36

R741

R243

R242

RESET

TD

C243

C901

R244

C301

C241

D243

C173

D998

RD

R35

R756

X701

X702

D997

D996

D995

C172

Q881

CN901

C891

C968

C966

C967

C965

C964

Q6

R977

C963

C962

C961

IC301

R714

R710

R2

R881

D902

R882

C881

C302

R248

C192

C191

C710

Q7

C168

C167

C194

C81

C175

C707

R711

Q977

R712

R162

C242

D994

D993

D992

D991

R43

R713

C38

R715

R44

R716

R163

R747

R748

R749

C33

R705

C713

R311

R312

R301

R302

Q901

C322

C323

C324

C325

D901

R901

Q781

R352

R342

R341

R351

R709

J1

R729

R10

R172

C193

C169

R173

Q891

C37

R32

R706

C34

C176

C174

C166

C164

D341

R707

J801

R704

D351

R737

D241

R757

R245

R241

C712

D971

J321

C31

C914

R1

C43

D51

C1

L901

Q5

D1

D2

C40

C4

D701

C906

C2

C716

C313

Q1

R42

R38

R751

C314

C303

C304

R802

R52

R92

C92

C82

R82

L702

C910

C905

R980

Q10

C48

R978

C781

Q321

Q341

R165

R164

R323

R333

C321

X31

R31

C903

D703

C852

R750

R851

C919

R9

R39

C41

R51

C5

D892

C319

D972

C907

C83

C93

R811

C355

C7

B701

C770

C308

R783

D781

R753

R721

R722

R723

R246

R247

C94

D242

Q331

R726

R728

R972

C701

C702

C316

R33

C703

C704

C718

R891

D891

R892

Q782

R703

R702

R976

C3

C913

C908

C909

C317

D705

D707

D244

D709

D702

D704

D706

D708

D712

R971

C315

C717

C911

C244

D713

D784

C912

C783

C320

R782

R763

C6

C318

R904

R903

R902

D4

C784

R725

R40

R353

R343

R784

Q784

D782

R41

R174

R175

C42

C45

Q976

C307

C904

C44

Q351

C51

C915

R752

C708

C705

R701

R910

C709

D710

R911

C971

D5

C341

C84

R754

R755

100/16

0.47

HD74HC126FP-X

AN80T07A

4.7k

330

47k

220/6.3

4.7k

4.7k

0.47

0.22

2.2k

4.7u

TEA6320T-X

4.7k

10/16

47k

3.3k

47k

QGZ1601J1-15

2.2k

2.2k

UPD784217AGC302

10k

0.033

10k

10k

100K

0.1

0.0056

4.7/25

TB2118F-X

10

UN2211-X

4.7/25

4.7/25

2.2/50

100

100k

10k

100p

100

22k

47k

1/50

3.3k

3.3k

47k

0.01

UN2211-X

MA111-X

2SD601A/QR/-X

MA111-X

47k
47k

51k

10k

820

820

2.2k

2.2k

0

4.7u

270

7p

10p

0.01

270

2.2/50

1/50

RB160M-30-X

2.2/50

1/50

MA111-X

RB160M-30-X

10k

1000P

0.01

3.3k

0

220k

220k

47k

47k

47k

IC-PST3433U-X

47k

47k

RB160M-30-X

470

47k

47k

100p

0.1

1.2k

0

47k

0.047

0.01

QAU0223-001

2.2k

47p

0.001

0.047

2.2k

2.2k

10k

180k

22k

0.047

3300/16

12k

0.47

1/50

RB160M-30-X

1/50

RB160M-30-X

2.2k

47k

QAX0617-001Z

QAX0401-001

RB160M-30-X

RB160M-30-X

RB160M-30-X

1/50

0.1

UN2211-X

QNZ0611-001

0.1

100p

100p

100p

100p

100p

2SB624/4/-X

12k

100p

100p

100p

LA47516

10K

470

47k

47k

MA111-X

4.7k

0.47

220

100/10

47/16

47/6.3

UN2211-X

0.0056

0.033

0.082

1/50

0.22

0.1

470

2SB709A/QR/-X

470

22k

22/16

RB160M-30-X

RB160M-30-X

RB160M-30-X

RB160M-30-X

470

470

0.001

470

220

470

2.2k

4.7k

4.7k

4.7k

47/6.3

47k

0.1

0.1

27k

27k

27k

27k

UN2111-X

0.1

0.1

0.1

0.1

1N5401-F64

1k

UN2111-X

820

820

2.2k

2.2k

47k

QNB0100-002

47k

10k

22k

100/10

4.7/25

2.2k

UN2211-X

10p

6.2k

47k

0.047

0.22

0.0082

0.1

0.22

0.0082

MA111-X

47k

QNZ0095-001

47k

MA111-X

0

MA111-X

2.2k

47

47k

0.01

RB160M-30-X

100/10

12

0.047

MA111-X

22/16

QQR0703-001

2SB709A/R/-X

MA111-X

MA111-X

10/16

220/10

0.01

0.047

100p

2SD601A/QR/-X

100

10k

100p

100p

100p

47K

100k

13k

0.0033

0.0033

13k

4.7u

47/16

47/16

47k

UN2211-X

0.047

0

47/6.3

KTD1304-X

KTD1304-X

47k

47k

100

100

0.047

QAX0616-001Z

10

22/16

0.01

10k

10k

10/16

47

0

0.047

22k

0.1/50

MA111-X

0.022

220/10

0.015

0.015

100/16

22/16

0

0.047

1/50

10K

MA111-X

47k

1k

10k

10k

1k

47K

0.015

MA111-X

KTD1304-X

10k

10k

2.2k

22p

27p

4.7/25

10k

27p

8P

1k

MA111-X

47k

UN2211-X

0

0

27k

0.01

10/16

22/16

QMFZ047-150-T

220/10

220/10

47/16

MA8051/M/-X

2.2k

2.2/50

0.1

0.22/50

MA8110/M/-X

0.01

0.082

0.022

47k

10k

0.01

22/16

5.6K

4.7k

9.1k

MA111-X

100/16

10k

39k

100

100

47k

UN2111-X

MA111-X

10k

47k

47k

0.01

0.0027

UN2211-X

1/50

10/16

0.01

KTD1304-X

330P

47k

0.047

0.047

47k

10k

0.1

MA111-X

1K

0.1

MA111-X

0.047

0.015

820

10M

PSW

RST

CH.R

DAC-CDTI

DAC-CCLK

DAC-CSN

KEY2

DAC-PDN

INT

FM/AM

REMOCON

ENC1

CD.L

ENC2

KEY1

KEY0

SW1

SW5V

LCDCL

SO

OUTLR

CDRW

I/O

OUTLF

TU.R

CD.R

OUTRF

SCK

OUTRR

SO

SI

VOLCL

CDON

CH.L

SI

A-GND

VOLDA

TU.L

CDON

LCDDA

LCDCE

VOLDA

I/O

VOLCL

MP3REQ

CD.R

A-GND

ACC5V

CD.L

DETACH

10V

SW2

MP3DOUT

MP3DIN

MP3STBY

BUS0

BUS1

LM0

BUS0

MP3RESET

KEY2

SCK

LM1

BUS1

BUS2

BUS3

RST

LCDCL

LCDDA

CCE

BUCK

MP3CLK

CDRW

ENC2

9V

BUS2

LCDCE

CD8V

CH.R

CH.L

PLLDI

SD/ST

PLLCE

PLLDA

PLLCL

KEY1

LEVEL

KEY0

LEVEL

BUS3

BUCK

CCE

SM

MP3CLK

SW2

MP3REQ

MP3RESET

MP3STBY

MP3DOUT

MONO

MP3DIN

DAC-PDN

DAC-CDTI

DAC-CCLK

DAC-CSN

RR-

IFC-CONT

FL-

RL-

RR-

FR-

FL+

RL+

RR+

FR+

DIMIN

TELMUTE

INT

RR+

RL+

FR-

FL+

FL-

PSW

LM0

SW1

LM1

MONO

REMOCON

TELMUTE

ENC1

RL-

FR+

DIMIN

SEEK/STOP

IFC-CONT

PLLDI

PLLCL

PLLDA

PLLCE

FM/AM

SD/ST

T

o SHEET

 2

T

o CJ601

(SHEET

 1)

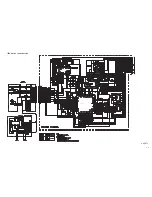
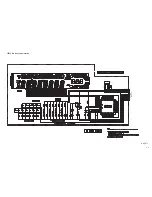
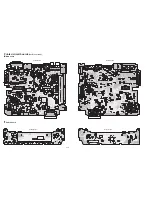
Standard schematic diagrams 

(For UI3 version)

Main amplifier section

Summary of Contents for KD-G413

Page 1: ...mited No MA178 2005 2 CD RECEIVER MA178 2005 2 KD G414 KD G413 TABLE OF CONTENTS 1 PRECAUTIONS 1 3 2 SPECIFIC SERVICE INSTRUCTIONS 1 6 3 DISASSEMBLY 1 7 4 ADJUSTMENT 1 25 5 TROUBLESHOOTING 1 26 KD G413 KD G414 CONTROL PANEL BLACK SILVER Area suffix UI India ...

Page 2: ...e FM 87 5 MHz to 108 0 MHz AM 531 kHz to 1 602 kHz FM Tuner Usable Sensitivity 11 3 dBf 1 0 µV 75 Ω 50 dB Quieting Sensitivity 16 3 dBf 1 8 µV 75 Ω Alternate Channel Selectivity 400 kHz 65 dB Frequency Response 40 Hz to 15 000 Hz Stereo Separation 35 dB Capture Ratio 1 5 dB AM Tuner Sensitivity 20 µV Selectivity 35 dB CD PLAYER SECTION Type Compact disc player Signal Detection System Non contact o...

Page 3: ... formed during molding may be left over on some parts of the chassis Therefore pay attention to such burrs in the case of preforming repair of this system Please use enough caution not to see the beam directly or touch it in case of an adjustment or operation check ...

Page 4: ... laser diode in the optical pickup The tester s internal power source can easily destroy the laser diode 1 3 Handling the traverse unit optical pickup 1 Do not subject the traverse unit optical pickup to strong shocks as it is a sensitive complex unit 2 Cut off the shorted part of the flexible cable using nippers etc after replacing the optical pickup For specific details refer to the replacement ...

Page 5: ...o function 6 CAUTION Use of controls adjustments or performance of procedures other than those specified here in may result in hazardous radiation exposure REPRODUCTION AND POSITION OF LABELS Please use enough caution not to see the beam directly or touch it in case of an adjustment or operation check WARNING LABEL CAUTION Visible and Invisible laser radiation when open and interlock failed or def...

Page 6: ...1 6 No MA178 SECTION 2 SPECIFIC SERVICE INSTRUCTIONS 2 1 HOW TO IDENTIFY MODELSE 2 1 1 NAME PLATE Discernment sign Discernment sign ...

Page 7: ... joint c on the back side of the main body then remove the bottom cover from the main body Note When releasing the joints using a screwdriver do not damage the main board Fig 2 3 1 3 Removing the front chassis assembly See Fig 3 Remove the front panel assembly and bottom cover 1 Remove the two screws A on the both sides of the main body 2 Release the two joints d and two joints e on the both sides...

Page 8: ...rear bracket 3 1 6 Removing the main board See Figs 5 and 6 Remove the front panel assembly bottom cover and side pan el Reference Remove the front chassis assembly as required 1 Remove the three screws D attaching the rear bracket on the back side of the main body See Fig 5 2 Remove the two screws G attaching the main board See Fig 6 3 Disconnect the connector CN501 on the main board from the mai...

Page 9: ... switch board See Figs 8 to 10 Remove the front panel assembly 1 Remove the five screws J on the back side of the front pan el assembly See Fig 8 2 Release the twelve joints f and remove the rear cover See Fig 9 3 Release the joint g and take out the switch board from the front panel assembly See Fig 10 Note When removing the rear cover assembly and switch board be careful not to lose the spring F...

Page 10: ...emoving the top cover See Figs 1 and 2 1 Remove the two screws A on the both side of the body 2 Lift the front side of the top cover and move the top cover backward to release the two joints a Fig 1 Fig 2 A A A Joints a Top cover Joints a Top cover ...

Page 11: ...tor board 2 Solder the short circuit point on the connector board 3 Disconnect the flexible wire from the pickup 4 Move the connector board in the direction of the arrow to release the two joints b 5 Unsolder the wire on the connector board if necessary CAUTION Unsolder the short circuit point after reassembling Fig 3 Fig 4 Fig 5 B Connector board Pickup Short circuit point Joints b Wires Pickup S...

Page 12: ... switch See Figs 6 and 7 1 Extend the two tabs c of the feed sw holder and pull out the switch 2 Unsolder the DET switch wire if necessary Fig 6 Fig 7 Connector board DET switch Pickup DET switch Tab c Tab c DET switch wire Feed sw holder ...

Page 13: ...he chassis unit to the frame CAUTION The shape of the suspension spring L and R are dif ferent Handle them with care When reassembling make sure that the three shafts on the underside of the chassis unit are inserted to the dampers certainly Fig 8 Fig 9 Suspension spring L Suspension spring L Suspension spring R Suspension spring R Chassis unit Frame Chassis unit Frame Shafts Shaft Damper Damper D...

Page 14: ...edure remove the top cover 1 Remove the clamper arm spring 2 Move the clamper assembly in the direction of the arrow to release the two joints d Fig 10 Fig 11 Clamper arm spring Chassis rivet assembly Joint d Joint d Clamper assembly Clamper arm spring Clamper assembly Joint d Joint d Chassis rivet assembly ...

Page 15: ...ve the screw C and move the loading feed motor assembly in the direction of the arrow to remove it from the chassis rivet assembly 2 Disconnect the wire from the loading feed motor assembly if necessary CAUTION When reassembling connect the wire from the loading feed motor assembly to the flame as shown in Fig 12 Fig 12 Fig 13 Loading feed motor assembly Loading feed motor assembly C ...

Page 16: ... F 2 Reattach the feed sw holder to the feed rack while setting the joint g to the slot of the feed rack and setting the part f of the feed rack to the switch of the feed sw holder correct ly 3 As the feed sw holder is temporarily attached to the pickup unit set to the gear of the joint g and to the bending part of the chassis joint h at a time CAUTION Make sure that the part i on the underside of...

Page 17: ...he slot of the chassis rivet assembly respectively and join the joint k at a time Fig 19 Fig 20 3 2 10 Removing the top plate assembly See Fig 21 Prior to performing the following procedure remove the top cover connector board chassis unit and clamper assembly 1 Remove the screw H 2 Move the top plate assembly in the direction of the arrow to release the two joints r 3 Unsolder the wire marked s i...

Page 18: ...irection of the arrow to release the joint u 2 Unsolder the wire of the mode sw marked s if necessary 3 Turn the select lock arm in the direction of the arrow to re lease the two joints v 4 The select lock arm spring comes off the select lock arm at the same time Fig 22 Fig 23 Mode sw Select lock arm Joint t Link plate Joint u s Top plate Top plate Select lock arm Select lock arm spring Select loc...

Page 19: ... the underside of the select lock arm and join the select lock arm to the slots joint v Turn the select lock arm as shown in the figure 3 Reattach the mode sw while setting the part t to the first peak of the link plate gear and join the joint u CAUTION When reattaching the mode sw check if the points y and z are correctly fitted and if each part operates properly Fig 24 Fig 25 Fig 26 Select lock ...

Page 20: ...29 and 30 REFERENCE Reverse the above removing procedure 1 Reattach the link plate spring 2 Reattach the link plate to the link plate spring while joining them at joint d 3 Reattach the joint a of the select arm R to the first peak of the link plate while joining the two joints b with the slots Then turn the select arm R as shown in the figure The top plate is joined to the joint c CAUTION When re...

Page 21: ...e 5 Extend the lock arm rivet assembly outward and release the joint j from the boss of the chassis rivet assembly The roller guide springs on both sides come off at the same time CAUTION When reassembling reattach the left and right roller guide springs to the lock arm rivet assembly before reat taching the lock arm rivet assembly to the chassis rivet assembly Make sure to fit the part k of the r...

Page 22: ...chassis unit pickup unit and top plate assembly 1 Remove the screw K attaching the loading gear bracket The loading gear 6 and 7 come off the loading gear brack et 2 Pull out the loading gear 5 Fig 35 Fig 36 K Loading gear bracket Loading gear 6 Loading gear 5 Loading gear 3 K Loading gear bracket Loading gear 6 Loading gear 5 Loading gear 7 ...

Page 23: ...7 Remove the loading gear 1 8 Move the change plate rivet assembly in the direction of the arrow to release from the three shafts of the chassis rivet assembly upward See Fig 38 9 Detach the loading gear plate rivet assembly from the shaft of the chassis rivet assembly upward while releasing the joint p See Figs 38 and 40 10 Pull out the loading gear 4 Fig 37 Fig 38 Fig 39 Fig 40 Slot m Slot m Joi...

Page 24: ...ng procedure remove the top cover connector board chassis unit and clamper assembly 1 Remove the two screws L attaching the spindle motor as sembly through the slot of the turn table on top of the body 2 Unsolder the wire on the connector board if necessary Fig 41 Fig 42 L Turn table L Turn table Spindle motor ...

Page 25: ...load there is a loss of 6dB between SSG output and antenna input The loss of 6dB need not be considered since direct reading of figures are applied in this working standard How to connect the extension cable for adjusting Caution Be sure to attach the heat sink and rear bracket onto the power amplifier IC and regulator IC respectively before supply the power If voltage is applied without attaching...

Page 26: ...vicinity of IC501 pin 26 Does the S search waveform appear at IC501 pins 9 and 10 4V YES NO YES Check the pickup and its connections Is the disk rotated YES NO Is 4V present between IC501 pins 15 and 16 NO Is 4V present at IC521 pin 5 NO Check IC521 Does the RF signal appear at ARF test point YES YES Check the spindle motor and its wiring Is the RF waveform at ARF test point distorted YES Proceed ...

Page 27: ...ignal including sampling output components output to IC581 pins 1 and 7 during playback Is the audio signal output at IC161 pins 3 and 30 during playback Normal NO YES NO Is 9V present at IC901 pin 13 YES Check the connection between IC901 pin13 and IC161 pin31 Check IC901 and its peripheral circuits NO YES NO Check IC581 and its peripheral circuits YES NO Check IC161 and its peripheral circuits C...

Page 28: ...501 pins 15 and 16 Does the S search waveform appear at IC501 pins 8 and 9 4V YES NO YES Check the pickup and its connections Is the disk rotated YES NO Is 4V present between IC501 pins 6 and 7 NO Is 4V present at IC541 pin 41 NO Check IC541 Does the RF signal appear at RF test point YES YES Check the spindle motor and its wiring Is the RF waveform at RF test point distorted YES Proceed to the Tra...

Page 29: ...ignal including sampling output components output to IC581 pins 1 and 7 during playback Is the audio signal output at IC161 pins 3 and 30 during playback Normal NO YES NO Is 9V present at IC901 pin 13 YES Check the connection between IC901 pin13 and IC161 pin31 Check IC901 and its peripheral circuits NO YES NO Check IC581 and its peripheral circuits YES NO Check IC161 and its peripheral circuits C...

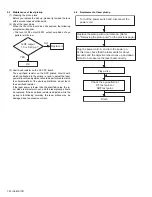
Page 30: ...al block do not touch the semi fixed resistor If the laser power is lower than the specified value the la ser diode is almost worn out and the laser pickup should be replaced If the semi fixed resistor is adjusted while the pickup is functioning normally the laser pickup may be damaged due to excessive current 5 4 Replacement of laser pickup Is RF output 1 3 0 4Vp p YES NO OK Replace it Turn of th...

Page 31: ...GN 11 GN BK 2 VI 10 VI BK 4 WH 12 WH BK 1 GY 9 GY BK 5 BL WH 6 BL Black RD BK Red BL Blue WH White GN Green VI Violet GY Gray YL Yellow RR FR FL RL REMOTE ANT ACC GND MEMORY Rear Right Front Right Front Left Rear Left Remote ACC Line Ground Memory Backup Battery Auto Antenna MEMORY GND ACC RL RL RR RR FL FL FR FR REMOTE ANT REMOTE OUTPUT ONLY POWER ANTENNA NC ...

Page 32: ... No MA178 AV MULTIMEDIA COMPANY CAR ELECTRONICS CATEGORY 10 1 1chome Ohwatari machi Maebashi city 371 8543 Japan Victor Company of Japan Limited VPT Printed in Japan ...

Page 33: ...4 CONTROL PANEL BLACK SILVER Area suffix UI India CD ROM No SML200502 Contents Block diagram For UI3 version Standard schematic diagrams For UI3 version Printed circuit boards For UI3 version 2 1 2 2 2 5 Block diagram For UI2 version Standard schematic diagrams For UI2 version Printed circuit boards For UI2 version 2 6 2 7 2 10 ...

Page 34: ...r on some parts of the chassis Therefore pay attention to such burrs in the case of preforming repair of this system Safety precaution Please use enough caution not to see the beam directly or touch it in case of an adjustment or operation check ...

Page 35: ...ONT RIGHT FRONT RIGHT REAR LEFT REAR LEFT REAR RIGHT REAR RIGHT COM1 COM2 COM3 S1 to S52 LCD SCK LCD SO LCD CE SDA SCL J1 ANT SW1 SW2 PSW VT1 VT2 VF1 VF2 MD LD VREF LM MSW FEED FEED SPINDLE SPINDLE VF1 VF2 VT1 VT2 LD MD VREF SP SP FEED FEED TRK TRK FOCUS FOCUS SPK BATTERY CN901 MUTE FM AM IFC CONT SD ST MONO SEEK STOP S METER EO FM OSC IFC IC602 REMOCON REMOCON DIMMER OUTL OUTR IRQ STAT D601 to D6...

Page 36: ...MA111 X QNN0519 001 2 2K 2 7k HD74HC126FP X 0 01 1 50 1 50 820 820 4 7u 2 2 50 QGZ1601J1 15 QQR0703 001 47k 47K 2 2K 2SD601A QR X 2SB709A QR X 100 MA111 X 2 7k 2 7k 0 1 QAU0394 001 100P LA47516 QNZ0095 001 22 16 0 1 0 1 100k 100 100P 0 1 QMFZ047 150 T 0 1 0 1 KTD1304 X KTD1304 X 100 1k 100k 2SB1197K QR X 10K 0 1 1k MA111 X 2 2K 820 820 2 2K 100 4 7 25 UN2211 X 100 MA111 X MA111 X 100p 0 1 47k 47k ...

Page 37: ...945ECUC 0 0 1 1A3G T1 2 2k 2 2k 2 2k 1K 1K 0 047 4 7k 0 047 0 0 082 1000p 0 1 220 6 3 82k 0 1 0 015 680p 0 1 22 4 7k 4 7k 0 01 0 0 33 0 33 0 022 0 022 330p 560P 33K 0 SN74LVC07ANS X 0 27k 47 6 3 150 0 0 0 68k 3 3K 3 3K 0 1 0 01 220 10 2SB1322 RS T 8 2k 18K 4 7K 68K 27K 15K 0 10k 2 2K NJU7772F15 X 15k 15k 100 10 0 1 10k 10k 30k 1 5k 15k 1 5k 15k 30k 10k 0 01 100p NJU7772F15 X 0 01 100p QGB2027M4 22...

Page 38: ...820 3 9k 2 7k 1 8k 1 2k 820 820 1 2k 1 8k QLD0355 001 820 3 47k SEL DISP 1k 390 390 CD POWER 330 1 2k 10k 470 4 7 6 3 0 012 FM AM VOL EJECT EQ MODE VOL 6 5 4 1 2k 2 DOWN UP 330 470 330 1 1 2k 2 2k 0 022 2 2k 330 910 MA8051 M X MA8062 M X NSPW310BS BRS NSPW310BS BRS S32 R5V LCD CE COM3 KEY1 S17 S31 REMOCON KEY0 S30 ILL_10V S29 S28 GND S27 S26 S25 S24 S23 S22 S21 S20 S19 S18 LCD SCK LCD SO LCD CE KE...

Page 39: ...0 C555 C701 C702 C703 C704 C705 C706 C711 C712 C713 C715 C781 C782 C783 C801 C901 C902 C903 C904 C905 C907 C908 C909 C910 C911 C913 C914 C915 C916 C919 C971 C972 C973 C974 C521 J1 CN501 CN701 CN901 D1 D2 D3 D4 D6 D301 D341 D351 D321 D331 D701 D702 D706 D711 D712 D713 D714 D715 D716 D717 D718 D719 D720 D781 D782 D901 D903 D904 D905 D906 D907 IC552 IC161 IC301 IC521 IC523 IC581 IC701 IC801 IC971 J80...

Page 40: ... LEFT REAR RIGHT REAR RIGHT VOLDA VOLCL MUTE J1 ANT SW1 SW2 PSW LM0 LM1 FEED FEED SPINDLE SPINDLE VF1 VF2 VT1 VT2 LD MD SPINDLE SPINDLE FEED FEED TRACKING TRACKING FOCUS FOCUS SPK BATTERY CN901 SD ST MONO SM IFC CONT SEEK STOP MUTE PLLCE PLLDA PLLCL PLLDI FMVT AMVT FM AM BCK LRCK AOUT BCK LRCK AOUTL AOUTL AOUTR AOUTR DAC_CDTI DAC_CCLK DAC_CSN DAC_PDN J321 LINE OUT CN001 FOCUS TRACKING COIL TRACKIN...

Page 41: ... 50 MA111 X RB160M 30 X 10k 1000P 0 01 3 3k 0 220k 220k 47k 47k 47k IC PST3433U X 47k 47k RB160M 30 X 470 47k 47k 100p 0 1 1 2k 0 47k 0 047 0 01 QAU0223 001 2 2k 47p 0 001 0 047 2 2k 2 2k 10k 180k 22k 0 047 3300 16 12k 0 47 1 50 RB160M 30 X 1 50 RB160M 30 X 2 2k 47k QAX0617 001Z QAX0401 001 RB160M 30 X RB160M 30 X RB160M 30 X 1 50 0 1 UN2211 X QNZ0611 001 0 1 100p 100p 100p 100p 100p 2SB624 4 X 12...

Page 42: ... 3 0 01 100 6 3 0 01 0 01 10k 0 01 100 6 3 0 1 2 2K 1 5k 1 5k 2 2K 2 2K 22k 2 2k 2 2k 4 7K 47 4 7K 0 1 4 7 25 2 2k 0 01 0 01 4 7 25 4 7 25 4 7 25 TC94A14FA 8 2k 22 22 2SB1241 QR T 5p 82k 0 01 0 01 100 10 0 1 0 1 2k 10k 1k 15k 68p 0 01 0 01 0 01 10K 470k 5 6k 10k 0 015 47P 0 01 0 0027 0 01 0 033 0 470P 470P 0 01 0 1 0 033 47 10 0 0 0 047 0 047 100 10 10k 0 01 0 01 820 100 100 10 0 0068 0 330k 82k 3...

Page 43: ...k 2 7k 820 820 3 9k 2 7k 1 8k 1 2k 820 820 1 2k 1 8k 820 3 47k SEL DISP 1k 390 390 CD POWER 330 820 10k 470 4 7 6 3 0 012 FM AM VOL EJECT EQ MODE VOL 6 5 4 1 2k 2 DOWN UP 330 470 330 1 1 2k 2 2k 0 022 2 2k 330 820 MA8051 M X MA8062 M X NSPW310BS BRS NSPW310BS BRS S32 R5V LCD CE COM3 KEY1 S17 S31 KEY0 S30 ILL_10V S29 S28 GND S27 S26 S25 S24 S23 S22 S21 S20 S19 S18 LCD SCK LCD SO LCD CE KEY0 KEY1 KE...

Page 44: ...C358 C355 C7 R772 B353 B354 C310 C515 R811 C810 C360 C359 R433 C783 Reverse side C1 C2 C3 C4 C5 C6 C8 C31 C33 C36 C38 C39 C40 C42 C43 C44 C45 C46 C47 C49 C51 C81 C82 C84 C91 C92 C94 C161 C162 C169 C170 C171 C172 C173 C179 C180 C191 C192 C193 C194 C241 C242 C244 C301 C302 C303 C304 C307 C308 C311 C312 C313 C314 C315 C316 C317 C318 C319 C320 C321 C322 C323 C324 C325 C341 C403 C404 C405 C406 C407 C40...

Page 45: ... M E M O ...

Page 46: ... No MA178SCH Victor Company of Japan Limited AV MULTIMEDIA COMPANY CAR ELECTRONICS CATEGORY 10 1 1chome Ohwatari machi Maebashi city 371 8543 Japan Printed in Japan VPT ...

Page 47: ...neral assembly and parts list Block No M1 CD mechanism assembly and parts list Block No MB Electrical parts list Block No 01 02 KD G414 KD G413_UI2 Electrical parts list Block No 03 04 KD G414 KD G413_UI3 Packing materials and accessories parts list Block No M3 KD G414 KD G413 3 2 3 5 3 7 3 10 3 16 Area suffix UI India MA178 ...

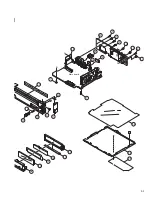
Page 48: ...3 2 Exploded view of general assembly and parts list A B C Switch board Block No M M M 1 1 2 3 5 8 5 9 18 16 15 14 13 34 32 26 24 25 28 29 21 22 20 19 31 30 27 23 51 33 33 4 4 4 ...

Page 49: ...3 3 B Main board A C 14 13 10 9 11 12 39 38 35 41 36 37 40 34 52 17 7 7 48 42 43 6 47 6 44 46 6 45 50 49 ...

Page 50: ...2 G413UI3 25 GE31560 007A VOL BUTTON G414UI2 G414UI3 26 GE31559 008A SEARCH BUTTON G413UI2 G413UI3 26 GE31559 007A SEARCH BUTTON G414UI2 G414UI3 27 GE31555 005A PRESET BTN L G413UI2 G413UI3 27 GE31555 001A PRESET BTN L G414UI2 G414UI3 28 GE31556 005A PRESET BTN R G413UI2 G413UI3 28 GE31556 001A PRESET BTN R G414UI2 G414UI3 29 GE31557 007A D FUNC BUTTON 30 GE31558 005A DETACH BUTTON G413UI2 G413UI3...

Page 51: ...1 The parts without symbol number are not service 111 2 111 37 27 32 23 13 15 99 28 98 83 12 86 121 16 17 124 4 125 1 111 3 3 71 111 93 111 91 92 113 88 89 82 87 20 18 115 90 32 30 38 114 11 85 25 73 111 33 34 74 72 35 26 31 22 36 116 29 112 19 61 24 112 62 21 38 76 95 96 14 97 100 123 81 94 77 75 74 73 84 94 101 100 122 93 75 83 ...

Page 52: ...SPENSION SP L 61 69011614T PICKUP OPT 725 62 64180406T DET SW ESE22 71 303210301T CONN PWB ASS Y 72 30321002T MODE SW 73 30321003T LOAD MOTOR WIRE 74 30321005T MODE SW WIRE 75 30321009T SL WIRE 76 30321011T WIRE HOLDER 77 19501403T WIRE CLUMPER 81 303211301T ROLLER SHAFT AS 82 303211501T L GEAR PLATE RV 83 303211302T LOADING PLATE A 84 303211502T LOCK ARM RV ASS 85 303211303T L F MOTOR ASS Y 86 30...

Page 53: ...CITOR 4 7uF 25V M C167 QEKJ1EM 475Z E CAPACITOR 4 7uF 25V M C168 QFV91HJ 474Z MF CAPACITOR 0 47uF 50V J C169 QFV91HJ 474Z MF CAPACITOR 0 47uF 50V J C171 NCB31HK 822X C CAPACITOR 8200pF 50V K C172 NCB31CK 224X C CAPACITOR 0 22uF 16V K C173 NCB21CK 224X C CAPACITOR 0 22uF 16V K C174 NCB31EK 333X C CAPACITOR 0 033uF 25V K C175 NCB31HK 562X C CAPACITOR 5600pF 50V K C176 QEKJ1EM 475Z E CAPACITOR 4 7uF ...

Page 54: ...J Symbol No Part No Part Name Description Local R10 NRSA02J 220X MG RESISTOR 22Ω 1 10W J R11 NRSA63J 103X MG RESISTOR 10kΩ 1 16W J R12 NRSA63J 102X MG RESISTOR 1kΩ 1 16W J R13 NRSA63J 103X MG RESISTOR 10kΩ 1 16W J R14 NRSA63J 222X MG RESISTOR 2 2kΩ 1 16W J R16 NRSA63J 104X MG RESISTOR 100kΩ 1 16W J R31 NRSA63J 102X MG RESISTOR 1kΩ 1 16W J R32 NRSA63J 102X MG RESISTOR 1kΩ 1 16W J R33 NRSA63J 152X M...

Page 55: ...7kΩ 1 16W J R738 NRSA63J 472X MG RESISTOR 4 7kΩ 1 16W J R739 NRSA63J 103X MG RESISTOR 10kΩ 1 16W J R740 NRSA63J 103X MG RESISTOR 10kΩ 1 16W J R741 NRSA63J 473X MG RESISTOR 47kΩ 1 16W J R742 NRSA63J 512X MG RESISTOR 5 1kΩ 1 16W J R743 NRSA63J 473X MG RESISTOR 47kΩ 1 16W J R745 NRSA63J 473X MG RESISTOR 47kΩ 1 16W J R749 NRSA63J 473X MG RESISTOR 47kΩ 1 16W J R751 NRSA63J 103X MG RESISTOR 10kΩ 1 16W J...

Page 56: ...LSI IC IC581 NJM4565M WE IC IC701 UPD784217AGC302 IC IC702 IC PST3433U X IC IC901 AN80T07A REGULATOR IC Symbol No Part No Part Name Description Local Q1 2SD601A QR X TRANSISTOR Q5 2SB709A R X TRANSISTOR Q6 2SB624 4 X TRANSISTOR Q7 UN2211 X TRANSISTOR Q10 UN2211 X TRANSISTOR Q31 UN2211 X TRANSISTOR Q341 KTD1304 X TRANSISTOR Q351 KTD1304 X TRANSISTOR Q401 2SB624 4 X TRANSISTOR Q402 UN2211 X TRANSIST...

Page 57: ...25V K C462 QEKJ0JM 107Z E CAPACITOR 100uF 6 3V M Symbol No Part No Part Name Description Local C463 QEKJ0JM 107Z E CAPACITOR 100uF 6 3V M C464 NCB31EK 104X C CAPACITOR 0 1uF 25V K C481 QERF1CM 476Z E CAPACITOR 47uF 16V M C482 NCB31EK 104X C CAPACITOR 0 1uF 25V K C483 NCB31EK 104X C CAPACITOR 0 1uF 25V K C501 QEKJ1CM 476Z E CAPACITOR 47uF 16V M C502 NCB31HK 103X C CAPACITOR 0 01uF 50V K C503 QEKJ1A...

Page 58: ...Part No Part Name Description Local R172 NRSA63J 223X MG RESISTOR 22kΩ 1 16W J R173 NRSA63J 222X MG RESISTOR 2 2kΩ 1 16W J R174 NRSA63J 473X MG RESISTOR 47kΩ 1 16W J R175 NRSA63J 473X MG RESISTOR 47kΩ 1 16W J R181 NRSA63J 271X MG RESISTOR 270Ω 1 16W J R182 NRSA63J 271X MG RESISTOR 270Ω 1 16W J R301 NRSA63J 273X MG RESISTOR 27kΩ 1 16W J R302 NRSA63J 273X MG RESISTOR 27kΩ 1 16W J R311 NRSA63J 273X M...

Page 59: ...3J 103X MG RESISTOR 10kΩ 1 16W J R743 NRSA63J 103X MG RESISTOR 10kΩ 1 16W J R744 NRSA63J 103X MG RESISTOR 10kΩ 1 16W J R745 NRSA63J 103X MG RESISTOR 10kΩ 1 16W J R746 NRSA63J 103X MG RESISTOR 10kΩ 1 16W J R747 NRSA63J 472X MG RESISTOR 4 7kΩ 1 16W J R748 NRSA63J 472X MG RESISTOR 4 7kΩ 1 16W J R749 NRSA63J 472X MG RESISTOR 4 7kΩ 1 16W J R750 NRSA63J 103X MG RESISTOR 10kΩ 1 16W J R751 NRSA63J 103X MG...

Page 60: ... 1 16W J R636 NRSA63J 331X MG RESISTOR 330Ω 1 16W J R638 NRSA63J 471X MG RESISTOR 470Ω 1 16W J R640 NRSA63J 331X MG RESISTOR 330Ω 1 16W J R642 NRSA63J 122X MG RESISTOR 1 2kΩ 1 16W J R644 NRSA63J 331X MG RESISTOR 330Ω 1 16W J R651 NRSA63J 222X MG RESISTOR 2 2kΩ 1 16W J R652 NRSA63J 222X MG RESISTOR 2 2kΩ 1 16W J R653 NRSA63J 103X MG RESISTOR 10kΩ 1 16W J R654 NRSA63J 103X MG RESISTOR 10kΩ 1 16W J R...

Page 61: ...XXXXX 3 15 MEMO ...
Page 62: ...3 16 Packing materials and accessories parts list Block No M M M 3 KIT P3 A1 A4 P1 P5 P5 P2 A2 A3 P4 A5 A6 A7 A8 A9 A12 A11 A13 P6 P7 A10 ...

Page 63: ... LOCK NUT A 8 QYWWS53A008ZA WASHER 0mm 5 3mm x A 9 GE40130 002A HOOK x2 A 10 FSJB3002 00C HARD CASE G413UI2 G414UI2 A 10 FSJB3002 00C N HARD CASE G413UI3 G414UI3 A 11 RM RK50 REMOCON UNIT A 12 BATTERY A 13 QAM0390 004 16P CORD ASSY KIT SRW 385U SCREW PARTS KIT A5 A6 A7 A8 A9 P 1 GE31703 001A CARTON G413UI2 G413UI3 P 1 GE31700 001A CARTON G414UI2 G414UI3 P 2 QPC03004315P POLY BAG 30cm x 43cm P 3 FS...

Reviews: