background image

10

Setting up your TV

LT-32/26A61BU/SU / LCT1996-001A-U / English

„

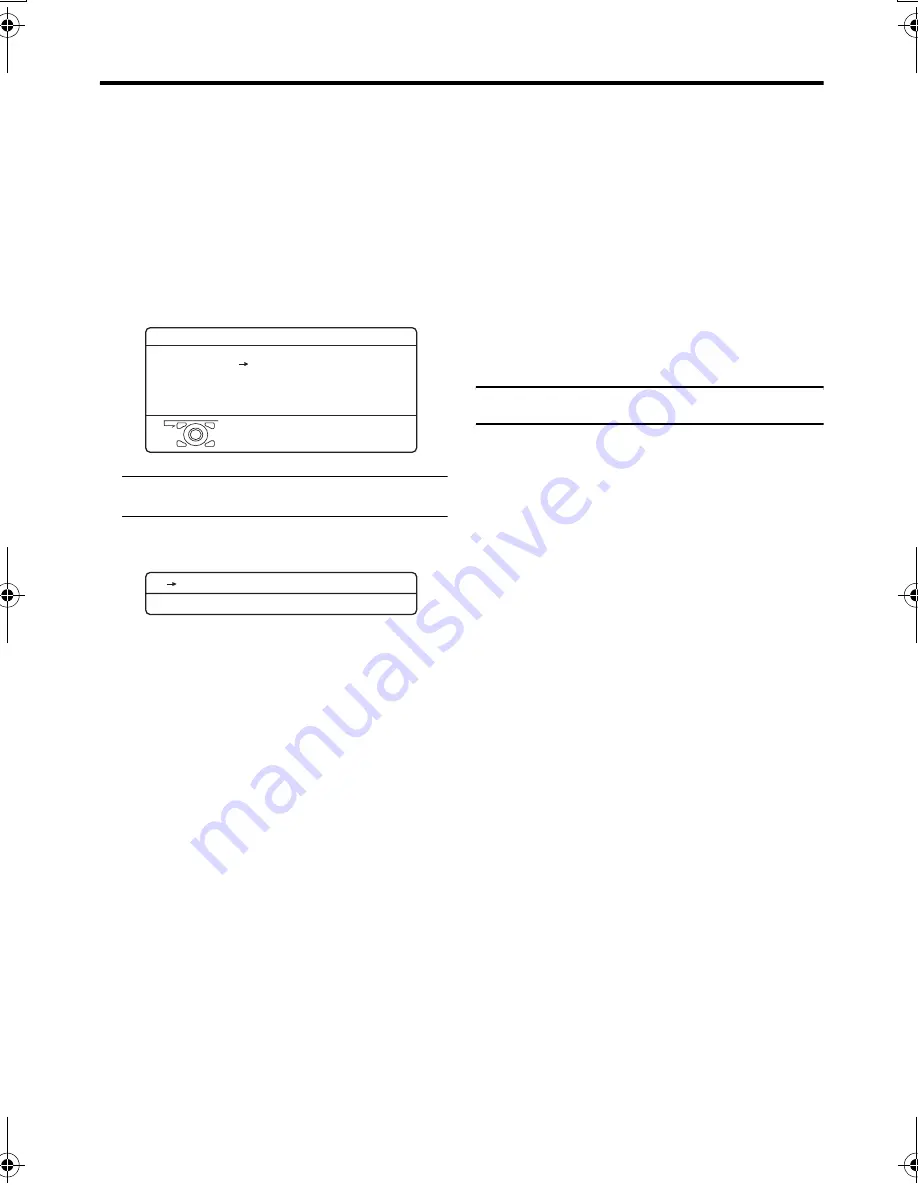
Downloading the data to VCR

You can transmit to the latest Programme 

numbers (PR) data to a VCR with the T-V 
LINK function.

Caution

• This only works when a T-V LINK 

compatible VCR is connected to the 

EXT-2 terminal.

• This only works when the T-V LINK 

menu is being displayed.

1 Turn on the VCR

2 Press the 

a

 button

The data transmission begins.

The T-V LINK menu disappears once the 
data transmission ends.

When the T-V LINK menu is 

changed over to another menu:

The TV has finished its menu. This new 

menu is operated from the VCR. See the 
VCR instruction manual for what to do 
next.

If “FEATURE NOT AVAILABLE” 

appears at the T-V LINK menu:

Check the following three items. Then 

press the 

2

 button to retry data 

transmission.

• Has a T-V LINK compatible VCR 

been connected to the EXT-2 
terminal?

• Has the VCR power been turned on?
• Does the SCART cable that is 

connected to the EXT-2 terminal to T-
V LINK compatible VCR have all its 

proper connections?

T-V LINK functions

When you have a T-V LINK compatible 

VCR connected to the EXT-2 Terminal on 
the TV, it is easier to set up the VCR and to 
view videos. T-V LINK uses the following 

features:

To use T-V LINK functions:

A “T-V LINK compatible VCR” means a 
JVC video cassette recorder with the T-V 
LINK logo, or with one of the following 

logos. However, these VCRs may support 
some or all of the features described earlier. 
For details, see your VCR instruction 
manual.

“Q-LINK” (a trademark of Panasonic 

Corporation)

“Data Logic” (a trademark of Metz 

Corporation)

“Easy Link” (a trademark of Phillips 

Corporation)

“Megalogic” (a trademark of Grundig 

Corporation)

“SMARTLINK” (a trademark of Sony 

Corporation).

D0005

DOWNLOAD TV 

RECORDING DEVICE

T-V LINK

OK

EXIT

-EN

D0037

TRANSFER. . . . . 

TV RECORDING 

DEVICE

-EN

LT-32&26A61BUSU_Eng.book  Page 10  Tuesday, October 11, 2005  6:07 PM

Summary of Contents for InteriArt LT-26A61BU

Page 1: ... INSTRUCTIONS BREEDBEELD LCD TV GEBRUIKSAANWIJZING TELEVISOR CON PANEL LCD PANORÁMICO MANUAL DE INSTRUCCIONES TV LCD WIDESCREEN ISTRUZIONI TELEVISOR COM ECRÃ PANORÂMICO DE CRISTAL LÍQUIDO INSTRUÇÕES LT 32A61BU LT 32A61SU LT 26A61BU LT 26A61SU ENGLISH DEUTSCH FRANÇAIS NEDERLANDS CASTELLANO ITALIANO PORTUGUÊS ...

Page 2: ......

Page 3: ...njuries CAUTION The TV screen may be damaged if the TV is carried as shown in the diagram below The TV should always be carried by two people Pixel defects LCDs use collections of fine points pixels to display images While there is no problem with more than 99 99 of these pixels please understand that a very small number of pixels may not light or may light all the time Distance recommendations Av...

Page 4: ...roblems that cannot be repaired may occur Pay attention to the following when handling the screen Do not use glue or adhesive tape on the screen Do not write on the screen Do not allow the screen to come in contact with any hard objects Do not allow condensation to form on the screen Do not use alcohol thinner benzene or other solvents on the screen Do not rub the screen hard The surface of the TV...

Page 5: ...tion function 16 ZOOM function 17 3D SOUND function 18 Return to TV channel instantly 18 Favourite channel function 19 Operating a JVC brand VCR or DVD player 20 Teletext function 21 Basic operation 21 Using the List Mode 21 Hold 22 Sub page 22 Reveal 22 Size 22 Index 23 Cancel 23 Using the TV s menu 24 Basic operation 24 PICTURE menu 25 PICTURE MODE 25 BRIGHT 1 25 CONTRAST 25 BRIGHT 2 25 SHARP 25...

Page 6: ...The TV will generate a slight amount of heat during operation Ensure that sufficient space is available around the TV to allow satisfactory cooling See Distance recommendations on page 1 Using the stand This TV comes with a table top stand already attached This stand can be used to adjust the direction of the TV screen to the left or right Rotate the TV to the left and right While holding the bott...

Page 7: ... Remove the cover before connecting an antenna or VCR Leave the cover off if they do not fit properly Do not force to replace the cover Doing so may cause damage to the connection cables and the cover Remove the cover by removing the hooks When replacing the cover place the side of the cover against the TV and insert the hooks ...

Page 8: ... VCR connected by a SCART cable C to the EXT 2 terminal on the TV For details about T V LINK functions see T V LINK functions on page 10 You can watch a video using the VCR without doing C For details see your VCR instruction manual To connect more equipment please see Connecting external equipment on page 40 If you connect a decoder to a T V LINK compatible VCR set the DECODER EXT 2 function to O...

Page 9: ...e batteries we supply are only for setting up and testing your TV please replace them as soon as you need to If the remote control does not work properly replace the batteries Initial settings When the TV is first turned on it goes into the initial settings mode and you will see the JVC logo Follow the instructions on the screen display to make the initial settings 1 Make sure to set the VCR TV DV...

Page 10: ...he country where you are 6 Press the blue button to start the AUTO PROGRAM function The AUTO PROGRAM menu appears and received TV channels are automatically stored in the programme numbers PR To cancel the AUTO PROGRAM function Press the a button After the TV channels have been registered in the programme numbers PR the EDIT menu appears If you want to you can now edit the programme numbers PR usi...

Page 11: ... the TV If your TV can detect the TV channel name from the TV channel broadcast signal the TV channel name is assigned to the programme number PR to which the TV channel has been set However which TV channels are set to which programme numbers PR will depend on the area in which you live If a TV channel you want to view is not set to a programme number PR you can set it using the MANUAL function F...

Page 12: ...CR been connected to the EXT 2 terminal Has the VCR power been turned on Does the SCART cable that is connected to the EXT 2 terminal to T V LINK compatible VCR have all its proper connections T V LINK functions When you have a T V LINK compatible VCR connected to the EXT 2 Terminal on the TV it is easier to set up the VCR and to view videos T V LINK uses the following features To use T V LINK fun...

Page 13: ...annel or input is changed or if the menu is displayed on the TV when recording images from an external device connected to the TV for example a camcorder when recording a TV channel after it has been unscrambled on a decoder when recording a TV channel by using the TV s output because the VCR s own tuner cannot properly receive that channel You cannot carry out Direct Rec using your TV s control G...

Page 14: ... turn the TV on from standby mode When the TV is turned on the power lamp lights blue To turn the TV off Press the A button again The power lamp goes off Caution The A button on the TV does not fully isolate the TV from the AC supply If you are not going to use the TV for a long period be sure to disconnect the AC plug from the AC socket Choose a TV channel Press the P p buttons to choose a progra...

Page 15: ...nd functions 13 ENGLISH Adjust the volume Press the r Volume q buttons The volume level indicator appears Using the Menu Use the MENU OK button Refer to Using the TV s menu see page 24 for details of using the menu ...

Page 16: ...Volume q buttons Turn the TV on or off from standby mode Press the standby button to turn the TV on or off When the TV is turned on the power lamp lights blue The power can be turned on by pressing the b button p p buttons or Number buttons 0 3 4 5 9 6 7 8 1 2 To turn the TV on or off set the VCR TV DVD switch on the remote control to the TV position and press the button If the VCR TV DVD switch o...

Page 17: ... the resolution of the original video source the motion may appear unnatural when the video source is input with progressive scanning component signals If this happens change the output setting of the connected device to interlace scanning component signal output See the instructions that came with the device for more information The PC sound is the same as the EXT 3 sound To return to a TV channe...

Page 18: ...the EXT terminal number is displayed Time display The current time of the teletext data is displayed If the TV has not received a TV channel that has teletext programmes since it was turned on the time display is blank To view the current time choose a TV channel that has teletext programmes An incorrect current time is sometimes displayed when watching videos PR LIST The programme number PR and E...

Page 19: ...s the left and right sides of a normal picture 4 3 aspect ratio to fill the screen without making the picture appear unnatural The top and bottom of the picture are slightly cut off 14 9 ZOOM This zooms up the wide picture 14 9 aspect ratio to the upper and lower limits of the screen 16 9 ZOOM This zooms up the wide picture 16 9 aspect ratio to the full screen 16 9 ZOOM SUBTITLE This zooms up the ...

Page 20: ...power is turned off on The ZOOM mode is changed g Text button is pressed The TV is switched between TV mode and EXT mode 3D SOUND function You can enjoy sounds with a wider ambience This function does not work for the sound from headphones Press the i button to select one of 3D SOUND modes ON When you listen to stereo sound please select ON mode You can enjoy sound similar to the experience at the...

Page 21: ... to 4 NOT AVAILABLE appears on the screen Channels locked with the CHILD LOCK function cannot be registered If AUTO PROGRAM is performed the registered favourite channels are reset When you want to delete a favourite channel delete the set channel and set contents with FAVOURITE SETTING see page 31 in the FEATURES menu Calling the favourite channel 1 In the normal screen press the d favourite butt...

Page 22: ...lso press the H or T button and display the DVD disc menu screen and then operate by pressing the 7 buttons 2 Press the VCR DVD Control Button to control your VCR or DVD player If your device is not made by JVC these buttons will not work Even if your device is made by JVC some of these buttons may not work depending on the device you are using You can use the p buttons to choose a TV channel the ...

Page 23: ...in the TV and text mode or Text mode You cannot operate menus when viewing a teletext programme Language display depends on the country which was set on the COUNTRY menu If characters on a Teletext programme do not appear properly change the COUNTRY setting to other country s To change the COUNTRY setting perform steps 1 and 2 of the AUTO PROGRAM procedure on page 32 and then press the a button Us...

Page 24: ... being received Press the C Hold button To cancel the Hold function Press C Hold button again Sub page Some teletext pages include sub pages that are automatically displayed You can hold any sub page or view it at any time 1 Press the d Favourite button to operate the Sub page function 2 Press the Number buttons to enter a sub page number Example 3rd sub page press 0 0 0 and 3 To cancel the Sub pa...

Page 25: ...e number button to enter a page number or press a colour button The TV searches for a teletext page 2 Press H Cancel button The TV programme appears When the TV finds the teletext page its page number appears in the upper left of the screen 3 Press H Cancel button to return to a teletext page when the page number is on the screen The TV mode cannot be resumed by pressing the H Cancel button To ret...

Page 26: ... button to exit from the menu Some menu items may not be operated or set depending on the TV status or other menu item settings Menu items that cannot be operated or set are displayed in grey in the menu and cannot be chosen Types of menu The menu will disappear after about one minute if no operation is performed Operation with the buttons on the TV You can also operate the menus using the buttons...

Page 27: ...SOFT Softens contrast and sharpness BRIGHT 1 You can adjust the back light 2 darker 3 brighter CONTRAST You can adjust the picture contrast 2 lower 3 higher BRIGHT 2 You can adjust the picture brightness 2 darker 3 brighter SHARP You can adjust the picture sharpness 2 softer 3 sharper COLOUR You can adjust the picture colour 2 lighter 3 deeper HUE You can adjust the picture tint 2 reddish 3 greeni...

Page 28: ...ally 1 Choose COLOUR SYSTEM Then press the a or 3 button The sub menu of the COLOUR SYSTEM function appears 2 Press the 6 buttons to choose the appropriate colour system Then press the a button PAL PAL system SECAM SECAM system NTSC 3 58 NTSC 3 58 MHz system NTSC 4 43 NTSC 4 43 MHz system AUTO This function detects a colour system from the input signal You can only use this when you are viewing a ...

Page 29: ...e of three ZOOM modes REGULAR PANORAMIC or 14 9 ZOOM as the ZOOM mode for the normal picture 4 3 aspect ratio 1 Choose 4 3 AUTO ASPECT then press the a button 2 Press the 6 buttons to choose a ZOOM mode D0017 EN 4 3 AUTO ASPECT OK PANORAMIC REGULAR 14 9 ZOOM ...

Page 30: ...the low tone of the sound 2 weaker 3 strong TREBLE You can adjust the high tone of the sound 2 weaker 3 strong BALANCE You can adjust the volume balance between the left and right speaker 2 turn the left speaker s volume level up 3 turn the right speaker s volume level up 3D SOUND You can enjoy Surround sound with a live effect by using the 3D SOUND function You can choose a 3D SOUND mode from ON ...

Page 31: ... the period of time to OFF CHILD LOCK When there is a TV channel you do not want your children to watch you can use the CHILD LOCK function to lock out the TV channel Even when a child chooses a programme number PR for a locked TV channel the screen will change to blue and display n CHILD LOCK so the TV channel cannot be viewed Unless you enter a pre set ID number by a special operation the lock c...

Page 32: ...u have forgotten the ID number Perform step 1 of To set the CHILD LOCK function After confirming the ID number press the b button to exit the menu Even if you reset the lock temporarily it does not mean that the CHILD LOCK function set for the TV channel is cancelled The next time anyone tries to view the TV channel it will be locked again When you want to cancel the CHILD LOCK function you must p...

Page 33: ...he a or 3 button The FAVOURITE SETTING menu appears 2 Press the 6 buttons and chose the favourite channel that you want to delete 3 Press the blue button The chosen favourite channel and set contents are deleted For details of the favourite channels see Favourite channel function on page 19 D0112 EN FAVOURITE SETTING OK RESET 1 PR 07 2 PR 01 3 PR 01 4 PR 01 ...

Page 34: ...n changes the programme number PR of a TV channel ID This function registers a channel name ID to a TV channel INSERT This function adds a new TV channel in the current programme numbers PR list by using the CH CC number You cannot use the INSERT function if you do not know the channel number of a TV channel Use the MANUAL function to register a TV channel in the programme number PR DELETE This fu...

Page 35: ...ansmit the programme number PR data For programme number PR 0 AV appears in the programme numbers PR list An EXT terminal number does not appear in the programme numbers PR list MOVE 1 Press the 6 buttons to choose a TV channel 2 Press the 3 button to start the MOVE function 3 Press the 6 buttons to choose a new programme number PR To cancel the MOVE function Press the b button 4 Press the 2 butto...

Page 36: ...rform steps 1 and 2 of the AUTO PROGRAM page 32 procedure and set the COUNTRY setting to FRANCE before pressing the a button A CH CC number unique to this TV and corresponding to the Channel number of a TV channel is required Find the corresponding CH CC number from a table CH CC numbers on page 44 based on the Channel number of the TV channel When the COUNTRY setting is not FRANCE use a two digit...

Page 37: ...nnel 2 Press the blue button to activate the MANUAL function At the right side following the CH CC number the SYSTEM broadcasting system of the TV channel appears To cancel the MANUAL function Press the b button 3 Press the 3 button to choose the SYSTEM broadcasting system for a TV channel you want to register TV channel SECAM L system from a French station Set the SYSTEM to L If it is set to one ...

Page 38: ...ose a language Then press the a button DECODER EXT 2 If you have a decoder connected to a T V LINK compatible VCR which in turn is connected to the EXT 2 terminal use the DECODER EXT 2 function to unscramble the scrambled TV channels 1 Turn on the decoder power 2 Display the scrambled TV channel on the TV Even if the decoder is working a scrambled picture appears 3 Display the SET UP menu and choo...

Page 39: ...en press the a or 3 button The EXT SETTING menu appears 2 Follow the instructions for the function you want to use and operate the function S IN You can enjoy the high quality picture of the S VIDEO signal Y C signal DUBBING You can choose a signal source to be output from an EXT 2 terminal S IN S VIDEO input You can connect a device such as an S VHS VCR to enjoy the high quality picture of the S ...

Page 40: ...ource to be output from the EXT 2 terminal You can do this with the output signals of the devices connected to other EXT terminals or with the picture and sound from a TV channel you are currently viewing 1 Press the 5 buttons to choose the arrow from the menu 2 Press the 6 buttons to choose an EXT terminal or TV Then press the a button The arrow in the menu represents a signal flow The left side ...

Page 41: ...T 2 terminal When you choose an EXT terminal as an output you can view a TV programme or a picture from the other EXT terminal while dubbing the picture from a device connected to the EXT terminal onto a VCR connected to the EXT 2 terminal The RGB signals from TV games cannot be output Teletext programmes cannot be output ...

Page 42: ... you are connecting equipment not listed in the following connection diagram see the table to choose the best EXT terminal Connecting cables are not supplied 1 VCR composite signal 2 VCR composite signal S VIDEO signal 3 T V LINK compatible VCR composite signal S VIDEO signal 4 Decoder 5 DVD player composite signal S VIDEO signal 6 DVD player composite signal RGB signal 7 DVD player component vide...

Page 43: ...Additional preparation 41 ENGLISH without terminal covers ...

Page 44: ...is is useful when you want to dub the video sound from another device onto the VCR connected to the EXT 2 terminal For details on how to do this see DUBBING on page 38 The signals from EXT 4 and PC IN terminal cannot be output from EXT 2 TV output from the EXT 1 terminal The video sound signal of a TV channel you are viewing is always output from the EXT 1 terminal Changing over a programme number...

Page 45: ...om the audio output from HDMI compatible device to the VIDEO 3 AUDIO L R terminal on the back of the TV To watch the images from a HDMI DVI compatible device press the G or p p buttons to choose DVI To connect the DVI compatible device to the DVI terminal connect the DVI terminal of the DVI compatible device to the DVI terminal of the TV with the DVI cable Ensure that the connectors are facing the...

Page 46: ...CC 12 CC 212 S12 CC 13 CC 213 S13 CC 14 CC 214 S14 CC 15 CC 215 S15 CC 16 CC 216 S16 CC 17 CC 217 S17 CC 18 CC 218 S18 CC 19 CC 219 S19 CC 20 CC 220 S20 CC 21 CC 221 S21 CC 22 CC 222 S22 CC 23 CC 223 S23 CC 24 CC 224 S24 CC 25 CC 225 S25 CC 26 CC 226 S26 CC 27 CC 227 S27 CC 28 CC 228 S28 CC 29 CC 229 S29 CC 30 CC 230 S30 CC Channel CC 31 CC 231 S31 CC 32 CC 232 S32 CC 33 CC 233 S33 CC 34 CC 234 S3...

Page 47: ...C number Find the CH CC number CC110 to CC161 corresponding to the TV channel SECAM L system from a French cable TV station based on the broadcast frequency of the TV channel When you do not know the broadcast frequency please contact the cable TV station The CH CC numbers of CH102 CH169 and CC110 CC161 correspond to the TV channels being broadcast by a SECAM L system The other CH CC numbers corre...

Page 48: ...and the sound is muted If you still want to view the TV channel follow the description BLUE BACK on page 30 to change the BLUE BACK function setting to OFF If the SYSTEM setting for a TV channel is incorrect it may prevent the sound from being issued Follow the description EDIT MANUAL on page 32 to use the MANUAL function to try to change the SYSTEM setting When you are using EXT 3 EXT 4 or DVI te...

Page 49: ... to use the remote control from the sides or rear of the TV or from more than seven metres away from the TV Use the remote control in front of your TV or from less than seven metres away When you are viewing a teletext programme you cannot operate the menus Press the b button to return to the ordinary TV programme and then try operating the menus If the TV suddenly stops responding disconnect the ...

Page 50: ...re is unstable the screen may become white for a moment This happens when the signal which drives the liquid crystal is missing This is not a fault When a still image has been displayed for a long period a faint residual image may remain on the screen for a short time after the power has been turned off or when another image is displayed This is not a fault and the image will eventually disappear ...

Page 51: ...49 ENGLISH Cable management 1 2 3 4 ...

Page 52: ...put Rated Power output 5 W 5 W Speakers 6 6 cm round 2 EXT 1 terminal Euroconnector 21 pin SCART Video input Audio L R inputs and RGB inputs are available TV broadcast outputs Video and Audio L R are available EXT 2 terminal Euroconnector 21 pin SCART Video input S VIDEO Y C input Audio L R inputs and RGB inputs are available Video and Audio L R outputs are available T V LINK functions are availab...

Page 53: ... 2005 Victor Company of Japan Limited LCT1996 001A U 1005TKH CR MU ...

Page 54: ...LT 32A61BU LT 32A61SU LT 26A61BU LT 26A61SU ...

Reviews: