background image

9

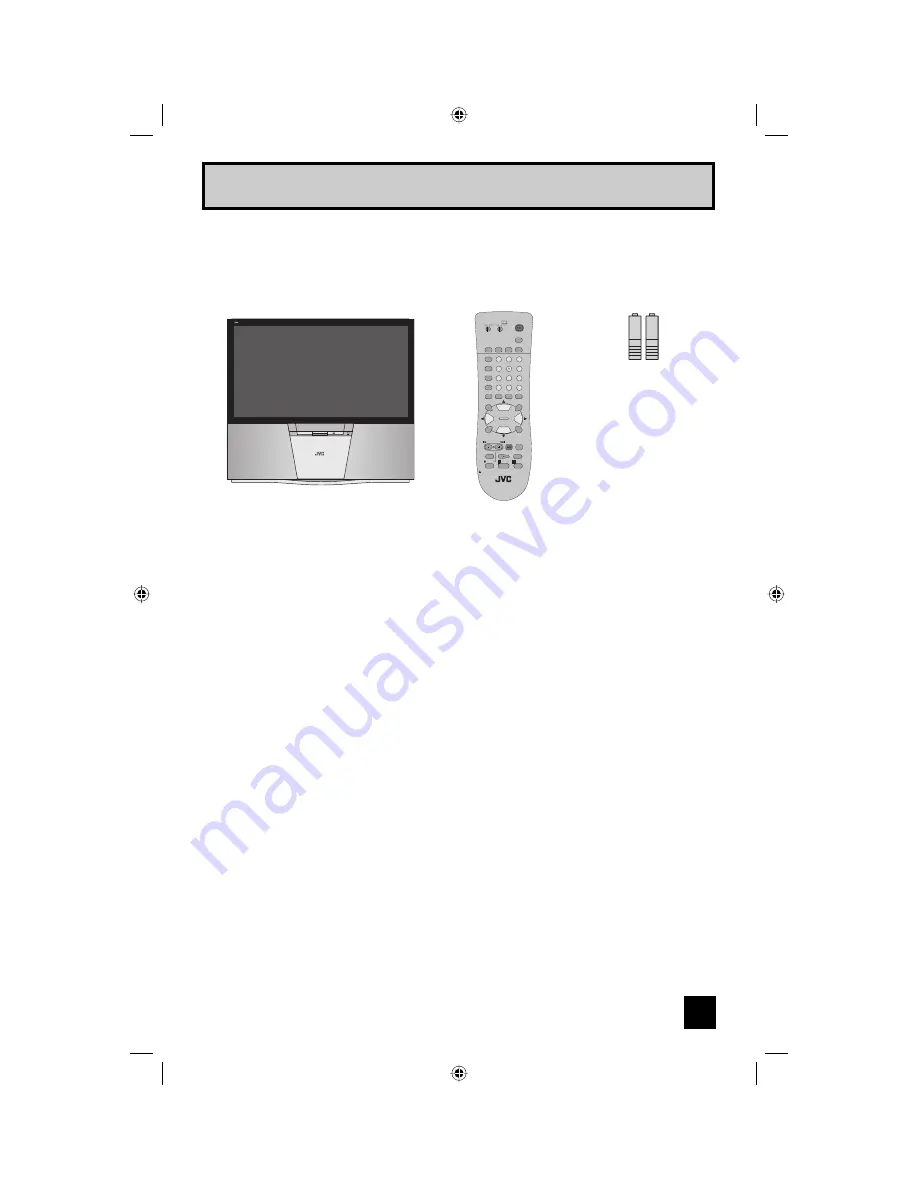
Two AA 

Batteries

1 Television

1 Remote Control

Note: Your television 
and/or remote 
control may differ 
from the examples 
illustrated here.

Quick Setup                           Unpacking your TV

Thank you for your purchase of a JVC Color Television. Before you begin setting up your new 
television, please check to make sure you have all of the following items. In addition to this 
guide, your television box should include:

PULL/OPEN

POWER

DIGITAL IMAGE SCALING TECHNOLOGY

AA Alkaline

AA Alkaline

POWER

THEATER PRO

VIDEO STATUS

SLEEP
TIMER

FAVORITE

SUB CH

1

7

4

TUNE

3

9

6

/TV

MUTING

MENU

OK

BACK

2

8

0

5

CH +

VOL

VOL

+

REC

OPEN/CLOSE

STILL/PAUSE

STOP

PAUSE

PLAY

FF

REW

TV CATV VCR

DVD

VCR CHANNEL

PREV  NEXT

TV/VCR

VCR/

DVD

POWER

ASPECT

CH –

TV

RM-C1270G

ML/MTS SOUND

GUIDE

DISPLAY

C.C.

D/A

INPUT

LCT1885-001A-A ENG   9

7/20/05, 9:07:43 AM

Summary of Contents for I'Art Pro 0705JGI-II-IM

Page 1: ...use LCT1885 001A A 0705JGI II IM Model Number Serial Number Illustration of AV 56P776 and RM C1270G For Models AV 48P776 AV 56P776 AV 48P786 AV 56P786 Projection Television Users Guide POWER THEATER PRO VIDEO STATUS SLEEP TIMER FAVORITE SUB CH 1 7 4 TUNE 3 9 6 RETURN TV MUTING MENU OK BACK 2 8 0 5 CH VOL VOL REC OPEN CLOSE STILL PAUSE STOP PAUSE PLAY FF REW TV CATV VCR DVD VCR CHANNEL PREV NEXT TV...

Page 2: ...unless the blades can be fully inserted to prevent blade exposure CAUTION To reduce the risk of electric shock Do not remove cover or back No user serviceable parts inside Refer servicing to qualified service personnel The lightning flash with arrowhead symbol within an equilateral triangle is intended to alert the user to the presence of uninsulated dangerous voltage within the product s enclosur...

Page 3: ...tion refer to the operating instructions 3 Overloaded AC outlets and extension cords are dangerous and so are frayed power cords and broken plugs They may result in a shock or fire hazard Call your service technician for replacement 4 Do not allow anything to rest on or roll over the power cord and do not place the TV set where power cord is subject to traffic or abuse This may result in a shock o...

Page 4: ...roperly secured Use only a cart or stand recommended by the TV set manufacturer Do not try to roll a cart with small casters across thresholds or deep pile carpets Wall or shelf mounting should follow the manufacturer s instructions and should use a mounting kit approved by the manufacturer 10 Caution children about dropping or pushing objects into the TV set through cabinet openings Some internal...

Page 5: ...t exhibits a distinct change in performance this indicates a need for service 16 Do not attempt to service this TV set yourself as opening or removing covers may expose you to dangerous voltage or other hazards Refer all servicing to qualified service personnel 17 When replacement parts are required have the service technician verify in writing that the replacement parts he uses have the same safe...

Page 6: ...uster will keep your TV clean If you wish to wipe down the television first unplug it Then wipe gently with a soft cloth slightly moistened with water You can add a few drops of mild liquid detergent to the water to help remove spots of oily dirt DO NOT allow liquid to enter the TV through the ventilation slots DO NOT use strong or abrasive cleaners on the TV DO NOT spray liquids or cleaners direc...

Page 7: ...ator 51 Digital In 52 Digital In Audio 52 Picture Settings 53 Adjust Picture Settings 53 Color Temperature 53 Digital Noise Clear 53 VSM 54 Natural Cinema 54 Reset 54 Sound Settings 55 Adjust Sound Settings 55 Reset 55 Set Clock 56 On Off Timer 57 Power 58 Number Buttons 58 Tune 58 Input 58 Channel 58 Volume 58 Return TV 59 Sound 59 Video Status 60 TheaterPro D6500K 60 Sleep Timer 61 ML MTS 61 Mut...

Page 8: ... Update 68 Digital CH D A Digital Analog 69 Sub Channel 69 Guide 69 Weak Signal 70 No Program 70 Troubleshooting 71 Warranty 72 Authorized Service Center 73 Specifications 74 Notes 75 Digital Button Functions 69 Digital Setup 67 Appendices 71 OSD Information 70 LCT1885 001A A ENG 8 7 20 05 9 07 43 AM ...

Page 9: ...ave all of the following items In addition to this guide your television box should include PULL OPEN POWER DIGITAL IMAGE SCALING TECHNOLOGY AA Alkaline AA Alkaline POWER THEATER PRO VIDEO STATUS SLEEP TIMER FAVORITE SUB CH 1 7 4 TUNE 3 9 6 RETURN TV MUTING MENU OK BACK 2 8 0 5 CH VOL VOL REC OPEN CLOSE STILL PAUSE STOP PAUSE PLAY FF REW TV CATV VCR DVD VCR CHANNEL PREV NEXT TV VCR VCR DVD POWER A...

Page 10: ... away a quick setup guide follows on the next few pages Once you have unpacked your television the next step is to connect it to your antenna cable or satellite system and to connect the audio video devices you want to use with your television To make these connections you will use plugs like the ones illustrated below Coaxial Cables S Video Cable Used to connect audio video devices like VCRs DVD ...

Page 11: ...l are trademarks of Dolby Laboratories DIGITAL IN AUDIO R L VIDEO S VIDEO OVER INPUT 3 INPUT 2 INPUT 1 COMPONENT VIDEO Y Pb Pr MODELS AV 48P776 AV 56P776 AV 48P786 AV 56P786 MODELS AV 48P776 AV 56P776 AV 48P786 AV 56P786 Quick Setup TV Models NOTE Before you connect your television to another device please refer to the proper diagrams for your specific TV and remote These will help assist you in u...

Page 12: ... DVD VCR CHANNEL PREV NEXT TV VCR VCR DVD POWER ASPECT CH TV RM C1270G ML MTS SOUND GUIDE DISPLAY C C D A INPUT Quick Setup TV Remote Control RM C1270G For information on remote control buttons see pages 58 66 SUB CHANNEL and GUIDE buttons are for digital channels If your TV is connected to an ATSC antenna or Digital Cable you can use these buttons LCT1885 001A A ENG 12 7 20 05 9 07 44 AM ...

Page 13: ... the remote can be used for basic operation of the television The top and bottom buttons will scan forward and back through the available channels To move rapidly through the channels using JVC s Hyperscan feature press and hold CH or CH The channels will zip by at a rate of five channels per second The right and left buttons will turn the volume up or down These buttons are also marked with four ...

Page 14: ...n on the TV To connect a DVD player see VCR Connection A DVD player is optional If you have a satellite television system refer to the satellite TV manual No VCR Connection TV Rear Panel 75Ω VHF UHF Cable or Antenna Output Coaxial Cable OR Cable Box OUT IN Note If you do not have a cable box connect the cable wire from the wall outlet into the back of the TV LCT1885 001A A ENG 14 7 20 05 9 07 45 A...

Page 15: ...ting the other to avoid accidentally switching the cables You may also connect the DVD player to Input 1 Cable or Antenna Output Coaxial Cable Attachment DVD Player OPTIONAL VCR TV Rear Panel OVER 75Ω VHF UHF AUDIO OUT R L OPTICAL OUT Digital Audio AUDIO R L VIDEO S VIDEO OVER INPUT 3 INPUT 2 INPUT 1 COMPONENT VIDEO Y Pb Pr IN OUT R L V IN OUT OR Green Blue Red Y PB PR OUT AUDIO OUT L R Diagram 1 ...

Page 16: ...o Way Splitter Coaxial Cable Attachment DVD Player OPTIONAL VCR TV Rear Panel OVER 75Ω VHF UHF AUDIO OUT R L OPTICAL OUT Digital Audio AUDIO R L VIDEO S VIDEO OVER INPUT 3 INPUT 2 INPUT 1 COMPONENT VIDEO Y Pb Pr OR Green Blue Red Y PB PR OUT AUDIO OUT L R LCT1885 001A A ENG 16 7 20 05 9 07 45 AM ...

Page 17: ...the front of the TV Note If your camcorder is a mono sound model it will have only one AUDIO OUT Connect it to the L MONO on the front of the TV You may connect a camcorder game console or other equipment to your television by using the front input jacks Input 4 located under the front panel door To access pull on the door to open it You can also connect these using the television s rear input jac...

Page 18: ...e TV to the LEFT AUDIO INPUT on the amplifier 2 Connect a red cable from the RIGHT AUDIO OUTPUT on the back of the TV to the RIGHT AUDIO INPUT on the amplifier Notes Refer to your amplifier s manual for more information You can use AUDIO OUTPUT for your home theater system Connecting to an External Amplifier LCT1885 001A A ENG 18 7 20 05 9 07 46 AM ...

Page 19: ...put can be PCM or Dolby Digital TV Rear Panel Amplifier OPTICAL OUT Digital Audio 1 Connect the optical cable from the back of the TV to the back of the amplifier Notes This terminal can only output digital audio In order to use the optical output connection select PCM or Dolby Digital on Digital Sound in the Digital Setup Menu See page 68 Refer to your owners manual on using your amplifier LCT188...

Page 20: ...r television 2 Connect a red cable from the DTV decoder RIGHT AUDIO OUT to the RIGHT AUDIO IN into VIDEO 3 on the back of your television 3 Connect a white cable from the DTV decoder LEFT AUDIO OUT to the LEFT AUDIO IN into VIDEO 3 on the back of your television The digital in terminal is not compatible with the picture signal of a personal computer Use a HDMI to DVI cable commercially available i...

Page 21: ... DIGITAL OUT HDMI Cable VIDEO DIGITAL AUDIO DIGITAL DIGITAL IN Quick Setup Connections Connecting to a HDMI Compatible Device 1 Connect the HDMI Cable from the DIGITAL OUT on the back of your DTV or HDMI device to the DIGITAL IN on the back of your television Notes When you do the above connection set DIGITAL IN AUDIO in the Initial Setup menu to DIGITAL See DIGITAL IN AUDIO page 52 Some decoders ...

Page 22: ...r television 3 Connect a Green Component Cable from the AV Receiver s Y MONITOR OUT into the Y VIDEO INPUT 1 on the back of your television 4 Connect a Blue Component Cable from the AV Receiver s PB MONITOR OUT into the Pb VIDEO INPUT 1 on the back of your television 5 Connect a Red Component Cable from the AV Receiver s PR MONITOR OUT into the Pr VIDEO INPUT 1 on the back of your television Note ...

Page 23: ...s The interactive plug in menu setting does not appear if your TV has been turned on before In this case use the onscreen menus to perform these settings See pages 45 56 and 33 If you press the Menu button while setting up the interactive plug in menu it will skip over it Step 3 The Interactive Plug In Menu Quick Setup Plug In Menu After the JVC INTERACTIVE PLUG IN MENU has been displayed the TV a...

Page 24: ...anually See manual clock set below To set the clock using the XDS signal To choose AUTO To TIME ZONE To select your time zone Atlantic Eastern Central Mountain Pacific Alaska or Hawaii To move to D S T Daylight Savings Time To turn D S T ON or OFF To NEXT To Auto Tuner Setup Notes D S T can be used when it is set to ON in the SET CLOCK menu Only when the MODE is set to AUTO the Daylight Savings Ti...

Page 25: ...ick setup is now complete You can now begin watching your television or you can continue on in this guide for more information on programming your remote control or using the JVC onscreen menu system to customize your television viewing experience Notes If you want to cancel the Auto Tuner Setup press the MENU button Noise muting will not work during Auto Tuner Setup If you choose SKIP it finished...

Page 26: ... Citizen Curtis Diamond Eagle Eastern GC Brand Gemini General Instrument Hamlin Hitachi Jerrold Macom Magnavox Memorex Movietime Oak Paragon Panasonic Philips Pioneer 024 032 025 051 032 022 051 058 059 024 032 025 029 034 032 051 022 043 065 024 025 026 027 020 021 022 057 023 040 041 042 045 058 064 049 024 065 024 025 026 027 020 021 022 057 023 049 050 051 054 033 030 032 051 039 037 048 055 0...

Page 27: ...33 045 024 037 051 049 050 089 064 083 084 081 000 001 023 045 058 027 081 093 024 023 003 JVC Kenwood 000 001 002 003 004 005 003 004 064 005 LXI 027 064 058 065 066 063 067 VCRs CODES Magnavox Marantz Marta Memorex MGA Minolta Mitsubishi Multitech NEC Olympic Optimus Orion Panasonic Penney Pentax Philco Philips Pioneer Proscan Quasar Radio Shack 031 023 024 086 003 004 005 064 024 067 038 040 04...

Page 28: ...yer If your DVD player does not respond to the first code try the others listed If it does not respond to any of the codes try the search codes function on page 29 After you program your remote some DVD buttons may not work properly If so use the DVD player s remote Remote Programming DVD Codes Aiwa Apex Denon Hitachi JVC Kenwood Konka Mitsubishi Onkyo Oritron Panasonic Philips Pioneer 043 040 020...

Page 29: ... with your equipment 5 Press RETURN TV to exit VCR DVD Search Codes Function 1 Slide the first 2 way selector switch to TV and the other 2 way selector switch to VCR or DVD 2 Press the VCR or DVD POWER and RETURN TV buttons Hold for at least three seconds and release 3 Press the VCR or DVD POWER button and see if the VCR or DVD responds 4 If there was a response press RETURN TV The codes are now s...

Page 30: ... or CH buttons Pressing the CH or CH buttons let you Move vertically in a main menu screen Move through a submenu screen Move to the next letter number or other choice in a submenu Back up to correct an error Scan through TV channels when not in a menu screen Left and right arrows mean press the VOLUME or VOLUME buttons to move left or right to Select a highlighted menu item Select an item in a su...

Page 31: ... different color To move to a different feature use the π arrows to move up or down the list When you press the up arrow at the top of the list or the down arrow at the bottom the next menu screen will appear Use the arrows to select an option from the highlighted feature Pressing MENU on the remote control will close the onscreen menu system and return you to normal television viewing Each menu a...

Page 32: ...PAGE PREVIOUS ENG FRAN ESP LANGUAGE CLOSED CAPTION AUTO SHUT OFF XDS ID OFF ON 3 5 INITIAL SETUP 03 INITIAL SETUP 02 ON OFF ON INITIAL SETUP SELECT OPERATE EXIT MENU NEXT PAGE PREVIOUS 2 5 NOISE MUTING FRONT PANEL LOCK V1 SMART INPUT VIDEO INPUT LABEL POSITION ADJUSTMENT POWER INDICATOR OFF INITIAL SETUP 01 INITIAL SETUP SELECT OPERATE EXIT MENU NEXT PAGE PREVIOUS 1 5 DIGITAL IN DIGITAL IN AUDIO A...

Page 33: ...w Press the MENU button π To AUTO TUNER SETUP To operate To choose CABLE or AIR Press the OK button to start Programming will take approximately 2 to 4 minutes The auto tuner is finished when the message PROGRAMMING OVER appears onscreen Press the Menu button when finished AUTO TUNER SETUP SELECT OPERATE EXIT MENU AIR TUNER MODE PRESS OK TO START LCT1885 001A A ENG 33 7 20 05 9 07 51 AM ...

Page 34: ...tup and you wish to add them you may by placing an next to the channel number Digital channels can not be added to the channel summary if the auto tuner setup did not find them π To the SCAN column Press the OK button to include or delete from scan Press the MENU button when finished CHANNEL SUMMARY 06 07 08 09 10 CHNO SELECT OPERATE EXIT MENU 01 02 03 04 05 OK SCAN CHNO SCAN ID ID MTV A E E HBO L...

Page 35: ...MARY To operate π To the ID column Press the OK button to enter π To select RESET Press the OK button to finish Your characters are now reset Notes You can use characters for Alphabet numbers marks and spaces It is possible to set the maximum of 40 channel labels If you try to set more than the 40 maximum the message MEMORY OVERFLOW will appear You can block access to a channel by activating the c...

Page 36: ...en The channel cannot be accessed until the correct code is entered Notes Once a channel has been unlocked it will remain unlocked until the television is turned off See also Set Lock Code page 42 Channel Guard Message V Chip THIS CHANNEL IS LOCKED BY CHANNEL GUARD PLEASE ENTER LOCK CODE BY 10 KEY PAD TO UNLOCK IT NO Your TV is equipped with V Chip technology which enables you to block channels or...

Page 37: ...on stations which do not broadcast rating signals will be placed in the Unrated Programming category Examples of Unrated programs Emergency Bulletins Locally Originated Programming News Political Programs Public Service Announcements Religious Programs Sports Weather Some Commercials Note TV programs or movies that do not have rating signals will be blocked if the unrated category is set to BLOCK ...

Page 38: ...ed violence and some suggestive sexual dialog or situations It is recommended that parents watch these programs first or with their children TV 14 Parents Strongly Cautioned Programs contain some material that may be unsuitable for children under the age of 14 including possible intense violence sexual situations strong coarse language or intensely suggestive dialog Parents are cautioned against u...

Page 39: ... Press the MENU button when finished Note If you want to change the setup move the cursor to the top column and change the lock icon to by pressing OK again You may then select individual categories to block Directions to set US V Chip Ratings Press the MENU button π To V CHIP To operate lock icon appears Press ZERO to access the V Chip menu To turn V Chip ON or OFF π To move to SET US TV RATINGS ...

Page 40: ... content of movies with this rating may include more explicit sexual language and violence content than movies rated PG R Restricted These films contain material that is explicit in nature and is not recommended for unsupervised children under the age of 17 NC 17 No One Under 17 These movies contain content which most parents would feel is too adult for their children to view Content can consist o...

Page 41: ...trayals that are clearly imaginary comedic or unrealistic in nature C8 Programming Intended for Children 8 and Over Violence Guidelines Any realistic depictions of violence will be infrequent discreet of low intensity and will show the consequences of the acts There will be no offensive language nudity or sexual content G General Audience Programming will contain little violence and will be sensit...

Page 42: ...n to finish your lock code is now set Press the Menu button when finished After a power interruption you must reset the lock code Write your lock code number down and keep it hidden from potential viewers If you forget the lock code a new code may be set using the steps listed above Notes When a viewer attempts to watch a blocked channel this message appears The channel will remain blocked until t...

Page 43: ...jected to low levels of vibrations If the colors become separated please perform the adjustments below again In the beginning please be sure to perform AUTO convergence adjustment Press the MENU button π To CONVERGENCE To Enter π To select AUTO The convergence adjustment will start It will take about 50 seconds When the adjustment is finished it will return to what you were watching Note You can r...

Page 44: ... convergence make sure you start with the center position position 5 and work your way around radially for best results When you make the adjustment in the center position 5 you are making the adjustment for the whole screen In other positions you are making the adjustment only in that area You can reset the adjustment if you do not like the results See below If you perform AUTO convergence after ...

Page 45: ...in follow the steps below Press the Menu button π To LANGUAGE To choose a language ENG English FRAN French or ESP Spanish Press the MENU button when finished Language INITIAL SETUP SELECT OPERATE EXIT MENU NEXT PAGE PREVIOUS ENG FRAN ESP LANGUAGE CLOSED CAPTION AUTO SHUT OFF XDS ID OFF ON 3 5 LCT1885 001A A ENG 45 7 20 05 9 07 57 AM ...

Page 46: ...tion Analog Setting Digital Auto Setting Press the MENU button π To CLOSED CAPTION To enter π To Type To select Auto Advanced or Basic Auto Shows closed caption a priority for digital channels over analog channels It is set automatically Advanced Shows only the digital closed caption Basic Shows only the analog closed caption π To Service To select 1 2 3 4 5 or 6 π To Appearance To enter To select...

Page 47: ...e π To Colors To enter π To select Text Edge or Background To select the setting you like Auto White Black Red Green Blue Yellow Magenta or Cyan π To Set Press the OK button to save π To Opacities To enter π To select Text Edge or Background To select Auto Transparent Translucent Solid or Flashing π To Set Press the OK button to save Press the MENU button when finished Digital Manual Setting Digit...

Page 48: ... program name The XDS ID information is provided by the broadcaster Press the MENU button π To XDS ID To turn ON or OFF Press the MENU button when finished XDS ID INITIAL SETUP SELECT OPERATE EXIT MENU NEXT PAGE PREVIOUS 3 5 ENG FRAN ESP LANGUAGE CLOSED CAPTION AUTO SHUT OFF XDS ID OFF ON This feature inserts a blank gray screen over channels which are not broadcasting or are too weak to be receiv...

Page 49: ...NITIAL SETUP SELECT OPERATE EXIT MENU NEXT PAGE PREVIOUS 2 5 ON OFF ON NOISE MUTING FRONT PANEL LOCK V1 SMART INPUT VIDEO INPUT LABEL POSITION ADJUSTMENT POWER INDICATOR OFF This feature is used if you have connected an AV Receiver to your television By turning this feature on your television can automatically detect the signal source from your components that are connected to your AV Receiver Pre...

Page 50: ...bel Preset Labels VCR DVD DVHS STB SAT AMP GAME CAM DISC You have a VCR connected to the video input You have a DVD connected to the video input You have a Digital VCR connected to the video input You have a Set top Box connected to the video input You have a Satellite Receiver connected to the video input You have an Amplifier connected to the video input You have a Video Game connected to the vi...

Page 51: ...size perform the position adjustment again Position adjustment allows you to adjust the screen position vertically and horizontally when the aspect is set Panorama Zoom or Cinema Zoom for 1080i and 720p signals Position Adjustment OPERATE RESET EXIT OK MENU Power indicator allows you to adjust the brightness of the power indicator Press the MENU button π To POWER INDICATOR To adjust POWER INDICATO...

Page 52: ...AL IN option can only be displayed in the INITIAL SETUP menu when an HDMI480p picture signal is being input to the DIGITAL IN terminal This option adjusts the position when an HDMI or DVI 480p picture signal is being displayed on the screen There are two types of HDMI480p picture signals 640x480 and 720x480 If the displayed picture is slightly shifted the position can be adjusted by selecting eith...

Page 53: ...fine detail displayed in the picture Picture Settings Adjust the Picture Settings Color Temperature You can decide how strong or dull the colors appear on the TV screen Press the MENU button π To COLOR TEMPERATURE To enter To set LOW or HIGH Press the MENU button when finished TINT COLOR PICTURE BRIGHT DETAIL COLOR TEMPERATURE HIGH PICTURE ADJUST SELECT OPERATE EXIT MENU NEXT PAGE PREVIOUS STANDAR...

Page 54: ...FF SELECT OPERATE EXIT MENU NEXT PAGE PREVIOUS STANDARD PICTURE ADJUST 2 2 DIG NOISE CLEAR NATURAL CINEMA VSM RESET OFF ON ON VSM Velocity Scan Modulation VSM ON OFF Natural cinema corrects the problem of blurred edges which may occur when viewing a program originally shot on film such as motion pictures or animation If you notice blurring at the edges of these programs press NATURAL CINEMA and se...

Page 55: ... TREBLE or BALANCE To adjust the setting π To move to the next setting Press the MENU button when finished Note You can reset the sound adjustments BASS TREBLE and BALANCE you set at once as the default setting when you select reset See page 54 You can adjust BALANCE only when HYPER SURROUND is off See page 59 Sound Settings Adjust the Sound Settings BASS TREBLE BALANCE RESET SOUND ADJUST SELECT O...

Page 56: ...tain Pacific Alaska or Hawaii π To D S T daylight savings time To turn D S T ON or OFF Press OK to start clock Press the MENU button when finished SET CLOCK PRESS TO START CLOCK SELECT OPERATE EXIT MENU OK TIME MODE TIME ZONE D S T MANUAL ATLANTIC ON SET CLOCK PRESS TO FINISH SELECT OPERATE EXIT MENU OK TIME MODE TIME ZONE D S T AUTO ATLANTIC ON THANK YOU ATLANTIC EASTERN CENTRAL MOUNTAIN HAWAII A...

Page 57: ...pt OFF TIME and move to CHANNEL To select channel To ON VOLUME To set the volume level To move to MODE Choose ONCE or EVERYDAY To ON OFF TIMER Choose YES to accept the timer setting choose NO if you don t wish to accept Press the OK button to finish Press the MENU button to exit the menu The on off time cannot be set to locked or guarded channels In order for the on off timer to work the clock mus...

Page 58: ...d You can also access the FRONT CONTROL PANEL screen by using the MENU button on the front of the TV instead of the remote control It appears between INITIAL SETUP and PICTURE ADJUST screen and it has INPUT VIDEO STATUS and ASPECT menus Choose INPUT by pressing MENU on the front panel and choose a mode by using the CHANNEL buttons OPERATE Input Use these buttons to move up or down all the availabl...

Page 59: ... before the channel currently onscreen Return Lets you program a specific channel to return to while scanning through the channels using the CH and CH buttons TV Returns to the TV mode Press the RETURN TV and hold for three seconds The channel currently active has been programmed as your return channel Now scan through the channels using the CHANNEL buttons Press the RETURN TV You will return to y...

Page 60: ...hange the mode by pressing the π buttons You can also access the FRONT CONTROL PANEL screen by using the MENU button on the side of the TV instead of the remote control It appears between INITIAL SETUP and PICTURE ADJUST screen and it has INPUT VIDEO STATUS and ASPECT menus Choose VIDEO STATUS by pressing MENU on the side panel and choose a mode by using the CHANNEL buttons OPERATE Video Status VI...

Page 61: ...n you change the mode Notes When you are receiving a digital broadcast if there are other languages you can change the language by pressing the ML MTS button Keep the TV in stereo mode to get the best sound quality The sound will work in stereo mode even if a certain broadcast is in mono sound only Choose the mono setting to reduce excessive noise on a certain channel or broadcast Selecting SAP wi...

Page 62: ...ep by pressing MENU If the clock sleep timer or on off timer are not set the display screen will show CLOCK NOT SET SLEEP TIMER OFF and ON OFF TIMER OFF respectively Display 05 KLVX PBS JAZZ FESTIVAL NOW SLEEP TIMER ON OFF TIMER ON TIME OFF TIME 12 20 PM OFF EVERYDAY 7 00 PM 10 00 PM Display Time Channel Off C C Closed Caption Use the C C Closed Caption button to select the mode of closed caption ...

Page 63: ...s have a D in front of the channel number The maximum number of channels you can register is 24 If you have registered the maximum number of channels and try to register more channels the oldest channel you registered will be deleted Sub channels can not be registered The newest channel you registered will appear at the top of the list Regarding digital channels see page 69 70 Delete the favorite ...

Page 64: ...MA With this ratio a normal 4 3 aspect picture is stretched to fit the dimensions of the 16 9 aspect screen CINEMA This ratio zooms in on the center part of a 4 3 aspect picture blowing it up to fill the 16 9 screen FULL This is the ratio to use when watching 16 9 High Definition broadcasts PANORAMA ZOOM This ratio stretches the High Definition 16 9 aspect image to eliminate the black side bars CI...

Page 65: ...PANEL screen by using the MENU button on the front of the TV instead of the remote control It appears between INITIAL SETUP and PICTURE ADJUST screen and it has INPUT VIDEO STATUS and ASPECT menus Choose ASPECT by pressing MENU on the front panel and choose a mode by using the CHANNEL buttons OPERATE SLIM can only be dispalyed when the signal is ATSC 480i or 480p If the televison receives a 16 9 s...

Page 66: ...ions of your DVD player These functions include play rewind fast forward stop still pause previous next tray open close power on and power off Move the selector switch to DVD to operate The remote is preset with the code 000 to control JVC brand DVD players For any other manufacturer s brand DVD player please see the code chart and instructions on page 28 You can use this remote control to operate...

Page 67: ...while you are doing this the background screen will turn blank In this case the tuner will switch to digital since you are accessing the digital setup menu Digital Setup Digital Setup Select Back BACK Exit MENU Operate PCM Antenna Level Digital Sound Software Version Software Update Confirms the present antenna level Press the MENU button π To DIGITAL SETUP To enter π To Antenna Level To enter Ant...

Page 68: ...es not have Dolby Digital decoder select PCM If you don t select PCM it cannot output the sound from the speakers For connecting an amplifier using the optical output see page 19 At first insert the SD Multi media card into the memory card slot This function will appear only when you insert an SD Card Press the MENU button π To DIGITAL SETUP To enter π To Software Update To enter π Checks the card...

Page 69: ...Sub Channels By using the SUB CH button you can select a sub channel easily For example to move to sub channel 123 45 Press 1 One Press 2 Two Press 3 Three Press the SUB CH button Press 4 Four Press 5 Five Press the TUNE button Note If there are more than 2 major channels select the digital channel by using the π buttons and then press the OK button You can view the program from the GUIDE Notes Th...

Page 70: ...eiving a signal NO PROGRAM appears on the television screen It appears when that channel is not receiving a signal and you have the Noise Muting function OFF and you have a single screen It moves automatically every two seconds to prevent the screen from burn in See page 6 Note Even if NO PROGRAM appears on the screen your timer functions and auto shut off functions that you set are still active N...

Page 71: ...was not reset See page 56 Tint and Color may be improperly adjusted See page 53 The Video Status mode may be turned to the wrong setting See page 67 There could be interference from another electrical appliance such as a computer another TV or VCR Move any such appliances further away from the TV There could be interference from a high wattage appliance like a hairdryer or vacuum operating nearby ...

Page 72: ...72 LCT1885 001A A ENG 72 7 20 05 9 08 11 AM ...

Page 73: ...73 LCT1885 001A A ENG 73 7 20 05 9 08 11 AM ...

Page 74: ... Vp p burst signal 75 ohms Digital In HDMI jack x 1 Note The Digital In terminal is not compatible with picture signals of a personal computer 47 1 4 x 48 7 6 x 24 1 2 120 x 116 9 x 82 2 remote control unit x 1 AA batteries X 2 Dimensions inch W X H X D cm Weight lbs kg Accessories Audio Output Jacks FIX 500mVrms 4dBs Low impedance 1000 Hz when modulated 100 170 77 Optical Output Digital Audio Dig...

Page 75: ...75 Notes LCT1885 001A A ENG 75 7 20 05 9 08 11 AM ...

Page 76: ...76 Notes LCT1885 001A A ENG 76 7 20 05 9 08 11 AM ...

Page 77: ...77 Notes LCT1885 001A A ENG 77 7 20 05 9 08 11 AM ...

Page 78: ...78 Notes LCT1885 001A A ENG 78 7 20 05 9 08 12 AM ...

Page 79: ...79 Notes LCT1885 001A A ENG 79 7 20 05 9 08 12 AM ...

Page 80: ...VC COMPANY OF AMERICA Division of JVC Americas Corp 1700 Valley Road Wayne New Jersey 07470 JVC CANADA INC 21 Finchdene Square Scarborough Ontario Canada M1X 1A7 LCT1885 001A A ENG 80 7 20 05 9 08 12 AM ...

Reviews: