


Page 4
May 2, 2003 11:22 am
— 4 —
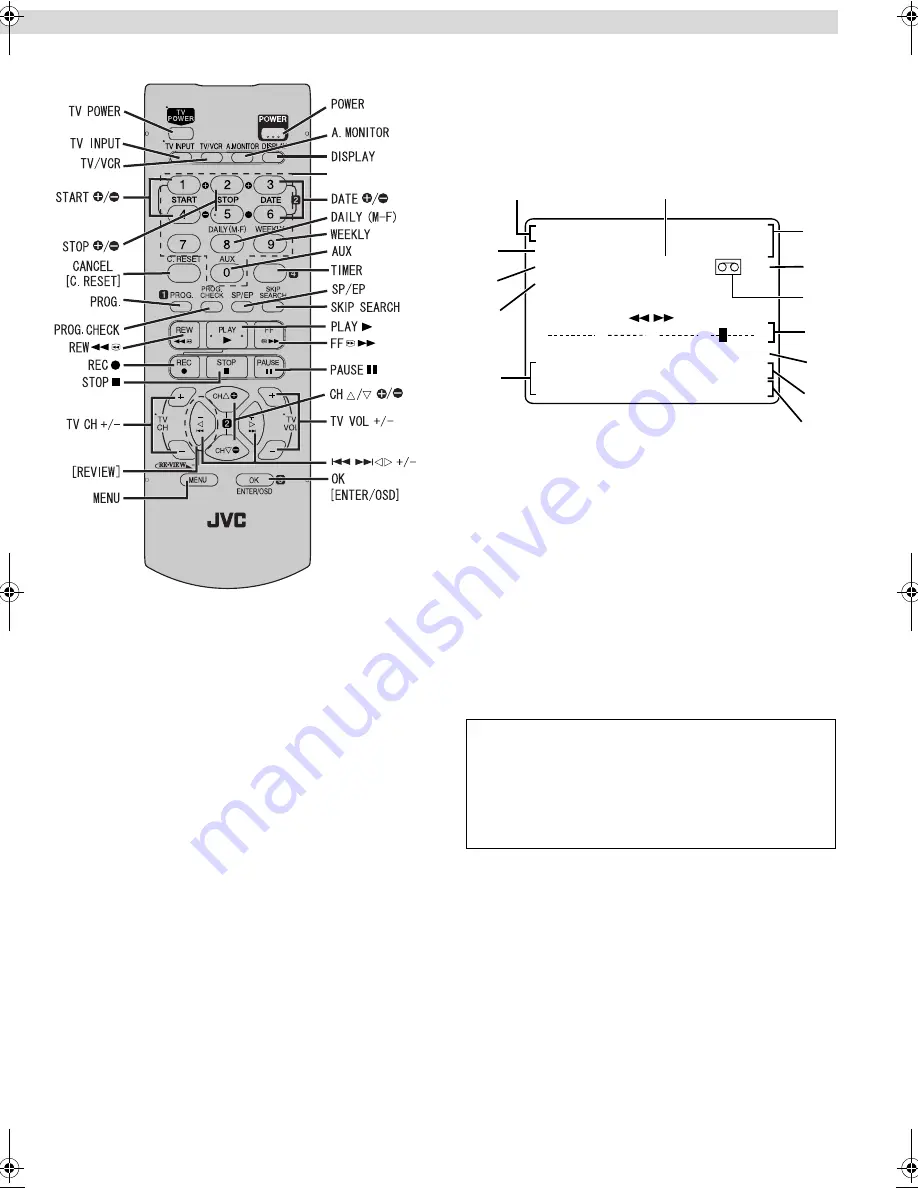
Remote
On-screen display
If you press
OSD
(
OK
) on the Remote when “SUPERIMPOSE” is
set to “ON”(
墌
pg. 13), you can see the current VCR status on the
TV screen. To clear the time counter, press
OSD
(
OK
) again.
The indications are not recorded even if the VCR is in the
recording mode.
A
Channel and auxiliary input
B
Day and clock time
C
STEREO program indication
D
SAP indication
E
Audio monitor indications
F
Time counter
G
Tape Remaining Time
H
Index number
I
Tape position
J
Cassette mark
K
Tape speed
L
VCR operation mode
M
Timer warning display
To recall an indication
TIMER
CANCEL
Number keys
A
Press
OSD (OK)
.
●
All indications corresponding to the current status are
displayed for 5 seconds. After that, the counter
information and RECORD/PAUSE (if in the Record Pause
mode), are left displayed on the screen.
B
Press
OSD (OK)
again to clear the display.
●
The RECORD/PAUSE indication is left displayed on the
screen.
B
+
+
+
E
CH125
RECORD
THU
12:00 AM
PAUSE
STEREO –WARNING–
SP
SAP
TIMER RECORDING
TO START SOON
(CANCEL)
INDEX 1
NORM
REMAIN
1:00
HI-FI
COUNT
–1:23:45
A
B
C
D
E
L
K
J
I
H
G
F
M
– Buttons, Connectors and Indicators –
HR-S8010UM-EN.fm Page 4 Friday, May 2, 2003 11:25 AM


