background image

9

Karaoke features

Karaoke

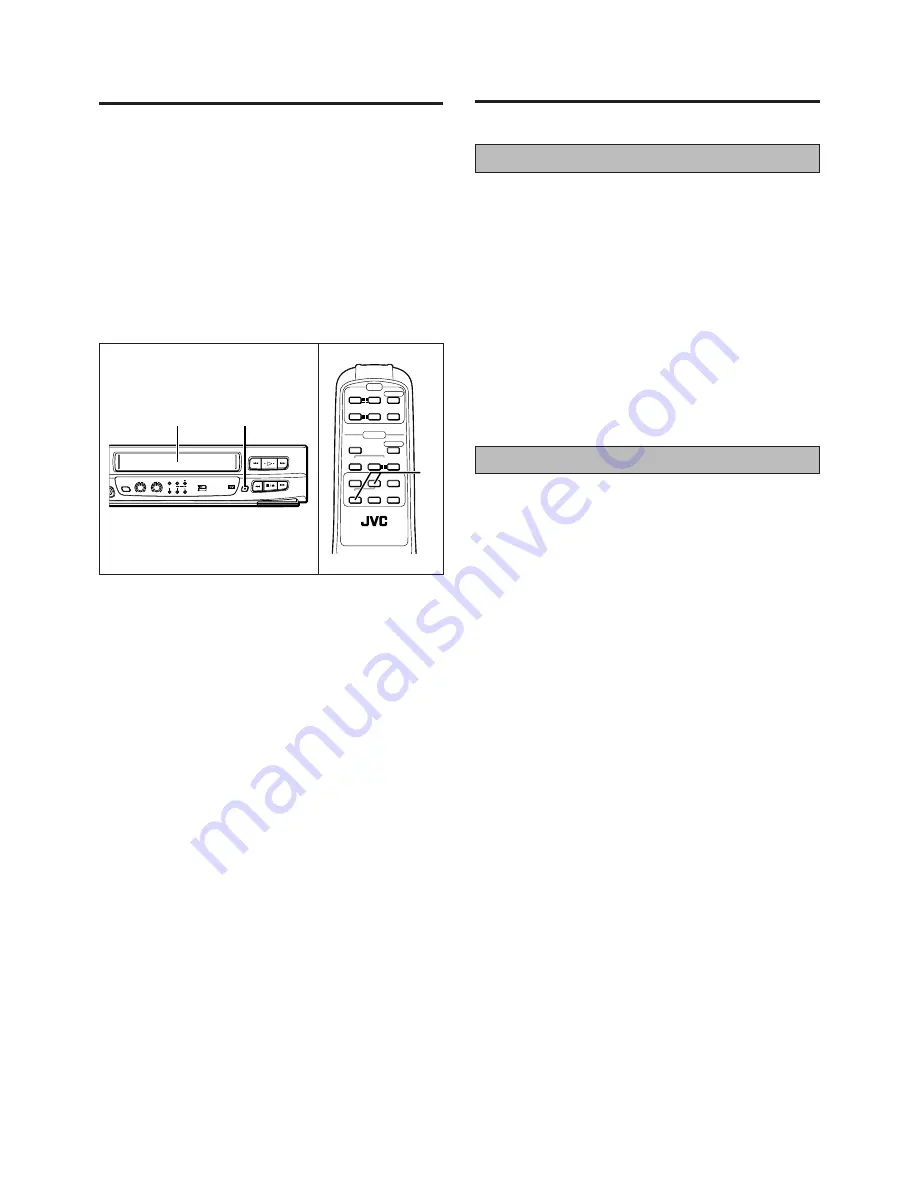
Use this feature to enjoy karaoke video. Connect a microphone
to both MIC 1 and MIC 2 for duets.

Insert a pre-recorded Karaoke tape.

Press the PLAY 

3

 button.

Adjust the MIC volume as necessary.

Adjust the DIGITAL ECHO volume as necessary.

Start singing.

Karaoke search

Use this feature to access to the start of the next tune to be sung.

Press Karaoke search 

4

 or 

¢

 button.

Playback will start automatically, when the specified song
is found.

Notes:

Karaoke search does not work with a tape which has no
signal on its normal soundtrack. Also, if the length of blank
parts between tunes is shorter than 3 seconds, if the tune
has a fade-out ending, or if the tape contains excessive
noise signals, Karaoke search may not work properly with
that tape.

When you are not using the microphone, disconnect the
microphone from the MIC input terminals. When connecting
and disconnecting the microphone, it is recommended to set
the power of video cassette player to OFF.

1

2

3

4

5

1

Use the following procedure to record TV programmes on a
blank video tape.

Before proceeding:

To record TV programmes, the video cassette player must
be connected to the TV as shown in connection B of the
“Connections” section.

Turn on the power of the TV and video cassette player.

Make sure that the video cassette’s safety tab is intact. If it
has been removed, cover the hole with adhesive tape.

Recording

1

2

Load a blank video tape.

Press the Record 

 button to start recording. (On the

remote control unit press the Record 

  and Play 

3

3

3

3

3

button at the same time.)
The recording indicator will light during recording.

7

Press the Stop/Eject 

§

 button or the remote control’s

Stop 

7

 button to stop recording.

To stop recording temporarily:

7

Press the Pause 

8

 button.

The recording indicator will blink.
Press the Play 

3

 button to resume recording.

Notes:

To engage recording standby, press the Record 

  button

and then press the Pause 

8

 button. The recording indicator

will blink during recording standby. Press the Play 

3

 button

again to start recording.

If the Record 

 button does not work, check to see if the

cassette safety tab has been removed.

The player automatically stops when record-standby contin-
ues for more than 5 minutes.

The video tape will be rewound automatically when the end
of the tape is reached.

1

2

2

-    TVCH    +

-   VOLUME   +

TV/VIDEO

AUTO

- TR

TV/VIDEO

OPERATE

VIDEO

OPERATE

REMOTE CONTROL UNIT

+

-

(

L

[

J

+

(

TV

AUDIO

MONITOR

NTSC
ON PAL TV

NTSC4.43

NTSC3.58

STANDBY

OPERATE

PAL NTSC

MAX

MIN

MIC

10

0

DIGITAL ECHO

R

L

Summary of Contents for HR-P91K

Page 1: ...TIONS PU30425 1937 HR P91K VIDEO CASSETTE PLAYER ENGLISH PAL NTSC VIDEO CASSETTE PLAYER HR P91K AUDIO MONITOR NTSC ON PAL TV NTSC4 43 NTSC3 58 STANDBY OPERATE PAL NTSC MIC 1 2 MAX MIN MIC 10 0 DIGITAL ECHO R L ...

Page 2: ...he moisture dry When transporting 7 Be sure to remove cassette from VCP before packing 7 Avoid violent shocks to the VCP during packing and trans port 7 Only cassettes marked VHS can be used with this video cassette player Table of contents Thank you for purchasing this JVC video cassette player To ensure optimum performance of this unit please read this instruction manual thoroughly Precautions 2...

Page 3: ... is ejected STANDBY Rewind 1 indicator Lights when the power turns off Standby mode Blinks during rewind mode and Karaoke search Blinks slowly during rewind power off mode Play Fast forward indicator Lights during playback mode Blinks during fast forward mode and Karaoke search Blinks slowly during repeat playback mode Audio L R indicators Lights the selected audio output Record indicator Lights d...

Page 4: ...ch playback 7 Play 3 button To start playback 8 Record button Press the Record and Play 3 3 3 3 3 buttons together to start recording 9 OPERATE TV button To turn the TV power on and off 0 TV VIDEO TV button To switch TV between TV and VIDEO or AV OPERATE Player button To turn the power on and off standby mode TRACKING buttons To adjust tracking during playback Fast forward Z button To fast forward...

Page 5: ... connection is in addition to connec tion A Follow steps 1 and 2 of Connection A Connect the TV s VIDEO OUT and AUDIO OUT termi nals to the video cassette player s VIDEO IN and AU DIO IN terminals Connect the TV s VIDEO IN and AUDIO IN terminals to the VCP s VIDEO OUT and AUDIO OUT terminals Connect the power cord to your household AC outlet TV system The TV system switch should be set as follows ...

Page 6: ... channel adjustment screw to the right and vice versa Adjust the TV picture with the TV s tuning controls Using the TV while the video cassette player is connected To watch a normal TV broadcast select a TV station with the TV s channel selector 7 Insert the cassette as shown and push it gently into the video cassette player Thevideocassetteplayerwillbeturnedonautomaticallyand the cassette will be...

Page 7: ...s an NTSC 4 43 setting Select NTSC 4 43 to record NTSC 4 43 signal NTSC PAL and MESECAM video tapes can be played back on this video cassette player Refer to the Colour system output mode selection section for details Before proceeding Turn on the power of the TV and video cassette player Make sure that the TV is set to the video channel or that the TV s TV VIDEO switch is set to VIDEO refer to th...

Page 8: ...ds When released normal playback will continue Disturbances in the shuttle search picture are normal and do not indicate a problem with the video cassette player 1 Repeat playback Use this feature to repeat playback of a cassette 20 times During playback Press the Play 3 button for more than 5 seconds The Play indicator will blink slowly and playback of the cassette will repeat 20 times automatica...

Page 9: ...e TV as shown in connection B of the Connections section Turn on the power of the TV and video cassette player Make sure that the video cassette s safety tab is intact If it has been removed cover the hole with adhesive tape Recording 1 2 Load a blank video tape Press the Record button to start recording On the remote control unit press the Record and Play 3 3 3 3 3 button at the same time The rec...

Page 10: ...nput and output connectors of the player to a stereo amplifier When listening to sound from the connected stereo system turn down the sound volume of the TV completely CAUTION L This player has a dynamic range of more than 90 dB with regards to its Hi Fi audio capability It is recommended that you check the maximum level if you are going to listen to the Hi Fi audio signals through a stereo amplif...

Page 11: ...the video cassette player s buttonpressed Is the TV set to the video channel Is a cassette loaded Aretheconnectionscorrect Set the Colour System Out put switch according to the recorded tape system Is the video cassette player in the playback mode Istrackingadjustedproperly Is the TV adjusted properly Install this VCP a little way apart from the TV set The batteries are weak Replace the batteries ...

Page 12: ...o More than 45 dB Horizontal resolution More than 250 lines PAL MESECAM More than 220 lines NTSC Audio Line input level 8 dBm 50 k ohms unbalanced Line output level 6 dBm 1 k ohm unbalanced Frequency response 70 Hz to 10 000 Hz Normal 20 Hz to 20 000 Hz Hi Fi FF REW time Approx 2 min 30 sec with E 180 cassette Power requirements Rating AC 110 240 V 50 60 Hz Operating AC 90 260 V 50 60 Hz Power con...

Page 13: ...13 MEMO ...

Page 14: ...Printed In Japan 0896 YSV YP YP COPYRIGHT 1996 VICTOR COMPANY OF JAPAN LTD C VICTOR COMPANY OF JAPAN LIMITED HR P91K ...

Reviews: