background image

11

SP

No olvide leer esta 
información.

Realice una copia de seguridad de los 
datos importantes que ha grabado

Se recomienda que guarde los datos importantes 
que haya grabado copiándolos en un DVD o 
cualquier otro soporte de grabación. (

 p. 33) 

JVC no se responsabilizará de cualquier pérdida 
de datos.

Realice una grabación de prueba

Antes de grabar los datos importantes, realice 
una grabación de prueba y reproduzca los datos 
grabados para comprobar si el vídeo y el sonido 
se han grabado correctamente.

Reinicie la cámara si no funciona 
correctamente

Esta cámara utiliza una microcomputadora. 
Determinados factores, como el ruido de 
fondo y las interferencias, pueden afectar a su 
funcionamiento. Reinicie la cámara si no funciona 
correctamente.

Precauciones sobre el uso de baterías

 Asegúrese de utilizar baterías JVC BN-VF808U/

VF815U/VF823U.

 Si la cámara sufre una descarga electrostática, 

apague la cámara antes de utilizarla de nuevo.

Si se produce un fallo de funcionamiento, 
deje de usar inmediatamente la cámara y 
consulte con su distribuidor local de JVC.

 Si se produce un problema al utilizar la tarjeta 

microSD, lleve la tarjeta junto con la cámara 
al servicio técnico. Si falta alguno de los dos, 
no se podrá diagnosticar la causa del fallo y la 
cámara no se podrá reparar.

 Durante la reparación o la revisión de la 

cámara, es posible que se borren datos 
grabados. Antes de realizar una reparación o 
revisión, haga una copia de seguridad de todos 
los datos.

Como las cámaras se pueden utilizar 
en un punto de venta para realizar 
demostraciones, el modo de demostración 
está activado de forma predeterminada

Para desactivar el modo de demostración, ajuste 
[MODO DEMO] en [OFF].

No cubra el ventilador (

 p. 14 

(

/

)

Si la cámara se calienta demasiado, se puede 
producir un fallo de funcionamiento.

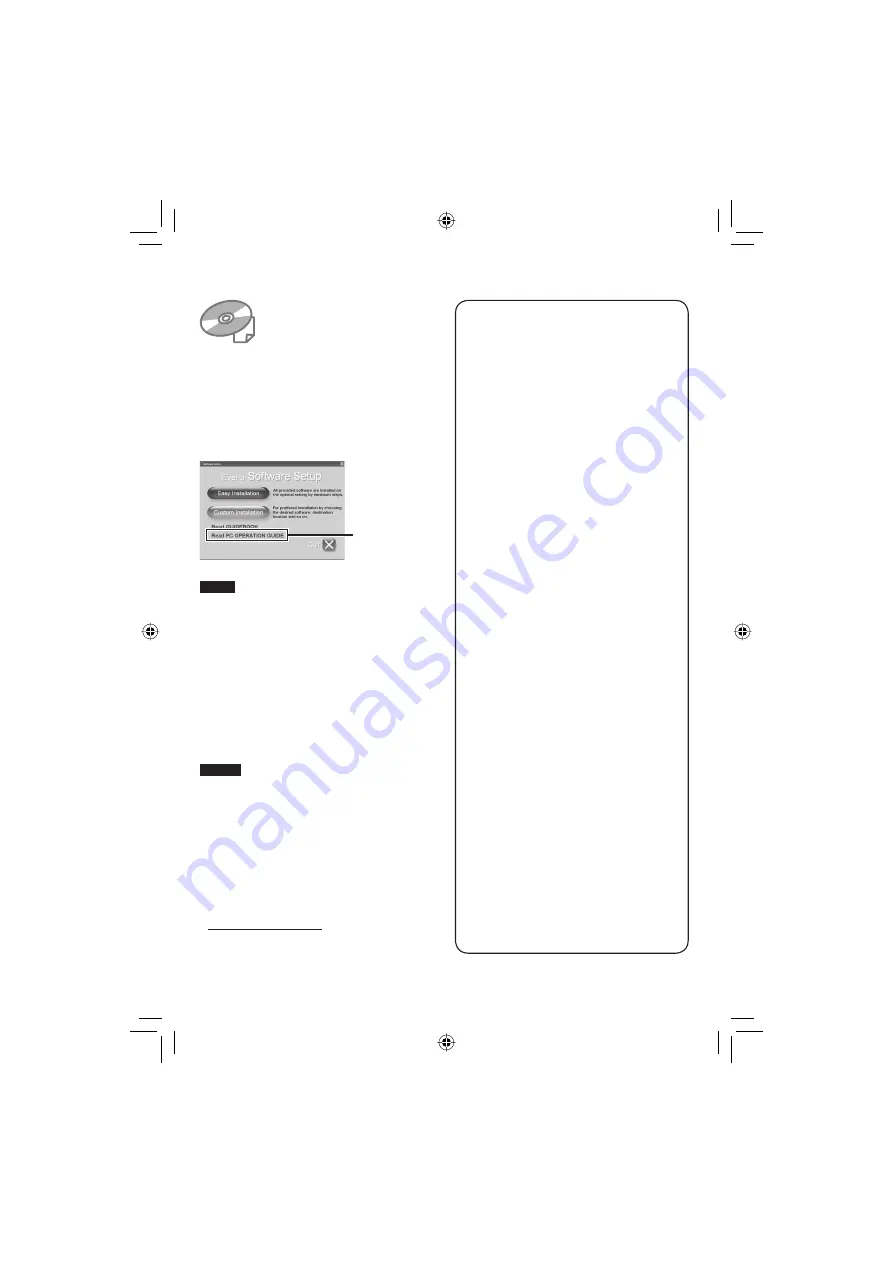
Para Windows

Consulte PC OPERATION GUIDE en el 
CD-ROM suministrado.

!

  Inserte el CD-ROM suministrado en el PC. 

Al cabo de unos momentos, aparece la 
pantalla [Software Setup]. Si no aparece la 
pantalla [Software Setup], haga doble clic 
en el icono de CD-ROM de [Mi PC].

NOTA

Consulte en PC OPERATION GUIDE los 
requisitos del sistema correspondientes al 
software suministrado. Para obtener más 
información, consulte la guía del usuario o la 
ayuda del software.

Para Macintosh

!

  Inserte el CD-ROM suministrado en el equipo.

#

  Haga doble clic en el icono de CD-ROM.

$

  Haga doble clic en “Start.pdf”, en la carpeta 

“PC guide”.

%

  Haga clic en el idioma deseado.

NOTAS

 Si edita vídeos con el software QuickTime 

Component for Everio (para Macintosh) 
suministrado, seleccione el formato 
MPEG-2 TS.

 Si edita vídeos en formato MPEG-2 TS 

en un equipo, ajuste [x.v.Color] en [OFF] 
antes de la grabación.


Adobe

®

 Acrobat

®

 Reader™ o Adobe

®


Reader

®

 deben estar instalados para 

leer archivos PDF. Adobe

®

 Reader

®

 se 

puede encontrar en el sitio web de Adobe: 
http://www.adobe.com/


Para obtener más información sobre las 
operaciones, consulte GUIDEBOOK y 
PC OPERATION GUIDE en el CD-ROM 
suministrado

#

 Clic

FUNCIONAMIENTO 
DE PC

Summary of Contents for GZ-HD30U

Page 1: ...liente Muchas gracias por haber adquirido esta cámara con disco duro integrado Antes de usarla lea la información de seguridad y las precauciones contenidas en las páginas 2 y 3 para garantizar un uso seguro de este producto Para futuras consultas Escriba a continuación el número de modelo situado en la base de la cámara y el número de serie situado en el compartimiento de la batería de la cámara ...

Page 2: ...rchlorate When the equipment is installed in a cabinet or on a shelf make sure that it has sufficient space on all sides to allow for ventilation 10 cm 3 15 16 or more on both sides on top and at the rear Do not block the ventilation holes If the ventilation holes are blocked by a newspaper or cloth etc the heat may not be able to get out No naked flame sources such as lighted candles should be pl...

Page 3: ...iquid has been spilled or objects have fallen into the apparatus the apparatus has been exposed to rain or moisture does not operate normally or has been dropped Remember that this camera is intended for private consumer use only Any commercial use without proper permission is prohibited Even if you record an event such as a show performance or exhibition for personal enjoyment it is strongly reco...

Page 4: ...afety and performance can not be guaranteed ACCESS POWER CHARGE The power turns on if you open the LCD monitor Close the LCD monitor after you finish recording Charge the battery before recording Turn off the camera and attach the battery pack Power charge lamp blinks Charging goes out Charging finished Battery Pack To AC Outlet 110V to 240V AC Adapter Open the cover ...

Page 5: ...10 seconds T Power Button SET DATE TIME YES NO SELECT SET SELECT SET QUIT DATE TIME JAN 31 11 AM 07 2008 CLOCK ADJUST S Set the date and time Select Set Select Set When the message disappears press the power button for at least 2 seconds to turn off the power and then press it again for at least 2 seconds To change the date and time 墌 p 19 Open the lens cover U Select video mode ...

Page 6: ...es when you press the button R Select auto mode INFO AUTO The mode changes when you press the button recording mode only The auto recording indicator appears S Start recording START STOP Press the START STOP button to start recording and press it again to stop 4 h 5 9 m XP 0 0 1 3 0 REC Remaining space on the hard disk Picture Quality Record standby Recording Before recording an important scene it...

Page 7: ... screen Press down the set lever to start playback and press it again to stop To perform operations such as fast forwarding or fast rewinding 墌 p 26 To view video still image on TV 墌 p 28 䡵 䡵 CAUTION Don t forget to make copies after recording To copy files onto DVD discs 墌 p 33 To dub files using a VCR DVD recorder 墌 p 36 To play back a created DVD disc 墌 p 34 To edit files on your computer 墌 p 1...

Page 8: ...ng format MPEG 2 TS To record at maximum picture quality FHD mode To edit videos on your PC You can edit videos in a short time You can dub and edit videos on an HDV compatible device GZ HD40 1440 CBR only You can view video written back from a PC 墌 p 11 䡵 䡵 Recording format NOTES When you edit videos using the provided QuickTime Component for Everio software for Macintosh select MPEG 2 TS format ...

Page 9: ...videos in the selected format AVCHD or MPEG 2 TS are played back Only videos in the selected format AVCHD or MPEG 2 TS are displayed on the LCD monitor but the other videos are also stored CLOCK ADJUST BASIC SETTINGS LANGUAGE STREAM FORMAT DATE DISPLAY STYLE AVCHD MPEG 2 TS RETURN SET QUIT VIDEO QUALITY ZOOM DIS MANUAL SETTING NORMAL QUALITY XP SP EP RETURN SET QUIT in AVCHD format To copy videos ...

Page 10: ...LED Light 24 Registering Files to Events 24 Manual Recording 25 To Change to Manual Recording Mode 25 Program AE 25 Manual Setting in Menu 25 PLAYBACK Playing Back Files 26 Video Playback 26 Still Image Playback 27 Watching Images on TV 28 Connection with TV 28 Playback Operation 29 EDITING PRINTING Managing Files 30 To Capture a Still Image from a Video 30 Deleting Protecting Files 30 Changing th...

Page 11: ...ing repaired or inspected Back up all data before requesting repairs or inspections Because cameras may be used for demonstration in a shop the demonstration mode is set to on by default To deactivate the demonstration mode set DEMO MODE to OFF Do not cover the fan 墌 p 14 If the camera becomes too hot inside it may cause a malfunction For Windows Refer to the PC OPERATION GUIDE in the supplied CD ...

Page 12: ...ONENT Connector AV Connector DC Connector Camera Connection Terminal AC Adapter AP V14U AP V18U Battery Pack BN VF815U Component Cable 墌 p 28 Audio Video Cable 墌 p 29 36 USB Cable Shoulder Strap 墌 p 20 CD ROM 墌 p 11 Remote Control RM V751U 墌 p 13 Lithium Battery CR2025 Pre installed in the remote control unit GZ HD40 Everio Dock CU VC7U 墌 below NOTE Make sure to use the provided cables for connect...

Page 13: ...ore use Beam Effective Area To Reinsert the Battery NOTE The transmitted beam may not be effective or may cause incorrect operation when the remote sensor is directly exposed to sunlight or powerful lighting Pull out the battery holder by pressing the lock tab Effective distance Max 5 m 16 ft Remote Sensor Lock Tab Lithium Battery CR2025 ...

Page 14: ...14 EN Index NOTES The LCD monitor can rotate 270 Power linked operation You can also turn on off the camera by opening closing the LCD monitor Be careful not to cover sensors 7 and during shooting ...

Page 15: ... Space Button Data Battery Button 0 1 墌 p 18 Set Lever Move to Reverse Skip 墌 p 26 Up Backlight Compensation Button Move to Forward Skip 墌 p 26 Down Manual Focus Button FOCUS Move to Reverse Search 墌 p 26 Left Light Button LIGHT 墌 p 24 Move to Forward Search 墌 p 26 Right Program AE Button PROGRAM AE 墌 p 25 Press down Play Pause 墌 p 26 Menu Button MENU LCD Monitor Speaker Fan outlet Access Lamp ACC...

Page 16: ...4 6 0 Exposure Adjustment Indicator Backlight Compensation Indicator Spot Exposure Control Indicator C Iris Lock Indicator During Video Recording Only REC 0 0 4 0 1 4 h 5 9 m XP xvC PHOTO Mode Indicator 墌 p 22 Wind Cut Indicator x v Color Picture Quality Remaining Time 墌 p 22 41 Counter MREC Appears during recording 墌 p 22 MQ Appears during record standby mode Shooting Indicator 墌 p 22 Microphone ...

Page 17: ...Slow Motion P Q Reverse Slow Motion The number on the left shows speed Counter Volume Level Indicator Battery Indicator Date Time Effect Mode Indicator Wipe Fader Effect Indicator During Still Image Playback 1 0 1 0 0 9 8 PM 4 5 5 JA N 2 0 2 0 0 8 1080p Mode Indicator 墌 p 27 Output with 1080p Folder File Number Slide Show Playback Indicator 墌 p 27 Battery Indicator Date Time Operation guide displa...

Page 18: ...with fast moving 䡵 To detach the battery pack Slide and hold BATT step 2 then remove the battery pack NOTES You can also use the camera with just the AC adapter Please do not pull or bend the AC adapter plug and cable This may damage the AC adapter Checking the Remaining Battery Power Preparation Close the LCD monitor to turn off the camera Attach the battery pack mode press INDEX twice mode press...

Page 19: ...t lever to To quit the screen Press MENU NOTE If you do not set the date and time the SET DATE TIME screen appears every time you turn on the camera 䡵 䡵 Language Setting The language on the display can be changed 1 Open the LCD monitor to turn on the camera 2 Press MENU MENU 3 Select BASIC SETTINGS Select Set x v Color REGISTER EVENT BASIC SETTINGS GAIN UP SET QUIT 4 Select LANGUAGE Select Set CLO...

Page 20: ...ush the lens cover strongly Doing so may cause damage to the lens Tripod Mounting Align the camera stud hole with the tripod stud and the mounting socket with the screw and then rotate the camera clockwise to mount it to the tripod NOTE Do not use a tripod on unsteady or unlevel surfaces It could tip over causing serious damage to the camera Eyelet Strap Guide Buckle Lens Cover Switch Lens Cover ...

Page 21: ...t out NOTES Insert and remove the microSD card only while the power is turned off Otherwise data on the card may be corrupted Do not touch the terminal on the reverse side of the label 䡵 R Change the recording medium The camera is programmed to record on the built in hard disk when it is shipped from the factory You can change the recording medium to microSD card AVCHD format only Set REC MEDIA FO...

Page 22: ...tings in VIDEO QUALITY 䡵 䡵 䡵 Slide the mode switch to select video mode NOTES If the camera is not operated for 5 minutes while the power is on it turns itself off automatically to conserve power To turn on the camera again when using the battery pack close the LCD monitor and open it again When using the AC adapter perform any operation such as zooming A new file will be created for every 4 GB Do...

Page 23: ... open it again When using the AC adapter perform any operation such as zooming The sides of still images recorded in 16 9 size may be cut off when printed Check whether 16 9 size prints can be printed at your local print store When you turn off the camera after the recording is paused and turn it on again the QUICK REVIEW and DELETE button cannot work Still Image Recording Preparation Open the LCD...

Page 24: ...ht conditions No display Deactivates this function 䡵 Registering Files to Events If you select an event to register the file to before starting recording the file will be registered to the selected event thus making the file easy to find at playback Preparation Select mode Select the recording mode 1 Press MENU MENU 2 Select REGISTER EVENT Select Set x v Color REGISTER EVENT BASIC SETTINGS GAIN UP...

Page 25: ...oting in extremely bright surroundings such as in snow 䡵 䡵 䡵 SPOTLIGHT Select this when a spotlight makes a subject appear too bright VTWILIGHT Makes evening scenes look more natural 5 NIGHT Select this to raise the sensitivity when in dim surroundings NOTE It is recommended to use the tripod in NIGHT mode because the shutter speed becomes slow Manual Setting in Menu In the manual recording mode 1...

Page 26: ...the search speed maximum 60x Turn down the volume Turn up the volume Speaker volume Headphone volume PLAYBACK Playing Back Files Video Playback Slide the mode switch to select video mode Select the playback mode PLAY REC SELECT VIDEO 1 1 SELECT SET SORT The index screen appears Select the desired file Select Set To return to the index screen Press INDEX To check the file information Press AUTO INF...

Page 27: ...1 1 SELECT SET SORT The index screen appears Select the desired file Select Set Slide the mode switch to select still image mode Rotate 90 degrees counterclockwise Display the previous file Start end the slide show Display the next file Rotate 90 degrees clockwise During the slide show moving the set lever to changes the playback order Operations during Playback Still Image Playback ...

Page 28: ... using the HDMI connector NOTE When connecting to a 1080p compatible TV set HDMI OUTPUT to AUTO1 When this is set 1080p appears at the top of the display 䡵 To connect using the COMPONENT connector NOTE Change the settings in COMPONENT OUTPUT according to the connection 䡵 Watching Images on TV HDMI Connector AC Adapter DC Connector HDMI Connector HDMI Cable optional To AC Outlet AV Cable AC Adapter...

Page 29: ...hen connecting the camera to the VCR DVD recorder Turn on the VCR DVD recorder and set the VCR DVD recorder to its AUX input mode 4 Start playback on the camera 墌 p 26 27 To display camera s on screen display on TV Set DISPLAY ON TV to ON NOTE When the video was recorded with x v Color set to ON change the x v Color setting on TV For details refer to the TV s instruction manual 䡵 AV Cable DC Conne...

Page 30: ... or vertical directions depending on the picture quality of the source video file Images cannot be captured when the video is in search or slow motion playback The continuous shooting function cannot be used to capture images Deleting Protecting Files Protected files cannot be deleted To delete them release the protection first Once files are deleted they cannot be restored Check files before dele...

Page 31: ... the set lever to Dividing Files You can divide the selected video into two AVCHD format only Preparation Select mode Select the playback mode 1 Press MENU MENU 2 Select DIVIDE Select Set EFFECT WIPE FADER DIVIDE VIDEO BASIC SETTINGS DIVIDE SET QUIT 3 Select the desired file Select Set DIVIDE SELECT SET QUIT Playback starts 4 Set the point at which you want to divide the file DIVIDE 00 00 04 SET Q...

Page 32: ...ng files listed by recording date 5 Select the file to add to playlist Select Set TOTAL SEP 01 2008 0 999 SELECT REGISTER To preview scenes press INDEX When the index screen of individual scenes appears select the file To return to the previous screen press INDEX Files recorded in 1440 CBR picture quality are displayed with a 1440 CBR icon Files recorded in other than 1440 CBR picture quality are ...

Page 33: ...he HDD and microSD card mode mode AVCHD Using a DVD Burner to Copy Files from the Camera The files in the camera can be backed up to a DVD disc using a DVD burner This disc cannot be played in a normal DVD player Use one of the following methods to view the disc Playback the disc using the camera To play back the created disc using the camera 墌 p 34 Playback the disc using a DVD burner Playback on...

Page 34: ...the thumbnails by date Select Set ALL SCENES NO YES DO YOU WANT TO MAKE AN AUTOMATIC HEADLINE ON THE DISC TOP MENU SET TOP SELECT In case of still image or video in MPEG 2 TS format go to step 5 5 Select EXECUTE Select Set ALL SCENES CANCEL EXECUTE 0 100 DVD DL DVD 3 5 SELECT SET TOP The files are copied on the disc When COMPLETED appears press down the set lever to complete the operation When INS...

Page 35: ...the Everio dock with an i LINK cable sold separately 5 Dub the playlist 1 Press MENU 2 Select DUBBING PLAYBACK NOTES Be sure to use the VC VDV204U or VC VDV206U i LINK cable Operation using the i LINK cable is not guaranteed on all of the devices Video is not displayed on the camera during dubbing i LINK OUTPUTTING appears on the screen If a dubbed video is played back on an HDV device the video a...

Page 36: ...ss MENU 2 Select DUBBING PLAYBACK 3 Select the desired playlist 4 Select YES A black screen is displayed for 5 seconds at the first and the last scene 3 At the point you want to start dubbing start recording on the VCR DVD recorder Refer to the VCR DVD recorder s instruction manual To stop dubbing Stop recording on the VCR DVD recorder then press START STOP again To hide the date or icons on the s...

Page 37: ...R IMAGE to SD Recording stops automatically after 12 hours of continuous recording The focus is not adjusted automatically Clean any dirt or water droplets from the lens Set focus to the automatic mode If you are recording in a dark place or a subject that has no contrast between dark and light adjust the focus manually A function cannot be activated Check the indication that represents that funct...

Page 38: ...ong and thin etc Change VIDEO OUTPUT in the BASIC SETTINGS to match your TV Dubbing When dubbing the connected video device does not start recording automatically Operate the video device manually to start and stop recording Other problems The camera operates slowly when switching between video mode and still image mode or when switching the power on or off Copy all files from the media onto your ...

Page 39: ...low the camera to be subject to impact vibrations CANCELLED BECAUSE PLAYLIST NUMBER LIMIT EXCEEDED When creating a DVD reduce the number of playlists to be saved AVCHD Reduce the number of videos to add to the playlist to 999 files or less MPEG 2 TS Reduce the number of videos to add to the playlist to 99 files or less PROCESSING CANCELLED DUETO LACK OF SPACE FOR OPERATION NO REGISTERED SCENES IN ...

Page 40: ...l LED Light Within 1 5 m 4 9 ft recommended shooting distance For video audio Recording Playback format AVCHD mode Video MPEG 4 AVC H 264 Audio Dolby Digital 2ch MPEG 2 TS mode Video MPEG 2 TS Audio MPEG 1 Layer 2 Signal format 1080 60i 䡵 䡵 Recording mode video AVCHD XP VBR average of 17 Mbps SP VBR average of 12 Mbps EP VBR average of 5 Mbps MPEG 2 TS FHD VBR average of 26 6 Mbps 1440 CBR CBR ave...

Page 41: ...200 MPEG 2 TS FHD 600 360 1440 CBR 600 360 Approximate number of storable images for still image Recording medium Image size Quality HDD microSD Card GZ HD40 120 GB GZ HD30 80 GB 512 MB 1 GB 2 GB 4 GB 8 GB 16 9 2432 x 1368 FINE 9999 9999 330 670 1350 2700 5420 2432 x 1368 STANDARD 9999 9999 510 1040 2100 4200 8420 1920 x 1080 FINE 9999 9999 510 1040 2100 4200 8420 1920 x 1080 STANDARD 9999 9999 80...

Page 42: ...ime remove from charger or powered unit when not in use as some machines use current even when switched off ATTENTION The product you have purchased is powered by a rechargeable battery that is recyclable Please call 1 800 8 BATTERY for information on how to recycle this battery Recording Medium Be sure to follow the guidelines below to prevent corruption or damage to your recorded data Do not ben...

Page 43: ...t from dropping Attach the shoulder strap securely and fasten the grip belt securely When using the camera with a tripod attach the camera to the tripod securely If the camera drops you may be injured and the camera may be damaged When a child uses the unit there must be parental guidance Declaration of Conformity Model Number GZ HD40U GZ HD30U Trade Name JVC Responsible party JVC AMERICAS CORP Ad...

Page 44: ... 24 31 Everio Dock 12 H Hard Disk 42 HDMI Connection 28 Headphone Volume 26 I Image Rotation 27 L Language Setting 19 LCD Monitor 16 42 LED Light 24 Lens Cover 20 M Manual Recording 25 Menu Settings 21 Microphone 15 microSD Card 21 P Playlist 32 Program AE 25 Protecting Files 30 R Recordable Time Number of Images 41 Recording Medium 42 Remote Control 13 15 S Speaker Volume 26 T TV 28 Z Zooming 24 ...

Page 45: ...MEMO ...

Page 46: ... los orificios de ventilación están bloqueados por un periódico o paño etc el calor no podrá salir No deberá ser colocada en el aparato ninguna fuente de llama sin protección tales como velas encendidas Cuando descarte las pilas deberá considerar los problemas ambientales y respetar estrictamente las normas locales o leyes vigentes para la eliminación de estas pilas La unidad no deberá ser expuest...

Page 47: ...estas instrucciones 2 Conserve estas instrucciones 3 Preste atención a las advertencias 4 Siga todas las instrucciones 5 No utilice este aparato cerca del agua 6 Limpie sólo con paño seco 7 No bloquee ninguna abertura de ventilación Instale de acuerdo con las instrucciones del fabricante 8 No lo instale cerca de ninguna fuente de calor tales como radiadores calefactores cocinas u otros aparatos in...

Page 48: ...rantizar la seguridad ni el rendimiento ACCESS POWER CHARGE La cámara se enciende al abrir la pantalla LCD Cierre la pantalla LCD tras terminar de grabar Cargue la batería antes de grabar Apague la cámara e inserte la batería Luz de alimentación carga Parpadea carga en curso Se apaga carga terminada Batería A la toma de CA de 110 V a 240 V Adaptador de CA Abrir la cubierta ...

Page 49: ...tación AJUSTE FECHA HORA SÍ NO SELECC AJUSTE SELECC AJUSTE SALIR FECHA HORA JAN 31 11 AM 07 2008 AJUS RELOJ S Ajuste la fecha y la hora Seleccionar Ajustar Seleccionar Ajustar Cuando desaparezca el mensaje pulse el botón de alimentación durante al menos 2 segundos para apagar la cámara y vuelva a pulsarlo durante al menos 2 segundos Para cambiar la fecha y la hora p 19 Abra la cubierta del objetiv...

Page 50: ...El modo cambia al pulsar el botón R Seleccione el modo automático INFO AUTO El modo cambia al pulsar el botón sólo modo de grabación Aparece el indicador de grabación automática S Inicie la grabación START STOP Pulse el botón START STOP para iniciar la grabación y vuelva a pulsarlo para detenerla 4 h 5 9 m XP 0 0 1 3 0 REC Espacio restante en el disco duro Calidad de imagen Espera de grabación Gra...

Page 51: ... el botón selector para iniciar la reproducción y vuelva a pulsarlo para detenerla Para realizar operaciones como avance rápido o retroceso rápido p 26 Para visualizar vídeos imágenes fijas en un televisor p 28 PRECAUCIÓN No olvide realizar copas tras la grabación Para copiar archivos en discos DVD p 33 Para copiar archivos mediante una grabadora de vídeo DVD p 36 Para reproducir un disco DVD crea...

Page 52: ...ormato de grabación MPEG 2 TS Para grabar con la máxima calidad de imagen Modo FHD Para editar vídeos en el PC Es posible editar vídeos en poco tiempo Se pueden copiar y editar vídeos en un dispositivo compatible con HDV GZ HD40 sólo 1440 CBR Se puede visualizar el vídeo grabado desde un PC p 11 Formato de grabación NOTAS Si edita vídeos con el software QuickTime Component for Everio para Macintos...

Page 53: ...los vídeos que tengan el formato seleccionado AVCHD o MPEG 2 TS Sólo se mostrarán en la pantalla LCD los vídeos que tengan el formato seleccionado AVCHD o MPEG 2 TS pero también se guardarán los demás vídeos AJUS RELOJ AJUSTES BÁSICOS LANGUAGE FLUJO DE DATOS ESTILO INDIC FECHA AVCHD MPEG 2 TS VOLVER AJUSTE SALIR CALIDAD DE VÍDEO ZOOM DIS AJUSTE MANUAL CALIDAD NORMAL XP SP EP VOLVER AJUSTE SALIR en...

Page 54: ...hivos en eventos 24 Grabación manual 25 Para cambiar al modo de grabación manual 25 Programa AE 25 Ajuste manual en el menú 25 REPRODUCCIÓN Reproducción de archivos 26 Reproducción de vídeo 26 Reproducción de imágenes fijas 27 Visionado de imágenes en el televisor 28 Conexión con el televisor 28 Operación de reproducción 29 EDICIÓN IMPRESIÓN Gestión de archivos 30 Para capturar una imagen fija de ...

Page 55: ...ntes de realizar una reparación o revisión haga una copia de seguridad de todos los datos Como las cámaras se pueden utilizar en un punto de venta para realizar demostraciones el modo de demostración está activado de forma predeterminada Para desactivar el modo de demostración ajuste MODO DEMO en OFF No cubra el ventilador p 14 Si la cámara se calienta demasiado se puede producir un fallo de funci...

Page 56: ...tor COMPONENT Conector AV Conector de CC Terminal de conexión de la cámara Adaptador de CA AP V14U AP V18U Batería BN VF815U Cable componente p 28 Cable de audio vídeo p 29 36 Cable USB Correa para hombro p 20 CD ROM p 11 Mando a distancia RM V751U p 13 Pila de litio CR2025 Preinstalada en el mando a distancia GZ HD40 Base de conexión Everio CU VC7U abajo NOTA Asegúrese de utilizar los cables sumi...

Page 57: ...z de infrarrojos Para volver a insertar la pila NOTA El haz transmitido no será efectivo o puede provocar un funcionamiento incorrecto si el sensor remoto está expuesto a la luz directa del sol o a un foco de luz muy potente Presione la pestaña de cierre para extraer el soporte de la pila Distancia efectiva Máx 5 m Sensor remoto Pestaña de cierre Pila de litio CR2025 ...

Page 58: ...NOTAS La pantalla LCD puede girar 270 Funcionamiento siempre listo para grabar La cámara también se puede encender y apagar abriendo y cerrando la pantalla LCD Procure no tapar los sensores 7 y durante la filmación ...

Page 59: ...otón de batería de datos 0 1 p 18 Botón selector Mover hacia Botón de salto hacia atrás p 26 arriba compensación de contraluz Mover hacia Botón de salto hacia adelante p 26 abajo enfoque manual FOCUS Mover hacia Botón de búsqueda hacia atrás p 26 izquierda luz LIGHT p 24 Mover hacia Botón de búsqueda hacia adelante p 26 derecha programa AE PROGRAM AE p 25 Presionar Reproducción pausa p 26 Botón de...

Page 60: ...cador de ajuste de exposición Indicador de compensación de contraluz Indicador de control de exposición puntual C Indicador de bloqueo del diafragma Sólo durante la grabación de vídeo REC 0 0 4 0 1 4 h 5 9 m XP xvC PHOTO Indicador de modo p 22 Indicador de reducción de viento x v Color Calidad de imagen Tiempo restante p 22 41 Contador MREC Aparece durante la grabación p 22 MQ Aparece durante el m...

Page 61: ...atrás El número de la izquierda indica la velocidad Contador Indicador de nivel de volumen Indicador de batería Fecha hora Indicador de modo de efectos especiales Indicador de efectos de cortinilla fundido Durante la reproducción de imágenes fijas 1 0 1 0 0 9 8 PM 4 5 5 JA N 2 0 2 0 0 8 1080p Indicador de modo p 27 Salida con 1080p Número de carpeta o archivo Indicador de reproducción automática d...

Page 62: ...ido Para extraer la batería Deslice y mantenga presionado BATT paso 2 y extraiga la batería NOTAS La cámara también se puede usar con sólo el adaptador de CA No estire ni doble el enchufe o el cable del adaptador de CA Se podría dañar el adaptador de CA Comprobación de la carga restante de la batería Preparativos Cierre la pantalla LCD para apagar la cámara Instale la batería Modo pulse INDEX dos ...

Page 63: ...acia Para salir de la pantalla Pulse MENU NOTA Si no ajusta la fecha y la hora la pantalla AJUSTE FECHA HORA aparecerá cada vez que encienda la cámara Ajuste del idioma El idioma en el que se muestra la información de la pantalla puede cambiarse 1 Abra la pantalla LCD para encender la cámara 2 Pulse MENU MENU 3 Seleccione AJUSTES BÁSICOS Seleccionar Ajustar x v Color REGISTRAR EVENTO AJUSTES BÁSIC...

Page 64: ...ierta del objetivo De lo contrario puede dañarse el objetivo Instalación en trípode Encaje el orificio para perno de la cámara con el perno del trípode y el zócalo de fijación con el tornillo a continuación gire la cámara a la derecha para montarla en el trípode NOTA No utilice el trípode en superficies inestables o desniveladas La cámara podría caer y sufrir una avería grave Orificio Guía correde...

Page 65: ... microSD sólo se puede insertar y extraer con la cámara apagada De lo contrario los datos de la tarjeta podrían dañarse No toque el terminal de la parte posterior de la etiqueta R Cambio del soporte de grabación La cámara está preajustada de fábrica para grabar en el disco duro integrado El soporte de grabación se puede cambiar por una tarjeta microSD sólo formato AVCHD Ajuste SOPORTE GRAB VÍDEO y...

Page 66: ... VÍDEO Deslice el interruptor de modo para seleccionar el modo vídeo NOTAS Si no se realiza ninguna operación durante 5 minutos cuando la cámara está encendida ésta se apaga automáticamente para ahorrar energía Para volver a encender la cámara cuando ésta se utiliza con la batería cierre la pantalla LCD y vuélvala a abrir Cuando utilice la cámara con el adaptador de CA realice cualquier operación ...

Page 67: ...a LCD y vuélvala a abrir Cuando utilice la cámara con el adaptador de CA realice cualquier operación como utilizar el zoom Las imágenes fijas grabadas en tamaño 16 9 pueden imprimirse con los lados recortados Compruebe si en su establecimiento habitual pueden imprimir imágenes de tamaño 16 9 Cuando apaga la cámara después de detener la grabación y la vuelve a encender los botones QUICK REVIEW y DE...

Page 68: ...es insuficiente Sin indicación Desactiva esta función Registro de archivos en eventos Si antes de empezar la grabación selecciona un evento en el que desea registrar el archivo el archivo se registrará en el evento seleccionado lo que facilita la localización del archivo para reproducirlo Preparativos Seleccione el modo Seleccione el modo de grabación 1 Pulse MENU MENU 2 Seleccione REGISTRAR EVENT...

Page 69: ...entes extremadamente claros como en la nieve FOCO Cuando un sujeto aparece demasiado claro iluminado por la luz de un foco V ATARDECER Hace que las escenas de atardecer parezcan más naturales 5 NOCHE Seleccione esta opción para aumentar la sensibilidad en entornos con poca luz NOTA Se recomienda utilizar un trípode en el modo NOCHE porque la velocidad de obturación es lenta Ajuste manual en el men...

Page 70: ...del siguiente archivo Bajar el volumen Subir el volumen Volumen del altavoz Volumen del auricular REPRODUCCIÓN Reproducción de archivos Reproducción de vídeo Deslice el interruptor de modo para seleccionar el modo vídeo Seleccione el modo de reproducción PLAY REC SELECT VÍDEO 1 1 SELECC AJUSTE CLASIF Aparece la pantalla de índice Seleccione el archivo que desee Seleccionar Ajustar Para volver a la...

Page 71: ...de índice Seleccione el archivo que desee Seleccionar Ajustar Deslice el interruptor de modo para seleccionar el modo imagen fija Girar 90 grados a la izquierda Ver el archivo anterior Iniciar finalizar la reproducción automática Ver el archivo siguiente Girar 90 grados a la derecha Si durante la reproducción automática se mueve el botón selector hacia se modifica el orden de reproducción Operacio...

Page 72: ...or HDMI NOTA Si se conecta a un televisor compatible con 1080p ajuste SALIDA HDMI en AUTO1 Una vez ajustado aparece 1080p en la parte superior de la pantalla Para realizar la conexión con el conector COMPONENT NOTA Cambie los ajustes de SALIDA COMPONENTES de acuerdo con la conexión Visionado de imágenes en el televisor Conector HDMI Adaptador de CA Conector de CC Conector HDMI Cable HDMI opcional ...

Page 73: ...ra a la grabadora de vídeo DVD Encienda la grabadora de vídeo DVD y ajuste la grabadora de vídeo DVD en el modo de entrada AUX 4 Inicie la reproducción en la cámara p 26 27 Para ver en el televisor la visualización en pantalla de la cámara Ajuste VER EN TV en ON NOTA Si se ha grabado el vídeo con x v Color ajustado en ON cambie el ajuste x v Color en el televisor Para obtener más información consu...

Page 74: ...capturar imágenes cuando el vídeo se reproduce en modo de búsqueda o en cámara lenta Las imágenes se pueden capturar cuando el vídeo se reproduce normalmente o cuando está en pausa La función de toma continua no se puede utilizar para capturar imágenes Eliminación protección de archivos Los archivos protegidos no se pueden eliminar Para eliminarlos primero debe anular la protección Una vez elimina...

Page 75: ...ón de archivos Es posible dividir el vídeo seleccionado en dos Sólo formato AVCHD Preparativos Seleccione el modo Seleccione el modo de reproducción 1 Pulse MENU MENU 2 Seleccione DIVIDIR Seleccionar Ajustar EFECTO CORTINILLA FUNDIDO DIVIDIR VÍDEO AJUSTES BÁSICOS DIVIDIR AJUSTE SALIR 3 Seleccione el archivo que desee Seleccionar Ajustar DIVIDIR SELECC AJUSTE SALIR Se inicia la reproducción 4 Ajust...

Page 76: ... correspondientes ordenados por fecha de grabación 5 Seleccione el archivo que desee agregar a la lista de reproducción Seleccionar Ajustar TOTAL SEP 01 2008 0 999 SELECC REGIST Para obtener una vista preliminar de las escenas pulse INDEX Cuando aparezca la pantalla de índice de escenas individuales seleccione el archivo Para volver a la pantalla anterior pulse INDEX Los archivos grabados en calid...

Page 77: ... grabadora de DVD para copiar archivos de la cámara Se puede hacer una copia de seguridad de los archivos de la cámara en un disco DVD con una grabadora de DVD Este disco no se puede reproducir en un reproductor de DVD normal Utilice uno de los siguientes métodos para ver el disco Reproducción del disco mediante la cámara Para reproducir el disco creado con la cámara p 34 Reproducción del disco co...

Page 78: ...ra y luego encienda la grabadora de DVD 3 Seleccione REPRODUCCIÓN 4 Seleccione la carpeta que desee 5 Seleccione el archivo que desee Para volver a la pantalla anterior pulse INDEX Para ver vídeos imágenes fijas en el televisor Vea la página 28 Copia de seguridad de todos los archivos Preparativos Seleccione el modo o Seleccione unidad de disco duro o tarjeta microSD Conecte la cámara a la grabado...

Page 79: ... se vende por separado 5 Copie la lista de reproducción 1 Pulse MENU 2 Seleccione REPROD COPIA para copiar la lista de reproducción NOTAS Asegúrese de utilizar el cable i LINK VC VDV204U o VC VDV206U No se garantiza un buen funcionamiento en todos los dispositivos con el cable i LINK El vídeo no se visualiza en la cámara durante la copia i LINK EMITIENDO aparece en la pantalla Si un vídeo copiado ...

Page 80: ...ducción en la cámara 1 Pulse MENU 2 Seleccione REPROD COPIA 3 Seleccione la lista de reproducción que desee 4 Seleccione SÍ Aparece una pantalla negra durante 5 segundos en la primera y en la última escena 3 En el punto donde desee iniciar la copia inicie la grabación en la grabadora de vídeo o de DVD Consulte el manual de instrucciones de la grabadora de vídeo o de DVD Para detener la copia Deten...

Page 81: ...as 12 horas de grabación continua El enfoque no se ajusta automáticamente Limpie la suciedad o las gotas de agua que pueda haber en el objetivo Ajuste el enfoque en el modo automático Si está grabando en un lugar oscuro o un sujeto que no ofrece ningún contraste entre las partes oscuras y las claras ajuste el enfoque de forma manual No se puede activar una función Compruebe la indicación que repre...

Page 82: ... y delgadas etc Cambie SALIDA DE VÍDEO en AJUSTES BÁSICOS para que coincida con el ajuste del televisor Copia Al realizar la copia el dispositivo de vídeo conectado no empieza a grabar automáticamente Inicie o detenga la grabación en el dispositivo de vídeo manualmente Otros problemas La cámara funciona con lentitud al pasar del modo de vídeo al modo de imagen fija y viceversa o al encenderla o ap...

Page 83: ...a vibraciones o golpes CANCELADO POR SUPERAR LÍMITE DE NÚMEROS EN LISTA DE REPRODUCCIÓN A la hora de crear un DVD reduzca el número de listas de reproducción que vaya a guardar AVCHD Reduzca el número de vídeos que vaya a añadir a la lista de reproducción a 999 archivos o menos MPEG 2 TS Reduzca el número de vídeos que vaya a añadir a la lista de reproducción a 99 archivos o menos PROCESAMIENTO CA...

Page 84: ...e filmación recomendada Para vídeo audio Formato de grabación reproducción Modo AVCHD Vídeo MPEG 4 AVC H 264 Audio Dolby Digital 2 canales Modo MPEG 2 TS Vídeo MPEG 2 TS Audio MPEG 1 Layer 2 Formato de señal 1080 60i Modo de grabación vídeo AVCHD XP VBR promedio de 17 Mbps SP VBR promedio de 12 Mbps EP VBR promedio de 5 Mbps MPEG 2 TS FHD VBR promedio de 26 6 Mbps 1440 CBR CBR promedio de 27 Mbps ...

Page 85: ...P 3000 1980 100 200 MPEG 2 TS FHD 600 360 1440 CBR 600 360 Número aproximado de imágenes almacenables para imágenes fijas Soporte de grabación Tamaño de imagen Calidad Unidad de disco duro Tarjeta microSD GZ HD40 120 GB GZ HD30 80 GB 512 MB 1 GB 2 GB 4 GB 8 GB 16 9 2432 x 1368 FINA 9999 9999 330 670 1350 2700 5420 2432 x 1368 ESTÁNDAR 9999 9999 510 1040 2100 4200 8420 1920 x 1080 FINA 9999 9999 51...

Page 86: ...uando se guarde durante un periodo de tiempo prolongado Enchufe adaptador cuando no se utilice se debe retirar del cargador o dispositivo eléctrico ya que algunas máquinas utilizan corriente incluso estando apagadas ATENCIÓN La batería que ha adquirido es reciclable Por favor comunicarse al 1 800 8 BATTERY para información sobre como reciclar dicha batería Soporte de grabación Asegúrese de seguir ...

Page 87: ... de mano balancear demasiado la bolsa de la cámara con la cámara dentro deje la cámara en áreas donde haya polvo o arena como en la playa Para evitar que la unidad se caiga Fije bien la correa para hombro y ajuste bien la correa de mano Si utiliza la cámara con un trípode fije bien la cámara en el trípode Si se le cae la cámara puede herirse usted y dañarse la cámara Si un niño utiliza la unidad u...

Page 88: ...uridad en DVD 33 Cubierta del objetivo 20 D Disco duro 42 División de archivos 31 E Eliminación de archivos 30 G Giro de las imágenes 27 Grabación manual 25 L Lista de reproducción 32 Luz LED 24 M Mando a distancia 13 15 Micrófono 15 P Pantalla LCD 16 42 Programa AE 25 Protección de archivos 30 R Registro de eventos 24 31 S Soporte de grabación 42 T Tarjeta microSD 21 Televisor 28 Tiempo de grabac...

Reviews: