background image

MEMO

Summary of Contents for GR-AXM4U

Page 1: ...YT0002 003B Compact VHS For Customer Use Enter below the Serial Nos of the GR AXM4U camcorder and the AA V11U AC Power Adapter Charger The serial numbers are located on the bottom of the GR AXM4U and the AA V11U Model No GR AXM4U AA V11U Serial No ...

Page 2: ...ions or proper disposal Dear Customer Thank you for purchasing the JVC Compact VHS camcorder Before use please read the safety information and precautions contained in the following pages to ensure safe use of your new camcorder Using This Instruction Manual All major sections and subsections are listed in the Table Of Contents Z pg 7 Notes appear after most subsections Be sure to read these as we...

Page 3: ...rsonal safety In order not to defeat the built in safeguards observe the following basic rules for its installation use and servicing ATTENTION Follow and obey all warnings and instructions marked on your product and its operating instructions For your safety please read all the safety and operating instructions before you operate this product and keep this manual for future reference INSTALLATION...

Page 4: ...ng amplifiers that produce heat SERVICING 1 Servicing If your product is not operating correctly or exhibits a marked change in performance and you are unable to restore normal operation by following the detailed procedure in its operating instructions do not attempt to service it yourself as opening or removing covers may expose you to dangerous voltage or other hazards Refer all servicing to qua...

Page 5: ...ore details Z pg 37 The viewfinder switches off automatically to save power when the LCD monitor is opened at an angle of over 60 degrees The LCD monitor turns on off when it is opened closed at approx 60 degrees Or simply play back the tape on a VHS VCR using the Cassette Adapter VHS Playpak Z pg 40 2REW STOP 3PLAY PAUSE BATT RELEASE 1 Hook on Set to PLAY 1 SHOOTING 1 Slide the LENS COVER open cl...

Page 6: ...ulder Strap W T W T W T W T Zoom in Zoom out Digital Hyper Zoom Z pg 19 Random Assemble Editing Z pg 42 44 Program AE with Special Effects Z pg 26 n Cinema n Sepia n Twilight n Sports n High Speed 1 2000 sec Shutter Digital Wipes and Fades Z pg 28 Black Fader Blue Fader Slide Wipe Mosaic Fader Shutter Wipe 3 LCD Color Monitor 90 45 45 The Logical Choice The only compact video cassettes that can be...

Page 7: ...S 22 Exposure Control 22 White Balance Adjustment 23 Focusing 24 Program AE With Special Effects 26 Fade Wipe 28 Using Menu For Detailed Adjustment 30 Instant Titles 32 Self Timer 34 Animation 35 Time Lapse 36 PLAYBACK 37 Basic Playback 37 Features 38 Basic Connections 39 Using The Cassette Adapter 40 EDITING 41 Tape Dubbing 41 Random Assemble Editing R A Edit 42 Insert Editing 45 Audio Dubbing 46...

Page 8: ...TACH BATTERY PACK 3 When charging is completed the END indicator lights Slide the battery pack opposite the direction of the arrow RECORDING TIME USING THE BATTERY PACK ATTACH BATTERY PACK 1 Hook its top end to the camcorder and push the battery pack in until it locks in place DETACH BATTERY PACK 2 Slide BATT RELEASE and pull out the battery pack BATT PACK CHARGE DISCHARGE BN V12U approx 1 hr 10 m...

Page 9: ...e adapter immediately after discharging To avoid interference with reception do not use the AC Power Adapter Charger near a radio Make sure you unplug the DC cord before charging or discharging the battery pack A blinking CHG indicator means that the battery pack has become hot Wait until it cools down to continue The CHG indicator may not light properly with a brand new battery pack or with one t...

Page 10: ...ert a CR2025 lithium battery and push it in CLOSE COVER 5 Close the compartment cover until it clicks in place NOTE See SAFETY PRECAUTIONS Z pg 2 for information on safe handling of lithium batteries Viewfinder Adjustment POSITION VIEWFINDER 1 Adjust the viewfinder manually for best viewability see illustration at left SELECT MODE 2 Set the power switch to CAMERA ADJUST DIOPTER 3 Turn the diopter ...

Page 11: ... FAR or NEAR to move the highlight bar to Cancel then press MENU If you re satisfied with the settings go on to step 5 START CLOCK OPERATION 5 Once you ve set the month day year and time press FAR or NEAR until Set begins to blink then press MENU The Main Menu screen reappears CLOSE MAIN MENU 6 Press MENU NOTES To display the date and time in the viewfinder or the LCD monitor and on a connected TV...

Page 12: ...to move the highlight bar to Tape Length SET TAPE LENGTH 4 Press FAR or NEAR to cycle through until the correct setting appears depending on the tape used T20 20 minutes of recording time T30 30 min and T40 40 min when recording in SP mode CLOSE MAIN MENU 5 Press MENU NOTE The tape remaining time Z pg 16 displayed in the LCD monitor or the viewfinder is correct only if the correct tape length has ...

Page 13: ...SETTE 3 Make sure the label is facing outward CLOSE CASSETTE HOLDER 4 Press PUSH and make sure the holder is closed and locked CLOSE LCD MONITOR 5 First make sure the holder is closed Then close the LCD monitor NOTES Closing the LCD monitor while the cassette holder is still open may cause damage to the LCD monitor A cassette holder can t be opened unless a power supply is attached Make sure that ...

Page 14: ...r 2 and then through the buckle 3 Repeat the procedure to attach the other end of the strap to the other eyelet making sure the strap isn t twisted ADJUST LENGTH 2 Adjust as shown in the illustration at left 1 then slide both keepers snug against the eyelets to prevent slipping 2 Tripod Mounting ALIGN AND TIGHTEN 1 Align the screw and camera direction stud on the tripod with the camera s mounting ...

Page 15: ...en the infrared beam sensor window is directly exposed to sunlight or powerful lighting Buttons Functions With the camcorder s power switch With the camcorder s power switch set set to CAMERA to PLAY 1 Infrared beam Transmits the beam signal transmitting window 2 ZOOM T W buttons Zoom invariable speed Z pg 19 3 PLAY button Playback start Z pg 37 4 STOP button Stop Z pg 37 5 REW button Retake Rewin...

Page 16: ...er then set the power switch to CAMERA The power indicator lights and the camcorder enters the Record Standby mode The scene you re aimed at appears in the LCD monitor with the word PAUSE superimposed upon it START SHOOTING 3 Tilt the LCD monitor upward downward for best viewability Z pg 18 and press the Recording Start Stop button The tally lamp lights while recording is in progress and REC appea...

Page 17: ... may be a delay after you press EJECT until the holder opens Do not use force The tape s remaining time is displayed in the LCD monitor or the viewfinder as shown The indicated remaining time is approximate The time required to calculate the remaining tape length and the accuracy of the calculation may vary according to the type of tape used The tape remaining time displayed in the viewfinder is c...

Page 18: ...u tilt the LCD monitor upward you can shoot from a low angle OPEN LCD MONITOR 1 Make sure the LCD monitor is fully open TILT LCD MONITOR UPWARD 2 The LCD monitor can be tilted upward up to 45 degrees Brightness control You can adjust the brightness of the LCD monitor by turning the BRIGHT dial ADJUST BRIGHTNESS 1 If you want to brighten the image Turn the dial toward If you want to darken the imag...

Page 19: ...n Record Standby set manual focus or Focus Lock Z pg 24 25 then zoom in or out in Record mode The Zoom Level Indicator 5 only moves during optical zoom Once the indicator reaches T all magnification from that point is through digital processing During digital image processing the quality of the image may suffer FEATURE Quick Review PURPOSE To check the end of the last recording OPERATION 1 Press a...

Page 20: ...00U Remote Control Unlit 1 Press VISS once to place the index code INDEX blinks in the viewfinder or the LCD monitor during marking NOTE If VISS is pressed during Record Standby mode the mark is placed where RECORDING START STOP is pressed FEATURE Retake PURPOSE To re record certain segments OPERATION 1 Make sure the camcorder is in the Record Standby mode 2 Press either RETAKE button to reach the...

Page 21: ... mode and then press DISPLAY to select the desired display mode RECORDING Advanced Features DEC 25 96 PM 3 29 43 Date display Time display Date Time display Date Time off mode Date display DEC 25 96 DEC 25 96 PM 10 59 20 Date Time display Time display PM 10 59 20 LCD monitor or viewfinder DISPLAY Quick Rec Records a scene for 5 seconds providing quick scene transitions like those seen in TV progra...

Page 22: ...ting scenes with low contrast backgrounds Switch off DIS when recording with the camcorder on a tripod Exposure Control This feature automatically adjusts the iris for the best available picture quality but you can override and make the adjustment manually SELECT SHOOTING MODE 1 Set the Shooting Mode selector to PRESET BRIGHTEN IMAGE 2 Press maximum 06 The Exposure level indicator appears in the L...

Page 23: ...the Shooting Mode selector to PRESET ADJUST FOCUS 2 Point the camcorder at a white flat object such as a sheet of white paper and adjust focus manually Z pg 25 ADJUST WHITE BALANCE 3 Press MWB until MWB appears then press and hold MWB for more than 3 seconds MWB blinks in the LCD monitor or the view finder during adjustment then stops blinking but stays lit when adjustment is complete NOTES To swi...

Page 24: ...een your subject and the camcorder Engage the focus lock function to lock your subject in before recording When you want your subject to be focused and to appear in a corner of the screen First center on the subject and focus using auto focus mode Then engage the focus lock function and move the camcorder until the subject is where you want it SELECT SHOOTING MODE 1 Set the Shooting Mode selector ...

Page 25: ...Release FAR or NEAR The focus indication is replaced by the focus lock indication and the adjusted focus is locked in RELEASE MANUAL FOCUS MODE 4 Press FAR and NEAR simultaneously The Manual Focus mode is immediately released and the focus lock indication disappears NOTES Be sure to focus the lens in the maximum telephoto position when you use the Manual Focus mode If you focus in on a certain sub...

Page 26: ... PROG AE EFFECT turns the Cinema mode on and off If you set to PRESET pressing PROG AE EFFECT brings up the Effect menu Press again to move the highlight bar to the desired effect Once you decide on an effect it is selected and activated and its indicator appears within 2 seconds If you started this procedure in the Record Standby mode press RECORDING START STOP to begin recording at this point DE...

Page 27: ...effect The picture becomes sepia tinted reddish brown monochrome creating the look of an old photograph Makes dusk and twilight scenes etc look more natural and dramatic White balance is set to Press MWB if you want to change the setting Automatically adjusts to high shutter speed 1 250 to 1 500 to clearly capture fast moving action with less blur Clarity is especially noticeable during slow motio...

Page 28: ...o the desired effect Once you decide on an effect it is selected and reserved and its indicator appears within 2 seconds START RECORDING 3 Press RECORDING START STOP to start recording and activate a fade or wipe in OR END RECORDING Press RECORDING START STOP to stop recording and engage a fade or wipe out DEACTIVATE EFFECT 4 When the Shooting Mode Selector is set to FULL AUTO press FADE WIPE When...

Page 29: ... the picture into from a mosaic pattern SHUTTER WIPE A black screen moves in from the top and bottom closing over the image like a shutter or a new image pushes open the black screen vertically from the center SLIDE WIPE A black screen moves in from the left to gradually cover the image or a new image moves in from right to left ...

Page 30: ... to step 8 If you select Title or Date Time press NEAR to access the selection menu for each function Title Z pg 32 Date Time Z pg 11 If you select Sub Menu press NEAR to bring up the Sub Menu screen Go to step 5 SELECT FUNCTION AT SUB MENU 5 Press or to place the highlight bar on the desired option then press NEAR The selected item begins blinking CHANGE SETTINGS 6 Press or to change the displaye...

Page 31: ...ment Color Filter NOR For normal shooting with no color adjustment lRED Gives recording a reddish tint lBLUE Gives recording a bluish tint Tape Length Allows you to set the tape length depending on the tape used Z pg 12 Title Allows you to superimpose a preset title onto a scene Z pg 32 Date Time Allows you to set the current date and time Z pg 11 Tally ON The tally lamp comes on to signal the sta...

Page 32: ... made yourself onto a scene SELECT SHOOTING MODE 1 Set the Shooting Mode selector to PRESET ACCESS MAIN MENU SCREEN 2 Press MENU ACCESS INSTANT TITLE MENU SCREEN 3 Press or to move the highlight bar to Title then press NEAR The Title menu appears SELECT PRESET TITLE 4 Press or to move the highlight bar to the desired title To create an original title refer to page 33 DISPLAY PRESET TITLE 5 Press M...

Page 33: ...ess MENU The selected characters appear at the bottom of the screen Repeat as many times as desired max 18 To select the location of the next character press FAR or NEAR to move the blinking cursor to the row of squares at the bottom of the screen then press FAR or NEAR to move the blinking cursor underneath the desired location Press when you re done and the blinking cursor returns to the charact...

Page 34: ...e choices Stop when the desired time appears Choose from 15S 30S 1min 5min or select to turn the function OFF Then press FAR twice to return to the Main Menu screen CLOSE MAIN MENU 6 Press MENU START DELAYED RECORDING 7 Press RECORDING START STOP If you set the tally lamp to ON Z pg 31 it begins blinking and the blinking frequency increases about 5 seconds before recording is to start Once recordi...

Page 35: ...30 Press to move the highlight bar down to Rec Time press NEAR and press or to cycle through the choices Then press MENU START RECORDING 4 Press RECORDING START STOP after focusing on the subject The recording stops automatically after the selected period of time ASSEMBLE SERIES OF PICTURES 5 Repeat steps 3 and 4 for the desired number of pictures CHECK YOUR WORK 6 Play back the series of pictures...

Page 36: ... again will cancel the mode You can also set the interval time in the Sub Menu screen Press to move the highlight bar down to Interval Time press NEAR and press or to cycle through the choices Exposure control Z pg 22 manual focusing Z pg 25 and D I S settings Z pg 22 should be performed at this point Once you perform step 5 these settings cannot be changed START TIME LAPSE RECORDING 5 Press RECOR...

Page 37: ... dial toward To darken the image turn the dial toward Speaker volume control You can adjust the speaker volume by turning the SPEAKER VOLUME dial ADJUST VOLUME 1 If you want to turn up the volume Turn the dial toward MAX If you want to turn down the volume Turn the dial toward MIN NOTES The camcorder shuts off automatically after about 5 minutes in Stop mode To turn on again set the power switch t...

Page 38: ...ard Search 1 Press FF during playback Speed is 5 times normal in SP and 15 times normal in EP mode Reverse Search 1 Press REW during playback Speed is as noted above NOTE Noise bars appear and pictures may become monochrome or darken in Shuttle Search This is normal FEATURE Counter Memory Function PURPOSE To make it easier to locate a specific tape segment OPERATION 1 Press COUNTER R M and hold fo...

Page 39: ...o and Video cables between the AUDIO and VIDEO connectors on the camcorder and those on the TV SELECT MODE 2 Set the TV to its VIDEO or AV mode as specified in its instructions Connection To A TV With NO A V Input Connectors Playback ONLY NOTE Use the optional RF V5U RF unit Refer to the RF V5U instruction manual for connection procedure NOTES It is recommended to use the AC Power Adapter Charger ...

Page 40: ...ment door PLAY BACK ON CONNECTED VCR 3 Load the cassette adapter into the VCR and play the tape back as you would any other REMOVE CASSETTE FROM ADAPTER 4 Slide the latch and the compartment door opens automatically Then insert your finger in the hole on the underside of the adapter as shown in the illustration at left push up and remove the cassette NOTES During tape loading and unloading do not ...

Page 41: ...ngage the camcorder s Play mode to find a spot just before the edit in point Once it s reached press PAUSE on the camcorder START EDITING 5 Press PLAY on the camcorder and engage the VCR s Record mode STOP EDITING TEMPORARILY 6 Engage the VCR s Record Pause mode and press PAUSE on the camcorder EDIT MORE SEGMENTS 7 Repeat steps 4 through 6 for additional editing then stop the VCR and camcorder whe...

Page 42: ...R use the controls on the VCR MAKE CONNECTIONS CONNECT TO 1 A JVC VCR EQUIPPED WITH REMOTE PAUSE TERMINAL Connect the editing cable to the Remote PAUSE terminal B JVC VCR NOT EQUIPPED WITH REMOTE PAUSE TERMINAL Connect the editing cable to the R A EDIT connector C NON JVC VCR WITH NEITHER Connect the editing cable to the RM V700U s Pause In jack All other connections are as shown in the illustrati...

Page 43: ...egistered scene s is displayed at the bottom of the screen REGISTER ADDITIONAL SCENES 4 Repeat steps 2 and 3 for each additional scene as many as 8 MAKE CORRECTIONS 5 Press CANCEL during steps 2 and 3 to erase the most recently registered point NOTES The RM V700U can be used to operate other camcorder functions as well Point the RM V700U at the camcorder s remote sensor and press any of the follow...

Page 44: ...he VCR in the specified order END AUTOMATIC EDITING 3 When all selected scenes have been copied the camcorder and VCR enter the still or pause mode Press STOP on both units When finished editing be sure to disconnect the editing cable and the audio video cable NOTES If you performed step 1 C on page 42 MAKE CONNECTIONS keep the remote control pointed at the VCR during editing The on screen display...

Page 45: ...where the new scene should start ENGAGE INSERT EDITING MODE 5 Press and hold INSERT and without releasing INSERT press and release PAUSE The Insert mode is engaged and the scene the camcorder is aimed at appears on the screen BEGIN INSERT EDITING 6 Press RECORDING START STOP When the counter reaches 0 00 00 editing stops automatically and the camcorder enters the Insert Pause mode END INSERT EDITI...

Page 46: ...Dub Standby mode END AUDIO DUBBING 4 Press STOP NOTES Do not press FF or REW during Audio Dub Standby or the edit points will not be accurate If the mike is too close to the TV or if the TV s volume is too high whistling or howling may occur NOTES for Insert Editing and Audio Dubbing Insert Editing and audio Dubbing may not work correctly if the tape contains blank segments or if the recording spe...

Page 47: ...and wipe gently with soft cloth Be careful not to damage the monitor Close the LCD monitor CLEAN LENS 3 Blow it with a blower brush then wipe gently with lens cleaning paper REMOVE EYEPIECE 4 Turn the eyepiece counterclockwise and pull it out CLEAN VIEWFINDER 5 Remove dust using a blower brush RE ATTACH EYEPIECE 6 Align the marks re attach the eyepiece and turn it clockwise NOTES Avoid using stron...

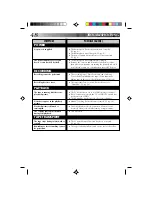
Page 48: ...s In this case check the position of the tab The camcorder Power switch has not been set to CAMERA Z pg 16 PLAYBACK The tape is running but there s no playback picture Noise bars appear in the playback picture Playback picture is blurred or interrupted The counter indication is blurred during Still playback The TV has not been set to its VIDEO mode or channel If A V connection is used the TV s VID...

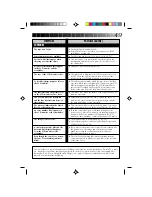
Page 49: ... black spots or bright spots of light red green or blue may appear constantly on the LCD monitor These spots are not recorded on the tape This is not due to any defect of the unit Effective dots more than 99 99 This may occur when the surface or the edge of the LCD monitor is pressed Wipe them gently with soft cloth Gently wipe the LCD monitor in a semicircle because wiping strongly spreads the st...

Page 50: ...50 INDEX Controls q w er t yu i o 4 1 8 7 3 2 6 5 9 0 Q W E R T p g h j U Y f d I O P a s ...

Page 51: ... EDIT CANCEL Button Z pg 43 r STOP Button Z pg 37 t PLAY PAUSE Button Z pg 37 y POWER Switch Z pg 5 u Recording Start Stop Button Z pg 5 i BRIGHT Dial Z pg 18 o SPEAKER VOLUME Dial Z pg 37 Connectors p Shoulder Strap Eyelets Z pg 14 Q DC in jack Z pg 9 W JLIP Joint Level Interface Protocol Connector Connect the Editing Cable when performing Random Assemble Editing Z pg 43 In the future it will be ...

Page 52: ...hours and when you turn it on again the indicator should disappear Main Menu Setting Change Indicator Z pg 30 FADE WIPE indicator Z pg 28 q D I S Digital Image Stabilizer Indicator Z pg 22 w PROG AE EFFECT indicator Z pg 26 e Recording Indicator Z pg 16 r Zoom Indicator Bar Z pg 19 LCD monitor Viewfinder Indications 1 Remaining Tape Time Z pg 16 2 Recording Mode SP EP Indicator Z pg 13 3 Interval ...

Page 53: ...Marking pg 20 Insert Cassette pg 13 Insert Editing pg 45 Instant Titles pg 32 Interval Timer pg 34 L LCD monitor Viewfinder indications pg 52 Low angle shooting pg 18 M Main Menu pg 30 Manual Focus pg 25 MBR Code Setting pg 42 P Playback pg 37 Program AE with Special Effects pg 26 Provided Accessories pg 6 Q Quick Rec pg 21 Quick Review pg 19 R Random Assemble Editing pg 42 44 Record Standby pg 16...

Page 54: ...t your nearest JVC dealer Plug adapter INFORMATION This device complies with Part 15 of FCC Rules Operation is subject to the following two conditions 1 This device may not cause harmful interference and 2 this device must accept any interference received including interference that may cause undesired operation Change or modifications not approved by the party responsible for compliance could voi...

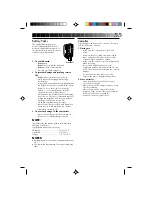
Page 55: ...ck when it begins to deliver less recording time per charge NOTE It is normal for the battery pack to be warm after charging or after use Temperature Range Specifications Charging 10 C to 35 C Operation 0 C to 40 C Storage 10 C to 30 C NOTES Recharging time is based on room temperature of 20 C The lower the temperature the longer recharging takes Cassettes To properly use and store your cassettes ...

Page 56: ... the eyepiece of the viewfinder at the sun carry it by holding the viewfinder or the LCD monitor swing it excessively when using the shoulder strap 5 This camcorder features a built in head cleaner which automatically cleans the heads and head drum when a cassette is loaded or unloaded If however the heads become dirty and cause blurriness or interruption in the playback picture consult your neare...

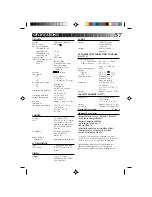
Page 57: ...stem VIDEO Output 1 Vp p 75 ohms unbalanced via VIDEO out connector AUDIO Output 8 dBs 1 k ohm via AUDIO out connector Speaker 20 mm round x 1 monaural AC POWER ADAPTER BATTERY CHARGER AA V11U Power requirement U S A and Canada AC 120 V 60 HZ Other countries AC 110 V to 240 V 50 60 Hz Power consumption 23 W Output Charge DC 8 5 V 1 3 A VTR DC 6 3 V 1 8 A Charging system Constant current peak detec...

Page 58: ...RESH que le permite descargar totalmente el paquete de pilas antes de recargarlo Para descargar las pilas coloque el paquete de pilas en el adaptador como se muestra en la ilustración de la izquierda Luego presione REFRESH El indicador REFRESH se enciende cuando se inicia la descarga y se apaga cuando la descarga ha terminado Marcas Indicador POWER Indicador END PAQUETE CARGA DESCARGA DE PILAS BN ...

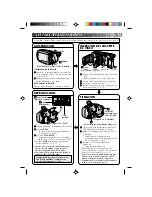
Page 59: ...desactiva cuando se lo abre cierre a 60 grados aprox O simplemente reproduzca la cinta en un VCR de VHS utilizando el adaptador de cassette VHS Playpak Z P 40 2REW rebobinado Si la unidad comienza a funcionar mal deje de usarla inmediatamente y consulte a su concesionario local de JVC 3PLAY PAUSE reproducción pausa STOP parada Enganche 1 2 EJECT eyección 3 Inserte 4 PUSH presione PUSH OPEN presion...

Page 60: ...ire occasional service Just as quality is a keyword in the engineering and production of the wide array of JVC products service is the key to maintaining the high level performance for which JVC is world famous The JVC service and engineering organization stands behind our products NATIONAL HEADQUARTERS JVC SERVICE ENGINEERING COMPANY OF AMERICA DIVISION OF US JVC CORP 107 Little Falls Road Fairfi...

Page 61: ...ment not provided with the products or if the model or serial number has been altered tampered with defaced or removed 2 Initial installation and installation and removal for repair 3 Operational adjustments covered in the Owner s Manual normal maintenance video and audio head cleaning 4 Damage that occurs in shipment due to act of God and cosmetic damage 5 Signal reception problems and failures d...

Page 62: ...MEMO ...

Page 63: ...MEMO ...

Page 64: ...GR AXM4U COPYRIGHT 1996 VICTOR COMPANY OF JAPAN LTD JVC COMPANY OF AMERICA DIVISION OF US JVC CORP 41 Slater Drive Elmwood Park N J 07407 U Printed in Japan 0996TOV UN YP ...

Reviews: