background image


34


PICTURE SOURCE


You can obtain optimal picture quality by selecting an 
appropriate option—picture source type (either video source 
or film source). 


Select one of the following:


SCREEN SAVER


You can activate or deactivate screen saver while operating 
the built-in disc player. 


Select one of the following:


FILE TYPE


If both audio tracks (MP3 files) and still pictures (JPEG 
files) are recorded on a disc, you can select which to play. 


Select one of the following:

7


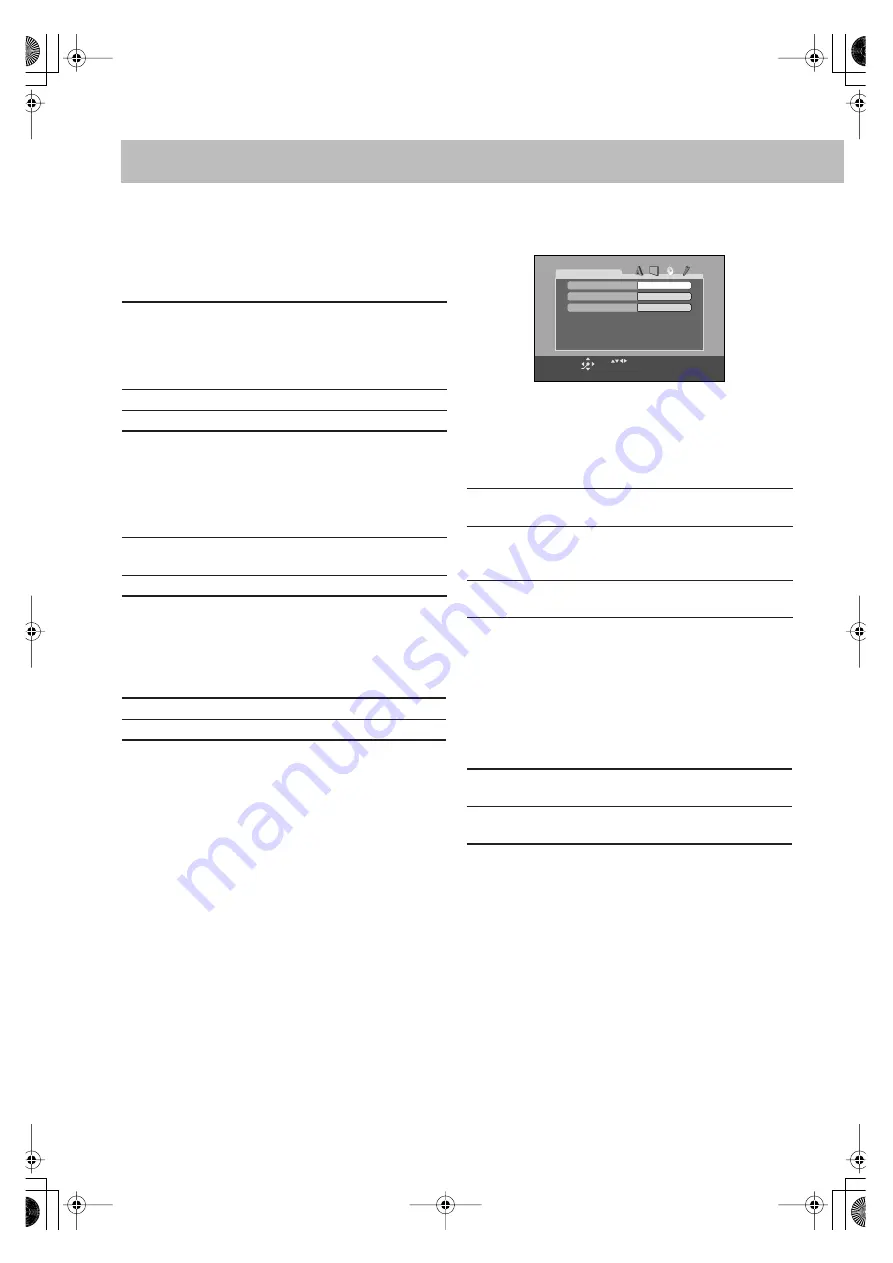
AUDIO Setup Menu


You can adjust the sound settings of the System.


DIGITAL AUDIO OUTPUT


When using the digital output terminal on the rear, set this 
correctly according to the connected component.


Select one of the following:


• See also “OPTICAL DIGITAL OUT Signals” on page 42.


DOWN MIX


When using the digital output on the rear, set this correctly 
according to the connected component.
When playing a multi-channel DVD, the System converts 
the signals into 2 channels properly.


Select one of the following:

AUTO:


Normally select this.
When playing back a disc containing both video 
and film sources, the System automatically 
changes the processing to match it to the picture 
type (film or video source) of the current chapter.


FILM:


To play a film source disc.


VIDEO:


To play a video source disc.


ON:


The picture on the TV screen becomes dark when 
no operation is done for about 5 minutes.


OFF:


To cancel the screen saver.


AUDIO:


To play MP3 files.


STILL PICTURE:


To play JPEG files.


PCM ONLY:


To connect to a linear PCM digital 
equipment.


DOLBY DIGITAL 
/PCM:


To connect to a Dolby Digital decoder 
or an amplifier with a built-in Dolby 
Digital decoder.


STREAM/PCM:


To connect to a DTS decoder or an 
amplifier with a built-in DTS decoder.


DOLBY 
SURROUND:


To connect an amplifier with the Dolby 
Pro Logic decoder.


STEREO:


To connect a conventional stereo 
amplifier, receiver, MD recorder, etc. 

STREAM/PCM

AUTO

AUDIO

DIGITAL AUDIO OUTPUT

D. RANGE COMPRESSION

DOLBY SURROUND

DOWN MIX

USE             TO SELECT.  USE ENTER TO CONFIRM
TO EXIT, PRESS [SET UP].

ENTER

SELECT

FS-GD7[J]_EN.book Page 34 Thursday, February 3, 2005 7:49 PM

Summary of Contents for FS-GS7

Page 1: ...ists of CA FSGD7 and SP FSGD7 For Customer Use Enter below the Model No and Serial No which are located either on the rear bot tom or side of the cabinet Retain this information for future reference Model No Serial No 00 00_Cover_GD7 J fm Page 1 Wednesday February 2 2005 11 12 AM ...

Page 2: ...ight of 10 cm or more Attention Aération correcte Pour prévenir tout risque de décharge électrique ou d incendie et éviter toute détérioration installez l appareil de la manière suivante 1 Avant Bien dégagé de tout objet 2 Côtés dessus dessous Assurez vous que rien ne bloque les espaces indiqués sur le schéma ci dessous 3 Dessous Posez l appareil sur une surface plane et horizontale Veillez à ce q...

Page 3: ...s 1700 Valley Road Wayne New Jersey 07470 Telephone Number 973 317 5000 This device complies with Part 15 of FCC Rules Operation is subject to the following two conditions 1 This device may not cause harmful interference and 2 this device must accept any interference received including interference that may cause undesired operation For Canada pour le Canada CAUTION TO PREVENT ELECTRIC SHOCK MATCH...

Page 4: ...G 3 Safty J fm Page 3 Wednesday February 2 2005 5 03 PM ...

Page 5: ...the Sound Track 19 Selecting the Subtitle Language 20 Selecting the View Angle 20 Playing Back a Bonus Group 20 Selecting Browsable Still Pictures 21 Special Effect Playback 21 Advanced Disc Operations 22 Programming the Playing Order Program Play 22 Playing at Random Random Play 23 Playing Repeatedly 24 Prohibiting Disc Ejection Child Lock 24 On Screen Disc Operations 25 On screen Bar Information...

Page 6: ...ined however you can use the buttons and controls on the main unit if they have the same or similar name and marks Some related tips and notes are explained later in the sections Learning More about This System on pages 37 to 38 and Troubleshooting on page 40 but not in the same section explaining the operations If you want to know more about the functions or if you have a doubt about the function...

Page 7: ...pack the package and check the accessories Step 2 Prepare the remote control Step 3 Hook up the components such as AM FM antennas speakers etc see pages 4 to 6 Finally plug the AC power cord Now you can operate the System DO NOT use an old battery together with a new one DO NOT use different types of batteries together DO NOT expose batteries to heat or flame DO NOT leave the batteries in the batt...

Page 8: ...since the terminal names actually printed on the rear may vary Turn the power off to all components before connections Audio cord not supplied Optical digital cord not supplied Component video cord not supplied Red Blue Green Composite video cord supplied AM loop antenna supplied Turn it until the best reception is obtained To a wall outlet Plug the AC power cord only after all connections are com...

Page 9: ...M loop antenna Keep it connected Vynile covered wire not supplied Extend it horizontally Disconnect the supplied FM antenna and connect to an outdoor FM antenna using a 75 Ω wire with coaxial type connector Outdoor FM antenna not supplied For better FM AM reception Gray cord connect to red terminal Gray cord with black stripe connect to black terminal FS GD7 J _EN book Page 5 Thursday February 3 2...

Page 10: ...ing the speaker cords match the polarity of the speaker terminals gray cord to red and gray cord with black stripe to black Changing the Scanning Mode This System supports progressive scanning If you connect a progressive TV through the COMPONENT jacks you can enjoy a high quality picture from the built in DVD player by selecting progressive mode DO NOT connect more than one speaker to each termin...

Page 11: ...heater Systems Inc which enables multi channel like Dolby Digital As the compression ratio is lower than for Dolby Digital it provides wider dynamic range and better separation When playing a multi channel encoded DVD the System properly converts these multi channel signals into 2 channels and emits the downmixed sound from the speakers To enjoy the powerful sound of these multi channel encoded DV...

Page 12: ...ated see page 15 7 SLEEP indicator Lights when the Sleep Timer is activated see page 18 8 Disc operation indicators Lights when Repeat mode is activated 1 Lights when One Track Repeat is activated 1DISC Lights when One Disc Repeat is activated ALL Lights when All Disc Repeat is activated A B Lights when A B Repeat is activated GROUP Lights when Group Repeat is activated RANDOM Lights when Random P...

Page 13: ...ds DVD Audio Audio CD Audio CD SVCD VCD PBC appears while playing a disc with PBC SVCD VCD Changes to PBC when stopping PBC playback MP3 By pressing DISPLAY you can show the current group and track numbers for a few seconds MP3 JPEG JPEG Elapsed playing time Chapter no Total title no Elapsed playing time Track no Track no Group no Elapsed playing time Track no Total playing time Total track no Ela...

Page 14: ...ETURN 1 3 GROUP TITLE 4 SHIFT SET DISPLAY 8 7 2 2 3 5 ENTER Numeric buttons The STANDBY lamp on the main unit lights up A small amount of power is always consumed even while on standby For private listening Connect a pair of headphones to the PHONES jack on the main unit The sound will no longer come out of the speakers Be sure to turn down the volume before connecting or putting the headphones Di...

Page 15: ...hts To preset the stations You can preset 30 FM and 15 AM stations 1 Tune in to a station you want to preset You can also store the monaural reception mode for FM preset stations if selected 2 Activate the preset number entry mode Finish the following process while the indication on the display is flashing 5 seconds 3 Select a preset number for the station you store 4 Store the station To tune in ...

Page 16: ... stop completely while Resume is activated press 7 twice To cancel Resume see RESUME on page 35 When operating the System the on screen guide icon see the following table appears on the TV screen To deactivate the on screen guide icons see ON SCREEN GUIDE on page 35 To select a disc Remote Control When current source is not disc press DVD CD3 to select the disc player as the source during PLAY fla...

Page 17: ...ith PBC While playing a disc with PBC PBC appears on the display When disc menu appears on the TV screen select an item on the menu Playback of the selected item starts To cancel PBC You can also cancel PBC function by pressing the number button to select a track To reactivate PBC press 7 then press 4 Examples To select number 5 press 5 To select number 15 press 10 then 5 To select number 30 press...

Page 18: ...ndowsR Me WindowsR 2000 and WindowsR XP are registered trademarks of Microsoft corporation 5 Check if the drivers are correctly installed 1 Open the Control Panel on your PC Select Start Control Panel 2 Click System Hardware Device Manager Sound video and game controllers and Universal Serial Bus controllers The following window appears and you can check whether the drivers are installed To play b...

Page 19: ...ble level from 0 to 5 When you adjust this setting the SOUND TURBO II is canceled automatically To adjust the bass To adjust the treble SOUND TURBO DIMMER VOLUME AUDIO VOL SLEEP ENTER CANCEL CLOCK TIMER BASS TREBLE VFP CLEAR VOICE DVD LEVEL DIMMER FADE MUTING SHIFT SET A STANDBY DISPLAY AHB PRO SOUND TURBO 2 3 5 Remote control Main unit Remote control Main unit To restore the volume press again or...

Page 20: ... or adjust it and store your own likeliness To select a preset picture tone 1 Activate VFP 2 Select a preset picture tone NORMAL Original recording level MIDDLE Output level is increased less than HIGH HIGH Output level is increased more than MIDDLE Remote ONLY Canceled Remote ONLY NORMAL MIDDLE HIGH DIM 1 Dims the display DIM 2 Erases the display illumination AUTO DIM Erase the display illuminati...

Page 21: ...k before press the button repeatedly until the clock setting mode is selected see page 30 2 Adjust the hour 3 Adjust the minute Now the built in clock starts working To check the current clock time during play While playing a DVD or MP3 you cannot check the current clock time see page 9 GAMMA Adjust if the neutral color is bright or dark 3 to 3 BRIGHTNESS Adjust if the entire picture is bright or ...

Page 22: ...ns off on standby automatically Auto Standby does not work while you are listening to radio FM AM and the external component AUX and USB To turn off the System after a certain period of time Sleep Timer 1 Specify the time in minutes SLEEP indicator also lights up 2 Wait until the set time goes off To check the time remaining until the shut off time If you press the button repeatedly you can change...

Page 23: ... playing a DVD Video While playing a DVD Audio While playing an SVCD or VCD SVCD can have 4 audio channels Karaoke SVCD usually uses these 4 channels to record two 2 channel recordings ST1 ST2 ANGLE SLOW AUDIO ZOOM 8 SUBTITLE DVD CD 3 SHIFT ENTER 2 3 5 7 PAGE Remote control Numeric buttons ST1 ST2 ST To listen to normal stereo 2 channel playback L1 L2 L To listen to the left audio channel R1 R2 R ...

Page 24: ...Back a Bonus Group This function is only used while playing DVD Audio Some DVD Audios have a special group called bonus group whose contents are not open to the public To play back a bonus group you have to enter the specific key number a kind of password for the bonus group The way of getting the key number depends on the disc 1 Select the bonus group The bonus group is usually recorded as the la...

Page 25: ...ion playback 1 While playing 2 Select slow motion speed To resume normal playback press DVD CD 3 To replay the previous scenes One touch replay function This function is only used while playing DVD Video Zoom 1 While playing back As the number increases magnification also increases 2 Move the zoomed in position To resume normal playback press ZOOM repeatedly until ZOOM OFF appears on the TV screen...

Page 26: ...mpt for the group number entry as well however during playback the System will ignore these entries 3 If you want to program the other chapters or tracks repeat the above step 2 DISC1 8 4 FM PLAY MODE REPEAT A B REPEAT 8 DVD CD 3 5 7 SHIFT CANCEL Remote control Main unit Numeric buttons To enter the numbers Examples To enter number 5 press 5 To enter number 15 press 10 then 5 To enter number 30 pr...

Page 27: ...ammed To skip a step To pause To stop To release press DVD CD 3 To erase the last step To erase the entire program To add steps in the program Repeat step 2 on page 22 In the programmed order In the reverse order PROGRAM RANDOM Canceled Playback starts in random order Random Play continues to the disc on the next tray when all the chapters or tracks in current disc are played once when Repeat Play...

Page 28: ...int B To cancel A B Repeat press REPEAT A B again while holding SHIFT Prohibiting Disc Ejection Child Lock You can lock the disc trays so that no one can eject the loaded disc This is possible while the System is on standby and the clock indication is turned on see page 10 While the disc trays are closed To cancel the prohibition repeat the same procedure UNLOCKED appears on the display Remote ONL...

Page 29: ...VCD 2 OFF 1 3 1 3 1 3 TIME 4 TITLE 14 TOTAL1 25 58 CHAP 23 VCD TIME OFF ST TIME 0 04 58 TRACK 3 1 3 DISC 2 VCD CD Numeric buttons 1 Disc type 2 Playback information Indication Meanings Mbps Current transfer rate Megabits per second Current disc Current title Current chapter Current group Current track Time indications 3 Operation modes Indication Meanings Playback Forward Reverse search Forward Re...

Page 30: ...ITLE 14 TOTAL1 25 58 CHAP 23 DVD VIDEO TITLE 2 TIME OFF CHAP 1 3 1 3 1 1 DISC 3 DISC 3 TOTAL 1 01 58 CHAP 3 8 5Mbps OFF 1 3 1 3 1 3 TIME TITLE 14 TOTAL1 25 58 CHAP 23 DVD VIDEO TITLE 2 TIME OFF CHAP 1 3 1 3 1 1 TOTAL 1 01 58 CHAP 3 8 5Mbps DISC 2 1 3 1 3 1 3 TITLE 14 TOTAL1 25 58 CHAP 23 TITLE 2 1 3 1 3 1 1 TOTAL 1 01 58 CHAP 3 ENGLISH 2 1 3 1 3 1 3 TITLE 14 TOTAL1 25 58 CHAP 23 TITLE 2 1 3 2 3 1 ...

Page 31: ... 2 to erase the last entry 5 Finish the setting ALL Repeats all discs or all programmed tracks A B Repeats a desired portion see next column TITLE Repeats the current title GROUP Repeats the current group DISC Repeats the current disc except for DVD CHAPTER Repeats the current chapter TRACK Repeats the current track OFF Cancels Repeat Play A B Repeat starts The selected portion plays repeatedly Be...

Page 32: ...30 press 3 then 0 The System starts playing the searched chapter or track CHAP TRACK OFF 1 3 1 3 1 3 TIME TITLE 14 TOTAL1 25 58 CHAP 23 DVD VIDEO TITLE 2 TIME OFF CHAP 1 3 1 3 1 1 TOTAL 1 01 58 CHAP 3 8 5Mbps CHAPTER _ DISC 2 CONTROL screen Ex When the MP3 disc is loaded 1 Current group number total group number 2 Current group 3 Group list 4 Current track in blue 5 Track information ID3 Tag Versi...

Page 33: ...M repeatedly until ZOOM OFF appears on the TV screen Move the highlight bar to a desired item If you move the highlight bar while playing back an MP3 disc the selected track starts playback automatically For MP3 Playback starts with the selected track Pressing DVD CD 3 also starts playback For JPEG The selected track still picture is displayed until you change it Slide show playback starts Each tr...

Page 34: ... the following operations until you finish setting in the following order 1 Set the hour then the minute for on time 2 Set the hour then the minute for off time 3 Select the playback source TUNER FM TUNER AM DISC or AUX 4 For TUNER FM and TUNER AM Select a preset channel see page 11 Select FM or AM for the last selected station For DISC Select the disc number title group number then the chapter tr...

Page 35: ...ator 1 2 3 are lit on the display Daily Timer is activated at the same time everyday until the timer is turned off manually see the next column or another timer is activated When the on time comes The System turns on tunes in to the specified station or start playing the loaded disc with the specified chapter or track and sets the volume level to the preset level While Daily Timer is working the t...

Page 36: ...p Menu 3 AUDIO Setup Menu 4 OTHERS Setup Menu Remote ONLY ENGLISH ENGLISH OFF ENGLISH LANGUAGE MENU LANGUAGE ON SCREEN LANGUAGE AUDIO LANGUAGE SUBTITLE USE TO SELECT USE ENTER TO CONFIRM TO EXIT PRESS SET UP ENTER SELECT 4 3 LB AUTO PICTURE MONITOR TYPE PICTURE SOURCE ON AUDIO SCREEN SAVER FILE TYPE USE TO SELECT USE ENTER TO CONFIRM TO EXIT PRESS SET UP ENTER SELECT 4 3 LB AUTO PICTURE MONITOR TY...

Page 37: ...and FRENCH 7 PICTURE Setup Menu You can select the desired options concerning a picture or monitor screen MONITOR TYPE Select the monitor type of your TV to play DVD Video recorded with aspect ratio of 16 9 Select one of the following ENGLISH ENGLISH OFF ENGLISH LANGUAGE MENU LANGUAGE ON SCREEN LANGUAGE AUDIO LANGUAGE SUBTITLE USE TO SELECT USE ENTER TO CONFIRM TO EXIT PRESS SET UP ENTER SELECT 16...

Page 38: ...nels properly Select one of the following AUTO Normally select this When playing back a disc containing both video and film sources the System automatically changes the processing to match it to the picture type film or video source of the current chapter FILM To play a film source disc VIDEO To play a video source disc ON The picture on the TV screen becomes dark when no operation is done for abo...

Page 39: ...DE You can activate or deactivate the on screen guide icons see pages 12 and 25 When recording the picture on a VCR select OFF to avoid recording the guide icons on your video tape Select one of the following AUTO To apply the compression effect to the downmixed multi channel sound ON To always apply the compression effect for all Dolby Digital software Loud sound will become low and vice versa ON...

Page 40: ...ate the TV TV CH SHIFT TV VIDEO TV TV VOL Remote control To turn on or off the TV To select the input mode either TV or VIDEO To adjust the TV volume To select the TV channel Remote ONLY at the same time at the same time at the same time FS GD7 J _EN book Page 36 Thursday February 3 2005 7 49 PM ...

Page 41: ... sampling rate of 44 1 kHz and at bit rate of 128 kbps This System can recognize the total of 1000 tracks and of 99 groups each group can contain up to 150 tracks Those exceeding the maximum number cannot be recognized This System can show up to 23 characters of the file track names except for extention and 30 characters of the ID3 tags on the display and the TV screen Some characters or symbols w...

Page 42: ...k and select a baseline JPEG file Note that it may take a long time to select another file Timer Operations see pages 30 and 31 When you unplug the AC power cord or if a power failure occurs the timer will be canceled You need to set the clock first then the timer again If you set the Sleep Timer after Daily Timer starts playing the selected source Daily Timer is canceled Setup Menu Operations see...

Page 43: ... line from center to edge Cleaning the System Stains should be wiped off with a soft cloth If the System is heavily stained wipe it with a cloth soaked in water diluted neutral detergent and wrung well then wipe clean with a dry cloth Since the System may deteriorate in quality become damaged or get its paint peeled off be careful about the following DO NOT wipe it with a hard cloth DO NOT wipe it...

Page 44: ...sion 1 and Version 2 This System can show ID3 Tag Version 2 4 or earlier MP3 JPEG groups and tracks are not played back as you expect The playing order is determined when the disc was recorded It depends on the writing application MP3 JPEG tracks are not played back The inserted disc may includes both type of tracks MP3 files and JPEG files In this case you can only play back the files selected by...

Page 45: ...urdish KY Kirghiz LA Latin LN Lingala LO Laothian LT Lithuanian LV Latvian Lettish MG Malagasy MI Maori MK Macedonian ML Malayalam MN Mongolian MO Moldavian MR Marathi MS Malay MAY MT Maltese MY Burmese NA Nauru NE Nepali NL Dutch NO Norwegian OC Occitan OM Afan Oromo OR Oriya PA Panjabi PL Polish PS Pashto Pushto PT Portuguese QU Quechua RM Rhaeto Romance RN Kirundi RO Rumanian RU Russian RW Kiny...

Page 46: ...kHz 16 bit Linear PCM 1 with 48 kHz 16 20 24 bit Linear PCM with 96 kHz Linear PCM 48 kHz 16 bit Linear PCM with Dolby Digital Dolby Digital bitstream 48 kHz 16 bit Linear PCM with DTS DTS bitstream 48 kHz 16 bit Linear PCM DVD Audio no output 2 with 48 96 192 kHz 16 20 24 bit Linear PCM with 44 1 88 2 176 4 kHz 16 20 24 bit Linear PCM no output 3 with Dolby Digital Dolby Digital bitstream 48 kHz ...

Page 47: ...14 10 11 12 13 20 23 29 15 10 15 36 24 29 11 13 16 18 20 22 27 28 13 32 33 13 21 10 12 13 21 23 29 11 13 23 29 12 21 23 29 17 30 31 36 6 10 13 16 18 21 24 36 11 22 23 12 10 10 12 12 23 16 8 10 11 10 14 10 15 12 24 12 11 13 23 15 Remote sensor 15 15 15 13 10 14 16 6 16 10 14 12 24 19 21 29 11 13 21 14 14 STANDBY lamp FS GD7 J _EN book Page 43 Thursday February 3 2005 7 49 PM ...

Page 48: ...Super Video CD MP3 JPEG format DVD R DVD RW recorded in video format Horizontal resolution 500 lines Wow and flutter Immeasurable General Power requirement AC 120 V 60 Hz Power consumption 150 W at operation 26 W on standby 1 3 W with deactivating the clock indication Dimensions approx 189 mm x 224 mm x 406 mm 7 1 2 inch x 8 7 8 inch x 16 inch W H D Mass approx 6 5 kg 14 4 lbs Speakers Type 2 way ...

Page 49: ...warranty fm Page 1 Wednesday February 2 2005 11 13 AM ...

Page 50: ...warranty fm Page 2 Wednesday February 2 2005 11 13 AM ...

Page 51: ...0205MWMMDWBET EN 2005 Victor Company of Japan Limited FS GD7 COMPACT COMPONENT SYSTEM 00 00_Cover_GD7 J fm Page 2 Wednesday February 2 2005 11 12 AM ...

Reviews: