background image

ENGLISH

FRANÇAIS

ESPAÑOL

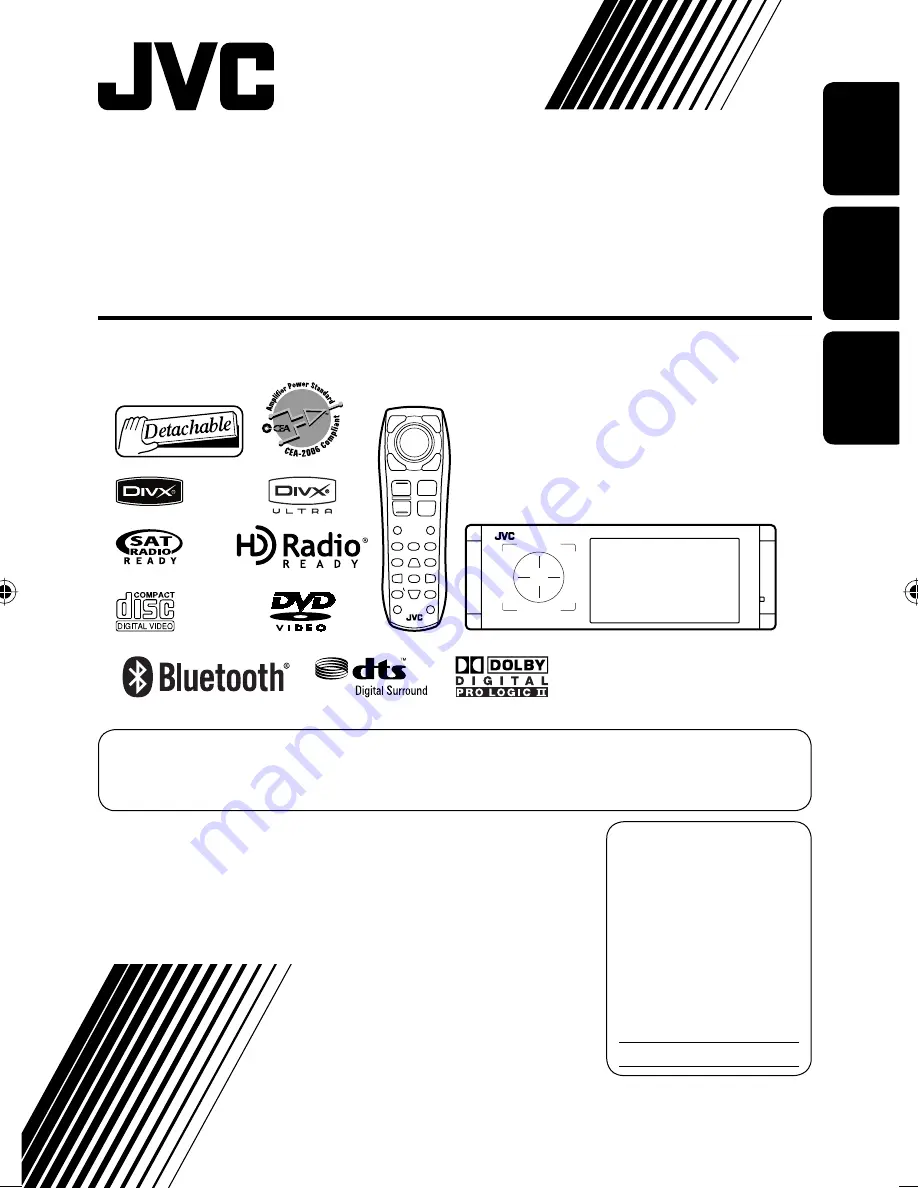
KD-ADV49/KD-AVX44

For installation and connections, refer to the separate manual.
Para la instalación y las conexiones, refiérase al manual separado.
Pour l’installation et les raccordements, se référer au manuel séparé.

INSTRUCTIONS

MANUAL DE INSTRUCCIONES

MANUEL D’INSTRUCTIONS

LVT1797-001A

[J/C]

  For canceling the display demonstration, see page 7.
  Para cancelar la demonstración en pantalla, consulte la página 7.
  Pour annuler la démonstration des affichages, référez-vous à la page 7.

DVD/CD RECEIVER

RECEPTOR CON DVD/CD
RÉCEPTEUR DVD/CD

For customer Use:

Enter below the Model No. 
and Serial No. which are 
located on the top or bottom 
of the cabinet. Retain this 
information for future 
reference.

Model No.
Serial No.

Cover_KDADV49AVX44[JC].indd   2

Cover_KDADV49AVX44[JC].indd   2

08.1.18   6:33:17 PM

08.1.18   6:33:17 PM

Summary of Contents for EXAD KD-AVX44

Page 1: ...INSTRUCCIONES MANUEL D INSTRUCTIONS LVT1797 001A J C For canceling the display demonstration see page 7 Para cancelar la demonstración en pantalla consulte la página 7 Pour annuler la démonstration des affichages référez vous à la page 7 DVD CD RECEIVER RECEPTOR CON DVD CD RÉCEPTEUR DVD CD For customer Use Enter below the Model No and Serial No which are located on the top or bottom of the cabinet...

Page 2: ... reception which can be determined by turning the equipment off and on the user is encouraged to try to correct the interference by one or more of the following measures Reorient or relocate the receiving antenna Increase the separation between the equipment and receiver Connect the equipment into an outlet on a circuit different from that to which the receiver is connected Consult the dealer or a...

Page 3: ...ed by Macrovision and is intended for home and other limited viewing uses only unless otherwise authorized by Macrovision Reverse engineering or disassembly is prohibited Contents INTRODUCTION Playable disc type 4 Before operations 5 OPERATIONS Basic operations AV menu 6 Basic operations Control panel 8 Basic operations Remote controller RM RK252 10 Listening to the radio 12 Disc operations 14 Dua...

Page 4: ... Rewritable CD R RW Compliant to ISO 9660 level 1 level 2 Romeo Joliet CD DA MP3 WMA WAV AAC 4 JPEG DivX MPEG1 MPEG2 MPEG4 1 IfyouinsertaDVDVideodiscofanincorrectRegionCode Regioncodeerror appearsonthemonitor 2 DVD Rrecordedinmulti borderformatisalsoplayable exceptforduallayerdiscs DVD RWduallayerdiscsarenotplayable 3 Itispossibletoplaybackfinalized R RW Videoformatonly discs RWdoublelayerdiscsare...

Page 5: ...e 57 Beforeoperations Touch pad controls How to operate the unit by the touch pad controls You can operate the unit by touching the appropriate part of the touch pad controls To adjust the volume move your finger on the touch pad knob as illustrated below to display the animation on the monitor then press 5 or repeatedly You can also adjust the volume by just continuing to move your finger on the ...

Page 6: ... the touch pad controls and monitor are turned on Ÿ Enter AV Menu Non available items will be shaded Select an icon to enter the setup screen In this manual English indications are used for purpose of explanation You can select the indication language on the monitor page 53 Setup AV Menu Enter Through Sound Fader Balance Volume Adjust Subwoofer Level High Pass Filter Crossover High Pass Filter Exi...

Page 7: ...play Setup Display Clock Disc Setup 1 Disc Setup 2 Tuner Demonstration Exit Off On 6 7 Time Set Exit Hours 3 00PM Time Set Exit Minutes 3 35PM Setup AV Menu Enter Setup Display Clock Disc Setup 1 Disc Setup 2 Tuner 1 00AM Clock Time Set Time Format OSD Clock Clock Adjust Canceling the display demonstration and setting the clock ...

Page 8: ...r is on w Remote sensor e Resets the unit Use only when the internal system malfunctions r Detaches the control panel page 9 1 Youcannotselectthesesourcesiftheyarenotready 2 Byholding5 youcandisplaythelistaccessible fortheselectedsource Basicoperations Controlpanel 1 Selects sources 1 Tuner or HD Radio Satellite Radio SIRIUS XM Disc USB or USB iPod Changer iPod or External Input Bluetooth AV Input...

Page 9: ...mation Ex When the playback source is a DVD video disc Playback picture screen only for video sources DVD 01 02 0 01 20 MULTI DIGITAL CHAP RPT C T VIDEO 3 45PM DVD 01 02 0 01 20 MULTI DIGITAL CHAP RPT C T VIDEO 3 45 PM Source information screen Playback picture and the source information screen Navigation screen This screen is displayed when Navigation is selected for AV Input page 56 Back to the ...

Page 10: ...l function See the Installation Connection Manual separate volume for connection IMPORTANT When Dual Zone is activated page 26 the remote controller functions only for operating the DVD CD player Basicoperations Remotecontroller RM RK252 Main elements and features R03 LR03 AAA 1 Turns on the power Turns off the power Hold Attenuates the sound when the power is on 2 Disc USB and USB iPod Reverse se...

Page 11: ...selecting buttons 3 4 Reverse skip forward skip Reverse search forward search Hold In menu selecting mode Selects an item Then press to confirm the selection Skips 10 items at a time Hold Bluetooth 5 Selects group folder 4 Reverse skip forward skip Reverse search forward search Hold q Disc USB and USB iPod Forward search w Selects the source e Disc USB and USB iPod Starts and pauses playback Bluet...

Page 12: ...50 C Preset no D Frequency E Assigned station name page 51 F FM reception indicator Select Tuner Ÿ Select the band TUNER FM1 P1 87 5 MHz FLAT MO ABC Radio Listeningtotheradio When an FM stereo broadcast is hard to receive 1 2 3 Mono Exit Off On Off Mode Mono SSM Title Entry Mode AV Menu Enter Search for a station Auto Search Manual Search Hold either or until Manual Search appears on the monitor t...

Page 13: ...on The station selected in step 2 is now stored in preset number 4 Selecting preset stations On the remote 1 2 On the unit To select directly To select from the Preset List 1 2 For FM Each time you hold 5 you can change the bands 3 Select the preset number Mode Start Mono SSM Title Entry Mode AV Menu Enter FM1 Enter Store 87 5 89 9 97 9 105 9 108 0 87 5 1 2 3 4 5 6 Hold FM1 Enter Store 87 5 89 9 9...

Page 14: ...or the unit cannot accept the operation you have tried to do In some cases without showing operations will not be accepted 0 Ejects the disc 3 8 Starts and pauses playback BAND Stops playback Open the front panel Ÿ Insert the disc Playback starts automatically Caution Do not place your finger behind the control panel Caution on volume setting Discs and connected USB devices produce very little noi...

Page 15: ...apter no Playing time E Playback mode 4 Touch Selects chapter Hold Reverse forward search 1 5 Selects program no Play List no DISP Touch if necessary page 9 4 Touch Selects track Hold Reverse forward search for DivX MPEG 2 5 Touch Selects folder Hold Displays Folder List DISP Touch if necessary page 9 DVD 01 02 0 01 20 FLAT DIGITAL C P VR PRG A Audio format B VR PRG Original program VR PL Play Lis...

Page 16: ...no Playing time CD 02 0 01 20 FLAT Current Track Title Artist Name Disc Title 4 Touch Selects track Hold Reverse forward search 1 A Sound surround mode pages 22 and 50 B Track no Playing time C Track title only for CD Text Artist Name Disc title 2 CD 01 02 0 01 20 FLAT Current Folder Name Current File Name mp3 MP3 RPT 4 Touch Selects track Hold Reverse forward search 1 5 Touch Selects folder Hold ...

Page 17: ...r Repeats current chapter Program Repeats current program not available for Playlist playback Track Repeats current track for VCD PBC not in use Disc All Randomly plays all tracks for VCD PBC not in use Track Repeats current track Folder Randomly plays all tracks of current folder then tracks of next folders Folder Repeats all tracks of the current folder Disc All Randomly plays all tracks Track R...

Page 18: ...ctivate the prohibition No Eject appears To cancel the prohibition repeat the same procedure to select EJECT OK Hold Folder List My Best Cinema Pops My Best2 Favorite Song Cinema2 Folder List My Best Cinema Pops My Best2 Favorite Song Cinema2 File List Enter Song011 mp3 Song012 mp3 Song013 mp3 Song014 mp3 Song015 mp3 Song016 mp3 Operations using the remote controller RM RK252 Also functions as CLR...

Page 19: ... Searchspeed x2 x5 x10 x20 x60 2 Slowmotionspeed 1 32 1 16 1 8 1 4 1 2 3 Searchspeed x2 x10 Stops playback Starts or pauses playback Reverse forward search 1 No sound can be heard Forward slow motion 2 during pause No sound can be heard Reverse slow motion does not work Select chapter during playback or pause Reverse forward search 3 Hold Selects program Selects Play List during playback or pause ...

Page 20: ...track within the same folder Selects folder Changes the aspect ratio of the playback pictures While playing Back advance the scenes by 5 minutes For DivX6 Using menu driven features 1 2 Select the item you want to start playback 3 1st press 1st press 2nd press 3rd press 2nd press Current playback position Twice Also functions as CLR clear Erases a misentry if pressed while holding SHIFT ...

Page 21: ... of the playback pictures Twice Stops playback Starts or pauses playback Reverse forward search 3 Forward slow motion 4 during pause No sound can be heard Reverse slow motion does not work Selects track Reverse forward search 5 Hold No sound can be heard Selects track Changes the aspect ratio of the playback pictures Stops playback Starts or pauses playback Reverse forward search 3 Selects track R...

Page 22: ...l Zone is in use MULTI For multi channel encoded sources such as Dolby Digital 3 and DTS 4 When activated MULTI is shown on the source information screen Dolby Pro Logic II Movie Music For 2 channel sources except for DivX MPEG1 MPEG2 discs 3 ManufacturedunderlicensefromDolbyLaboratories Dolby ProLogic andthedouble Dsymbolare trademarksofDolbyLaboratories 4 DTS and DTSDigitalSurround areregistered...

Page 23: ...gnalsofDivX MPEG1 MPEG2discs Surround On Exit Auto Through Dolby PLII Movie Dolby PLII Music To change the Dolby PLIIMusic setting In step 4 in the left column 1 Select Dolby PLIIMusic 2 Enter each sub screen then select the desired setting EX When Panorama is selected in step 1 Panorama Select On to add wraparound sound effect Center Width Adjust the center image so it may be heard only from the ...

Page 24: ...nu appears For entering time numbers To move the entry position To select a number Repeat steps Ÿ and to set other items if needed To remove the on screen bar Operations using the on screen bar DVD VCD DivX MPEG1 MPEG2 JPEG These operations are possible on the monitor using the remote controller ...

Page 25: ...disc type DVD V T02 C03 TOTAL 1 25 58 TIME TITLE CHAP RPT C RPT T02 C03 PG 001 C 002 PL 003 C 004 TRACK 01 F001 T001 F002 F002 5 Time indication Elapsed playing time of the disc Remaining title time for DVD Remaining disc time for others Elapsed playing time of the current chapter track 2 Remaining time of the current chapter track 2 6 Playback status Play Reverse forward search Reverse forward sl...

Page 26: ...e you can only operate the DVD CD player using the remote controller 1 2 3 Off Deactivates Dual Zone On Activates Dual Zone without applying Headphone Surround The DUAL indicator lights up On Surround On Activates Dual Zone and applies Headphone Surround Headphone Surround appears and the DUAL SURROUND indicator lights up When Dual Zone is activated the main source is changed to Disc To select a d...

Page 27: ... of tracks in the current folder total number of tracks on the disc 8 Track information only for MP3 WMA WAV AAC 9 Track list p Current track highlighted To select a folder or track 1 Select Folder column or Track column on the control screen 2 Select a folder or track If necessary press 6 to start playback MODE REPEAT TRACK TIME 00 14 Track 6 14 Track Information Cloudy Fair Fog Hail Indian summe...

Page 28: ...gramorPlayListmaynot bedisplayeddependingontherecordingequipment Folder 144 240 Track 144 198 Page 4 7 fol120 fol121 fol122 fol123 fol124 fol125 fol126 fol127 fol128 fol129 fol150 fol151 fol152 fol153 fol154 fol155 fol156 fol157 fol158 fol159 fol140 fol141 fol142 fol143 fol144 fol145 fol146 fol147 fol148 fol149 fol130 fol131 fol132 fol133 fol134 fol135 fol136 fol137 fol138 fol139 file0141 wma file...

Page 29: ...ck DISP Touch if necessary page 9 BAND Stops playback Connect a USB device USB is selected as the source and playback starts automatically This unit can play JPEG MPEG1 MPEG2 1 MP3 WMA WAV AAC 2 files stored on a USB mass storage class device You can operate the USB device in the same way you operate the files on discs pages 17 to 25 You cannot select USB when Dual Zone is in use All tracks on the...

Page 30: ...cator lights up on the source information screen To cancel select Off in step 4 You can use Repeat or Random playback mode Ex To select Track Repeat 1 2 3 Repeat Set Off Track Folder Off Mode Repeat Random Mode AV Menu Enter Caution Avoid using the USB device if it might hinder your safety driving Do not pull out and attach the USB device repeatedly while Now Reading is flashing on the monitor Do ...

Page 31: ... a call from phone book from call history Redial and Received Call by dialing number by preset numbers by voice command Receiving the text message Playing back a Bluetooth audio player Refer also to the instructions supplied with the Bluetooth device Connecting a Bluetooth device for the first time Pairing and PIN Code When you connect a Bluetooth device to the unit for the first time make pairing...

Page 32: ...tooth device While Open is flashing on the monitor Enter the same PIN code as entered in the above step on the device to be connected Now connection is established and you can use the device through the unit turns blue and the following icon appears when the connection is established Appears when the Bluetooth phone is connected Appears when the Bluetooth audio player is connected Appears when the...

Page 33: ... P901i P6200 Delete Enter No Yes Bluetooth AV Menu Enter Phone Connect Bluetooth Dial Menu Device Menu Settings Making a call You can make hands free calls using the unit The sound comes out from the connected speakers 1 2 3 The built in microphone is behind the upper left hand corner of the unit Bluetooth AV Menu Enter Redial Bluetooth Dial Menu Device Menu Settings Continued on the next page ...

Page 34: ...g MENU page 60 When a call comes in The source is automatically changed to Bluetooth When Auto Answer is activated The unit answers the incoming calls automatically page 60 When Auto Answer is deactivated press SRC or touch any control to answer the incoming call To end the call or reject an incoming call Hold SRC or any control Answering a waiting call If your cellular phone is equipped with the ...

Page 35: ...phone numbers names listed in step 1 Select a number Move the entry position Hold Delete Enter No One All Redial Dial Store 08945671234 12312341234 Delete To copy the phone book You can copy the phone book memory of a cellular phone into the unit 1 2 3 4 Enter a PIN code to the unit You can enter any number you like 1 digit to 16 digit number Some cellular phones have their own PIN code Enter the ...

Page 36: ...try Phonebook Full appears on the monitor Delete unwanted names before copying page 35 Presetting the phone numbers You can preset up to six phone numbers 1 Display the phone number you want to preset by using Redial Received Calls Phonebook or Phone Number 2 3 Select a preset number 4 Store the phone number The phone number selected in step 1 is now stored in preset number 5 You can use the follo...

Page 37: ...a new device See page 32 for connecting disconnecting a registered device See page 33 for deleting a registered device When the sound is stopped or interrupted during the use of a Bluetooth device turn off then turn on the unit If the sound is not yet restored connect the device again Connecting disconnecting a registered device on page 32 Selecting playback modes You can use Repeat or Random play...

Page 38: ...rts automatically When you connect the iPod to the USB terminal USB iPod is selected as the source and playback starts automatically Search Mode Music Videos Shuffle Songs Search Mode Music Videos Shuffle Songs When connected with the USB cable Hold ListeningtotheiPod You can connect the iPod using the following cable or adapter Cable adapter To operate To listen to the music USB 2 0 cable supplie...

Page 39: ...tion screen To cancel select Off in step 4 Youcanalsoactivatetheplaybackmodethrough SearchMode Toactivate select ShuffleSongs thentouch6in step2onpage38 Changing the play speed of the audiobooks You can change the play speed of the audiobooks Follow steps 1 to 3 in the left column In step 3 1 2 Select the desired speed Selecting playback modes You can use Repeat or Random playback mode Ex To selec...

Page 40: ...to the previous menu touch 5 Selecting playback modes Operations are exactly the same as explained on page 39 AudioBooks isnotdisplayedinstep3 Pauses playback To resume touch again A Source name B Sound mode page 50 C Track no Playing time Preparation When operating through the CD changer jack make sure iPod is selected for the external input setting page 56 Select iPod Playback starts automatical...

Page 41: ...s selected for the external input setting page 56 Select Changer Ÿ Enter Disc List Each time you hold the button you can display the other list of the remaining discs Disc List MP3 DISC DISC 02 DISC 03 DISC 04 DISC 05 DISC 06 Disc List Enter MP3 DISC DISC 02 DISC 03 DISC 04 DISC 05 DISC 06 Each List can also be accessed through AV Menu List Disc List Folder List File List Hold Folder List My Best ...

Page 42: ...rent folder Disc Randomly plays all tracks of the current disc Disc Repeats all tracks of the current disc All Randomly plays all tracks of all loaded discs 4 When one of the playback modes is selected the corresponding indicator lights up on the source information screen To cancel select Off in step 4 You can use Repeat or Random playback mode Ex To select Track Repeat 1 2 3 Repeat Set Off Track ...

Page 43: ...he monitor once subscription has been completed For XM Radio Activate your subscription after connection Only Channel 0 1 and 247 are available before activation 1 Turn on the power 2 Select Satellite Radio The XMDirect Universal Tuner Box starts updating all the XM channels Channel 1 is tuned in automatically GCI update column below 3 Check your XM Satellite radio ID labelled on the casing of the...

Page 44: ...elect Satellite Radio Ÿ Select the band Select a category To select a channel from all categories including non categorised channels skip this step If you do not select a channel within 15 seconds the category selected is canceled You can select a channel from all categories now Select a channel to listen Holding either or changes the channels rapidly While searching invalid and unsubscribed chann...

Page 45: ...nel you want to preset 2 Display the Preset List 3 Select a preset number 4 Store the channel Selecting preset channels On the remote 1 2 On the unit See Selecting on the lists in the right column XM1 Enter Store Channel Name The City 40 at 40 Hank s Place Audio Visions Preview 1 2 3 4 5 6 XM1 Enter Store Channel Name The City 40 at 40 Hank s Place Audio Visions Preview 1 2 3 4 5 6 Hold SAT XM1 P5...

Page 46: ...ofCallSignandchannelnumberare displayed ListeningtotheHDRadio Broadcast Before operating connect HD Radio tuner box KT HD300 separately purchased to the CD changer jack on the rear of the unit What is HD Radio Technology HD Radio Technology can deliver high quality digital sound AM digital will have FM like quality in stereo and FM digital will have CD like quality with static free and clear recep...

Page 47: ...automatically due to the receiving condition 1 2 3 Analog Tuning to analog audio only Digital Tuning to digital audio only Auto Switch between digital and analog audio automatically If no sound can be heard from the selected setting change the setting to ANALOG or DIGITAL The setting automatically changes to AUTO if you tuned in to or change to another station or if you turned off the power This s...

Page 48: ...nnected component and start playing the source Navigation screen When you connect a Navigation System to the unit you can view the navigation screen regardless of the source Preparation Make sure AV Input setting is selected for Navigation page 56 To watch the navigation screen touch DISP repeatedly page 9 The aspect ratio of the navigation screen is fixed to Full regardless of the Aspect setting ...

Page 49: ...ng the Line Input Adapter KS U57 not supplied or AUX Input Adapter KS U58 not supplied EXT IN EXT INPUT FLAT Preparation Make sure External Input is selected for External Input page 56 Select External Input Ÿ Turn on the connected component and start playing the source A Sound mode page 50 B Assigned title page 51 ...

Page 50: ...ode is temporarily canceled Storing your own adjustments You can store your adjustments into User1 User2 and User3 1 Follow steps and Ÿ on the left 2 Select the item you want to adjust 3 Adjust each setting 4 Select User1 User2 or User3 then store the setting Soundequalization Edit Store 03 60 0 Hz Equalizer Exit Edit Flat Hard Rock R B Pop Jazz Equalizer Exit Edit Flat Hard Rock R B Pop Jazz Edit...

Page 51: ...dure You can assign titles as follows FM AM stations Up to 16 characters up to 30 stations AV Input External Input Up to 16 characters If you try to assign a title to a 31st station Name Full flashes on the monitor Delete unwanted titles before assignment YoucannotassigntitlestotheHDRadiostations Ex Assigning title to AV Input Select AV Input For FM AM stations Select the band then tune into a sta...

Page 52: ...olor of the monitor Blue Light Blue Red Orange Yellow Green Purple Dark Blue Dark Green Brown Light Brown Black Scroll Off Cancels Once Scrolls the source information once Auto Repeats scrolling 5 second intervals Holding DISP on the unit scrolls the information regardless of this setting Tag Display Off Cancels On Shows the Tag data while playing MP3 WMA WAV AAC tracks Dual Zone Bluetooth List Mo...

Page 53: ... tint if the human skin color is unnatural Aspect 3 You can change the aspect ratio of the picture Aspect ratio of incoming signal 4 3 16 9 Full For 16 9 original pictures Auto For Disc Aspect ratio is automatically selected to match to the incoming signals For other video sources Aspect ratio is fixed at Regular Regular For 4 3 original pictures Language 4 Select the indication language shown on ...

Page 54: ...Type Select the monitor type to watch a wide screen picture on the external monitor 16 9 Select when the aspect ratio of the external monitor is 16 9 4 3 Letterbox 4 3 Pan Scan Select when the aspect ratio of the external monitor is 4 3 Refer to the illustrations on the left to see how the pictures are shown on the monitor OSD Position Select the position of the on screen bar 25 1 Higher position ...

Page 55: ...l You can adjust the output level of the activated speakers Speaker Size above monitoring the test tone Front Lch Center Ch Front Rch Rear Rch Subwoofer 4 Rear Lch Adjust the output level of each speaker in the range of 10dB to 10dB Initial 0dB Hold 6 to turn on and off the test tone Speaker Distance You can adjust the speaker output timing Front Lch Center Ch Front Rch Rear Rch Rear Lch Adjust th...

Page 56: ... You can determine the use of LINE IN and VIDEO IN plugs Off Select when no component is connected AV Input is skipped while selecting the source iPod Off Select when connecting the iPod using the USB Audio and Video cable for iPod 38 Audio Video Select when connecting an AV component such as a VCR Audio Select when connecting an audio component such as a portable audio player Camera 4 Select when...

Page 57: ...ll settings you have made in AV Menu Hold 6 then reset the unit 3 Equalizer Flat Hard Rock R B Pop Jazz Dance Country Reggae Classic User1 User2 User3 50 1 AppearsonlywhenanHDRadiotunerboxisconnected 2 AppearsonlywhenaSIRIUSSatelliteRadioisconnected 3 Notselectablewhen AVInput isselectedasthesource 4 TheREVERSEGEARSIGNALleadconnectionisrequired Installation ConnectionManual Therearviewthrough thec...

Page 58: ...d the others Subwoofer Level 1 Adjust the subwoofer output level 06 to 08 Initial 00 High Pass Filter Through Select when the subwoofer is not connected On Select when the subwoofer is connected Crossover Adjust the crossover frequency between the front rear speakers and the subwoofer 80Hz 120Hz 150Hz Amplifier Gain You can change the maximum volume level of this unit Off Deactivates the built in ...

Page 59: ...st The accessible lists differ depending on the source 13 18 38 41 45 Dual Zone Off On On Surround On 26 Bluetooth Menu items Selectable settings reference page Dial Menu 7 Redial Received Calls Phonebook Preset Calls Phone Number Voice Dialling Select one of the call methods 34 1 Thissettingtakeseffectonlywhensurroundisdeactivated alsopages22and23 2 ThissettingtakeseffectonlywhenDualZoneisactivat...

Page 60: ...ls manually On The unit answers the incoming calls automatically Reject The unit refuses all incoming calls SMS Notify On The unit informs you of the arrival of a message by ringing and displaying Receiving Message Off The unit does not inform you of the arrival of a message Add Phonebook Copy the phone book memory of a cellular phone into the unit You can register up to 50 phone numbers 35 MIC Se...

Page 61: ... the edges Do not touch its recording surface When storing a disc into its case gently insert the disc around the center holder with the printed surface facing up Make sure to store discs into the cases after use Maintenance To keep discs clean A dirty disc may not play correctly If a disc does become dirty wipe it with a soft cloth in a straight line from center to edge Do not use any solvent for...

Page 62: ...you change the source playback also stops without ejecting the disc Next time you select Disc for the playback source disc play starts from where it stopped previously Playing Recordable Rewritable discs This unit can recognize a total of 5 000 files and 250 folders a maximum of 999 files per folder Use only finalized discs This unit can play back multi session discs however unclosed sessions will...

Page 63: ...equency 48 kHz 44 1 kHz 32 kHz for MPEG1 24 kHz 22 05 kHz 16 kHz for MPEG2 48 kHz 44 1 kHz 32 kHz 22 05 kHz for WMA 44 1 kHz for WAV 48 kHz 44 1 kHz for AAC This unit can show ID3 Tag Version 1 0 1 1 2 2 2 3 2 4 for MP3 This unit can also show WAV WMA AAC Tag This unit can play back files recorded in VBR variable bit rate Files recorded in VBR have a discrepancy in elapsed time indication This uni...

Page 64: ...ack files in a USB device properly when using a USB extension cord This unit cannot assure proper functions or supply power to all types of the devices This unit can recognize a total of 5 000 files and 250 folders a maximum of 999 files per folder This unit can recognize a total of 25 characters for file folder names For MPEG1 2 files The maximum bit rate for video signals average is 2 Mbps Bluet...

Page 65: ...io and Video cable HD Radio reception During SSM search All stations including conventional FM AM stations are searched and stored for the selected band Satellite radio operations You can also connect the JVC SIRIUS radio PnP Plug and Play using the JVC SIRIUS radio adapter KS U100K not supplied to the CD changer jack on the rear Select External Input as the source By turning on off the power of t...

Page 66: ...her than Руccĸий is selected for Language page 53 Upper and lower cases Numbers and symbols About sounds reproduced through the rear terminals Speaker out analog discrete output LINE OUT FRONT REAR CENTER OUT SUBWOOFER OUT Multi channel signals are emitted for a multi channel encoded software When Dual Zone is activated the same signal emitted through 2nd AUDIO OUT plugs are emitted for the main s...

Page 67: ...A Sanskrit TR Turkish BN Bengali Bangla HU Hungarian MG Malagasy SD Sindhi TS Tsonga BO Tibetan HY Armenian MI Maori SG Sangho TT Tatar BR Breton IA Interlingua MK Macedonian SH Serbo Croatian TW Twi CA Catalan IE Interlingue ML Malayalam SI Singhalese UK Ukrainian CO Corsican IK Inupiak MN Mongolian SK Slovak UR Urdu CS Czech IN Indonesian MO Moldavian SL Slovenian UZ Uzbek CY Welsh IS Icelandic ...

Page 68: ... controller does not work Deactivate Dual Zone page 26 While Dual Zone is activated the remote controller only functions for operating the DVD CD player No Signal appears Change the source Start the playback on the external component connected to VIDEO IN plug Check the cords and connections Signal input is too weak Mecha Error Push Reset appears on the monitor and the control panel does not move ...

Page 69: ...d Stop playback while driving on rough roads Change the disc No playback picture appears on the monitor Parking brake lead is not connected properly Installation Connection Manual No picture appears on the external monitor Connect the video cord correctly Select the correct input on the external monitor Eject Error or Loading Error appears on the monitor Changing the source by pressing SRC will so...

Page 70: ...nitor Readout time varies depending on the USB device Do not use too many hierarchy folders and empty folders Folder that is physically empty or folder that contains data but does not contain valid MP3 WMA WAV AAC track Turn off the power then on again Do not pull out or connect the USB device repeatedly while Now Reading is displayed on the monitor Correct characters are not displayed e g album n...

Page 71: ...k to the unit You may have tried to copy the same entries as stored to the unit Touch BAND to exit No Audio Device appears on the monitor Connect this unit and the Bluetooth audio player correctly No Voice Device appears on the monitor The connected cellular phone does not have the voice recognition system iPod playback The iPod does not turn on or does not work Check the connecting cable and its ...

Page 72: ...io CALL 1 888 539 SIRIUS TO SUBSCRIBE appears on the monitor Starts subscribing SIRIUS Satellite radio page 43 No Signal or NO SIGNAL appears on the monitor Move to an area with stronger signals No Antenna or CHECK ANTENNA appears on the monitor Connect the antenna firmly Invalid Channel appears on the monitor for about 5 seconds then returns to the previous display when listening to the SIRIUS Sa...

Page 73: ...nitor Reconnect this unit and the Satellite radio correctly and reset the unit Satellite radio does not work at all Reconnect the Satellite radio after a few seconds HD Radio reception Sound quality changes when receiving HD Radio stations Fix the reception mode either to Digital or Analog page 47 No sound can be heard Analog is selected when receiving all digital broadcast of HD Radio station Sel...

Page 74: ...FM AM TUNER Frequency Range FM with channel interval set to 100 kHz or 200 kHz 87 5 MHz to 107 9 MHz FM with channel interval set to 50 kHz 87 5 MHz to 108 0 MHz AM with channel interval set to 10 kHz 530 kHz to 1 710 kHz AM with channel interval set to 9 kHz 531 kHz to 1 602 kHz FM Tuner Usable Sensitivity 11 3 dBf 1 0 μV 75 Ω 50 dB Quieting Sensitivity 16 3 dBf 1 8 μV 75 Ω Alternate Channel Sele...

Page 75: ...TH Version Bluetooth 1 2 certified Output Power 4 dBm Max Power class 2 Service Area Within 10 m 10 9 yd Profile HFP Hands Free Profile 1 5 OPP Object Push Profile 1 1 A2DP Advanced Audio Distribution Profile 1 2 AVRCP Audio Video Remote Control Profile 1 3 GENERAL Power Requirements Operating Voltage DC 14 4 V 11 V to 16 V allowance Grounding System Negative ground Allowable Operating Temperature...

Page 76: ...DWJEIN 2008 Victor Company of Japan Limited Having TROUBLE with operation Please reset your unit Refer to page of How to reset your unit Still having trouble USA ONLY Call 1 800 252 5722 http www jvc com We can help you ...

Page 77: ...revendeur d autoradios JVC Il est recommandé de connecter des enceintes avec une puissance de plus de 50 W les enceintes arrière et les enceintes avant avec une impédance comprise entre 4 Ω et 8 Ω Si la puissance maximum est inférieure à 50 W changez Amplifier Gain pour éviter d endommager vos enceintes voir page 58 du MANUEL D INSTRUCTIONS Pour éviter les court circuits couvrir les bornes des fil...

Page 78: ...unit You cannot install the unit on the car which has any obstacles in the space shown in Required space for installation on page 1 Caution when installing Fit the unit into the mounting sleeve by using four corners of the trim plate DO NOT press the panel shaded in the illustration INSTALLATION MONTAGE DANS LE TABLEAU DE BORD L illustration suivante est un exemple d installation typique Si vous a...

Page 79: ...marillo 4 Jaune 4 USB cable see diagram Cable USB véase diagrama Câble USB voir le diagramme Conexiones tipicas Antes de la conexión Verifique atentamente el conexionado del vehículo Una conexión incorrecta podría producir daños graves en la unidad Los cordones del cable de alimentación y los del conector procedentes de la carrocería del automóvil podrían ser de diferentes en color 1Conecte los co...

Page 80: ... des feux de recul Reverse lamp lead Conductor de la luz trasera Fil des feux de recul To car battery A la batería del automóvil À la batterie de la voiture Purple with white stripe Púrpura con rayas blancas Violet avec bande blanche Reverse lamps Luces traseras Feux de recul B TROUBLESHOOTING The fuse blows Are the red and black leads connected correctly Power cannot be turned on Is the yellow le...

Page 81: ...Connexions pour un appareil de lecture extérieur KS HP2 Cordless headphones not supplied 7 Auriculares inalámbricos no suministrado 7 Casque d écoute sans fil non fourni 7 KV MR9010 9 INCH WIDESCREEN MONITOR not supplied MONITOR DE PANTALLA ANCHA DE 9 PULGADAS no suministrado MONITEUR COULEUR À ÉCRAN LARGE DE 9 POUCES non fourni Video cord not supplied Cordón de video no suministrado Cordon vidéo ...

Page 82: ... con jacks de salida de línea Adaptador de entrada por línea KS U57 Reproductor de audio portátil con jack mini estéreo de 3 5 mm 3 16 pulgada Adaptador de entrada AUX KS U58 Cuando conecte más de un componente máximo tres se recomienda que conecte los componentes en serie como se explica a continuación No puede utilizar juntas la radio XM y la radio satelital SIRIUS Lors de la connexion des appar...

Page 83: ...tallatie en aansluiting van het apparaat vindt u in de desbetreffende handleiding INSTRUCTIONS BEDIENUNGSANLEITUNG MANUEL D INSTRUCTIONS GEBRUIKSAANWIJZING LVT1797 003A E For canceling the display demonstration see page 7 Zum Abbrechen der Displaydemonstration siehe Seite 7 Pour annuler la démonstration des affichages référez vous à la page 7 Zie bladzijde 7 voor het annuleren van de displaydemons...

Page 84: ...r Richtlinie 1999 5 EG befindet Wien Con la presente JVC dichiara che questo KD AVX44 è conforme ai requisiti essenziali ed alle altre disposizioni pertinenti stabilite dalla direttiva 1999 5 CE Français Malti Par la présente JVC déclare que l appareil KD AVX44 est conforme aux exigences essentielles et aux autres dispositions pertinentes de la directive 1999 5 CE Hawnhekk JVC jiddikjara li dan KD...

Page 85: ... og øvrige relevante krav i direktiv 1999 5 EF Niniejszym JVC oświadcza że KD AVX44 jest zgodny z zasadniczymi wymogami oraz pozostałymi stosownymi postanowieniami Dyrektywy 1999 5 EC Cesky Slovensko JVC tímto prohlašuje že tento KD AVX44 je ve shodě se základními požadavky a dalšími príslušnými ustanoveními směrnice 1999 5 ES JVC izjavlja da je ta KD AVX44 v skladu z bistvenimi zahtevami in ostal...

Page 86: ...d human health This symbol is only valid in the European Union For security reasons a numbered ID card is provided with this unit and the same ID number is imprinted on the unit s chassis Keep the card in a safe place as it will help the authorities to identify your unit if stolen ENGLISH 2 WARNINGS To prevent accidents and damage DO NOT install any unit or wire any cable in a location where it ma...

Page 87: ...nology must be authorized by Macrovision and is intended for home and other limited viewing uses only unless otherwise authorized by Macrovision Reverse engineering or disassembly is prohibited Contents INTRODUCTION Playable disc type 4 Before operations 5 OPERATIONS Basic operations AV menu 6 Basic operations Control panel 8 Basic operations Remote controller RM RK252 10 Listening to the radio 12...

Page 88: ... Rewritable CD R RW Compliant to ISO 9660 level 1 level 2 Romeo Joliet CD DA MP3 WMA WAV AAC 4 JPEG DivX MPEG1 MPEG2 MPEG4 1 IfyouinsertaDVDVideodiscofanincorrectRegionCode Regioncodeerror appearsonthemonitor 2 DVD Rrecordedinmulti borderformatisalsoplayable exceptforduallayerdiscs DVD RWduallayerdiscsarenotplayable 3 Itispossibletoplaybackfinalized R RW Videoformatonly discs RWdoublelayerdiscsare...

Page 89: ...l panel is open When Illumination is set to Normal page 59 Beforeoperations Touch pad controls How to operate the unit by the touch pad controls You can operate the unit by touching the appropriate part of the touch pad controls To adjust the volume move your finger on the touch pad knob as illustrated below to display the animation on the monitor then press 5 or repeatedly You can also adjust the...

Page 90: ... the touch pad controls and monitor are turned on Ÿ Enter AV Menu Non available items will be shaded Select an icon to enter the setup screen In this manual English indications are used for purpose of explanation You can select the indication language on the monitor page 55 Setup AV Menu Enter Through Sound Fader Balance Volume Adjust Subwoofer Level High Pass Filter Crossover High Pass Filter Exi...

Page 91: ...isplay Setup Display Clock Disc Setup 1 Disc Setup 2 Tuner Demonstration Exit Off On 6 7 Time Set Exit Hours 18 00 Time Set Exit Minutes 18 35 Setup AV Menu Enter Setup Display Clock Disc Setup 1 Disc Setup 2 Tuner 0 00 Clock Time Set Time Format OSD Clock Clock Adjust Canceling the display demonstration and setting the clock ...

Page 92: ...e unit Use only when the internal system malfunctions r Detaches the control panel page 9 1 Youcannotselectthesesourcesiftheyarenotready 2 Byholding5 youcandisplaythelistaccessible fortheselectedsource Basicoperations Controlpanel 1 Selects sources 1 Tuner DAB Disc USB or USB iPod Changer iPod or External Input Bluetooth AV Input You can also select sources by touching 5 4 after holding SRC for en...

Page 93: ...screen only for video sources DVD 01 02 0 01 20 MULTI DIGITAL CHAP RPT C T VIDEO 15 45 DVD 01 02 0 01 20 MULTI DIGITAL CHAP RPT C T VIDEO 15 45 Source information screen Playback picture and the source information screen Navigation screen This screen is displayed when Navigation is selected for AV Input page 58 Back to the beginning To attach the control panel To tilt the control panel Hold 0 unti...

Page 94: ...l function See the Installation Connection Manual separate volume for connection IMPORTANT When Dual Zone is activated page 30 the remote controller functions only for operating the DVD CD player Basicoperations Remotecontroller RM RK252 Main elements and features R03 LR03 AAA 1 Turns on the power Turns off the power Hold Attenuates the sound when the power is on 2 Disc USB and USB iPod Reverse se...

Page 95: ...verse search forward search Hold In menu selecting mode Selects an item Then press to confirm the selection Skips 10 items at a time Hold Bluetooth 5 Selects group folder 4 Reverse skip forward skip Reverse search forward search Hold q Disc USB and USB iPod Forward search w Selects the source e Disc USB and USB iPod Starts and pauses playback Bluetooth Starts playback Answers incoming calls r Chan...

Page 96: ...tedly The ST indicator lights up when receiving an FM stereo broadcast with sufficient signal strength TUNER FM1 P1 87 5 MHz FLAT AF TP MO 15 45 Bayern Radio Pop Music Listeningtotheradio A Band B Sound mode page 52 C Preset no D Frequency E PS station name for FM RDS If no signal is coming in No Name appears F PTY code for FM RDS G Tuner related function indicators ...

Page 97: ...ations with the strongest signals are searched and stored automatically in the FM band When an FM stereo broadcast is hard to receive 1 2 3 4 Reception improves but the stereo effect will be lost The MO indicator lights up To restore the stereo effect select Off in step 4 Mono Exit Off On Off Mode Mono SSM PTy Standby Mode AV Menu Enter Mode Start Mono SSM PTy Standby Mode AV Menu Enter ...

Page 98: ...t To select directly 1 2 To select from the Preset List 1 2 For FM Each time you hold 5 you can change the bands 3 Select the preset number Hold FM1 Enter Store 87 5 89 9 97 9 105 9 108 0 87 5 1 2 3 4 5 6 The Preset List can also be accessed through AV Menu List or FM1 Enter Store 87 5 89 9 97 9 105 9 108 0 87 5 1 2 3 4 5 6 FM1 Enter Store 87 5 89 9 97 9 105 9 108 0 87 5 1 2 3 4 5 6 Hold FM1 Enter...

Page 99: ...earch Start Memory Pop Music Rock Music Easy Listening Serious Classics Current Affairs Varied Speech 1 2 3 4 5 6 PTy Search Start Memory Cultures Science Varied Speech Pop Music Rock Music Eash Listening Hold TUNER FM1 XX X MHz FLAT 15 45 Science PTy Search Storing your favorite programme types You can store your favorite PTY codes into the PTY Preset List 1 Follow steps 1 and 2 in the left colum...

Page 100: ...e changes to the preset TA volume level if the current level is lower than the preset level page 58 Lights up Not yet activated Tune in to another station providing the RDS signals Flashes Touch T P to deactivate Goes off PTY Standby Reception Indicator Enter AV Menu Mode PTy Standby right column and page 61 PTY The unit will temporarily switch to your favorite PTY programme from any source other ...

Page 101: ...u can change the Network Tracking Reception setting AF Regional on page 58 When the DAB tuner is connected refer also to Tracing the same programme Alternative Frequency Reception DAB AF page 49 A Automatic station selection Programme Search Usually when you select preset stations the preset station is tuned in If the signals from the FM RDS preset station are not sufficient for good reception thi...

Page 102: ...nitor the unit cannot accept the operation you have tried to do In some cases without showing operations will not be accepted 0 Ejects the disc 3 8 Starts and pauses playback BAND Stops playback Open the front panel Ÿ Insert the disc Playback starts automatically Caution Do not place your finger behind the control panel Caution on volume setting Discs and connected USB devices produce very little ...

Page 103: ...er no Playing time E Playback mode 4 Touch Selects chapter Hold Reverse forward search 1 5 Selects program no Play List no DISP Touch if necessary page 9 4 Touch Selects track Hold Reverse forward search for DivX MPEG 2 5 Touch Selects folder Hold Displays Folder List DISP Touch if necessary page 9 DVD 01 02 0 01 20 FLAT DIGITAL C P VR PRG 15 45 A Audio format B VR PRG Original program VR PL Play ...

Page 104: ... 52 C Track no Playing time CD 02 0 01 20 FLAT 15 45 Current Track Title Artist Name Disc Title 4 Touch Selects track Hold Reverse forward search 1 A Sound surround mode pages 26 and 52 B Track no Playing time C Track title only for CD Text Artist Name Disc title 2 CD 01 02 0 01 20 FLAT 15 45 Current Folder Name Current File Name mp3 MP3 RPT 4 Touch Selects track Hold Reverse forward search 1 5 To...

Page 105: ...r Repeats current chapter Program Repeats current program not available for Playlist playback Track Repeats current track for VCD PBC not in use Disc All Randomly plays all tracks for VCD PBC not in use Track Repeats current track Folder Randomly plays all tracks of current folder then tracks of next folders Folder Repeats all tracks of the current folder Disc All Randomly plays all tracks Track R...

Page 106: ...ctivate the prohibition No Eject appears To cancel the prohibition repeat the same procedure to select EJECT OK Hold Folder List My Best Cinema Pops My Best2 Favorite Song Cinema2 Folder List My Best Cinema Pops My Best2 Favorite Song Cinema2 File List Enter Song011 mp3 Song012 mp3 Song013 mp3 Song014 mp3 Song015 mp3 Song016 mp3 Operations using the remote controller RM RK252 Also functions as CLR...

Page 107: ... Searchspeed x2 x5 x10 x20 x60 2 Slowmotionspeed 1 32 1 16 1 8 1 4 1 2 3 Searchspeed x2 x10 Stops playback Starts or pauses playback Reverse forward search 1 No sound can be heard Forward slow motion 2 during pause No sound can be heard Reverse slow motion does not work Select chapter during playback or pause Reverse forward search 3 Hold Selects program Selects Play List during playback or pause ...

Page 108: ...track within the same folder Selects folder Changes the aspect ratio of the playback pictures While playing Back advance the scenes by 5 minutes For DivX6 Using menu driven features 1 2 Select the item you want to start playback 3 1st press 1st press 2nd press 3rd press 2nd press Current playback position Twice Also functions as CLR clear Erases a misentry if pressed while holding SHIFT ...

Page 109: ... of the playback pictures Twice Stops playback Starts or pauses playback Reverse forward search 3 Forward slow motion 4 during pause No sound can be heard Reverse slow motion does not work Selects track Reverse forward search 5 Hold No sound can be heard Selects track Changes the aspect ratio of the playback pictures Stops playback Starts or pauses playback Reverse forward search 3 Selects track R...

Page 110: ... center speaker otherwise no sound comes out of the center speaker page 57 You cannot activate this function in the following cases When USB iPod is selected as the source When Dual Zone is in use MULTI For multi channel encoded sources such as Dolby Digital 3 and DTS 4 When activated MULTI is shown on the source information screen Dolby Pro Logic II Movie Music For 2 channel sources except for Di...

Page 111: ...und Surround Off Surround On Surround On Exit Auto Through Dolby PLII Movie Dolby PLII Music To change the Dolby PLIIMusic setting In step 4 in the left column 1 Select Dolby PLII Music 2 Enter each sub screen then select the desired setting EX When Panorama is selected in step 1 Panorama Select On to add wraparound sound effect Center Width Adjust the center image so it may be heard only from the...

Page 112: ...nu appears For entering time numbers To move the entry position To select a number Repeat steps Ÿ and to set other items if needed To remove the on screen bar Operations using the on screen bar DVD VCD DivX MPEG1 MPEG2 JPEG These operations are possible on the monitor using the remote controller ...

Page 113: ...disc type DVD V T02 C03 TOTAL 1 25 58 TIME TITLE CHAP RPT C RPT T02 C03 PG 001 C 002 PL 003 C 004 TRACK 01 F001 T001 F002 F002 5 Time indication Elapsed playing time of the disc Remaining title time for DVD Remaining disc time for others Elapsed playing time of the current chapter track 2 Remaining time of the current chapter track 2 6 Playback status Play Reverse forward search Reverse forward sl...

Page 114: ...e you can only operate the DVD CD player using the remote controller 1 2 3 Off Deactivates Dual Zone On Activates Dual Zone without applying Headphone Surround The DUAL indicator lights up On Surround On Activates Dual Zone and applies Headphone Surround Headphone Surround appears and the DUAL SURROUND indicator lights up When Dual Zone is activated the main source is changed to Disc To select a d...

Page 115: ... of tracks in the current folder total number of tracks on the disc 8 Track information only for MP3 WMA WAV AAC 9 Track list p Current track highlighted To select a folder or track 1 Select Folder column or Track column on the control screen 2 Select a folder or track If necessary press 6 to start playback MODE REPEAT TRACK TIME 00 14 Track 6 14 Track Information Cloudy Fair Fog Hail Indian summe...

Page 116: ...gramorPlayListmaynot bedisplayeddependingontherecordingequipment Folder 144 240 Track 144 198 Page 4 7 fol120 fol121 fol122 fol123 fol124 fol125 fol126 fol127 fol128 fol129 fol150 fol151 fol152 fol153 fol154 fol155 fol156 fol157 fol158 fol159 fol140 fol141 fol142 fol143 fol144 fol145 fol146 fol147 fol148 fol149 fol130 fol131 fol132 fol133 fol134 fol135 fol136 fol137 fol138 fol139 file0141 wma file...

Page 117: ...yback DISP Touch if necessary page 9 BAND Stops playback Connect a USB device USB is selected as the source and playback starts automatically This unit can play JPEG MPEG1 MPEG2 1 MP3 WMA WAV AAC 2 files stored on a USB mass storage class device You can operate the USB device in the same way you operate the files on discs pages 21 to 29 You cannot select USB when Dual Zone is in use All tracks on ...

Page 118: ...cator lights up on the source information screen To cancel select Off in step 4 You can use Repeat or Random playback mode Ex To select Track Repeat 1 2 3 Repeat Set Off Track Folder Off Mode Repeat Random Mode AV Menu Enter Caution Avoid using the USB device if it might hinder your safety driving Do not pull out and attach the USB device repeatedly while Now Reading is flashing on the monitor Do ...

Page 119: ... from phone book from call history Redial and Received Call by dialing number by preset numbers by voice command Receiving the SMS Short Message Service Playing back a Bluetooth audio player Refer also to the instructions supplied with the Bluetooth device Connecting a Bluetooth device for the first time Pairing and PIN Code When you connect a Bluetooth device to the unit for the first time make p...

Page 120: ...tooth device While Open is flashing on the monitor Enter the same PIN code as entered in the above step on the device to be connected Now connection is established and you can use the device through the unit turns blue and the following icon appears when the connection is established Appears when the Bluetooth phone is connected Appears when the Bluetooth audio player is connected Appears when the...

Page 121: ...evice you want to delete 5 Deviec Menu Phone Connect Audio Connect Delete Pairing New Pairing Delete Pairing W21T P901i P6200 Delete Enter No Yes Bluetooth AV Menu Enter Phone Connect Bluetooth Dial Menu Device Menu Settings Continued on the next page Bluetooth AV Menu Enter Redial Bluetooth Dial Menu Device Menu Settings The built in microphone is behind the upper left hand corner of the unit ...

Page 122: ...ENU page 62 When a call comes in The source is automatically changed to Bluetooth When Auto Answer is activated The unit answers the incoming calls automatically page 62 When Auto Answer is deactivated press SRC or touch any control to answer the incoming call To end the call or reject an incoming call Hold SRC or any control Answering a waiting call If your cellular phone is equipped with the cal...

Page 123: ...phone numbers names listed in step 1 Select a number Move the entry position Hold Delete Enter No One All Redial Dial Store 08945671234 12312341234 Delete To copy the phone book You can copy the phone book memory of a cellular phone into the unit 1 2 3 4 Enter a PIN code to the unit You can enter any number you like 1 digit to 16 digit number Some cellular phones have their own PIN code Enter the ...

Page 124: ...try Phonebook Full appears on the monitor Delete unwanted names before copying page 39 Presetting the phone numbers You can preset up to six phone numbers 1 Display the phone number you want to preset by using Redial Received Calls Phonebook or Phone Number 2 3 Select a preset number 4 Store the phone number The phone number selected in step 1 is now stored in preset number 5 You can use the follo...

Page 125: ...ack title Artist Name Album title Appearsonlywhentheinformationcomesfromthe device Select Bluetooth Ÿ Start playback See pages 35 and 36 for connecting a new device See page 36 for connecting disconnecting a registered device See page 37 for deleting a registered device When the sound is stopped or interrupted during the use of a Bluetooth device turn off then turn on the unit If the sound is not ...

Page 126: ...K not supplied When connected with the USB cable below Make sure iPod Off is selected for AV Input page 58 USB iPod 01 0 01 20 FLAT 15 45 Track Title Album Title Artist Name A Source name B Sound mode page 52 C Track or video no Playing time 6 Starts pauses playback 5 Moves to the previous next item of a category ex another album artist playlist etc 1 DISP Touch if necessary page 9 1 5 maynotfunct...

Page 127: ...uch6in step2onpage42 Changing the play speed of the audiobooks You can change the play speed of the audiobooks Follow steps 1 to 3 in the left column In step 3 1 2 Select the desired speed 3 Select an item EX When Music is selected in step 2 Repeat the procedure to select the desired track video 4 Confirm the selection Selecting playback modes You can use Repeat or Random playback mode Ex To selec...

Page 128: ...the previous menu touch 5 Selecting playback modes Operations are exactly the same as explained on page 43 AudioBooks isnotdisplayedinstep3 Pauses playback To resume touch again A Source name B Sound mode page 52 C Track no Playing time Preparation When operating through the CD changer jack make sure iPod is selected for the external input setting page 58 Select iPod Playback starts automatically ...

Page 129: ...r is selected for the external input setting page 58 Select Changer Ÿ Enter Disc List Each time you hold the button you can display the other list of the remaining discs Disc List MP3 DISC DISC 02 DISC 03 DISC 04 DISC 05 DISC 06 Disc List Enter MP3 DISC DISC 02 DISC 03 DISC 04 DISC 05 DISC 06 Each List can also be accessed through AV Menu List Disc List Folder List File List Hold Folder List My Be...

Page 130: ...rent folder Disc Randomly plays all tracks of the current disc Disc Repeats all tracks of the current disc All Randomly plays all tracks of all loaded discs 4 When one of the playback modes is selected the corresponding indicator lights up on the source information screen To cancel select Off in step 4 You can use Repeat or Random playback mode Ex To select Track Repeat 1 2 3 Repeat Set Off Track ...

Page 131: ...gnals together with their regular programme signals DRC will reinforce the low level sounds to improve your listening The DRC indicator will light up while tuning in a service with the DRC signals 1 2 3 4 As the number increases the effect becomes stronger A TEXT indicator B Sound mode page 52 C Band D Preset No E Frequency F Service label G Ensemble label H PTY code I DAB indicators Standby Recep...

Page 132: ...service you want to preset 3 Display the Preset List 4 Select a preset number 5 Store the service Preset List can also be accessed through AV Menu List Selecting preset services On the remote 1 2 Hold DAB1 Enter Store Service Label No Serv FFH No Serv HRS HRH 1 2 3 4 5 6 DAB1 Enter Store Service Label No Serv FFH No Serv HRS HRH 1 2 3 4 5 6 DAB1 Enter Store Service Label No Serv FFH No Serv HRS HR...

Page 133: ...58 Activating deactivating Announcement Standby Reception Announcement Standby Reception allows the unit to switch temporarily to your favorite service announcement type Announcement Standby Reception Indicator Enter AV Menu Mode Announce Standby below and page 61 ANN The unit will temporarily switch to your favorite service from any source other than FM AM Lights up Not yet activated Tune in to a...

Page 134: ... connected component and start playing the source Navigation screen When you connect a Navigation System to the unit you can view the navigation screen regardless of the source Preparation Make sure AV Input setting is selected for Navigation page 58 To watch the navigation screen touch DISP repeatedly page 9 The aspect ratio of the navigation screen is fixed to Full regardless of the Aspect setti...

Page 135: ...the Line Input Adapter KS U57 not supplied or AUX Input Adapter KS U58 not supplied EXT IN EXT INPUT FLAT 15 45 Preparation Make sure External Input is selected for External Input page 58 Select External Input Ÿ Turn on the connected component and start playing the source A Sound mode page 52 B Assigned title page 53 ...

Page 136: ...ode is temporarily canceled Storing your own adjustments You can store your adjustments into User1 User2 and User3 1 Follow steps and Ÿ on the left 2 Select the item you want to adjust 3 Adjust each setting 4 Select User1 User2 or User3 then store the setting Soundequalization Edit Store 03 60 0 Hz Equalizer Exit Edit Flat Hard Rock R B Pop Jazz Equalizer Exit Edit Flat Hard Rock R B Pop Jazz Edit...

Page 137: ...lable characters page 68 To erase the whole characters hold DISP 2 Repeat step 1 until you finish entering the title Finish the procedure You can assign titles to AV Input and External Input You can enter up to 16 characters Ex Assigning title to AV Input Select AV Input Ÿ Assigningtitlestothesources Mode Title Entry Title Entry Store AV In Name AV INPUT A a 0 Mode AV Menu Enter ...

Page 138: ...olor of the monitor Blue Light Blue Red Orange Yellow Green Purple Dark Blue Dark Green Brown Light Brown Black Scroll Off Cancels Once Scrolls the source information once Auto Repeats scrolling 5 second intervals Holding DISP on the unit scrolls the information regardless of this setting Tag Display Off Cancels On Shows the Tag data while playing MP3 WMA WAV AAC tracks Dual Zone Bluetooth List Mo...

Page 139: ...pears and you cannot adjust this setting Aspect 3 You can change the aspect ratio of the picture Aspect ratio of incoming signal 4 3 16 9 Full For 16 9 original pictures Auto For Disc Aspect ratio is automatically selected to match to the incoming signals For other video sources Aspect ratio is fixed at Regular Regular For 4 3 original pictures Language 4 Select the indication language shown on th...

Page 140: ... 4 3 Pan Scan Select when the aspect ratio of the external monitor is 4 3 Refer to the illustrations on the left to see how the pictures are shown on the monitor OSD Position Select the position of the on screen bar 29 1 Higher position 2 Lower position File Type Select playback file type when a disc USB contains different types of files You can store this setting separately for each source Disc a...

Page 141: ...nter speaker when surround is deactivated Speaker Level You can adjust the output level of the activated speakers Speaker Size above monitoring the test tone Front Lch Center Ch Front Rch Rear Rch Subwoofer 2 Rear Lch Adjust the output level of each speaker in the range of 10dB to 10dB Initial 0dB Hold 6 to turn on and off the test tone Speaker Distance You can adjust the speaker output timing Fro...

Page 142: ...On 49 Input AV Input 3 You can determine the use of LINE IN and VIDEO IN plugs Off Select when no component is connected AV Input is skipped while selecting the source iPod Off Select when connecting the iPod using the USB Audio and Video cable for iPod 42 Audio Video Select when connecting an AV component such as a VCR Audio Select when connecting an audio component such as a portable audio playe...

Page 143: ...lize all settings you have made in AV Menu Hold 6 then reset the unit 3 Equalizer Flat Hard Rock R B Pop Jazz Dance Country Reggae Classic User1 User2 User3 52 1 Dependsontheamplifiergaincontrol page60 2 SelectableonlywhenaDABtunerisconnected 3 Notselectablewhen AVInput isselectedasthesource 4 TheREVERSEGEARSIGNALleadconnectionisrequired Installation ConnectionManual Therearviewthrough thecameraap...

Page 144: ...d the others Subwoofer Level 1 Adjust the subwoofer output level 06 to 08 Initial 00 High Pass Filter Through Select when the subwoofer is not connected On Select when the subwoofer is connected Crossover Adjust the crossover frequency between the front rear speakers and the subwoofer 80Hz 120Hz 150Hz Amplifier Gain You can change the maximum volume level of this unit Off Deactivates the built in ...

Page 145: ...ion you can change the announcement type for Announcement Standby Reception AudioBooks Only for USB iPod Normal Faster Slower 43 List The accessible lists differ depending on the source 14 22 42 48 Dual Zone Off On On Surround On 30 Bluetooth Menu items Selectable settings reference page Dial Menu 6 Redial Received Calls Phonebook Preset Calls Phone Number Voice Dialling Select one of the call met...

Page 146: ...ls manually On The unit answers the incoming calls automatically Reject The unit refuses all incoming calls SMS Notify On The unit informs you of the arrival of a message by ringing and displaying Receiving Message Off The unit does not inform you of the arrival of a message Add Phonebook Copy the phone book memory of a cellular phone into the unit You can register up to 50 phone numbers 39 MIC Se...

Page 147: ...c by the edges Do not touch its recording surface When storing a disc into its case gently insert the disc around the center holder with the printed surface facing up Make sure to store discs into the cases after use Maintenance To keep discs clean A dirty disc may not play correctly If a disc does become dirty wipe it with a soft cloth in a straight line from center to edge Do not use any solvent...

Page 148: ...you change the source playback also stops without ejecting the disc Next time you select Disc for the playback source disc play starts from where it stopped previously Playing Recordable Rewritable discs This unit can recognize a total of 5 000 files and 250 folders a maximum of 999 files per folder Use only finalized discs This unit can play back multi session discs however unclosed sessions will...

Page 149: ...equency 48 kHz 44 1 kHz 32 kHz for MPEG1 24 kHz 22 05 kHz 16 kHz for MPEG2 48 kHz 44 1 kHz 32 kHz 22 05 kHz for WMA 44 1 kHz for WAV 48 kHz 44 1 kHz for AAC This unit can show ID3 Tag Version 1 0 1 1 2 2 2 3 2 4 for MP3 This unit can also show WAV WMA AAC Tag This unit can play back files recorded in VBR variable bit rate Files recorded in VBR have a discrepancy in elapsed time indication This uni...

Page 150: ... Cannot play this device Check the device appears on the monitor The unit cannot recognize a USB device whose rating is other than 5 V and exceeds 500 mA While playing from a USB device the playback order may differ from other players This unit may be unable to play back some USB devices or some files due to their characteristics or recording conditions USB devices equipped with special functions ...

Page 151: ...Video cable Notice When operating an iPod some operations may not be performed correctly or as intended In this case visit the following JVC web site For the USB connection http www jvc victor co jp english car For the interface adapter connection http www jvc co jp english car support ks pd100 index html DAB tuner Only the primary DAB service can be preset even when you store a secondary service ...

Page 152: ... 68 Characters you can enter for titles In addition to the roman alphabet A Z a z you can use the following characters to assign titles page 53 When Руccĸий is selected for Language page 55 Upper and lower cases Numbers and symbols When any language other than Руccĸий is selected for Language page 55 Upper and lower cases Numbers and symbols About sounds reproduced through the rear terminals Speak...

Page 153: ...A Sanskrit TR Turkish BN Bengali Bangla HU Hungarian MG Malagasy SD Sindhi TS Tsonga BO Tibetan HY Armenian MI Maori SG Sangho TT Tatar BR Breton IA Interlingua MK Macedonian SH Serbo Croatian TW Twi CA Catalan IE Interlingue ML Malayalam SI Singhalese UK Ukrainian CO Corsican IK Inupiak MN Mongolian SK Slovak UR Urdu CS Czech IN Indonesian MO Moldavian SL Slovenian UZ Uzbek CY Welsh IS Icelandic ...

Page 154: ...ted to VIDEO IN plug Check the cords and connections Signal input is too weak Mecha Error Push Reset appears on the monitor and the control panel does not move Reset the unit page 3 The touch pad controls do not respond properly Illumination function does not work properly Keep your hands and controls clean and dry Eliminate static electricity and do not place magnetic items near the unit Leave th...

Page 155: ...ror File playback Disc cannot be played back Change the disc Record the tracks using a compliant application in the appropriate discs page 4 Add appropriate extension codes to the file names Noise is generated The track played back is not a playable file format Skip to another file Tracks are not played back as you have intended them to play Playback order may differ from the one played back using...

Page 156: ...etooth device Enter the same PIN code for both the unit and target device If the PIN code of the device is not indicated on its manuals try 0000 or 1234 Phone sound quality is poor Reduce the distance between the unit and the Bluetooth cellular phone Move the car to place where you can get a better signal reception The sound is interrupted or skipped while using a Bluetooth audio player Reduce the...

Page 157: ...ter the artwork is loaded page 67 CD changer No Disc appears on the monitor Insert a disc into the magazine No Magazine appears on the monitor Insert the magazine Cannot play this disc Check the disc appears on the monitor Disc does not include playable files Replace the disc with playable files Reset 08 appears on the monitor Connect this unit and the CD changer correctly and press the reset butt...

Page 158: ...r Terminals Input LINE IN VIDEO IN USB input terminal Aerial input Output 2nd AUDIO OUT VIDEO OUT Others CD changer OE REMOTE FM AM TUNER Frequency Range FM 87 5 MHz to 108 0 MHz AM MW 522 kHz to 1 620 kHz LW 144 kHz to 279 kHz FM Tuner Usable Sensitivity 11 3 dBf 1 0 μV 75 Ω 50 dB Quieting Sensitivity 16 3 dBf 1 8 μV 75 Ω Alternate Channel Selectivity 400 kHz 65 dB Frequency Response 40 Hz to 15 ...

Page 159: ...ompatible File System FAT 32 16 12 Max Current Less than 500 mA 5 V BLUETOOTH Version Bluetooth 1 2 certified Output Power 4 dBm Max Power class 2 Service Area Within 10 m Profile HFP Hands Free Profile 1 5 OPP Object Push Profile 1 1 A2DP Advanced Audio Distribution Profile 1 2 AVRCP Audio Video Remote Control Profile 1 3 GENERAL Power Requirements Operating Voltage DC 14 4 V 11 V to 16 V allowan...

Page 160: ...onforme aux directives et normes européennes en vigueur concernant la compatibilité électromagnétique et à la sécurité électrique Représentant européen de la société Victor Company of Japan Limited JVC Technology Centre Europe GmbH Le nom de la compagnie a changé dans JVC Technical Services Europe GmbH Postfach 10 05 52 61145 Friedberg Allemagne Sehr geehrter Kunde sehr geehrte Kundin dieses Gerät...

Page 161: ... Installeer toestellen en aansluitkabels NIET op plaatsen waar dit een gevaar vormt voor het bedienen van het stuur of de versnelling aangezien elke belemmering van de juiste werking van het stuur en de versnelling tot een ongeluk kan lijden dit een gevaar vormt voor de airbag aangezien elke belemmering van de werking van de airbag tot een dodelijk ongeluk kan lijden dit het uitzicht belemmert Bed...

Page 162: ...r Blokkeer de ventilatie niet INSTALLATION IN DASH MOUNTING The following illustration shows a typical installation If you have any questions or require information regarding installation kits consult your JVC IN CAR ENTERTAINMENT dealer or a company supplying kits If you are not sure how to install this unit correctly have it installed by a qualified technician Make sure not to block the fan on t...

Page 163: ...imentation fourni comme montré sur l illustration Contactez votre revendeur automobile autorisé avant d installer l appareil U moet mogelijk de bedrading van het bijgeleverde spanningssnoer als afgebeeld veranderen Raadpleeg een erkend autogarage alvorens deze receiver te installeren ELECTRICAL CONNECTIONS To prevent short circuits we recommend that you disconnect the battery s negative terminal a...

Page 164: ... Gray Grau Gris Grijs Green with black stripe Grün mit schwarzem Streifen Vert avec bande noire Groen met zwarte streep Green Grün Vert Groen Purple with black stripe Lila mit schwarzem Streifen Violet avec bande noire Paars met zwarte streep Purple Lila Violet Paars Left speaker front Linker Lautsprecher vorne Enceinte gauche avant Linkerspeaker voorin Right speaker front Rechter Lautsprecher vor...

Page 165: ...ite stripe Fernbedienungsleitung Blau mit weißem Streifen Fil d alimentation à distance Bleu avec bande blanche Afstandbedieningsdraad Blauw met witte streep To the remote lead of other equipment or power aerial if any Zum Zusatzkabel des anderen Geräts oder der Motorantenne sofern vorhanden Au fil de télécommande de l autre appareil ou à l antenne automatique s il y en a une Naar afstandsdraad va...

Page 166: ... Model name CD changer CD CH CH X1500 etc JVC DAB tuner KT DB1000 You can also connect the following components through the various JVC adapters Connection cords may need to be purchased separately Component Adapter Model name iPod Interface adapter for iPod KS PD100 Portable audio player with line output jacks Line Input Adapter KS U57 Portable audio player with 3 5 mm stereo mini jack AUX Input ...

Page 167: ...n et les raccordements se référer au manuel séparé INSTRUCTIONS MANUAL DE INSTRUCCIONES MANUEL D INSTRUCTIONS LVT1797 005A EU DVD CD RECEIVER RECEPTOR CON DVD CD RÉCEPTEUR DVD CD KD AVX44 For canceling the display demonstration see page 7 Para cancelar la demonstración en pantalla consulte la página 7 Pour annuler la démonstration des affichages référez vous à la page 7 ...

Page 168: ...r Richtlinie 1999 5 EG befindet Wien Con la presente JVC dichiara che questo KD AVX44 è conforme ai requisiti essenziali ed alle altre disposizioni pertinenti stabilite dalla direttiva 1999 5 CE Français Malti Par la présente JVC déclare que l appareil KD AVX44 est conforme aux exigences essentielles et aux autres dispositions pertinentes de la directive 1999 5 CE Hawnhekk JVC jiddikjara li dan KD...

Page 169: ... og øvrige relevante krav i direktiv 1999 5 EF Niniejszym JVC oświadcza że KD AVX44 jest zgodny z zasadniczymi wymogami oraz pozostałymi stosownymi postanowieniami Dyrektywy 1999 5 EC Cesky Slovensko JVC tímto prohlašuje že tento KD AVX44 je ve shodě se základními požadavky a dalšími príslušnými ustanoveními směrnice 1999 5 ES JVC izjavlja da je ta KD AVX44 v skladu z bistvenimi zahtevami in ostal...

Page 170: ...ble in a location where it may obstruct the steering wheel and gearshift lever operations it may obstruct the operation of safety devices such as air bags it may obstruct visibility DO NOT operate the unit while driving If you need to operate the unit while driving be sure to look around carefully The driver must not watch the monitor while driving The driver must not put on the headphones while d...

Page 171: ...nology must be authorized by Macrovision and is intended for home and other limited viewing uses only unless otherwise authorized by Macrovision Reverse engineering or disassembly is prohibited Contents INTRODUCTION Playable disc type 4 Before operations 5 OPERATIONS Basic operations AV menu 6 Basic operations Control panel 8 Basic operations Remote controller RM RK252 10 Listening to the radio 12...

Page 172: ... Rewritable CD R RW Compliant to ISO 9660 level 1 level 2 Romeo Joliet CD DA MP3 WMA WAV AAC 4 JPEG DivX MPEG1 MPEG2 MPEG4 1 IfyouinsertaDVDVideodiscofanincorrectRegionCode Regioncodeerror appearsonthemonitor 2 DVD Rrecordedinmulti borderformatisalsoplayable exceptforduallayerdiscs DVD RWduallayerdiscsarenotplayable 3 Itispossibletoplaybackfinalized R RW Videoformatonly discs RWdoublelayerdiscsare...

Page 173: ...l panel is open When Illumination is set to Normal page 59 Beforeoperations Touch pad controls How to operate the unit by the touch pad controls You can operate the unit by touching the appropriate part of the touch pad controls To adjust the volume move your finger on the touch pad knob as illustrated below to display the animation on the monitor then press 5 or repeatedly You can also adjust the...

Page 174: ... the touch pad controls and monitor are turned on Ÿ Enter AV Menu Non available items will be shaded Select an icon to enter the setup screen In this manual English indications are used for purpose of explanation You can select the indication language on the monitor page 55 Setup AV Menu Enter Through Sound Fader Balance Volume Adjust Subwoofer Level High Pass Filter Crossover High Pass Filter Exi...

Page 175: ...isplay Setup Display Clock Disc Setup 1 Disc Setup 2 Tuner Demonstration Exit Off On 6 7 Time Set Exit Hours 18 00 Time Set Exit Minutes 18 35 Setup AV Menu Enter Setup Display Clock Disc Setup 1 Disc Setup 2 Tuner 0 00 Clock Time Set Time Format OSD Clock Clock Adjust Canceling the display demonstration and setting the clock ...

Page 176: ...e unit Use only when the internal system malfunctions r Detaches the control panel page 9 1 Youcannotselectthesesourcesiftheyarenotready 2 Byholding5 youcandisplaythelistaccessible fortheselectedsource Basicoperations Controlpanel 1 Selects sources 1 Tuner DAB Disc USB or USB iPod Changer iPod or External Input Bluetooth AV Input You can also select sources by touching 5 4 after holding SRC for en...

Page 177: ...screen only for video sources DVD 01 02 0 01 20 MULTI DIGITAL CHAP RPT C T VIDEO 15 45 DVD 01 02 0 01 20 MULTI DIGITAL CHAP RPT C T VIDEO 15 45 Source information screen Playback picture and the source information screen Navigation screen This screen is displayed when Navigation is selected for AV Input page 58 Back to the beginning To attach the control panel To tilt the control panel Hold 0 unti...

Page 178: ...l function See the Installation Connection Manual separate volume for connection IMPORTANT When Dual Zone is activated page 30 the remote controller functions only for operating the DVD CD player Basicoperations Remotecontroller RM RK252 Main elements and features R03 LR03 AAA 1 Turns on the power Turns off the power Hold Attenuates the sound when the power is on 2 Disc USB and USB iPod Reverse se...

Page 179: ...verse search forward search Hold In menu selecting mode Selects an item Then press to confirm the selection Skips 10 items at a time Hold Bluetooth 5 Selects group folder 4 Reverse skip forward skip Reverse search forward search Hold q Disc USB and USB iPod Forward search w Selects the source e Disc USB and USB iPod Starts and pauses playback Bluetooth Starts playback Answers incoming calls r Chan...

Page 180: ...tedly The ST indicator lights up when receiving an FM stereo broadcast with sufficient signal strength TUNER FM1 P1 87 5 MHz FLAT AF TP MO 15 45 Bayern Radio Pop Music Listeningtotheradio A Band B Sound mode page 52 C Preset no D Frequency E PS station name for FM RDS If no signal is coming in No Name appears F PTY code for FM RDS G Tuner related function indicators ...

Page 181: ...ations with the strongest signals are searched and stored automatically in the FM band When an FM stereo broadcast is hard to receive 1 2 3 4 Reception improves but the stereo effect will be lost The MO indicator lights up To restore the stereo effect select Off in step 4 Mono Exit Off On Off Mode Mono SSM PTy Standby Mode AV Menu Enter Mode Start Mono SSM PTy Standby Mode AV Menu Enter ...

Page 182: ...t To select directly 1 2 To select from the Preset List 1 2 For FM Each time you hold 5 you can change the bands 3 Select the preset number Hold FM1 Enter Store 87 5 89 9 97 9 105 9 108 0 87 5 1 2 3 4 5 6 The Preset List can also be accessed through AV Menu List or FM1 Enter Store 87 5 89 9 97 9 105 9 108 0 87 5 1 2 3 4 5 6 FM1 Enter Store 87 5 89 9 97 9 105 9 108 0 87 5 1 2 3 4 5 6 Hold FM1 Enter...

Page 183: ...earch Start Memory Pop Music Rock Music Easy Listening Serious Classics Current Affairs Varied Speech 1 2 3 4 5 6 PTy Search Start Memory Cultures Science Varied Speech Pop Music Rock Music Eash Listening Hold TUNER FM1 XX X MHz FLAT 15 45 Science PTy Search Storing your favorite programme types You can store your favorite PTY codes into the PTY Preset List 1 Follow steps 1 and 2 in the left colum...

Page 184: ...e changes to the preset TA volume level if the current level is lower than the preset level page 58 Lights up Not yet activated Tune in to another station providing the RDS signals Flashes Touch T P to deactivate Goes off PTY Standby Reception Indicator Enter AV Menu Mode PTy Standby right column and page 61 PTY The unit will temporarily switch to your favorite PTY programme from any source other ...

Page 185: ...u can change the Network Tracking Reception setting AF Regional on page 58 When the DAB tuner is connected refer also to Tracing the same programme Alternative Frequency Reception DAB AF page 49 A Automatic station selection Programme Search Usually when you select preset stations the preset station is tuned in If the signals from the FM RDS preset station are not sufficient for good reception thi...

Page 186: ...nitor the unit cannot accept the operation you have tried to do In some cases without showing operations will not be accepted 0 Ejects the disc 3 8 Starts and pauses playback BAND Stops playback Open the front panel Ÿ Insert the disc Playback starts automatically Caution Do not place your finger behind the control panel Caution on volume setting Discs and connected USB devices produce very little ...

Page 187: ...er no Playing time E Playback mode 4 Touch Selects chapter Hold Reverse forward search 1 5 Selects program no Play List no DISP Touch if necessary page 9 4 Touch Selects track Hold Reverse forward search for DivX MPEG 2 5 Touch Selects folder Hold Displays Folder List DISP Touch if necessary page 9 DVD 01 02 0 01 20 FLAT DIGITAL C P VR PRG 15 45 A Audio format B VR PRG Original program VR PL Play ...

Page 188: ... 52 C Track no Playing time CD 02 0 01 20 FLAT 15 45 Current Track Title Artist Name Disc Title 4 Touch Selects track Hold Reverse forward search 1 A Sound surround mode pages 26 and 52 B Track no Playing time C Track title only for CD Text Artist Name Disc title 2 CD 01 02 0 01 20 FLAT 15 45 Current Folder Name Current File Name mp3 MP3 RPT 4 Touch Selects track Hold Reverse forward search 1 5 To...

Page 189: ...r Repeats current chapter Program Repeats current program not available for Playlist playback Track Repeats current track for VCD PBC not in use Disc All Randomly plays all tracks for VCD PBC not in use Track Repeats current track Folder Randomly plays all tracks of current folder then tracks of next folders Folder Repeats all tracks of the current folder Disc All Randomly plays all tracks Track R...

Page 190: ...ctivate the prohibition No Eject appears To cancel the prohibition repeat the same procedure to select EJECT OK Hold Folder List My Best Cinema Pops My Best2 Favorite Song Cinema2 Folder List My Best Cinema Pops My Best2 Favorite Song Cinema2 File List Enter Song011 mp3 Song012 mp3 Song013 mp3 Song014 mp3 Song015 mp3 Song016 mp3 Operations using the remote controller RM RK252 Also functions as CLR...

Page 191: ... Searchspeed x2 x5 x10 x20 x60 2 Slowmotionspeed 1 32 1 16 1 8 1 4 1 2 3 Searchspeed x2 x10 Stops playback Starts or pauses playback Reverse forward search 1 No sound can be heard Forward slow motion 2 during pause No sound can be heard Reverse slow motion does not work Select chapter during playback or pause Reverse forward search 3 Hold Selects program Selects Play List during playback or pause ...

Page 192: ...track within the same folder Selects folder Changes the aspect ratio of the playback pictures While playing Back advance the scenes by 5 minutes For DivX6 Using menu driven features 1 2 Select the item you want to start playback 3 1st press 1st press 2nd press 3rd press 2nd press Current playback position Twice Also functions as CLR clear Erases a misentry if pressed while holding SHIFT ...

Page 193: ... of the playback pictures Twice Stops playback Starts or pauses playback Reverse forward search 3 Forward slow motion 4 during pause No sound can be heard Reverse slow motion does not work Selects track Reverse forward search 5 Hold No sound can be heard Selects track Changes the aspect ratio of the playback pictures Stops playback Starts or pauses playback Reverse forward search 3 Selects track R...

Page 194: ... center speaker otherwise no sound comes out of the center speaker page 57 You cannot activate this function in the following cases When USB iPod is selected as the source When Dual Zone is in use MULTI For multi channel encoded sources such as Dolby Digital 3 and DTS 4 When activated MULTI is shown on the source information screen Dolby Pro Logic II Movie Music For 2 channel sources except for Di...

Page 195: ...und Surround Off Surround On Surround On Exit Auto Through Dolby PLII Movie Dolby PLII Music To change the Dolby PLIIMusic setting In step 4 in the left column 1 Select Dolby PLII Music 2 Enter each sub screen then select the desired setting EX When Panorama is selected in step 1 Panorama Select On to add wraparound sound effect Center Width Adjust the center image so it may be heard only from the...

Page 196: ...nu appears For entering time numbers To move the entry position To select a number Repeat steps Ÿ and to set other items if needed To remove the on screen bar Operations using the on screen bar DVD VCD DivX MPEG1 MPEG2 JPEG These operations are possible on the monitor using the remote controller ...

Page 197: ...disc type DVD V T02 C03 TOTAL 1 25 58 TIME TITLE CHAP RPT C RPT T02 C03 PG 001 C 002 PL 003 C 004 TRACK 01 F001 T001 F002 F002 5 Time indication Elapsed playing time of the disc Remaining title time for DVD Remaining disc time for others Elapsed playing time of the current chapter track 2 Remaining time of the current chapter track 2 6 Playback status Play Reverse forward search Reverse forward sl...

Page 198: ...e you can only operate the DVD CD player using the remote controller 1 2 3 Off Deactivates Dual Zone On Activates Dual Zone without applying Headphone Surround The DUAL indicator lights up On Surround On Activates Dual Zone and applies Headphone Surround Headphone Surround appears and the DUAL SURROUND indicator lights up When Dual Zone is activated the main source is changed to Disc To select a d...

Page 199: ... of tracks in the current folder total number of tracks on the disc 8 Track information only for MP3 WMA WAV AAC 9 Track list p Current track highlighted To select a folder or track 1 Select Folder column or Track column on the control screen 2 Select a folder or track If necessary press 6 to start playback MODE REPEAT TRACK TIME 00 14 Track 6 14 Track Information Cloudy Fair Fog Hail Indian summe...

Page 200: ...gramorPlayListmaynot bedisplayeddependingontherecordingequipment Folder 144 240 Track 144 198 Page 4 7 fol120 fol121 fol122 fol123 fol124 fol125 fol126 fol127 fol128 fol129 fol150 fol151 fol152 fol153 fol154 fol155 fol156 fol157 fol158 fol159 fol140 fol141 fol142 fol143 fol144 fol145 fol146 fol147 fol148 fol149 fol130 fol131 fol132 fol133 fol134 fol135 fol136 fol137 fol138 fol139 file0141 wma file...

Page 201: ...yback DISP Touch if necessary page 9 BAND Stops playback Connect a USB device USB is selected as the source and playback starts automatically This unit can play JPEG MPEG1 MPEG2 1 MP3 WMA WAV AAC 2 files stored on a USB mass storage class device You can operate the USB device in the same way you operate the files on discs pages 21 to 29 You cannot select USB when Dual Zone is in use All tracks on ...

Page 202: ...cator lights up on the source information screen To cancel select Off in step 4 You can use Repeat or Random playback mode Ex To select Track Repeat 1 2 3 Repeat Set Off Track Folder Off Mode Repeat Random Mode AV Menu Enter Caution Avoid using the USB device if it might hinder your safety driving Do not pull out and attach the USB device repeatedly while Now Reading is flashing on the monitor Do ...

Page 203: ... from phone book from call history Redial and Received Call by dialing number by preset numbers by voice command Receiving the SMS Short Message Service Playing back a Bluetooth audio player Refer also to the instructions supplied with the Bluetooth device Connecting a Bluetooth device for the first time Pairing and PIN Code When you connect a Bluetooth device to the unit for the first time make p...

Page 204: ...tooth device While Open is flashing on the monitor Enter the same PIN code as entered in the above step on the device to be connected Now connection is established and you can use the device through the unit turns blue and the following icon appears when the connection is established Appears when the Bluetooth phone is connected Appears when the Bluetooth audio player is connected Appears when the...

Page 205: ...evice you want to delete 5 Deviec Menu Phone Connect Audio Connect Delete Pairing New Pairing Delete Pairing W21T P901i P6200 Delete Enter No Yes Bluetooth AV Menu Enter Phone Connect Bluetooth Dial Menu Device Menu Settings Continued on the next page Bluetooth AV Menu Enter Redial Bluetooth Dial Menu Device Menu Settings The built in microphone is behind the upper left hand corner of the unit ...

Page 206: ...ENU page 62 When a call comes in The source is automatically changed to Bluetooth When Auto Answer is activated The unit answers the incoming calls automatically page 62 When Auto Answer is deactivated press SRC or touch any control to answer the incoming call To end the call or reject an incoming call Hold SRC or any control Answering a waiting call If your cellular phone is equipped with the cal...

Page 207: ...phone numbers names listed in step 1 Select a number Move the entry position Hold Delete Enter No One All Redial Dial Store 08945671234 12312341234 Delete To copy the phone book You can copy the phone book memory of a cellular phone into the unit 1 2 3 4 Enter a PIN code to the unit You can enter any number you like 1 digit to 16 digit number Some cellular phones have their own PIN code Enter the ...

Page 208: ...try Phonebook Full appears on the monitor Delete unwanted names before copying page 39 Presetting the phone numbers You can preset up to six phone numbers 1 Display the phone number you want to preset by using Redial Received Calls Phonebook or Phone Number 2 3 Select a preset number 4 Store the phone number The phone number selected in step 1 is now stored in preset number 5 You can use the follo...

Page 209: ...ack title Artist Name Album title Appearsonlywhentheinformationcomesfromthe device Select Bluetooth Ÿ Start playback See pages 35 and 36 for connecting a new device See page 36 for connecting disconnecting a registered device See page 37 for deleting a registered device When the sound is stopped or interrupted during the use of a Bluetooth device turn off then turn on the unit If the sound is not ...

Page 210: ...K not supplied When connected with the USB cable below Make sure iPod Off is selected for AV Input page 58 USB iPod 01 0 01 20 FLAT 15 45 Track Title Album Title Artist Name A Source name B Sound mode page 52 C Track or video no Playing time 6 Starts pauses playback 5 Moves to the previous next item of a category ex another album artist playlist etc 1 DISP Touch if necessary page 9 1 5 maynotfunct...

Page 211: ...uch6in step2onpage42 Changing the play speed of the audiobooks You can change the play speed of the audiobooks Follow steps 1 to 3 in the left column In step 3 1 2 Select the desired speed 3 Select an item EX When Music is selected in step 2 Repeat the procedure to select the desired track video 4 Confirm the selection Selecting playback modes You can use Repeat or Random playback mode Ex To selec...

Page 212: ...the previous menu touch 5 Selecting playback modes Operations are exactly the same as explained on page 43 AudioBooks isnotdisplayedinstep3 Pauses playback To resume touch again A Source name B Sound mode page 52 C Track no Playing time Preparation When operating through the CD changer jack make sure iPod is selected for the external input setting page 58 Select iPod Playback starts automatically ...

Page 213: ...r is selected for the external input setting page 58 Select Changer Ÿ Enter Disc List Each time you hold the button you can display the other list of the remaining discs Disc List MP3 DISC DISC 02 DISC 03 DISC 04 DISC 05 DISC 06 Disc List Enter MP3 DISC DISC 02 DISC 03 DISC 04 DISC 05 DISC 06 Each List can also be accessed through AV Menu List Disc List Folder List File List Hold Folder List My Be...

Page 214: ...rent folder Disc Randomly plays all tracks of the current disc Disc Repeats all tracks of the current disc All Randomly plays all tracks of all loaded discs 4 When one of the playback modes is selected the corresponding indicator lights up on the source information screen To cancel select Off in step 4 You can use Repeat or Random playback mode Ex To select Track Repeat 1 2 3 Repeat Set Off Track ...

Page 215: ...gnals together with their regular programme signals DRC will reinforce the low level sounds to improve your listening The DRC indicator will light up while tuning in a service with the DRC signals 1 2 3 4 As the number increases the effect becomes stronger A TEXT indicator B Sound mode page 52 C Band D Preset No E Frequency F Service label G Ensemble label H PTY code I DAB indicators Standby Recep...

Page 216: ...service you want to preset 3 Display the Preset List 4 Select a preset number 5 Store the service Preset List can also be accessed through AV Menu List Selecting preset services On the remote 1 2 Hold DAB1 Enter Store Service Label No Serv FFH No Serv HRS HRH 1 2 3 4 5 6 DAB1 Enter Store Service Label No Serv FFH No Serv HRS HRH 1 2 3 4 5 6 DAB1 Enter Store Service Label No Serv FFH No Serv HRS HR...

Page 217: ...58 Activating deactivating Announcement Standby Reception Announcement Standby Reception allows the unit to switch temporarily to your favorite service announcement type Announcement Standby Reception Indicator Enter AV Menu Mode Announce Standby below and page 61 ANN The unit will temporarily switch to your favorite service from any source other than FM AM Lights up Not yet activated Tune in to a...

Page 218: ... connected component and start playing the source Navigation screen When you connect a Navigation System to the unit you can view the navigation screen regardless of the source Preparation Make sure AV Input setting is selected for Navigation page 58 To watch the navigation screen touch DISP repeatedly page 9 The aspect ratio of the navigation screen is fixed to Full regardless of the Aspect setti...

Page 219: ...the Line Input Adapter KS U57 not supplied or AUX Input Adapter KS U58 not supplied EXT IN EXT INPUT FLAT 15 45 Preparation Make sure External Input is selected for External Input page 58 Select External Input Ÿ Turn on the connected component and start playing the source A Sound mode page 52 B Assigned title page 53 ...

Page 220: ...ode is temporarily canceled Storing your own adjustments You can store your adjustments into User1 User2 and User3 1 Follow steps and Ÿ on the left 2 Select the item you want to adjust 3 Adjust each setting 4 Select User1 User2 or User3 then store the setting Soundequalization Edit Store 03 60 0 Hz Equalizer Exit Edit Flat Hard Rock R B Pop Jazz Equalizer Exit Edit Flat Hard Rock R B Pop Jazz Edit...

Page 221: ...lable characters page 68 To erase the whole characters hold DISP 2 Repeat step 1 until you finish entering the title Finish the procedure You can assign titles to AV Input and External Input You can enter up to 16 characters Ex Assigning title to AV Input Select AV Input Ÿ Assigningtitlestothesources Mode Title Entry Title Entry Store AV In Name AV INPUT A a 0 Mode AV Menu Enter ...

Page 222: ...olor of the monitor Blue Light Blue Red Orange Yellow Green Purple Dark Blue Dark Green Brown Light Brown Black Scroll Off Cancels Once Scrolls the source information once Auto Repeats scrolling 5 second intervals Holding DISP on the unit scrolls the information regardless of this setting Tag Display Off Cancels On Shows the Tag data while playing MP3 WMA WAV AAC tracks Dual Zone Bluetooth List Mo...

Page 223: ...pears and you cannot adjust this setting Aspect 3 You can change the aspect ratio of the picture Aspect ratio of incoming signal 4 3 16 9 Full For 16 9 original pictures Auto For Disc Aspect ratio is automatically selected to match to the incoming signals For other video sources Aspect ratio is fixed at Regular Regular For 4 3 original pictures Language 4 Select the indication language shown on th...

Page 224: ... 4 3 Pan Scan Select when the aspect ratio of the external monitor is 4 3 Refer to the illustrations on the left to see how the pictures are shown on the monitor OSD Position Select the position of the on screen bar 29 1 Higher position 2 Lower position File Type Select playback file type when a disc USB contains different types of files You can store this setting separately for each source Disc a...

Page 225: ...nter speaker when surround is deactivated Speaker Level You can adjust the output level of the activated speakers Speaker Size above monitoring the test tone Front Lch Center Ch Front Rch Rear Rch Subwoofer 2 Rear Lch Adjust the output level of each speaker in the range of 10dB to 10dB Initial 0dB Hold 6 to turn on and off the test tone Speaker Distance You can adjust the speaker output timing Fro...

Page 226: ...On 49 Input AV Input 3 You can determine the use of LINE IN and VIDEO IN plugs Off Select when no component is connected AV Input is skipped while selecting the source iPod Off Select when connecting the iPod using the USB Audio and Video cable for iPod 42 Audio Video Select when connecting an AV component such as a VCR Audio Select when connecting an audio component such as a portable audio playe...

Page 227: ...lize all settings you have made in AV Menu Hold 6 then reset the unit 3 Equalizer Flat Hard Rock R B Pop Jazz Dance Country Reggae Classic User1 User2 User3 52 1 Dependsontheamplifiergaincontrol page60 2 SelectableonlywhenaDABtunerisconnected 3 Notselectablewhen AVInput isselectedasthesource 4 TheREVERSEGEARSIGNALleadconnectionisrequired Installation ConnectionManual Therearviewthrough thecameraap...

Page 228: ...d the others Subwoofer Level 1 Adjust the subwoofer output level 06 to 08 Initial 00 High Pass Filter Through Select when the subwoofer is not connected On Select when the subwoofer is connected Crossover Adjust the crossover frequency between the front rear speakers and the subwoofer 80Hz 120Hz 150Hz Amplifier Gain You can change the maximum volume level of this unit Off Deactivates the built in ...

Page 229: ...ion you can change the announcement type for Announcement Standby Reception AudioBooks Only for USB iPod Normal Faster Slower 43 List The accessible lists differ depending on the source 14 22 42 48 Dual Zone Off On On Surround On 30 Bluetooth Menu items Selectable settings reference page Dial Menu 6 Redial Received Calls Phonebook Preset Calls Phone Number Voice Dialling Select one of the call met...

Page 230: ...ls manually On The unit answers the incoming calls automatically Reject The unit refuses all incoming calls SMS Notify On The unit informs you of the arrival of a message by ringing and displaying Receiving Message Off The unit does not inform you of the arrival of a message Add Phonebook Copy the phone book memory of a cellular phone into the unit You can register up to 50 phone numbers 39 MIC Se...

Page 231: ...c by the edges Do not touch its recording surface When storing a disc into its case gently insert the disc around the center holder with the printed surface facing up Make sure to store discs into the cases after use Maintenance To keep discs clean A dirty disc may not play correctly If a disc does become dirty wipe it with a soft cloth in a straight line from center to edge Do not use any solvent...

Page 232: ...you change the source playback also stops without ejecting the disc Next time you select Disc for the playback source disc play starts from where it stopped previously Playing Recordable Rewritable discs This unit can recognize a total of 5 000 files and 250 folders a maximum of 999 files per folder Use only finalized discs This unit can play back multi session discs however unclosed sessions will...

Page 233: ...equency 48 kHz 44 1 kHz 32 kHz for MPEG1 24 kHz 22 05 kHz 16 kHz for MPEG2 48 kHz 44 1 kHz 32 kHz 22 05 kHz for WMA 44 1 kHz for WAV 48 kHz 44 1 kHz for AAC This unit can show ID3 Tag Version 1 0 1 1 2 2 2 3 2 4 for MP3 This unit can also show WAV WMA AAC Tag This unit can play back files recorded in VBR variable bit rate Files recorded in VBR have a discrepancy in elapsed time indication This uni...

Page 234: ... Cannot play this device Check the device appears on the monitor The unit cannot recognize a USB device whose rating is other than 5 V and exceeds 500 mA While playing from a USB device the playback order may differ from other players This unit may be unable to play back some USB devices or some files due to their characteristics or recording conditions USB devices equipped with special functions ...

Page 235: ...Video cable Notice When operating an iPod some operations may not be performed correctly or as intended In this case visit the following JVC web site For the USB connection http www jvc victor co jp english car For the interface adapter connection http www jvc co jp english car support ks pd100 index html DAB tuner Only the primary DAB service can be preset even when you store a secondary service ...

Page 236: ... 68 Characters you can enter for titles In addition to the roman alphabet A Z a z you can use the following characters to assign titles page 53 When Руccĸий is selected for Language page 55 Upper and lower cases Numbers and symbols When any language other than Руccĸий is selected for Language page 55 Upper and lower cases Numbers and symbols About sounds reproduced through the rear terminals Speak...

Page 237: ...A Sanskrit TR Turkish BN Bengali Bangla HU Hungarian MG Malagasy SD Sindhi TS Tsonga BO Tibetan HY Armenian MI Maori SG Sangho TT Tatar BR Breton IA Interlingua MK Macedonian SH Serbo Croatian TW Twi CA Catalan IE Interlingue ML Malayalam SI Singhalese UK Ukrainian CO Corsican IK Inupiak MN Mongolian SK Slovak UR Urdu CS Czech IN Indonesian MO Moldavian SL Slovenian UZ Uzbek CY Welsh IS Icelandic ...

Page 238: ...ted to VIDEO IN plug Check the cords and connections Signal input is too weak Mecha Error Push Reset appears on the monitor and the control panel does not move Reset the unit page 3 The touch pad controls do not respond properly Illumination function does not work properly Keep your hands and controls clean and dry Eliminate static electricity and do not place magnetic items near the unit Leave th...

Page 239: ...ror File playback Disc cannot be played back Change the disc Record the tracks using a compliant application in the appropriate discs page 4 Add appropriate extension codes to the file names Noise is generated The track played back is not a playable file format Skip to another file Tracks are not played back as you have intended them to play Playback order may differ from the one played back using...

Page 240: ...etooth device Enter the same PIN code for both the unit and target device If the PIN code of the device is not indicated on its manuals try 0000 or 1234 Phone sound quality is poor Reduce the distance between the unit and the Bluetooth cellular phone Move the car to place where you can get a better signal reception The sound is interrupted or skipped while using a Bluetooth audio player Reduce the...

Page 241: ...ter the artwork is loaded page 67 CD changer No Disc appears on the monitor Insert a disc into the magazine No Magazine appears on the monitor Insert the magazine Cannot play this disc Check the disc appears on the monitor Disc does not include playable files Replace the disc with playable files Reset 08 appears on the monitor Connect this unit and the CD changer correctly and press the reset butt...

Page 242: ...r Terminals Input LINE IN VIDEO IN USB input terminal Aerial input Output 2nd AUDIO OUT VIDEO OUT Others CD changer OE REMOTE FM AM TUNER Frequency Range FM 87 5 MHz to 108 0 MHz AM MW 522 kHz to 1 620 kHz LW 144 kHz to 279 kHz FM Tuner Usable Sensitivity 11 3 dBf 1 0 μV 75 Ω 50 dB Quieting Sensitivity 16 3 dBf 1 8 μV 75 Ω Alternate Channel Selectivity 400 kHz 65 dB Frequency Response 40 Hz to 15 ...

Page 243: ...ompatible File System FAT 32 16 12 Max Current Less than 500 mA 5 V BLUETOOTH Version Bluetooth 1 2 certified Output Power 4 dBm Max Power class 2 Service Area Within 10 m Profile HFP Hands Free Profile 1 5 OPP Object Push Profile 1 1 A2DP Advanced Audio Distribution Profile 1 2 AVRCP Audio Video Remote Control Profile 1 3 GENERAL Power Requirements Operating Voltage DC 14 4 V 11 V to 16 V allowan...

Page 244: ...et your unit Tiene PROBLEMAS con la operación Por favor reinicialice su unidad Consulte la página de Cómo reposicionar su unidad Vous avez des PROBLÈMES de fonctionnement Réinitialisez votre appareil Référez vous à la page intitulée Comment réinitialiser votre appareil 2008 Victor Company of Japan Limited ...

Page 245: ...tionnement est connecté au système de frein de stationnement intégré à la voiture Remarques sur les connexions électriques Remplacer le fusible par un de la valeur précisée Si le fusible saute souvent consulter votre revendeur d autoradios JVC Il est recommandé de connecter des enceintes avec une puissance de plus de 50 W les enceintes arrière et les enceintes avant avec une impédance comprise ent...

Page 246: ... the fan No tape las rejillas de ventilación Ne bloquez pas le ventilateur INSTALLATION IN DASH MOUNTING The following illustration shows a typical installation If you have any questions or require information regarding installation kits consult your JVC IN CAR ENTERTAINMENT dealer or a company supplying kits If you are not sure how to install this unit correctly have it installed by a qualified t...

Page 247: ...don d alimentation fourni comme montré sur l illustration Contactez votre revendeur automobile autorisé avant d installer l appareil ELECTRICAL CONNECTIONS To prevent short circuits we recommend that you disconnect the battery s negative terminal and make all electrical connections before installing the unit Be sure to ground this unit to the car s chassis again after installation CONEXIONES ELECT...

Page 248: ...onnecter un appareil extérieur voir le diagramme 4 Not included for this unit 4 No suministrado con esta unidad 4 Non fourni avec cet appareil Ignition switch Interruptor de encendido Interrupteur d allumage Fuse block Bloque de fusibles Porte fusible White with black stripe Blanco con rayas negras Blanc avec bande noire White Blanco Blanc Gray with black stripe Gris con rayas negras Gris avec ban...

Page 249: ...onnectez les enceintes de cet appareil et connectez les à l amplificateur Laissez les fils d enceintes de cet appareil inutilisés Vous pouvez désactiver l amplificateur intégré et envoyer les signaux audio uniquement à un ou plusieurs amplificateurs extérieurs afin d obtenir un son clair et pour éviter un échauffement interne de l appareil Voir le MANUEL D INSTRUCTIONS Remote lead Cable remoto Fil...

Page 250: ...apter for iPod KS PD100 Portable audio player with line output jacks Line Input Adapter KS U57 Portable audio player with 3 5 mm stereo mini jack AUX Input Adapter KS U58 When connecting two components it is recommended that you connect them in series as explained below Lors de la connexion des appareils extérieurs référez vous aussi aux manuels fournis avec les appareils et les adaptateurs PRECAU...

Page 251: ...підключень наведені у окремій інструкції INSTRUCTIONS ИНСТРУКЦИИ ПО ЭКСПЛУАТАЦИИ ІНСТРУКЦІЇ LVT1797 007A EE DVD CD RECEIVER ПРИЕМНИК ДЛЯ ВОСПРОИЗВЕДЕНИЯ ДИСКОВ DVD И КОМПАКТ ДИСКОВ ПРИЙМАЧ З ПРОГРАВАЧЕМ DVD CD ДИСКІВ KD AVX44 For canceling the display demonstration see page 7 Информацию об отмене демонстрации функций дисплея см на стр 7 Інформацію щодо відміни демонстрації функцій дисплею див на с...

Page 252: ...ble in a location where it may obstruct the steering wheel and gearshift lever operations it may obstruct the operation of safety devices such as air bags it may obstruct visibility DO NOT operate the unit while driving If you need to operate the unit while driving be sure to look around carefully The driver must not watch the monitor while driving The driver must not put on the headphones while d...

Page 253: ...nology must be authorized by Macrovision and is intended for home and other limited viewing uses only unless otherwise authorized by Macrovision Reverse engineering or disassembly is prohibited Contents INTRODUCTION Playable disc type 4 Before operations 5 OPERATIONS Basic operations AV menu 6 Basic operations Control panel 8 Basic operations Remote controller RM RK252 10 Listening to the radio 12...

Page 254: ... Rewritable CD R RW Compliant to ISO 9660 level 1 level 2 Romeo Joliet CD DA MP3 WMA WAV AAC 4 JPEG DivX MPEG1 MPEG2 MPEG4 1 IfyouinsertaDVDVideodiscofanincorrectRegionCode Regioncodeerror appearsonthemonitor 2 DVD Rrecordedinmulti borderformatisalsoplayable exceptforduallayerdiscs DVD RWduallayerdiscsarenotplayable 3 Itispossibletoplaybackfinalized R RW Videoformatonly discs RWdoublelayerdiscsare...

Page 255: ...l panel is open When Illumination is set to Normal page 59 Beforeoperations Touch pad controls How to operate the unit by the touch pad controls You can operate the unit by touching the appropriate part of the touch pad controls To adjust the volume move your finger on the touch pad knob as illustrated below to display the animation on the monitor then press 5 or repeatedly You can also adjust the...

Page 256: ... the touch pad controls and monitor are turned on Ÿ Enter AV Menu Non available items will be shaded Select an icon to enter the setup screen In this manual English indications are used for purpose of explanation You can select the indication language on the monitor page 55 Setup AV Menu Enter Through Sound Fader Balance Volume Adjust Subwoofer Level High Pass Filter Crossover High Pass Filter Exi...

Page 257: ...isplay Setup Display Clock Disc Setup 1 Disc Setup 2 Tuner Demonstration Exit Off On 6 7 Time Set Exit Hours 18 00 Time Set Exit Minutes 18 35 Setup AV Menu Enter Setup Display Clock Disc Setup 1 Disc Setup 2 Tuner 0 00 Clock Time Set Time Format OSD Clock Clock Adjust Canceling the display demonstration and setting the clock ...

Page 258: ...e unit Use only when the internal system malfunctions r Detaches the control panel page 9 1 Youcannotselectthesesourcesiftheyarenotready 2 Byholding5 youcandisplaythelistaccessible fortheselectedsource Basicoperations Controlpanel 1 Selects sources 1 Tuner DAB Disc USB or USB iPod Changer iPod or External Input Bluetooth AV Input You can also select sources by touching 5 4 after holding SRC for en...

Page 259: ...screen only for video sources DVD 01 02 0 01 20 MULTI DIGITAL CHAP RPT C T VIDEO 15 45 DVD 01 02 0 01 20 MULTI DIGITAL CHAP RPT C T VIDEO 15 45 Source information screen Playback picture and the source information screen Navigation screen This screen is displayed when Navigation is selected for AV Input page 58 Back to the beginning To attach the control panel To tilt the control panel Hold 0 unti...

Page 260: ...l function See the Installation Connection Manual separate volume for connection IMPORTANT When Dual Zone is activated page 30 the remote controller functions only for operating the DVD CD player Basicoperations Remotecontroller RM RK252 Main elements and features R03 LR03 AAA 1 Turns on the power Turns off the power Hold Attenuates the sound when the power is on 2 Disc USB and USB iPod Reverse se...

Page 261: ...verse search forward search Hold In menu selecting mode Selects an item Then press to confirm the selection Skips 10 items at a time Hold Bluetooth 5 Selects group folder 4 Reverse skip forward skip Reverse search forward search Hold q Disc USB and USB iPod Forward search w Selects the source e Disc USB and USB iPod Starts and pauses playback Bluetooth Starts playback Answers incoming calls r Chan...

Page 262: ...ndicator lights up when receiving an FM stereo broadcast with sufficient signal strength TUNER FM1 P1 87 5 MHz FLAT AF TP MO 15 45 Bayern Radio Pop Music Listeningtotheradio A Band B Sound mode page 52 C Preset no D Frequency E PS station name for FM Radio Data System If no signal is coming in No Name appears F PTY code for FM Radio Data System G Tuner related function indicators ...

Page 263: ...ations with the strongest signals are searched and stored automatically in the FM band When an FM stereo broadcast is hard to receive 1 2 3 4 Reception improves but the stereo effect will be lost The MO indicator lights up To restore the stereo effect select Off in step 4 Mono Exit Off On Off Mode Mono SSM PTy Standby Mode AV Menu Enter Mode Start Mono SSM PTy Standby Mode AV Menu Enter ...

Page 264: ...t To select directly 1 2 To select from the Preset List 1 2 For FM Each time you hold 5 you can change the bands 3 Select the preset number Hold FM1 Enter Store 87 5 89 9 97 9 105 9 108 0 87 5 1 2 3 4 5 6 The Preset List can also be accessed through AV Menu List or FM1 Enter Store 87 5 89 9 97 9 105 9 108 0 87 5 1 2 3 4 5 6 FM1 Enter Store 87 5 89 9 97 9 105 9 108 0 87 5 1 2 3 4 5 6 Hold FM1 Enter...

Page 265: ...umentary PTy Search Start Memory Pop Music Rock Music Easy Listening Serious Classics Current Affairs Varied Speech 1 2 3 4 5 6 PTy Search Start Memory Cultures Science Varied Speech Pop Music Rock Music Eash Listening Hold TUNER FM1 XX X MHz FLAT 15 45 Science PTy Search Storing your favorite programme types You can store your favorite PTY codes into the PTY Preset List 1 Follow steps 1 and 2 in ...

Page 266: ...he preset TA volume level if the current level is lower than the preset level page 58 Lights up Not yet activated Tune in to another station providing the Radio Data System signals Flashes Touch T P to deactivate Goes off PTY Standby Reception Indicator Enter AV Menu Mode PTy Standby right column and page 61 PTY The unit will temporarily switch to your favorite PTY programme from any source other ...

Page 267: ...u can change the Network Tracking Reception setting AF Regional on page 58 When the DAB tuner is connected refer also to Tracing the same programme Alternative Frequency Reception DAB AF page 49 A Automatic station selection Programme Search Usually when you select preset stations the preset station is tuned in If the signals from the FM Radio Data System preset station are not sufficient for good...

Page 268: ...nitor the unit cannot accept the operation you have tried to do In some cases without showing operations will not be accepted 0 Ejects the disc 3 8 Starts and pauses playback BAND Stops playback Open the front panel Ÿ Insert the disc Playback starts automatically Caution Do not place your finger behind the control panel Caution on volume setting Discs and connected USB devices produce very little ...

Page 269: ...er no Playing time E Playback mode 4 Touch Selects chapter Hold Reverse forward search 1 5 Selects program no Play List no DISP Touch if necessary page 9 4 Touch Selects track Hold Reverse forward search for DivX MPEG 2 5 Touch Selects folder Hold Displays Folder List DISP Touch if necessary page 9 DVD 01 02 0 01 20 FLAT DIGITAL C P VR PRG 15 45 A Audio format B VR PRG Original program VR PL Play ...

Page 270: ... 52 C Track no Playing time CD 02 0 01 20 FLAT 15 45 Current Track Title Artist Name Disc Title 4 Touch Selects track Hold Reverse forward search 1 A Sound surround mode pages 26 and 52 B Track no Playing time C Track title only for CD Text Artist Name Disc title 2 CD 01 02 0 01 20 FLAT 15 45 Current Folder Name Current File Name mp3 MP3 RPT 4 Touch Selects track Hold Reverse forward search 1 5 To...

Page 271: ...r Repeats current chapter Program Repeats current program not available for Playlist playback Track Repeats current track for VCD PBC not in use Disc All Randomly plays all tracks for VCD PBC not in use Track Repeats current track Folder Randomly plays all tracks of current folder then tracks of next folders Folder Repeats all tracks of the current folder Disc All Randomly plays all tracks Track R...

Page 272: ...ctivate the prohibition No Eject appears To cancel the prohibition repeat the same procedure to select EJECT OK Hold Folder List My Best Cinema Pops My Best2 Favorite Song Cinema2 Folder List My Best Cinema Pops My Best2 Favorite Song Cinema2 File List Enter Song011 mp3 Song012 mp3 Song013 mp3 Song014 mp3 Song015 mp3 Song016 mp3 Operations using the remote controller RM RK252 Also functions as CLR...

Page 273: ... Searchspeed x2 x5 x10 x20 x60 2 Slowmotionspeed 1 32 1 16 1 8 1 4 1 2 3 Searchspeed x2 x10 Stops playback Starts or pauses playback Reverse forward search 1 No sound can be heard Forward slow motion 2 during pause No sound can be heard Reverse slow motion does not work Select chapter during playback or pause Reverse forward search 3 Hold Selects program Selects Play List during playback or pause ...

Page 274: ...track within the same folder Selects folder Changes the aspect ratio of the playback pictures While playing Back advance the scenes by 5 minutes For DivX6 Using menu driven features 1 2 Select the item you want to start playback 3 1st press 1st press 2nd press 3rd press 2nd press Current playback position Twice Also functions as CLR clear Erases a misentry if pressed while holding SHIFT ...

Page 275: ...he playback pictures Twice Stops playback Starts or pauses playback Reverse forward search 3 Forward slow motion 4 during pause No sound can be heard Reverse slow motion does not work Selects track Reverse forward search 5 Hold No sound can be heard Selects track Changes the aspect ratio of the playback pictures Stops playback Starts or pauses playback Reverse forward search 3 Selects track Revers...

Page 276: ... center speaker otherwise no sound comes out of the center speaker page 57 You cannot activate this function in the following cases When USB iPod is selected as the source When Dual Zone is in use MULTI For multi channel encoded sources such as Dolby Digital 3 and DTS 4 When activated MULTI is shown on the source information screen Dolby Pro Logic II Movie Music For 2 channel sources except for Di...

Page 277: ...und Surround Off Surround On Surround On Exit Auto Through Dolby PLII Movie Dolby PLII Music To change the Dolby PLIIMusic setting In step 4 in the left column 1 Select Dolby PLII Music 2 Enter each sub screen then select the desired setting EX When Panorama is selected in step 1 Panorama Select On to add wraparound sound effect Center Width Adjust the center image so it may be heard only from the...

Page 278: ...nu appears For entering time numbers To move the entry position To select a number Repeat steps Ÿ and to set other items if needed To remove the on screen bar Operations using the on screen bar DVD VCD DivX MPEG1 MPEG2 JPEG These operations are possible on the monitor using the remote controller ...

Page 279: ...disc type DVD V T02 C03 TOTAL 1 25 58 TIME TITLE CHAP RPT C RPT T02 C03 PG 001 C 002 PL 003 C 004 TRACK 01 F001 T001 F002 F002 5 Time indication Elapsed playing time of the disc Remaining title time for DVD Remaining disc time for others Elapsed playing time of the current chapter track 2 Remaining time of the current chapter track 2 6 Playback status Play Reverse forward search Reverse forward sl...

Page 280: ...e you can only operate the DVD CD player using the remote controller 1 2 3 Off Deactivates Dual Zone On Activates Dual Zone without applying Headphone Surround The DUAL indicator lights up On Surround On Activates Dual Zone and applies Headphone Surround Headphone Surround appears and the DUAL SURROUND indicator lights up When Dual Zone is activated the main source is changed to Disc To select a d...

Page 281: ... of tracks in the current folder total number of tracks on the disc 8 Track information only for MP3 WMA WAV AAC 9 Track list p Current track highlighted To select a folder or track 1 Select Folder column or Track column on the control screen 2 Select a folder or track If necessary press 6 to start playback MODE REPEAT TRACK TIME 00 14 Track 6 14 Track Information Cloudy Fair Fog Hail Indian summe...

Page 282: ...gramorPlayListmaynot bedisplayeddependingontherecordingequipment Folder 144 240 Track 144 198 Page 4 7 fol120 fol121 fol122 fol123 fol124 fol125 fol126 fol127 fol128 fol129 fol150 fol151 fol152 fol153 fol154 fol155 fol156 fol157 fol158 fol159 fol140 fol141 fol142 fol143 fol144 fol145 fol146 fol147 fol148 fol149 fol130 fol131 fol132 fol133 fol134 fol135 fol136 fol137 fol138 fol139 file0141 wma file...

Page 283: ...yback DISP Touch if necessary page 9 BAND Stops playback Connect a USB device USB is selected as the source and playback starts automatically This unit can play JPEG MPEG1 MPEG2 1 MP3 WMA WAV AAC 2 files stored on a USB mass storage class device You can operate the USB device in the same way you operate the files on discs pages 21 to 29 You cannot select USB when Dual Zone is in use All tracks on ...

Page 284: ...cator lights up on the source information screen To cancel select Off in step 4 You can use Repeat or Random playback mode Ex To select Track Repeat 1 2 3 Repeat Set Off Track Folder Off Mode Repeat Random Mode AV Menu Enter Caution Avoid using the USB device if it might hinder your safety driving Do not pull out and attach the USB device repeatedly while Now Reading is flashing on the monitor Do ...

Page 285: ... from phone book from call history Redial and Received Call by dialing number by preset numbers by voice command Receiving the SMS Short Message Service Playing back a Bluetooth audio player Refer also to the instructions supplied with the Bluetooth device Connecting a Bluetooth device for the first time Pairing and PIN Code When you connect a Bluetooth device to the unit for the first time make p...

Page 286: ...tooth device While Open is flashing on the monitor Enter the same PIN code as entered in the above step on the device to be connected Now connection is established and you can use the device through the unit turns blue and the following icon appears when the connection is established Appears when the Bluetooth phone is connected Appears when the Bluetooth audio player is connected Appears when the...

Page 287: ...evice you want to delete 5 Deviec Menu Phone Connect Audio Connect Delete Pairing New Pairing Delete Pairing W21T P901i P6200 Delete Enter No Yes Bluetooth AV Menu Enter Phone Connect Bluetooth Dial Menu Device Menu Settings Continued on the next page Bluetooth AV Menu Enter Redial Bluetooth Dial Menu Device Menu Settings The built in microphone is behind the upper left hand corner of the unit ...

Page 288: ...ENU page 62 When a call comes in The source is automatically changed to Bluetooth When Auto Answer is activated The unit answers the incoming calls automatically page 62 When Auto Answer is deactivated press SRC or touch any control to answer the incoming call To end the call or reject an incoming call Hold SRC or any control Answering a waiting call If your cellular phone is equipped with the cal...

Page 289: ...phone numbers names listed in step 1 Select a number Move the entry position Hold Delete Enter No One All Redial Dial Store 08945671234 12312341234 Delete To copy the phone book You can copy the phone book memory of a cellular phone into the unit 1 2 3 4 Enter a PIN code to the unit You can enter any number you like 1 digit to 16 digit number Some cellular phones have their own PIN code Enter the ...

Page 290: ...try Phonebook Full appears on the monitor Delete unwanted names before copying page 39 Presetting the phone numbers You can preset up to six phone numbers 1 Display the phone number you want to preset by using Redial Received Calls Phonebook or Phone Number 2 3 Select a preset number 4 Store the phone number The phone number selected in step 1 is now stored in preset number 5 You can use the follo...

Page 291: ...ack title Artist Name Album title Appearsonlywhentheinformationcomesfromthe device Select Bluetooth Ÿ Start playback See pages 35 and 36 for connecting a new device See page 36 for connecting disconnecting a registered device See page 37 for deleting a registered device When the sound is stopped or interrupted during the use of a Bluetooth device turn off then turn on the unit If the sound is not ...

Page 292: ...K not supplied When connected with the USB cable below Make sure iPod Off is selected for AV Input page 58 USB iPod 01 0 01 20 FLAT 15 45 Track Title Album Title Artist Name A Source name B Sound mode page 52 C Track or video no Playing time 6 Starts pauses playback 5 Moves to the previous next item of a category ex another album artist playlist etc 1 DISP Touch if necessary page 9 1 5 maynotfunct...

Page 293: ...uch6in step2onpage42 Changing the play speed of the audiobooks You can change the play speed of the audiobooks Follow steps 1 to 3 in the left column In step 3 1 2 Select the desired speed 3 Select an item EX When Music is selected in step 2 Repeat the procedure to select the desired track video 4 Confirm the selection Selecting playback modes You can use Repeat or Random playback mode Ex To selec...

Page 294: ...the previous menu touch 5 Selecting playback modes Operations are exactly the same as explained on page 43 AudioBooks isnotdisplayedinstep3 Pauses playback To resume touch again A Source name B Sound mode page 52 C Track no Playing time Preparation When operating through the CD changer jack make sure iPod is selected for the external input setting page 58 Select iPod Playback starts automatically ...

Page 295: ...r is selected for the external input setting page 58 Select Changer Ÿ Enter Disc List Each time you hold the button you can display the other list of the remaining discs Disc List MP3 DISC DISC 02 DISC 03 DISC 04 DISC 05 DISC 06 Disc List Enter MP3 DISC DISC 02 DISC 03 DISC 04 DISC 05 DISC 06 Each List can also be accessed through AV Menu List Disc List Folder List File List Hold Folder List My Be...

Page 296: ...rent folder Disc Randomly plays all tracks of the current disc Disc Repeats all tracks of the current disc All Randomly plays all tracks of all loaded discs 4 When one of the playback modes is selected the corresponding indicator lights up on the source information screen To cancel select Off in step 4 You can use Repeat or Random playback mode Ex To select Track Repeat 1 2 3 Repeat Set Off Track ...

Page 297: ...gnals together with their regular programme signals DRC will reinforce the low level sounds to improve your listening The DRC indicator will light up while tuning in a service with the DRC signals 1 2 3 4 As the number increases the effect becomes stronger A TEXT indicator B Sound mode page 52 C Band D Preset No E Frequency F Service label G Ensemble label H PTY code I DAB indicators Standby Recep...

Page 298: ...or the service you want to preset 3 Display the Preset List 4 Select a preset number 5 Store the service Preset List can also be accessed through AV Menu List Selecting preset services On the remote 1 2 Hold DAB1 Enter Store Service Label No Serv FFH No Serv HRS HRH 1 2 3 4 5 6 DAB1 Enter Store Service Label No Serv FFH No Serv HRS HRH 1 2 3 4 5 6 DAB1 Enter Store Service Label No Serv FFH No Serv...

Page 299: ...uency Reception page 58 Activating deactivating Announcement Standby Reception Announcement Standby Reception allows the unit to switch temporarily to your favorite service announcement type Announcement Standby Reception Indicator Enter AV Menu Mode Announce Standby below and page 61 ANN The unit will temporarily switch to your favorite service from any source other than FM AM Lights up Not yet a...

Page 300: ... connected component and start playing the source Navigation screen When you connect a Navigation System to the unit you can view the navigation screen regardless of the source Preparation Make sure AV Input setting is selected for Navigation page 58 To watch the navigation screen touch DISP repeatedly page 9 The aspect ratio of the navigation screen is fixed to Full regardless of the Aspect setti...

Page 301: ...the Line Input Adapter KS U57 not supplied or AUX Input Adapter KS U58 not supplied EXT IN EXT INPUT FLAT 15 45 Preparation Make sure External Input is selected for External Input page 58 Select External Input Ÿ Turn on the connected component and start playing the source A Sound mode page 52 B Assigned title page 53 ...

Page 302: ...ode is temporarily canceled Storing your own adjustments You can store your adjustments into User1 User2 and User3 1 Follow steps and Ÿ on the left 2 Select the item you want to adjust 3 Adjust each setting 4 Select User1 User2 or User3 then store the setting Soundequalization Edit Store 03 60 0 Hz Equalizer Exit Edit Flat Hard Rock R B Pop Jazz Equalizer Exit Edit Flat Hard Rock R B Pop Jazz Edit...

Page 303: ...lable characters page 68 To erase the whole characters hold DISP 2 Repeat step 1 until you finish entering the title Finish the procedure You can assign titles to AV Input and External Input You can enter up to 16 characters Ex Assigning title to AV Input Select AV Input Ÿ Assigningtitlestothesources Mode Title Entry Title Entry Store AV In Name AV INPUT A a 0 Mode AV Menu Enter ...

Page 304: ...olor of the monitor Blue Light Blue Red Orange Yellow Green Purple Dark Blue Dark Green Brown Light Brown Black Scroll Off Cancels Once Scrolls the source information once Auto Repeats scrolling 5 second intervals Holding DISP on the unit scrolls the information regardless of this setting Tag Display Off Cancels On Shows the Tag data while playing MP3 WMA WAV AAC tracks Dual Zone Bluetooth List Mo...

Page 305: ...pears and you cannot adjust this setting Aspect 3 You can change the aspect ratio of the picture Aspect ratio of incoming signal 4 3 16 9 Full For 16 9 original pictures Auto For Disc Aspect ratio is automatically selected to match to the incoming signals For other video sources Aspect ratio is fixed at Regular Regular For 4 3 original pictures Language 4 Select the indication language shown on th...

Page 306: ...tterbox 4 3 Pan Scan Select when the aspect ratio of the external monitor is 4 3 Refer to the illustrations on the left to see how the pictures are shown on the monitor OSD Position Select the position of the on screen bar 29 1 Higher position 2 Lower position File Type Select playback file type when a disc USB contains different types of files You can store this setting separately for each source...

Page 307: ...nter speaker when surround is deactivated Speaker Level You can adjust the output level of the activated speakers Speaker Size above monitoring the test tone Front Lch Center Ch Front Rch Rear Rch Subwoofer 2 Rear Lch Adjust the output level of each speaker in the range of 10dB to 10dB Initial 0dB Hold 6 to turn on and off the test tone Speaker Distance You can adjust the speaker output timing Fro...

Page 308: ...On 49 Input AV Input 3 You can determine the use of LINE IN and VIDEO IN plugs Off Select when no component is connected AV Input is skipped while selecting the source iPod Off Select when connecting the iPod using the USB Audio and Video cable for iPod 42 Audio Video Select when connecting an AV component such as a VCR Audio Select when connecting an audio component such as a portable audio playe...

Page 309: ...lize all settings you have made in AV Menu Hold 6 then reset the unit 3 Equalizer Flat Hard Rock R B Pop Jazz Dance Country Reggae Classic User1 User2 User3 52 1 Dependsontheamplifiergaincontrol page60 2 SelectableonlywhenaDABtunerisconnected 3 Notselectablewhen AVInput isselectedasthesource 4 TheREVERSEGEARSIGNALleadconnectionisrequired Installation ConnectionManual Therearviewthrough thecameraap...

Page 310: ...d the others Subwoofer Level 1 Adjust the subwoofer output level 06 to 08 Initial 00 High Pass Filter Through Select when the subwoofer is not connected On Select when the subwoofer is connected Crossover Adjust the crossover frequency between the front rear speakers and the subwoofer 80Hz 120Hz 150Hz Amplifier Gain You can change the maximum volume level of this unit Off Deactivates the built in ...

Page 311: ...ion you can change the announcement type for Announcement Standby Reception AudioBooks Only for USB iPod Normal Faster Slower 43 List The accessible lists differ depending on the source 14 22 42 48 Dual Zone Off On On Surround On 30 Bluetooth Menu items Selectable settings reference page Dial Menu 6 Redial Received Calls Phonebook Preset Calls Phone Number Voice Dialling Select one of the call met...

Page 312: ...ls manually On The unit answers the incoming calls automatically Reject The unit refuses all incoming calls SMS Notify On The unit informs you of the arrival of a message by ringing and displaying Receiving Message Off The unit does not inform you of the arrival of a message Add Phonebook Copy the phone book memory of a cellular phone into the unit You can register up to 50 phone numbers 39 MIC Se...

Page 313: ...c by the edges Do not touch its recording surface When storing a disc into its case gently insert the disc around the center holder with the printed surface facing up Make sure to store discs into the cases after use Maintenance To keep discs clean A dirty disc may not play correctly If a disc does become dirty wipe it with a soft cloth in a straight line from center to edge Do not use any solvent...

Page 314: ...you change the source playback also stops without ejecting the disc Next time you select Disc for the playback source disc play starts from where it stopped previously Playing Recordable Rewritable discs This unit can recognize a total of 5 000 files and 250 folders a maximum of 999 files per folder Use only finalized discs This unit can play back multi session discs however unclosed sessions will...

Page 315: ...equency 48 kHz 44 1 kHz 32 kHz for MPEG1 24 kHz 22 05 kHz 16 kHz for MPEG2 48 kHz 44 1 kHz 32 kHz 22 05 kHz for WMA 44 1 kHz for WAV 48 kHz 44 1 kHz for AAC This unit can show ID3 Tag Version 1 0 1 1 2 2 2 3 2 4 for MP3 This unit can also show WAV WMA AAC Tag This unit can play back files recorded in VBR variable bit rate Files recorded in VBR have a discrepancy in elapsed time indication This uni...

Page 316: ... Cannot play this device Check the device appears on the monitor The unit cannot recognize a USB device whose rating is other than 5 V and exceeds 500 mA While playing from a USB device the playback order may differ from other players This unit may be unable to play back some USB devices or some files due to their characteristics or recording conditions USB devices equipped with special functions ...

Page 317: ...Video cable Notice When operating an iPod some operations may not be performed correctly or as intended In this case visit the following JVC web site For the USB connection http www jvc victor co jp english car For the interface adapter connection http www jvc co jp english car support ks pd100 index html DAB tuner Only the primary DAB service can be preset even when you store a secondary service ...

Page 318: ... 68 Characters you can enter for titles In addition to the roman alphabet A Z a z you can use the following characters to assign titles page 53 When Руccĸий is selected for Language page 55 Upper and lower cases Numbers and symbols When any language other than Руccĸий is selected for Language page 55 Upper and lower cases Numbers and symbols About sounds reproduced through the rear terminals Speak...

Page 319: ...A Sanskrit TR Turkish BN Bengali Bangla HU Hungarian MG Malagasy SD Sindhi TS Tsonga BO Tibetan HY Armenian MI Maori SG Sangho TT Tatar BR Breton IA Interlingua MK Macedonian SH Serbo Croatian TW Twi CA Catalan IE Interlingue ML Malayalam SI Singhalese UK Ukrainian CO Corsican IK Inupiak MN Mongolian SK Slovak UR Urdu CS Czech IN Indonesian MO Moldavian SL Slovenian UZ Uzbek CY Welsh IS Icelandic ...

Page 320: ...ted to VIDEO IN plug Check the cords and connections Signal input is too weak Mecha Error Push Reset appears on the monitor and the control panel does not move Reset the unit page 3 The touch pad controls do not respond properly Illumination function does not work properly Keep your hands and controls clean and dry Eliminate static electricity and do not place magnetic items near the unit Leave th...

Page 321: ...ror File playback Disc cannot be played back Change the disc Record the tracks using a compliant application in the appropriate discs page 4 Add appropriate extension codes to the file names Noise is generated The track played back is not a playable file format Skip to another file Tracks are not played back as you have intended them to play Playback order may differ from the one played back using...

Page 322: ...etooth device Enter the same PIN code for both the unit and target device If the PIN code of the device is not indicated on its manuals try 0000 or 1234 Phone sound quality is poor Reduce the distance between the unit and the Bluetooth cellular phone Move the car to place where you can get a better signal reception The sound is interrupted or skipped while using a Bluetooth audio player Reduce the...

Page 323: ...ter the artwork is loaded page 67 CD changer No Disc appears on the monitor Insert a disc into the magazine No Magazine appears on the monitor Insert the magazine Cannot play this disc Check the disc appears on the monitor Disc does not include playable files Replace the disc with playable files Reset 08 appears on the monitor Connect this unit and the CD changer correctly and press the reset butt...

Page 324: ...r Terminals Input LINE IN VIDEO IN USB input terminal Aerial input Output 2nd AUDIO OUT VIDEO OUT Others CD changer OE REMOTE FM AM TUNER Frequency Range FM 87 5 MHz to 108 0 MHz AM MW 522 kHz to 1 620 kHz LW 144 kHz to 279 kHz FM Tuner Usable Sensitivity 11 3 dBf 1 0 μV 75 Ω 50 dB Quieting Sensitivity 16 3 dBf 1 8 μV 75 Ω Alternate Channel Selectivity 400 kHz 65 dB Frequency Response 40 Hz to 15 ...

Page 325: ...ompatible File System FAT 32 16 12 Max Current Less than 500 mA 5 V BLUETOOTH Version Bluetooth 1 2 certified Output Power 4 dBm Max Power class 2 Service Area Within 10 m Profile HFP Hands Free Profile 1 5 OPP Object Push Profile 1 1 A2DP Advanced Audio Distribution Profile 1 2 AVRCP Audio Video Remote Control Profile 1 3 GENERAL Power Requirements Operating Voltage DC 14 4 V 11 V to 16 V allowan...

Page 326: ...агрузите Ваше устройство Для получения информации о перезагрузке Вашего устройства обратитесь на соответствующую страницу Маєте ПРОБЛЕМУ з функціонуванням Повторно налаштуйте систему Див сторінку Як повторно налаштувати пристрій 2008 Victor Company of Japan Limited Bіктор Компані оф Джепен Лімітед 12 3 чоме Морійя чо Канагава ку Йокогама Канагава 221 8520 Японія ...

Page 327: ...рухом Якщо автомобіль не на ручному гальмі на екрані монітора з являється напис Parking Brake і зображення не буде виводитися Це попередження з являється тільки тоді коли провід ручного гальма з єднаний з ручним гальмом автомобіля Зауваження щодо електричних з єднань Заміняти запобіжник можна тільки запобіжником із вказаними у специфікації номінальними характеристиками Якщо запобіжники часто виход...

Page 328: ...ослабте кріплення тильної частини Do not block the fan Не закрывайте вентилятор Не блокуйте вентилятор INSTALLATION IN DASH MOUNTING The following illustration shows a typical installation If you have any questions or require information regarding installation kits consult your JVC IN CAR ENTERTAINMENT dealer or a company supplying kits If you are not sure how to install this unit correctly have i...

Page 329: ...дажам автомобильных систем Вам можливо прийдеться внести зміни до з єднання провідників шнура живлення згідно з ілюстрацією Перед тим як встановлювати цей пристрій зв яжіться з уповноваженим дилером вашого авто ELECTRICAL CONNECTIONS To prevent short circuits we recommend that you disconnect the battery s negative terminal and make all electrical connections before installing the unit Be sure to g...

Page 330: ...external component see diagram К внешнему устройству см схему До зовнішнього компоненту див схему 4 Not included for this unit 4 Не входит в комплект 4 Не входить до комплекту постачання цього пристрою Ignition switch Переключатель зажигания Перемикач запалювання Fuse block Блок предохранителя Блок запобіжників White with black stripe Белый с черной полосой Білий з чорною смужкою White Белый Білий...

Page 331: ...цього пристрою приєднайте їх до підсилювача Залиште провідники гучномовців такими що не використовуються Можна відключити вбудований підсилювач і спрямувати звуковий сигнал тільки до зовнішнього підсилювача щоб одержати якісний звук і запобігти збільшенню температури в середині пристрою Див ІНСТРУКЦІЇ Remote lead Провод внешнего устройства Провідник зовнішнього пристрою JVC Amplifier JVC усилитель...

Page 332: ...necting two components it is recommended that you connect them in series as explained below Apple iPod Apple iPod Програвач Apple iPod Connecting external components Подключение внешних устройств З єднує зовнішні компоненти KS U20K CD changer jack Разъем устройства автоматической смены компакт дисков Гніздо пристрою зміни CD дисків Apple iPod Apple iPod Програвач Apple iPod USB 2 0 cable Кабель US...

Page 333: ...ENGLISH For installation and connections refer to the separate manual INSTRUCTIONS LVT1798 002A U For canceling the display demonstration see page 7 DVD CD RECEIVER KD AVX44 ...

Page 334: ...he steering wheel and gearshift lever operations it may obstruct the operation of safety devices such as air bags it may obstruct visibility DO NOT operate the unit while driving If you need to operate the unit while driving be sure to look around carefully The driver must not watch the monitor while driving The driver must not put on the headphones while driving The monitor built in this unit has...

Page 335: ...protection technology must be authorized by Macrovision and is intended for home and other limited viewing uses only unless otherwise authorized by Macrovision Reverse engineering or disassembly is prohibited Contents INTRODUCTION Playable disc type 4 Before operations 5 OPERATIONS Basic operations AV menu 6 Basic operations Control panel 8 Basic operations Remote controller RM RK252 10 Listening ...

Page 336: ... Rewritable CD R RW Compliant to ISO 9660 level 1 level 2 Romeo Joliet CD DA MP3 WMA WAV AAC 4 JPEG DivX MPEG1 MPEG2 MPEG4 1 IfyouinsertaDVDVideodiscofanincorrectRegionCode Regioncodeerror appearsonthemonitor 2 DVD Rrecordedinmulti borderformatisalsoplayable exceptforduallayerdiscs DVD RWduallayerdiscsarenotplayable 3 Itispossibletoplaybackfinalized R RW Videoformatonly discs RWdoublelayerdiscsare...

Page 337: ... Beforeoperations Touch pad controls How to operate the unit by the touch pad controls You can operate the unit by touching the appropriate part of the touch pad controls To adjust the volume move your finger on the touch pad knob as illustrated below to display the animation on the monitor then press 5 or repeatedly You can also adjust the volume by just continuing to move your finger on the touc...

Page 338: ... the touch pad controls and monitor are turned on Ÿ Enter AV Menu Non available items will be shaded Select an icon to enter the setup screen In this manual English indications are used for purpose of explanation You can select the indication language on the monitor page 49 Setup AV Menu Enter Through Sound Fader Balance Volume Adjust Subwoofer Level High Pass Filter Crossover High Pass Filter Exi...

Page 339: ...Tag Display Setup Display Clock Disc Setup 1 Disc Setup 2 Input Demonstration Exit Off On 6 7 Time Set Exit Hours 3 00PM Time Set Exit Minutes 3 35PM Setup AV Menu Enter Setup Display Clock Disc Setup 1 Disc Setup 2 Input 1 00AM Clock Time Set Time Format OSD Clock Canceling the display demonstration and setting the clock ...

Page 340: ...ource Basicoperations Controlpanel 1 Selects sources 1 Tuner Disc USB or USB iPod Changer iPod or External Input Bluetooth AV Input You can also select sources by touching 5 4 after holding SRC for entering Source Menu 2 Ejects the disc 3 Enters or exits AV Menu Activates Voice Dialling Hold While talking Adjusts the built in microphone volume 4 Tuner Searches for stations Disc USB USB iPod Change...

Page 341: ...mation Ex When the playback source is a DVD video disc Playback picture screen only for video sources DVD 01 02 0 01 20 MULTI DIGITAL CHAP RPT C T VIDEO 3 45PM DVD 01 02 0 01 20 MULTI DIGITAL CHAP RPT C T VIDEO 3 45 PM Source information screen Playback picture and the source information screen Navigation screen This screen is displayed when Navigation is selected for AV Input page 52 Back to the ...

Page 342: ...al lighting IMPORTANT When Dual Zone is activated page 26 the remote controller functions only for operating the DVD CD player Basicoperations Remotecontroller RM RK252 Main elements and features R03 LR03 AAA 1 Turns on the power Turns off the power Hold Attenuates the sound when the power is on 2 Disc USB and USB iPod Reverse search 3 Adjusts the volume level Adjusts the volume level through the ...

Page 343: ...selecting mode Selects an item Then press to confirm the selection Skips 10 items at a time Hold Bluetooth 5 Selects group folder 4 Reverse skip forward skip Reverse search forward search Hold q Disc USB and USB iPod Forward search w Selects the source e Disc USB and USB iPod Starts and pauses playback Bluetooth Starts playback Answers incoming calls r Changes the aspect ratio of the playback pict...

Page 344: ...46 C Preset no D Frequency E Assigned station name page 47 F FM reception indicator Select Tuner Ÿ Select the band TUNER FM1 P1 87 5 MHz FLAT MO ABC Radio Listeningtotheradio When an FM stereo broadcast is hard to receive 1 2 3 Mono Exit Off On Off Mode Mono SSM Title Entry Mode AV Menu Enter Search for a station Auto Search Manual Search Hold either or until Manual Search appears on the monitor t...

Page 345: ...eset number 4 Selecting preset stations On the remote 1 2 On the unit To select directly To select from the Preset List 1 2 For FM Each time you hold 5 you can change the bands 3 Select the preset number Mode Start Mono SSM Title Entry Mode AV Menu Enter FM1 Enter Store 87 5 89 9 97 9 105 9 108 0 87 5 1 2 3 4 5 6 Hold FM1 Enter Store 87 5 89 9 97 9 105 9 108 0 87 5 1 2 3 4 5 6 Hold TUNER FLAT No N...

Page 346: ...or the unit cannot accept the operation you have tried to do In some cases without showing operations will not be accepted 0 Ejects the disc 3 8 Starts and pauses playback BAND Stops playback Open the front panel Ÿ Insert the disc Playback starts automatically Caution Do not place your finger behind the control panel Caution on volume setting Discs and connected USB devices produce very little noi...

Page 347: ...apter no Playing time E Playback mode 4 Touch Selects chapter Hold Reverse forward search 1 5 Selects program no Play List no DISP Touch if necessary page 9 4 Touch Selects track Hold Reverse forward search for DivX MPEG 2 5 Touch Selects folder Hold Displays Folder List DISP Touch if necessary page 9 DVD 01 02 0 01 20 FLAT DIGITAL C P VR PRG A Audio format B VR PRG Original program VR PL Play Lis...

Page 348: ...no Playing time CD 02 0 01 20 FLAT Current Track Title Artist Name Disc Title 4 Touch Selects track Hold Reverse forward search 1 A Sound surround mode pages 22 and 46 B Track no Playing time C Track title only for CD Text Artist Name Disc title 2 CD 01 02 0 01 20 FLAT Current Folder Name Current File Name mp3 MP3 RPT 4 Touch Selects track Hold Reverse forward search 1 5 Touch Selects folder Hold ...

Page 349: ...r Repeats current chapter Program Repeats current program not available for Playlist playback Track Repeats current track for VCD PBC not in use Disc All Randomly plays all tracks for VCD PBC not in use Track Repeats current track Folder Randomly plays all tracks of current folder then tracks of next folders Folder Repeats all tracks of the current folder Disc All Randomly plays all tracks Track R...

Page 350: ...ctivate the prohibition No Eject appears To cancel the prohibition repeat the same procedure to select EJECT OK Hold Folder List My Best Cinema Pops My Best2 Favorite Song Cinema2 Folder List My Best Cinema Pops My Best2 Favorite Song Cinema2 File List Enter Song011 mp3 Song012 mp3 Song013 mp3 Song014 mp3 Song015 mp3 Song016 mp3 Operations using the remote controller RM RK252 Also functions as CLR...

Page 351: ... Searchspeed x2 x5 x10 x20 x60 2 Slowmotionspeed 1 32 1 16 1 8 1 4 1 2 3 Searchspeed x2 x10 Stops playback Starts or pauses playback Reverse forward search 1 No sound can be heard Forward slow motion 2 during pause No sound can be heard Reverse slow motion does not work Select chapter during playback or pause Reverse forward search 3 Hold Selects program Selects Play List during playback or pause ...

Page 352: ...track within the same folder Selects folder Changes the aspect ratio of the playback pictures While playing Back advance the scenes by 5 minutes For DivX6 Using menu driven features 1 2 Select the item you want to start playback 3 1st press 1st press 2nd press 3rd press 2nd press Current playback position Twice Also functions as CLR clear Erases a misentry if pressed while holding SHIFT ...

Page 353: ...he playback pictures Twice Stops playback Starts or pauses playback Reverse forward search 3 Forward slow motion 4 during pause No sound can be heard Reverse slow motion does not work Selects track Reverse forward search 5 Hold No sound can be heard Selects track Changes the aspect ratio of the playback pictures Stops playback Starts or pauses playback Reverse forward search 3 Selects track Revers...

Page 354: ...l Zone is in use MULTI For multi channel encoded sources such as Dolby Digital 3 and DTS 4 When activated MULTI is shown on the source information screen Dolby Pro Logic II Movie Music For 2 channel sources except for DivX MPEG1 MPEG2 discs 3 ManufacturedunderlicensefromDolbyLaboratories Dolby ProLogic andthedouble Dsymbolare trademarksofDolbyLaboratories 4 DTS and DTSDigitalSurround areregistered...

Page 355: ...gnalsofDivX MPEG1 MPEG2discs Surround On Exit Auto Through Dolby PLII Movie Dolby PLII Music To change the Dolby PLIIMusic setting In step 4 in the left column 1 Select Dolby PLIIMusic 2 Enter each sub screen then select the desired setting EX When Panorama is selected in step 1 Panorama Select On to add wraparound sound effect Center Width Adjust the center image so it may be heard only from the ...

Page 356: ...nu appears For entering time numbers To move the entry position To select a number Repeat steps Ÿ and to set other items if needed To remove the on screen bar Operations using the on screen bar DVD VCD DivX MPEG1 MPEG2 JPEG These operations are possible on the monitor using the remote controller ...

Page 357: ...disc type DVD V T02 C03 TOTAL 1 25 58 TIME TITLE CHAP RPT C RPT T02 C03 PG 001 C 002 PL 003 C 004 TRACK 01 F001 T001 F002 F002 5 Time indication Elapsed playing time of the disc Remaining title time for DVD Remaining disc time for others Elapsed playing time of the current chapter track 2 Remaining time of the current chapter track 2 6 Playback status Play Reverse forward search Reverse forward sl...

Page 358: ...e you can only operate the DVD CD player using the remote controller 1 2 3 Off Deactivates Dual Zone On Activates Dual Zone without applying Headphone Surround The DUAL indicator lights up On Surround On Activates Dual Zone and applies Headphone Surround Headphone Surround appears and the DUAL SURROUND indicator lights up When Dual Zone is activated the main source is changed to Disc To select a d...

Page 359: ... of tracks in the current folder total number of tracks on the disc 8 Track information only for MP3 WMA WAV AAC 9 Track list p Current track highlighted To select a folder or track 1 Select Folder column or Track column on the control screen 2 Select a folder or track If necessary press 6 to start playback MODE REPEAT TRACK TIME 00 14 Track 6 14 Track Information Cloudy Fair Fog Hail Indian summe...

Page 360: ...gramorPlayListmaynot bedisplayeddependingontherecordingequipment Folder 144 240 Track 144 198 Page 4 7 fol120 fol121 fol122 fol123 fol124 fol125 fol126 fol127 fol128 fol129 fol150 fol151 fol152 fol153 fol154 fol155 fol156 fol157 fol158 fol159 fol140 fol141 fol142 fol143 fol144 fol145 fol146 fol147 fol148 fol149 fol130 fol131 fol132 fol133 fol134 fol135 fol136 fol137 fol138 fol139 file0141 wma file...

Page 361: ...ck DISP Touch if necessary page 9 BAND Stops playback Connect a USB device USB is selected as the source and playback starts automatically This unit can play JPEG MPEG1 MPEG2 1 MP3 WMA WAV AAC 2 files stored on a USB mass storage class device You can operate the USB device in the same way you operate the files on discs pages 17 to 25 You cannot select USB when Dual Zone is in use All tracks on the...

Page 362: ...cator lights up on the source information screen To cancel select Off in step 4 You can use Repeat or Random playback mode Ex To select Track Repeat 1 2 3 Repeat Set Off Track Folder Off Mode Repeat Random Mode AV Menu Enter Caution Avoid using the USB device if it might hinder your safety driving Do not pull out and attach the USB device repeatedly while Now Reading is flashing on the monitor Do ...

Page 363: ...king a call from phone book from call history Redial and Received Call by dialing number by preset numbers by voice command Receiving the SMS Playing back a Bluetooth audio player Refer also to the instructions supplied with the Bluetooth device Connecting a Bluetooth device for the first time Pairing and PIN Code When you connect a Bluetooth device to the unit for the first time make pairing betw...

Page 364: ...h device While Open is flashing on the monitor Enter the same PIN code as entered in the above step on the device to be connected Now connection is established and you can use the device through the unit turns blue and the following icon appears when the connection is established Appears when the Bluetooth phone is connected Appears when the Bluetooth audio player is connected Appears when the Blu...

Page 365: ... P901i P6200 Delete Enter No Yes Bluetooth AV Menu Enter Phone Connect Bluetooth Dial Menu Device Menu Settings Making a call You can make hands free calls using the unit The sound comes out from the connected speakers 1 2 3 The built in microphone is behind the upper left hand corner of the unit Bluetooth AV Menu Enter Redial Bluetooth Dial Menu Device Menu Settings Continued on the next page ...

Page 366: ...ENU page 56 When a call comes in The source is automatically changed to Bluetooth When Auto Answer is activated The unit answers the incoming calls automatically page 56 When Auto Answer is deactivated press SRC or touch any control to answer the incoming call To end the call or reject an incoming call Hold SRC or any control Answering a waiting call If your cellular phone is equipped with the cal...

Page 367: ...phone numbers names listed in step 1 Select a number Move the entry position Hold Delete Enter No One All Redial Dial Store 08945671234 12312341234 Delete To copy the phone book You can copy the phone book memory of a cellular phone into the unit 1 2 3 4 Enter a PIN code to the unit You can enter any number you like 1 digit to 16 digit number Some cellular phones have their own PIN code Enter the ...

Page 368: ...try Phonebook Full appears on the monitor Delete unwanted names before copying page 35 Presetting the phone numbers You can preset up to six phone numbers 1 Display the phone number you want to preset by using Redial Received Calls Phonebook or Phone Number 2 3 Select a preset number 4 Store the phone number The phone number selected in step 1 is now stored in preset number 5 You can use the follo...

Page 369: ...a new device See page 32 for connecting disconnecting a registered device See page 33 for deleting a registered device When the sound is stopped or interrupted during the use of a Bluetooth device turn off then turn on the unit If the sound is not yet restored connect the device again Connecting disconnecting a registered device on page 32 Selecting playback modes You can use Repeat or Random play...

Page 370: ...rts automatically When you connect the iPod to the USB terminal USB iPod is selected as the source and playback starts automatically Search Mode Music Videos Shuffle Songs Search Mode Music Videos Shuffle Songs When connected with the USB cable Hold ListeningtotheiPod You can connect the iPod using the following cable or adapter Cable adapter To operate To listen to the music USB 2 0 cable supplie...

Page 371: ...tion screen To cancel select Off in step 4 Youcanalsoactivatetheplaybackmodethrough SearchMode Toactivate select ShuffleSongs thentouch6in step2onpage38 Changing the play speed of the audiobooks You can change the play speed of the audiobooks Follow steps 1 to 3 in the left column In step 3 1 2 Select the desired speed Selecting playback modes You can use Repeat or Random playback mode Ex To selec...

Page 372: ...to the previous menu touch 5 Selecting playback modes Operations are exactly the same as explained on page 39 AudioBooks isnotdisplayedinstep3 Pauses playback To resume touch again A Source name B Sound mode page 46 C Track no Playing time Preparation When operating through the CD changer jack make sure iPod is selected for the external input setting page 52 Select iPod Playback starts automatical...

Page 373: ...anger 4 Touch Selects track Hold Reverse forward search 5 Touch Selects folder MP3 only Hold Displays Disc List A MP3 indicator MP3 only B Sound mode page 46 C Disc no Folder no Track no Playing time D Current track title Artist name Disc title No Name appears for conventional CDs It is recommended to use a JVC MP3 compatible CD changer with your unit You can play only CDs CD DA and MP3 discs Disc...

Page 374: ...Each List can also be accessed through AV Menu List Disc List Folder List File List Folder List My Best Cinema Pops My Best2 Favorite Song Cinema2 File List Enter Song011 mp3 Song012 mp3 Song014 mp3 Song014 mp3 Song015 mp3 Song016 mp3 Disc List MP3 DISC DISC 02 DISC 03 DISC 04 DISC 05 DISC 06 Hold While playing an MP3 disc you can select and start playing a track in the disc using the Lists Disc L...

Page 375: ...cs Track Repeats current track Folder Randomly plays all tracks of current folder then tracks of next folders Folder Repeats all tracks of the current folder Disc Randomly plays all tracks of the current disc Disc Repeats all tracks of the current disc All Randomly plays all tracks of all loaded discs You can use the following buttons on the remote controller to operate the CD changer For details ...

Page 376: ...nnected component and start playing the source Navigation screen When you connect a Navigation System to the unit you can view the navigation screen regardless of the source Preparation Make sure AV Input setting is selected for Navigation page 52 To watch the navigation screen touch DISP repeatedly page 9 The aspect ratio of the navigation screen is fixed to Full regardless of the Aspect setting ...

Page 377: ...ng the Line Input Adapter KS U57 not supplied or AUX Input Adapter KS U58 not supplied EXT IN EXT INPUT FLAT Preparation Make sure External Input is selected for External Input page 52 Select External Input Ÿ Turn on the connected component and start playing the source A Sound mode page 46 B Assigned title page 47 ...

Page 378: ...ode is temporarily canceled Storing your own adjustments You can store your adjustments into User1 User2 and User3 1 Follow steps and Ÿ on the left 2 Select the item you want to adjust 3 Adjust each setting 4 Select User1 User2 or User3 then store the setting Soundequalization Edit Store 03 60 0 Hz Equalizer Exit Edit Flat Hard Rock R B Pop Jazz Equalizer Exit Edit Flat Hard Rock R B Pop Jazz Edit...

Page 379: ...itle Finish the procedure You can assign titles as follows FM AM stations Up to 16 characters up to 30 stations AV Input External Input Up to 16 characters If you try to assign a title to a 31st station Name Full flashes on the monitor Delete unwanted titles before assignment Ex Assigning title to AV Input Select AV Input For FM AM stations Select the band then tune into a station Ÿ Assigningtitle...

Page 380: ...d color of the monitor Blue Light Blue Red Orange Yellow Green Purple Dark Blue Dark Green Brown Light Brown Black Scroll Off Cancels Once Scrolls the source information once Auto Repeats scrolling 5 second intervals Holding DISP on the unit scrolls the information regardless of this setting Tag Display Off Cancels On Shows the Tag data while playing MP3 WMA WAV AAC tracks Dual Zone Bluetooth List...

Page 381: ...ratio of the picture Aspect ratio of incoming signal 4 3 16 9 Full For 16 9 original pictures Auto For Disc Aspect ratio is automatically selected to match to the incoming signals For other video sources Aspect ratio is fixed at Regular Regular For 4 3 original pictures NTSC PAL This setting is valid only to the external monitor connected Select the color system of the external monitor NTSC PAL Tu...

Page 382: ...rnal monitor is 4 3 Refer to the illustrations on the left to see how the pictures are shown on the monitor OSD Position Select the position of the on screen bar 25 1 Higher position 2 Lower position File Type Select playback file type when a disc USB contains different types of files You can store this setting separately for each source Disc and USB Audio Plays back audio files Still Picture Play...

Page 383: ...nter speaker when surround is deactivated Speaker Level You can adjust the output level of the activated speakers Speaker Size above monitoring the test tone Front Lch Center Ch Front Rch Rear Rch Subwoofer 2 Rear Lch Adjust the output level of each speaker in the range of 10dB to 10dB Initial 0dB Hold 6 to turn on and off the test tone Speaker Distance You can adjust the speaker output timing Fro...

Page 384: ... iPod 4 CD changer or iPod 40 41 External Input Any other than the above 45 Others Beep Off Cancels On Activates the key touch tone Telephone Muting 5 Off Cancels Muting1 Muting2 Select either one which mutes the sounds while using the cellular phone Illumination You can turn off the touch pad controls and monitor lights while turning on the unit 5 Touch pad controls Monitor Normal Always lights P...

Page 385: ...elect when the subwoofer is connected Crossover Adjust the crossover frequency between the front rear speakers and the subwoofer 80Hz 120Hz 150Hz Amplifier Gain You can change the maximum volume level of this unit Off Deactivates the built in amplifier Low Power Select this if the maximum power of the speakers is less than 50 W High Power Rear Speaker 7 You can activate deactivate the rear speaker...

Page 386: ...you can adjust Panorama and Center Width 2 Mode 3 Menu items Selectable settings reference page Mono Only for FM bands Off On 12 SSM Only for FM bands 12 Title Entry Only for FM AM stations AV Input and External Input 47 Repeat Random Only for Disc USB USB iPod Changer iPod and Bluetooth 17 30 37 39 40 43 AudioBooks Only for USB iPod Normal Faster Slower 39 List The accessible lists differ dependi...

Page 387: ...Disconnect the current device before connecting another device 32 Delete Pairing Only for the registered devices Delete the registered devices 33 New Pairing Enter the PIN code to establish the connection 32 Once the connection is established it is registered in the unit You can connect the unit and the device by using Phone Connect Audio Connect above from the next time on 1 Selectableonlyfor Dis...

Page 388: ...ok Copy the phone book memory of a cellular phone into the unit You can register up to 50 phone numbers 35 MIC Setting Adjust the built in microphone volume 01 02 03 Phone Volume Adjust the phone volume 00 to 30 or 50 1 Initial 15 Initialize Initialize all settings you have made in Bluetooth Yes Initializes the settings No Cancels Information The following information is shown Name The unit name A...

Page 389: ...c by the edges Do not touch its recording surface When storing a disc into its case gently insert the disc around the center holder with the printed surface facing up Make sure to store discs into the cases after use Maintenance To keep discs clean A dirty disc may not play correctly If a disc does become dirty wipe it with a soft cloth in a straight line from center to edge Do not use any solvent...

Page 390: ...you change the source playback also stops without ejecting the disc Next time you select Disc for the playback source disc play starts from where it stopped previously Playing Recordable Rewritable discs This unit can recognize a total of 5 000 files and 250 folders a maximum of 999 files per folder Use only finalized discs This unit can play back multi session discs however unclosed sessions will...

Page 391: ...equency 48 kHz 44 1 kHz 32 kHz for MPEG1 24 kHz 22 05 kHz 16 kHz for MPEG2 48 kHz 44 1 kHz 32 kHz 22 05 kHz for WMA 44 1 kHz for WAV 48 kHz 44 1 kHz for AAC This unit can show ID3 Tag Version 1 0 1 1 2 2 2 3 2 4 for MP3 This unit can also show WAV WMA AAC Tag This unit can play back files recorded in VBR variable bit rate Files recorded in VBR have a discrepancy in elapsed time indication This uni...

Page 392: ...ack files in a USB device properly when using a USB extension cord This unit cannot assure proper functions or supply power to all types of the devices This unit can recognize a total of 5 000 files and 250 folders a maximum of 999 files per folder This unit can recognize a total of 25 characters for file folder names For MPEG1 2 files The maximum bit rate for video signals average is 2 Mbps Bluet...

Page 393: ...when using the USB 2 0 cable or USB Audio and Video cable Menu items If you change the Amplifier Gain setting from High Power to Low Power while the volume level is set higher than 30 the unit automatically changes the volume level to VOL 30 After you change any of Menu Language Audio Language Subtitle settings turn off then on the power and re insert the disc or insert another disc so that your s...

Page 394: ... 62 Characters you can enter for titles In addition to the roman alphabet A Z a z you can use the following characters to assign titles page 47 When Руccĸий is selected for Language page 49 Upper and lower cases Numbers and symbols When any language other than Руccĸий is selected for Language page 49 Upper and lower cases Numbers and symbols About sounds reproduced through the rear terminals Speak...

Page 395: ...A Sanskrit TR Turkish BN Bengali Bangla HU Hungarian MG Malagasy SD Sindhi TS Tsonga BO Tibetan HY Armenian MI Maori SG Sangho TT Tatar BR Breton IA Interlingua MK Macedonian SH Serbo Croatian TW Twi CA Catalan IE Interlingue ML Malayalam SI Singhalese UK Ukrainian CO Corsican IK Inupiak MN Mongolian SK Slovak UR Urdu CS Czech IN Indonesian MO Moldavian SL Slovenian UZ Uzbek CY Welsh IS Icelandic ...

Page 396: ... controller does not work Deactivate Dual Zone page 26 While Dual Zone is activated the remote controller only functions for operating the DVD CD player No Signal appears Change the source Start the playback on the external component connected to VIDEO IN plug Check the cords and connections Signal input is too weak Mecha Error Push Reset appears on the monitor and the control panel does not move ...

Page 397: ...d Stop playback while driving on rough roads Change the disc No playback picture appears on the monitor Parking brake lead is not connected properly Installation Connection Manual No picture appears on the external monitor Connect the video cord correctly Select the correct input on the external monitor Eject Error or Loading Error appears on the monitor Changing the source by pressing SRC will so...

Page 398: ...terrupted The tracks have not been properly copied into the USB device Copy tracks again into the USB device and try again Bluetooth Bluetooth device does not detect the unit Search from the Bluetooth device again Reset the unit When Open appears on the monitor search from the Bluetooth device again The unit does not make pairing with the Bluetooth device Enter the same PIN code for both the unit ...

Page 399: ...n Reset 08 appears on the monitor Check the connection between the adapter and this unit The iPod s controls do not work after disconnecting from this unit Reset the iPod Restricted Device appears on the monitor Check whether the connected iPod is compatible with this unit page 61 No operations are available while playing back a track containing artwork Operate the unit after the artwork is loaded...

Page 400: ...Output composite 1 Vp p 75 Ω Other Terminals Input LINE IN VIDEO IN USB input terminal Antenna input Output 2nd AUDIO OUT VIDEO OUT Others CD changer FM AM TUNER Frequency Range FM 87 5 MHz to 108 0 MHz AM 531 kHz to 1 602 kHz FM Tuner Usable Sensitivity 11 3 dBf 1 0 μV 75 Ω 50 dB Quieting Sensitivity 16 3 dBf 1 8 μV 75 Ω Alternate Channel Selectivity 400 kHz 65 dB Frequency Response 40 Hz to 15 0...

Page 401: ...ompatible File System FAT 32 16 12 Max Current Less than 500 mA 5 V BLUETOOTH Version Bluetooth 1 2 certified Output Power 4 dBm Max Power class 2 Service Area Within 10 m Profile HFP Hands Free Profile 1 5 OPP Object Push Profile 1 1 A2DP Advanced Audio Distribution Profile 1 2 AVRCP Audio Video Remote Control Profile 1 3 GENERAL Power Requirements Operating Voltage DC 14 4 V 11 V to 16 V allowan...

Page 402: ...EN CT TH 0208MNMMDWJEIN 2008 Victor Company of Japan Limited Having TROUBLE with operation Please reset your unit Refer to page of How to reset your unit ...

Page 403: ...ܓ ӕ π ß H Batteries ྐЖ µ µÕ Ë Heat sink ಞᇊ ºËπ ÈÕπ Required space for installation ϰ ᄕ ڐ æ Èπ Ë Ë ß ËµÈÕß È π µ µ Èß Control panel վࡒ ػ ÀπÈ ªí G Remote controller ჲ µ Õπ LVT1798 006A U UT 0208MNMMDWJEIN EN CT TH 2008 Victor Company of Japan Limited Parts list for installation and connection Έ ء ϰ ો ྒྷڅ έ Ë πª Õ À µ µ Èß ËÕ µËÕ π The following parts are provided for this unit After checking them ple...

Page 404: ...en installing the unit You cannot install the unit on the car which has any obstacles in the space shown in Required space for installation on page 1 Caution when installing Fit the unit into the mounting sleeve by using four corners of the trim plate DO NOT press the panel shaded in the illustration 30 Flat type screws M5 x 8 mm 2 Ꮓᒘീਐ M5 x 8 mm 2 ŸÀ M5 x 8 2 Fit the protrusions outside the unit ...

Page 405: ... if any 250 mA max вбੂ ለ ࠜЉ ఛʨ 250 mA Õ øøÈ Õ µ π µ À π Ÿß 250 mA Fuse block ۘᎳീవ ºßøî Red и ß Brown ሶи πÈ µ Light green ଠႋи ÕËÕπ To car light control switch вԆԾԾጜ վළᘕ µ Ï ÿ ø Õß πµ Ï To cellular phone system в ྐੂޟ Ԧ µËÕ æ Ï ËÕπ To the remote lead of other equipment 200 mA max в ɾ ࡖށ ᛏ క ڄ ჲ ለ ఛʨ 200 mA µËÕ È Õª ÏÕË π π Ÿß 200 mA Ignition switch ᓭ ළᘕ Ï ÿ White with black stripe ΎиઘЉ෨и ঙ White Ύи G...

Page 406: ...Are the terminals of L and R speakers grounded in common Noise interfere with sounds Is the rear ground terminal connected to the car s chassis using shorter and thicker cords Unit becomes hot Is the speaker output lead grounded Are the terminals of L and R speakers grounded in common This unit does not work at all Have you reset your unit To car battery вԆԾྐЖ µËÕ µ µÕ Ë πµÏ Extension lead not sup...

Page 407: ...EN MONITOR not supplied 9 ʭᅛܳ Ε ԅЉ క Õ È ß 9 π È Ë È ÀÈ æ ÈÕ ËÕß Video cord not supplied ඁᏁྐង ԅЉ క Õ Ë È ÀÈ æ ÈÕ ËÕß 7 To listen to disc playback sound while in Dual Zone operations see page 26 of INSTRUCTIONS 7 ࠜ Ϛᕻࡌੇ ዬѕЂ γၪᆑ ڄ ᑵࡖ ቁ ኌ 26 ࡗ ݣڄ Ε é 7 ËÕµÈÕß øíß ºËπ Ï Õ ŸË π À ß π Dual Zone ÿÀπÈ 26 Õß ŸË Õ Èß π A B 5 Audio cord not supplied 5 ࡖᏁྐង ԅЉ క 5 ÕÕ Õ Ë È ÀÈ æ ÈÕ ËÕß Remote lead ჲ ለ µ Ë To t...

Page 408: ...2 0 cable USB 2 0 ྐង È USB 2 0 Connecting the iPod to the USB terminal You can connect the iPod to the USB terminal using the following cables To listen to the music USB 2 0 cable supplied for the iPod To watch the video USB Audio and Video cable for iPod KS U20K not supplied 8 USB device USB Õÿª Ï USB USB device USB Õÿª Ï USB Apple iPod Apple iPod Apple iPod iPod ݵ Apple Inc ᙧ س Ϛࠀ մ ࣁٌ ੋڄ ᆤé iPo...

Page 409: ...tallatie en aansluiting van het apparaat vindt u in de desbetreffende handleiding INSTRUCTIONS BEDIENUNGSANLEITUNG MANUEL D INSTRUCTIONS GEBRUIKSAANWIJZING LVT1800 001A E For canceling the display demonstration see page 7 Zum Abbrechen der Displaydemonstration siehe Seite 7 Pour annuler la démonstration des affichages référez vous à la page 7 Zie bladzijde 7 voor het annuleren van de displaydemons...

Page 410: ...d human health This symbol is only valid in the European Union For security reasons a numbered ID card is provided with this unit and the same ID number is imprinted on the unit s chassis Keep the card in a safe place as it will help the authorities to identify your unit if stolen ENGLISH 2 WARNINGS To prevent accidents and damage DO NOT install any unit or wire any cable in a location where it ma...

Page 411: ... technology must be authorized by Macrovision and is intended for home and other limited viewing uses only unless otherwise authorized by Macrovision Reverse engineering or disassembly is prohibited Contents INTRODUCTION Playable disc type 4 Before operations 5 OPERATIONS Basic operations AV menu 6 Basic operations Control panel 8 Basic operations Remote controller RM RK252 10 Listening to the rad...

Page 412: ... Rewritable CD R RW Compliant to ISO 9660 level 1 level 2 Romeo Joliet CD DA MP3 WMA WAV AAC 4 JPEG DivX MPEG1 MPEG2 MPEG4 1 IfyouinsertaDVDVideodiscofanincorrectRegionCode Regioncodeerror appearsonthemonitor 2 DVD Rrecordedinmulti borderformatisalsoplayable exceptforduallayerdiscs DVD RWduallayerdiscsarenotplayable 3 Itispossibletoplaybackfinalized R RW Videoformatonly discs RWdoublelayerdiscsare...

Page 413: ...pen When Illumination is set to Normal page 53 Beforeoperations Touch pad controls How to operate the unit by the touch pad controls You can operate the unit by touching the appropriate part of the touch pad controls To adjust the volume move your finger on the touch pad knob as illustrated below to display the animation on the monitor then press 5 or repeatedly You can also adjust the volume by j...

Page 414: ... the touch pad controls and monitor are turned on Ÿ Enter AV Menu Non available items will be shaded Select an icon to enter the setup screen In this manual English indications are used for purpose of explanation You can select the indication language on the monitor page 49 Setup AV Menu Enter Through Sound Fader Balance Volume Adjust Subwoofer Level High Pass Filter Crossover High Pass Filter Exi...

Page 415: ...isplay Setup Display Clock Disc Setup 1 Disc Setup 2 Tuner Demonstration Exit Off On 6 7 Time Set Exit Hours 18 00 Time Set Exit Minutes 18 35 Setup AV Menu Enter Setup Display Clock Disc Setup 1 Disc Setup 2 Tuner 0 00 Clock Time Set Time Format OSD Clock Clock Adjust Canceling the display demonstration and setting the clock ...

Page 416: ... Resets the unit Use only when the internal system malfunctions r Detaches the control panel page 9 1 Youcannotselectthesesourcesiftheyarenotready 2 Byholding5 youcandisplaythelistaccessible fortheselectedsource Basicoperations Controlpanel 1 Selects sources 1 Tuner DAB Disc USB or USB iPod Changer iPod or External Input AV Input You can also select sources by touching 5 4 after holding SRC for en...

Page 417: ...screen only for video sources DVD 01 02 0 01 20 MULTI DIGITAL CHAP RPT C T VIDEO 15 45 DVD 01 02 0 01 20 MULTI DIGITAL CHAP RPT C T VIDEO 15 45 Source information screen Playback picture and the source information screen Navigation screen This screen is displayed when Navigation is selected for AV Input page 52 Back to the beginning To attach the control panel To tilt the control panel Hold 0 unti...

Page 418: ...g The unit is equipped with the steering wheel remote control function See the Installation Connection Manual separate volume for connection IMPORTANT When Dual Zone is activated page 30 the remote controller functions only for operating the DVD CD player Basicoperations Remotecontroller RM RK252 Main elements and features R03 LR03 AAA 1 Turns on the power Turns off the power Hold Attenuates the s...

Page 419: ...enu selecting buttons 4 4 Reverse skip forward skip Reverse search forward search Hold In menu selecting mode Selects an item Then press to confirm the selection Skips 10 items at a time Hold p Disc USB and USB iPod Forward search q Selects the source w Disc USB and USB iPod Starts and pauses playback e Changes the aspect ratio of the playback pictures r Tuner and DAB Selects the bands Disc and US...

Page 420: ...tedly The ST indicator lights up when receiving an FM stereo broadcast with sufficient signal strength TUNER FM1 P1 87 5 MHz FLAT AF TP MO 15 45 Bayern Radio Pop Music Listeningtotheradio A Band B Sound mode page 46 C Preset no D Frequency E PS station name for FM RDS If no signal is coming in No Name appears F PTY code for FM RDS G Tuner related function indicators ...

Page 421: ...ations with the strongest signals are searched and stored automatically in the FM band When an FM stereo broadcast is hard to receive 1 2 3 4 Reception improves but the stereo effect will be lost The MO indicator lights up To restore the stereo effect select Off in step 4 Mono Exit Off On Off Mode Mono SSM PTy Standby Mode AV Menu Enter Mode Start Mono SSM PTy Standby Mode AV Menu Enter ...

Page 422: ...t To select directly 1 2 To select from the Preset List 1 2 For FM Each time you hold 5 you can change the bands 3 Select the preset number Hold FM1 Enter Store 87 5 89 9 97 9 105 9 108 0 87 5 1 2 3 4 5 6 The Preset List can also be accessed through AV Menu List or FM1 Enter Store 87 5 89 9 97 9 105 9 108 0 87 5 1 2 3 4 5 6 FM1 Enter Store 87 5 89 9 97 9 105 9 108 0 87 5 1 2 3 4 5 6 Hold FM1 Enter...

Page 423: ...earch Start Memory Pop Music Rock Music Easy Listening Serious Classics Current Affairs Varied Speech 1 2 3 4 5 6 PTy Search Start Memory Cultures Science Varied Speech Pop Music Rock Music Eash Listening Hold TUNER FM1 XX X MHz FLAT 15 45 Science PTy Search Storing your favorite programme types You can store your favorite PTY codes into the PTY Preset List 1 Follow steps 1 and 2 in the left colum...

Page 424: ...e changes to the preset TA volume level if the current level is lower than the preset level page 52 Lights up Not yet activated Tune in to another station providing the RDS signals Flashes Touch T P to deactivate Goes off PTY Standby Reception Indicator Enter AV Menu Mode PTy Standby right column and page 55 PTY The unit will temporarily switch to your favorite PTY programme from any source other ...

Page 425: ...u can change the Network Tracking Reception setting AF Regional on page 52 When the DAB tuner is connected refer also to Tracing the same programme Alternative Frequency Reception DAB AF page 43 A Automatic station selection Programme Search Usually when you select preset stations the preset station is tuned in If the signals from the FM RDS preset station are not sufficient for good reception thi...

Page 426: ...nitor the unit cannot accept the operation you have tried to do In some cases without showing operations will not be accepted 0 Ejects the disc 3 8 Starts and pauses playback BAND Stops playback Open the front panel Ÿ Insert the disc Playback starts automatically Caution Do not place your finger behind the control panel Caution on volume setting Discs and connected USB devices produce very little ...

Page 427: ...er no Playing time E Playback mode 4 Touch Selects chapter Hold Reverse forward search 1 5 Selects program no Play List no DISP Touch if necessary page 9 4 Touch Selects track Hold Reverse forward search for DivX MPEG 2 5 Touch Selects folder Hold Displays Folder List DISP Touch if necessary page 9 DVD 01 02 0 01 20 FLAT DIGITAL C P VR PRG 15 45 A Audio format B VR PRG Original program VR PL Play ...

Page 428: ...d surround mode pages 26 and 46 B Track no Playing time C Track title only for CD Text Artist Name Disc title 2 CD 01 02 0 01 20 FLAT 15 45 Current Folder Name Current File Name mp3 MP3 RPT 4 Touch Selects track Hold Reverse forward search 1 5 Touch Selects folder Hold Displays Folder List A Audio format MP3 WMA WAV AAC B Sound surround mode pages 26 and 46 C Folder no Track no Playing time D Curr...

Page 429: ...r Repeats current chapter Program Repeats current program not available for Playlist playback Track Repeats current track for VCD PBC not in use Disc All Randomly plays all tracks for VCD PBC not in use Track Repeats current track Folder Randomly plays all tracks of current folder then tracks of next folders Folder Repeats all tracks of the current folder Disc All Randomly plays all tracks Track R...

Page 430: ...ctivate the prohibition No Eject appears To cancel the prohibition repeat the same procedure to select EJECT OK Hold Folder List My Best Cinema Pops My Best2 Favorite Song Cinema2 Folder List My Best Cinema Pops My Best2 Favorite Song Cinema2 File List Enter Song011 mp3 Song012 mp3 Song013 mp3 Song014 mp3 Song015 mp3 Song016 mp3 Operations using the remote controller RM RK252 Also functions as CLR...

Page 431: ... Searchspeed x2 x5 x10 x20 x60 2 Slowmotionspeed 1 32 1 16 1 8 1 4 1 2 3 Searchspeed x2 x10 Stops playback Starts or pauses playback Reverse forward search 1 No sound can be heard Forward slow motion 2 during pause No sound can be heard Reverse slow motion does not work Select chapter during playback or pause Reverse forward search 3 Hold Selects program Selects Play List during playback or pause ...

Page 432: ...track within the same folder Selects folder Changes the aspect ratio of the playback pictures While playing Back advance the scenes by 5 minutes For DivX6 Using menu driven features 1 2 Select the item you want to start playback 3 1st press 1st press 2nd press 3rd press 2nd press Current playback position Twice Also functions as CLR clear Erases a misentry if pressed while holding SHIFT ...

Page 433: ...he playback pictures Twice Stops playback Starts or pauses playback Reverse forward search 3 Forward slow motion 4 during pause No sound can be heard Reverse slow motion does not work Selects track Reverse forward search 5 Hold No sound can be heard Selects track Changes the aspect ratio of the playback pictures Stops playback Starts or pauses playback Reverse forward search 3 Selects track Revers...

Page 434: ...l Zone is in use MULTI For multi channel encoded sources such as Dolby Digital 3 and DTS 4 When activated MULTI is shown on the source information screen Dolby Pro Logic II Movie Music For 2 channel sources except for DivX MPEG1 MPEG2 discs 3 ManufacturedunderlicensefromDolbyLaboratories Dolby ProLogic andthedouble Dsymbolare trademarksofDolbyLaboratories 4 DTS and DTSDigitalSurround areregistered...

Page 435: ...und Surround Off Surround On Surround On Exit Auto Through Dolby PLII Movie Dolby PLII Music To change the Dolby PLIIMusic setting In step 4 in the left column 1 Select Dolby PLII Music 2 Enter each sub screen then select the desired setting EX When Panorama is selected in step 1 Panorama Select On to add wraparound sound effect Center Width Adjust the center image so it may be heard only from the...

Page 436: ...nu appears For entering time numbers To move the entry position To select a number Repeat steps Ÿ and to set other items if needed To remove the on screen bar Operations using the on screen bar DVD VCD DivX MPEG1 MPEG2 JPEG These operations are possible on the monitor using the remote controller ...

Page 437: ...disc type DVD V T02 C03 TOTAL 1 25 58 TIME TITLE CHAP RPT C RPT T02 C03 PG 001 C 002 PL 003 C 004 TRACK 01 F001 T001 F002 F002 5 Time indication Elapsed playing time of the disc Remaining title time for DVD Remaining disc time for others Elapsed playing time of the current chapter track 2 Remaining time of the current chapter track 2 6 Playback status Play Reverse forward search Reverse forward sl...

Page 438: ...This surrounddoesnotworkforDivX MPEG1 MPEG2discs DualZoneoperations You can enjoy disc playback on the external monitor connected to the VIDEO OUT and 2nd AUDIO OUT plugs while listening to any source other than USB through the speakers When Dual Zone is in use you can only operate the DVD CD player using the remote controller 1 2 3 Off Deactivates Dual Zone On Activates Dual Zone without applying...

Page 439: ... disc For DivX MPEG1 MPEG2 JPEG while not playing Ex MP3 WMA 1 Current folder highlighted bar 2 Current folder no total folder no 3 Folder list Iftagdataincludes JacketPicture baselineJPEG it willbedisplayed IfyoupressOSD theplaybackmode selectionwindowappears page32 4 Selected playback mode page 32 5 Elapsed playing time of the current track not displayed for JPEG 6 Operation status 7 Current tra...

Page 440: ...E 00 14 Track 6 14 Track Information Cloudy Fair Fog Hail Indian summer Rain Shower Snow Thunder Typhoon Wind Winter sky Album Four seasons Artist Robert M Smith Title Rain T RPT Selecting playback modes You can also change the playback modes using the playback mode selection window For JPEG Random cannot be selected 1 2 Except for JPEG Select a playback mode 3 Select your desired option 4 Selecta...

Page 441: ...alprogramorPlayListmaynot bedisplayeddependingontherecordingequipment Folder 144 240 Track 144 198 Page 4 7 fol120 fol121 fol122 fol123 fol124 fol125 fol126 fol127 fol128 fol129 fol150 fol151 fol152 fol153 fol154 fol155 fol156 fol157 fol158 fol159 fol140 fol141 fol142 fol143 fol144 fol145 fol146 fol147 fol148 fol149 fol130 fol131 fol132 fol133 fol134 fol135 fol136 fol137 fol138 fol139 file0141 wma...

Page 442: ... DISP Touch if necessary page 9 BAND Stops playback Connect a USB device USB is selected as the source and playback starts automatically This unit can play JPEG MPEG1 MPEG2 1 MP3 WMA WAV AAC 2 files stored on a USB mass storage class device You can operate the USB device in the same way you operate the files on discs pages 21 to 29 You cannot select USB when Dual Zone is in use All tracks on the U...

Page 443: ... indicator lights up on the source information screen To cancel select Off in step 4 You can use Repeat or Random playback mode Ex To select Track Repeat 1 2 3 Repeat Set Off Track Folder Off Mode Repeat Random Mode AV Menu Enter Caution Avoid using the USB device if it might hinder your safety driving Do not pull out and attach the USB device repeatedly while Now Reading is flashing on the monito...

Page 444: ...K not supplied When connected with the USB cable below Make sure iPod Off is selected for AV Input page 52 USB iPod 01 0 01 20 FLAT 15 45 Track Title Album Title Artist Name A Source name B Sound mode page 46 C Track or video no Playing time 6 Starts pauses playback 5 Moves to the previous next item of a category ex another album artist playlist etc 1 DISP Touch if necessary page 9 1 5 maynotfunct...

Page 445: ...uch6in step2onpage36 Changing the play speed of the audiobooks You can change the play speed of the audiobooks Follow steps 1 to 3 in the left column In step 3 1 2 Select the desired speed 3 Select an item EX When Music is selected in step 2 Repeat the procedure to select the desired track video 4 Confirm the selection Selecting playback modes You can use Repeat or Random playback mode Ex To selec...

Page 446: ...the previous menu touch 5 Selecting playback modes Operations are exactly the same as explained on page 37 AudioBooks isnotdisplayedinstep3 Pauses playback To resume touch again A Source name B Sound mode page 46 C Track no Playing time Preparation When operating through the CD changer jack make sure iPod is selected for the external input setting page 52 Select iPod Playback starts automatically ...

Page 447: ...r is selected for the external input setting page 52 Select Changer Ÿ Enter Disc List Each time you hold the button you can display the other list of the remaining discs Disc List MP3 DISC DISC 02 DISC 03 DISC 04 DISC 05 DISC 06 Disc List Enter MP3 DISC DISC 02 DISC 03 DISC 04 DISC 05 DISC 06 Each List can also be accessed through AV Menu List Disc List Folder List File List Hold Folder List My Be...

Page 448: ...rent folder Disc Randomly plays all tracks of the current disc Disc Repeats all tracks of the current disc All Randomly plays all tracks of all loaded discs 4 When one of the playback modes is selected the corresponding indicator lights up on the source information screen To cancel select Off in step 4 You can use Repeat or Random playback mode Ex To select Track Repeat 1 2 3 Repeat Set Off Track ...

Page 449: ...gnals together with their regular programme signals DRC will reinforce the low level sounds to improve your listening The DRC indicator will light up while tuning in a service with the DRC signals 1 2 3 4 As the number increases the effect becomes stronger A TEXT indicator B Sound mode page 46 C Band D Preset No E Frequency F Service label G Ensemble label H PTY code I DAB indicators Standby Recep...

Page 450: ...service you want to preset 3 Display the Preset List 4 Select a preset number 5 Store the service Preset List can also be accessed through AV Menu List Selecting preset services On the remote 1 2 Hold DAB1 Enter Store Service Label No Serv FFH No Serv HRS HRH 1 2 3 4 5 6 DAB1 Enter Store Service Label No Serv FFH No Serv HRS HRH 1 2 3 4 5 6 DAB1 Enter Store Service Label No Serv FFH No Serv HRS HR...

Page 451: ...52 Activating deactivating Announcement Standby Reception Announcement Standby Reception allows the unit to switch temporarily to your favorite service announcement type Announcement Standby Reception Indicator Enter AV Menu Mode Announce Standby below and page 55 ANN The unit will temporarily switch to your favorite service from any source other than FM AM Lights up Not yet activated Tune in to a...

Page 452: ... connected component and start playing the source Navigation screen When you connect a Navigation System to the unit you can view the navigation screen regardless of the source Preparation Make sure AV Input setting is selected for Navigation page 52 To watch the navigation screen touch DISP repeatedly page 9 The aspect ratio of the navigation screen is fixed to Full regardless of the Aspect setti...

Page 453: ...the Line Input Adapter KS U57 not supplied or AUX Input Adapter KS U58 not supplied EXT IN EXT INPUT FLAT 15 45 Preparation Make sure External Input is selected for External Input page 52 Select External Input Ÿ Turn on the connected component and start playing the source A Sound mode page 46 B Assigned title page 47 ...

Page 454: ...ode is temporarily canceled Storing your own adjustments You can store your adjustments into User1 User2 and User3 1 Follow steps and Ÿ on the left 2 Select the item you want to adjust 3 Adjust each setting 4 Select User1 User2 or User3 then store the setting Soundequalization Edit Store 03 60 0 Hz Equalizer Exit Edit Flat Hard Rock R B Pop Jazz Equalizer Exit Edit Flat Hard Rock R B Pop Jazz Edit...

Page 455: ...lable characters page 60 To erase the whole characters hold DISP 2 Repeat step 1 until you finish entering the title Finish the procedure You can assign titles to AV Input and External Input You can enter up to 16 characters Ex Assigning title to AV Input Select AV Input Ÿ Assigningtitlestothesources Mode Title Entry Title Entry Store AV In Name AV INPUT A a 0 Mode AV Menu Enter ...

Page 456: ...und color of the monitor Blue Light Blue Red Orange Yellow Green Purple Dark Blue Dark Green Brown Light Brown Black Scroll Off Cancels Once Scrolls the source information once Auto Repeats scrolling 5 second intervals Holding DISP on the unit scrolls the information regardless of this setting Tag Display Off Cancels On Shows the Tag data while playing MP3 WMA WAV AAC tracks Dual Zone List Mode Di...

Page 457: ...pears and you cannot adjust this setting Aspect 3 You can change the aspect ratio of the picture Aspect ratio of incoming signal 4 3 16 9 Full For 16 9 original pictures Auto For Disc Aspect ratio is automatically selected to match to the incoming signals For other video sources Aspect ratio is fixed at Regular Regular For 4 3 original pictures Language 4 Select the indication language shown on th...

Page 458: ... 4 3 Pan Scan Select when the aspect ratio of the external monitor is 4 3 Refer to the illustrations on the left to see how the pictures are shown on the monitor OSD Position Select the position of the on screen bar 29 1 Higher position 2 Lower position File Type Select playback file type when a disc USB contains different types of files You can store this setting separately for each source Disc a...

Page 459: ...nter speaker when surround is deactivated Speaker Level You can adjust the output level of the activated speakers Speaker Size above monitoring the test tone Front Lch Center Ch Front Rch Rear Rch Subwoofer 2 Rear Lch Adjust the output level of each speaker in the range of 10dB to 10dB Initial 0dB Hold 6 to turn on and off the test tone Speaker Distance You can adjust the speaker output timing Fro...

Page 460: ...On 43 Input AV Input 3 You can determine the use of LINE IN and VIDEO IN plugs Off Select when no component is connected AV Input is skipped while selecting the source iPod Off Select when connecting the iPod using the USB Audio and Video cable for iPod 36 Audio Video Select when connecting an AV component such as a VCR Audio Select when connecting an audio component such as a portable audio playe...

Page 461: ...lize all settings you have made in AV Menu Hold 6 then reset the unit 3 Equalizer Flat Hard Rock R B Pop Jazz Dance Country Reggae Classic User1 User2 User3 46 1 Dependsontheamplifiergaincontrol page54 2 SelectableonlywhenaDABtunerisconnected 3 Notselectablewhen AVInput isselectedasthesource 4 TheREVERSEGEARSIGNALleadconnectionisrequired Installation ConnectionManual Therearviewthrough thecameraap...

Page 462: ...d the others Subwoofer Level 1 Adjust the subwoofer output level 06 to 08 Initial 00 High Pass Filter Through Select when the subwoofer is not connected On Select when the subwoofer is connected Crossover Adjust the crossover frequency between the front rear speakers and the subwoofer 80Hz 120Hz 150Hz Amplifier Gain You can change the maximum volume level of this unit Off Deactivates the built in ...

Page 463: ...RC 1 DRC 2 DRC 3 41 Announce Standby Only for DAB Off Transport News 43 When you activate Announcement Standby Reception you can change the announcement type for Announcement Standby Reception AudioBooks Only for USB iPod Normal Faster Slower 37 List The accessible lists differ depending on the source 14 22 36 42 Dual Zone Off On On Surround On 30 1 Thissettingtakeseffectonlywhensurroundisdeactiva...

Page 464: ...he edges Do not touch its recording surface When storing a disc into its case gently insert the disc around the center holder with the printed surface facing up Make sure to store discs into the cases after use Maintenance To keep discs clean A dirty disc may not play correctly If a disc does become dirty wipe it with a soft cloth in a straight line from center to edge Do not use any solvent for e...

Page 465: ...ce If you change the source playback also stops without ejecting the disc Next time you select Disc for the playback source disc play starts from where it stopped previously Playing Recordable Rewritable discs This unit can recognize a total of 5 000 files and 250 folders a maximum of 999 files per folder Use only finalized discs This unit can play back multi session discs however unclosed session...

Page 466: ...cy 48 kHz 44 1 kHz 32 kHz for MPEG1 24 kHz 22 05 kHz 16 kHz for MPEG2 48 kHz 44 1 kHz 32 kHz 22 05 kHz for WMA 44 1 kHz for WAV 48 kHz 44 1 kHz for AAC This unit can show ID3 Tag Version 1 0 1 1 2 2 2 3 2 4 for MP3 This unit can also show WAV WMA AAC Tag This unit can play back files recorded in VBR variable bit rate Files recorded in VBR have a discrepancy in elapsed time indication This unit can...

Page 467: ...ith 2 or more partitions Depending on the shape of the USB devices and connection ports some USB devices may not be attached properly or the connection might be loose When connecting a USB device refer also to its instructions Connect only one USB device to the unit at a time Do not use a USB hub This unit may not recognize a USB device connected through a USB card reader When connecting with a US...

Page 468: ... for the main source Disc 2nd AUDIO OUT 2 channel signal is emitted when Dual Zone is activated When playing a multi channel encoded disc multi channel signals are downmixed Characters you can enter for titles In addition to the roman alphabet A Z a z you can use the following characters to assign titles page 47 When Руccĸий is selected for Language page 49 Upper and lower cases Numbers and symbol...

Page 469: ...A Sanskrit TR Turkish BN Bengali Bangla HU Hungarian MG Malagasy SD Sindhi TS Tsonga BO Tibetan HY Armenian MI Maori SG Sangho TT Tatar BR Breton IA Interlingua MK Macedonian SH Serbo Croatian TW Twi CA Catalan IE Interlingue ML Malayalam SI Singhalese UK Ukrainian CO Corsican IK Inupiak MN Mongolian SK Slovak UR Urdu CS Czech IN Indonesian MO Moldavian SL Slovenian UZ Uzbek CY Welsh IS Icelandic ...

Page 470: ... activated the remote controller only functions for operating the DVD CD player No Signal appears Change the source Start the playback on the external component connected to VIDEO IN plug Check the cords and connections Signal input is too weak Mecha Error Push Reset appears on the monitor and the control panel does not move Reset the unit page 3 The touch pad controls do not respond properly Illu...

Page 471: ...picture appears on the monitor Parking brake lead is not connected properly Installation Connection Manual No picture appears on the external monitor Connect the video cord correctly Select the correct input on the external monitor Eject Error or Loading Error appears on the monitor Changing the source by pressing SRC will solve this error File playback Disc cannot be played back Change the disc R...

Page 472: ...nitor Readout time varies depending on the USB device Do not use too many hierarchy folders and empty folders Folder that is physically empty or folder that contains data but does not contain valid MP3 WMA WAV AAC track Turn off the power then on again Do not pull out or connect the USB device repeatedly while Now Reading is displayed on the monitor Correct characters are not displayed e g album n...

Page 473: ...ter the artwork is loaded page 59 CD changer No Disc appears on the monitor Insert a disc into the magazine No Magazine appears on the monitor Insert the magazine Cannot play this disc Check the disc appears on the monitor Disc does not include playable files Replace the disc with playable files Reset 08 appears on the monitor Connect this unit and the CD changer correctly and press the reset butt...

Page 474: ...r Terminals Input LINE IN VIDEO IN USB input terminal Aerial input Output 2nd AUDIO OUT VIDEO OUT Others CD changer OE REMOTE FM AM TUNER Frequency Range FM 87 5 MHz to 108 0 MHz AM MW 522 kHz to 1 620 kHz LW 144 kHz to 279 kHz FM Tuner Usable Sensitivity 11 3 dBf 1 0 μV 75 Ω 50 dB Quieting Sensitivity 16 3 dBf 1 8 μV 75 Ω Alternate Channel Selectivity 400 kHz 65 dB Frequency Response 40 Hz to 15 ...

Page 475: ... 0 Full Speed Data Transfer Rate Full Speed Maximum 12 Mbytes Low Speed Maximum 1 5 Mbytes Compatible Device Mass storage class Compatible File System FAT 32 16 12 Max Current Less than 500 mA 5 V GENERAL Power Requirements Operating Voltage DC 14 4 V 11 V to 16 V allowance Grounding System Negative ground Allowable Operating Temperature 0 C to 40 C Dimensions W H D Installation Size approx 182 mm...

Page 476: ...onforme aux directives et normes européennes en vigueur concernant la compatibilité électromagnétique et à la sécurité électrique Représentant européen de la société Victor Company of Japan Limited JVC Technology Centre Europe GmbH Le nom de la compagnie a changé dans JVC Technical Services Europe GmbH Postfach 10 05 52 61145 Friedberg Allemagne Sehr geehrter Kunde sehr geehrte Kundin dieses Gerät...

Page 477: ... Installeer toestellen en aansluitkabels NIET op plaatsen waar dit een gevaar vormt voor het bedienen van het stuur of de versnelling aangezien elke belemmering van de juiste werking van het stuur en de versnelling tot een ongeluk kan lijden dit een gevaar vormt voor de airbag aangezien elke belemmering van de werking van de airbag tot een dodelijk ongeluk kan lijden dit het uitzicht belemmert Bed...

Page 478: ...r Blokkeer de ventilatie niet INSTALLATION IN DASH MOUNTING The following illustration shows a typical installation If you have any questions or require information regarding installation kits consult your JVC IN CAR ENTERTAINMENT dealer or a company supplying kits If you are not sure how to install this unit correctly have it installed by a qualified technician Make sure not to block the fan on t...

Page 479: ...imentation fourni comme montré sur l illustration Contactez votre revendeur automobile autorisé avant d installer l appareil U moet mogelijk de bedrading van het bijgeleverde spanningssnoer als afgebeeld veranderen Raadpleeg een erkend autogarage alvorens deze receiver te installeren ELECTRICAL CONNECTIONS To prevent short circuits we recommend that you disconnect the battery s negative terminal a...

Page 480: ... Gray Grau Gris Grijs Green with black stripe Grün mit schwarzem Streifen Vert avec bande noire Groen met zwarte streep Green Grün Vert Groen Purple with black stripe Lila mit schwarzem Streifen Violet avec bande noire Paars met zwarte streep Purple Lila Violet Paars Left speaker front Linker Lautsprecher vorne Enceinte gauche avant Linkerspeaker voorin Right speaker front Rechter Lautsprecher vor...

Page 481: ...ite stripe Fernbedienungsleitung Blau mit weißem Streifen Fil d alimentation à distance Bleu avec bande blanche Afstandbedieningsdraad Blauw met witte streep To the remote lead of other equipment or power aerial if any Zum Zusatzkabel des anderen Geräts oder der Motorantenne sofern vorhanden Au fil de télécommande de l autre appareil ou à l antenne automatique s il y en a une Naar afstandsdraad va...

Page 482: ... Model name CD changer CD CH CH X1500 etc JVC DAB tuner KT DB1000 You can also connect the following components through the various JVC adapters Connection cords may need to be purchased separately Component Adapter Model name iPod Interface adapter for iPod KS PD100 Portable audio player with line output jacks Line Input Adapter KS U57 Portable audio player with 3 5 mm stereo mini jack AUX Input ...

Page 483: ...For installation and connections refer to the separate manual INSTRUCTIONS LVT1798 001A A For canceling the display demonstration see page 7 DVD CD RECEIVER KD AVX44 ...

Page 484: ...teering wheel and gearshift lever operations it may obstruct the operation of safety devices such as air bags it may obstruct visibility DO NOT operate the unit while driving If you need to operate the unit while driving be sure to look around carefully The driver must not watch the monitor while driving The driver must not put on the headphones while driving The monitor built in this unit has bee...

Page 485: ...ection technology must be authorized by Macrovision and is intended for home and other limited viewing uses only unless otherwise authorized by Macrovision Reverse engineering or disassembly is prohibited Contents INTRODUCTION Playable disc type 4 Before operations 5 OPERATIONS Basic operations AV menu 6 Basic operations Control panel 8 Basic operations Remote controller RM RK252 10 Listening to t...

Page 486: ...ritable CD R RW Compliant to ISO 9660 level 1 level 2 Romeo Joliet CD DA MP3 WMA WAV AAC 4 JPEG DivX MPEG1 MPEG2 MPEG4 1 IfyouinsertaDVDVideodiscofanincorrectRegionCode Regioncodeerror appearsonthemonitor 2 DVD Rrecordedinmulti borderformatisalsoplayable exceptforduallayerdiscs DVD RWduallayerdiscsarenotplayable 3 Itispossibletoplaybackfinalized R RW Videoformatonly discs RWdoublelayerdiscsarenotp...

Page 487: ...oreoperations Touch pad controls How to operate the unit by the touch pad controls You can operate the unit by touching the appropriate part of the touch pad controls To adjust the volume move your finger on the touch pad knob as illustrated below to display the animation on the monitor then press 5 or repeatedly You can also adjust the volume by just continuing to move your finger on the touch pa...

Page 488: ... touch pad controls and monitor are turned on Ÿ Enter AV Menu Non available items will be shaded Select an icon to enter the setup screen In this manual English indications are used for purpose of explanation You can select the indication language on the monitor page 49 Setup AV Menu Enter Through Sound Fader Balance Volume Adjust Subwoofer Level High Pass Filter Crossover High Pass Filter Exit Th...

Page 489: ...Display Setup Display Clock Disc Setup 1 Disc Setup 2 Input Demonstration Exit Off On 6 7 Time Set Exit Hours 3 00PM Time Set Exit Minutes 3 35PM Setup AV Menu Enter Setup Display Clock Disc Setup 1 Disc Setup 2 Input 1 00AM Clock Time Set Time Format OSD Clock Canceling the display demonstration and setting the clock ...

Page 490: ...e Basicoperations Controlpanel 1 Selects sources 1 Tuner Disc USB or USB iPod Changer iPod or External Input Bluetooth AV Input You can also select sources by touching 5 4 after holding SRC for entering Source Menu 2 Ejects the disc 3 Enters or exits AV Menu Activates Voice Dialling Hold While talking Adjusts the built in microphone volume 4 Tuner Searches for stations Disc USB USB iPod Changer iP...

Page 491: ...on Ex When the playback source is a DVD video disc Playback picture screen only for video sources DVD 01 02 0 01 20 MULTI DIGITAL CHAP RPT C T VIDEO 3 45PM DVD 01 02 0 01 20 MULTI DIGITAL CHAP RPT C T VIDEO 3 45 PM Source information screen Playback picture and the source information screen Navigation screen This screen is displayed when Navigation is selected for AV Input page 52 Back to the begi...

Page 492: ...ighting IMPORTANT When Dual Zone is activated page 26 the remote controller functions only for operating the DVD CD player Basicoperations Remotecontroller RM RK252 Main elements and features R03 LR03 AAA 1 Turns on the power Turns off the power Hold Attenuates the sound when the power is on 2 Disc USB and USB iPod Reverse search 3 Adjusts the volume level Adjusts the volume level through the 2nd ...

Page 493: ...cting mode Selects an item Then press to confirm the selection Skips 10 items at a time Hold Bluetooth 5 Selects group folder 4 Reverse skip forward skip Reverse search forward search Hold q Disc USB and USB iPod Forward search w Selects the source e Disc USB and USB iPod Starts and pauses playback Bluetooth Starts playback Answers incoming calls r Changes the aspect ratio of the playback pictures...

Page 494: ... Preset no D Frequency E Assigned station name page 47 F FM reception indicator Select Tuner Ÿ Select the band TUNER FM1 P1 87 5 MHz FLAT MO ABC Radio Listeningtotheradio When an FM stereo broadcast is hard to receive 1 2 3 Mono Exit Off On Off Mode Mono SSM Title Entry Mode AV Menu Enter Search for a station Auto Search Manual Search Hold either or until Manual Search appears on the monitor then ...

Page 495: ... number 4 Selecting preset stations On the remote 1 2 On the unit To select directly To select from the Preset List 1 2 For FM Each time you hold 5 you can change the bands 3 Select the preset number Mode Start Mono SSM Title Entry Mode AV Menu Enter FM1 Enter Store 87 5 89 9 97 9 105 9 108 0 87 5 1 2 3 4 5 6 Hold FM1 Enter Store 87 5 89 9 97 9 105 9 108 0 87 5 1 2 3 4 5 6 Hold TUNER FLAT No Name ...

Page 496: ...he unit cannot accept the operation you have tried to do In some cases without showing operations will not be accepted 0 Ejects the disc 3 8 Starts and pauses playback BAND Stops playback Open the front panel Ÿ Insert the disc Playback starts automatically Caution Do not place your finger behind the control panel Caution on volume setting Discs and connected USB devices produce very little noise c...

Page 497: ...r no Playing time E Playback mode 4 Touch Selects chapter Hold Reverse forward search 1 5 Selects program no Play List no DISP Touch if necessary page 9 4 Touch Selects track Hold Reverse forward search for DivX MPEG 2 5 Touch Selects folder Hold Displays Folder List DISP Touch if necessary page 9 DVD 01 02 0 01 20 FLAT DIGITAL C P VR PRG A Audio format B VR PRG Original program VR PL Play List C ...

Page 498: ...laying time CD 02 0 01 20 FLAT Current Track Title Artist Name Disc Title 4 Touch Selects track Hold Reverse forward search 1 A Sound surround mode pages 22 and 46 B Track no Playing time C Track title only for CD Text Artist Name Disc title 2 CD 01 02 0 01 20 FLAT Current Folder Name Current File Name mp3 MP3 RPT 4 Touch Selects track Hold Reverse forward search 1 5 Touch Selects folder Hold Disp...

Page 499: ...peats current chapter Program Repeats current program not available for Playlist playback Track Repeats current track for VCD PBC not in use Disc All Randomly plays all tracks for VCD PBC not in use Track Repeats current track Folder Randomly plays all tracks of current folder then tracks of next folders Folder Repeats all tracks of the current folder Disc All Randomly plays all tracks Track Repea...

Page 500: ...ate the prohibition No Eject appears To cancel the prohibition repeat the same procedure to select EJECT OK Hold Folder List My Best Cinema Pops My Best2 Favorite Song Cinema2 Folder List My Best Cinema Pops My Best2 Favorite Song Cinema2 File List Enter Song011 mp3 Song012 mp3 Song013 mp3 Song014 mp3 Song015 mp3 Song016 mp3 Operations using the remote controller RM RK252 Also functions as CLR cle...

Page 501: ...rchspeed x2 x5 x10 x20 x60 2 Slowmotionspeed 1 32 1 16 1 8 1 4 1 2 3 Searchspeed x2 x10 Stops playback Starts or pauses playback Reverse forward search 1 No sound can be heard Forward slow motion 2 during pause No sound can be heard Reverse slow motion does not work Select chapter during playback or pause Reverse forward search 3 Hold Selects program Selects Play List during playback or pause Sele...

Page 502: ...k within the same folder Selects folder Changes the aspect ratio of the playback pictures While playing Back advance the scenes by 5 minutes For DivX6 Using menu driven features 1 2 Select the item you want to start playback 3 1st press 1st press 2nd press 3rd press 2nd press Current playback position Twice Also functions as CLR clear Erases a misentry if pressed while holding SHIFT ...

Page 503: ...layback pictures Twice Stops playback Starts or pauses playback Reverse forward search 3 Forward slow motion 4 during pause No sound can be heard Reverse slow motion does not work Selects track Reverse forward search 5 Hold No sound can be heard Selects track Changes the aspect ratio of the playback pictures Stops playback Starts or pauses playback Reverse forward search 3 Selects track Reverse fo...

Page 504: ...ne is in use MULTI For multi channel encoded sources such as Dolby Digital 3 and DTS 4 When activated MULTI is shown on the source information screen Dolby Pro Logic II Movie Music For 2 channel sources except for DivX MPEG1 MPEG2 discs 3 ManufacturedunderlicensefromDolbyLaboratories Dolby ProLogic andthedouble Dsymbolare trademarksofDolbyLaboratories 4 DTS and DTSDigitalSurround areregistered tra...

Page 505: ...sofDivX MPEG1 MPEG2discs Surround On Exit Auto Through Dolby PLII Movie Dolby PLII Music To change the Dolby PLIIMusic setting In step 4 in the left column 1 Select Dolby PLIIMusic 2 Enter each sub screen then select the desired setting EX When Panorama is selected in step 1 Panorama Select On to add wraparound sound effect Center Width Adjust the center image so it may be heard only from the cent...

Page 506: ...ppears For entering time numbers To move the entry position To select a number Repeat steps Ÿ and to set other items if needed To remove the on screen bar Operations using the on screen bar DVD VCD DivX MPEG1 MPEG2 JPEG These operations are possible on the monitor using the remote controller ...

Page 507: ... type DVD V T02 C03 TOTAL 1 25 58 TIME TITLE CHAP RPT C RPT T02 C03 PG 001 C 002 PL 003 C 004 TRACK 01 F001 T001 F002 F002 5 Time indication Elapsed playing time of the disc Remaining title time for DVD Remaining disc time for others Elapsed playing time of the current chapter track 2 Remaining time of the current chapter track 2 6 Playback status Play Reverse forward search Reverse forward slow m...

Page 508: ...u can only operate the DVD CD player using the remote controller 1 2 3 Off Deactivates Dual Zone On Activates Dual Zone without applying Headphone Surround The DUAL indicator lights up On Surround On Activates Dual Zone and applies Headphone Surround Headphone Surround appears and the DUAL SURROUND indicator lights up When Dual Zone is activated the main source is changed to Disc To select a diffe...

Page 509: ...tracks in the current folder total number of tracks on the disc 8 Track information only for MP3 WMA WAV AAC 9 Track list p Current track highlighted To select a folder or track 1 Select Folder column or Track column on the control screen 2 Select a folder or track If necessary press 6 to start playback MODE REPEAT TRACK TIME 00 14 Track 6 14 Track Information Cloudy Fair Fog Hail Indian summer Ra...

Page 510: ...orPlayListmaynot bedisplayeddependingontherecordingequipment Folder 144 240 Track 144 198 Page 4 7 fol120 fol121 fol122 fol123 fol124 fol125 fol126 fol127 fol128 fol129 fol150 fol151 fol152 fol153 fol154 fol155 fol156 fol157 fol158 fol159 fol140 fol141 fol142 fol143 fol144 fol145 fol146 fol147 fol148 fol149 fol130 fol131 fol132 fol133 fol134 fol135 fol136 fol137 fol138 fol139 file0141 wma file0142...

Page 511: ...ISP Touch if necessary page 9 BAND Stops playback Connect a USB device USB is selected as the source and playback starts automatically This unit can play JPEG MPEG1 MPEG2 1 MP3 WMA WAV AAC 2 files stored on a USB mass storage class device You can operate the USB device in the same way you operate the files on discs pages 17 to 25 You cannot select USB when Dual Zone is in use All tracks on the USB...

Page 512: ...r lights up on the source information screen To cancel select Off in step 4 You can use Repeat or Random playback mode Ex To select Track Repeat 1 2 3 Repeat Set Off Track Folder Off Mode Repeat Random Mode AV Menu Enter Caution Avoid using the USB device if it might hinder your safety driving Do not pull out and attach the USB device repeatedly while Now Reading is flashing on the monitor Do not ...

Page 513: ... a call from phone book from call history Redial and Received Call by dialing number by preset numbers by voice command Receiving the SMS Playing back a Bluetooth audio player Refer also to the instructions supplied with the Bluetooth device Connecting a Bluetooth device for the first time Pairing and PIN Code When you connect a Bluetooth device to the unit for the first time make pairing between ...

Page 514: ...vice While Open is flashing on the monitor Enter the same PIN code as entered in the above step on the device to be connected Now connection is established and you can use the device through the unit turns blue and the following icon appears when the connection is established Appears when the Bluetooth phone is connected Appears when the Bluetooth audio player is connected Appears when the Bluetoo...

Page 515: ...1i P6200 Delete Enter No Yes Bluetooth AV Menu Enter Phone Connect Bluetooth Dial Menu Device Menu Settings Making a call You can make hands free calls using the unit The sound comes out from the connected speakers 1 2 3 The built in microphone is behind the upper left hand corner of the unit Bluetooth AV Menu Enter Redial Bluetooth Dial Menu Device Menu Settings Continued on the next page ...

Page 516: ...page 56 When a call comes in The source is automatically changed to Bluetooth When Auto Answer is activated The unit answers the incoming calls automatically page 56 When Auto Answer is deactivated press SRC or touch any control to answer the incoming call To end the call or reject an incoming call Hold SRC or any control Answering a waiting call If your cellular phone is equipped with the call wa...

Page 517: ...e numbers names listed in step 1 Select a number Move the entry position Hold Delete Enter No One All Redial Dial Store 08945671234 12312341234 Delete To copy the phone book You can copy the phone book memory of a cellular phone into the unit 1 2 3 4 Enter a PIN code to the unit You can enter any number you like 1 digit to 16 digit number Some cellular phones have their own PIN code Enter the spec...

Page 518: ...Phonebook Full appears on the monitor Delete unwanted names before copying page 35 Presetting the phone numbers You can preset up to six phone numbers 1 Display the phone number you want to preset by using Redial Received Calls Phonebook or Phone Number 2 3 Select a preset number 4 Store the phone number The phone number selected in step 1 is now stored in preset number 5 You can use the following...

Page 519: ...w device See page 32 for connecting disconnecting a registered device See page 33 for deleting a registered device When the sound is stopped or interrupted during the use of a Bluetooth device turn off then turn on the unit If the sound is not yet restored connect the device again Connecting disconnecting a registered device on page 32 Selecting playback modes You can use Repeat or Random playback...

Page 520: ...automatically When you connect the iPod to the USB terminal USB iPod is selected as the source and playback starts automatically Search Mode Music Videos Shuffle Songs Search Mode Music Videos Shuffle Songs When connected with the USB cable Hold ListeningtotheiPod You can connect the iPod using the following cable or adapter Cable adapter To operate To listen to the music USB 2 0 cable supplied fo...

Page 521: ... screen To cancel select Off in step 4 Youcanalsoactivatetheplaybackmodethrough SearchMode Toactivate select ShuffleSongs thentouch6in step2onpage38 Changing the play speed of the audiobooks You can change the play speed of the audiobooks Follow steps 1 to 3 in the left column In step 3 1 2 Select the desired speed Selecting playback modes You can use Repeat or Random playback mode Ex To select Tr...

Page 522: ...he previous menu touch 5 Selecting playback modes Operations are exactly the same as explained on page 39 AudioBooks isnotdisplayedinstep3 Pauses playback To resume touch again A Source name B Sound mode page 46 C Track no Playing time Preparation When operating through the CD changer jack make sure iPod is selected for the external input setting page 52 Select iPod Playback starts automatically Ÿ...

Page 523: ...r 4 Touch Selects track Hold Reverse forward search 5 Touch Selects folder MP3 only Hold Displays Disc List A MP3 indicator MP3 only B Sound mode page 46 C Disc no Folder no Track no Playing time D Current track title Artist name Disc title No Name appears for conventional CDs It is recommended to use a JVC MP3 compatible CD changer with your unit You can play only CDs CD DA and MP3 discs Disc Lis...

Page 524: ... List can also be accessed through AV Menu List Disc List Folder List File List Folder List My Best Cinema Pops My Best2 Favorite Song Cinema2 File List Enter Song011 mp3 Song012 mp3 Song014 mp3 Song014 mp3 Song015 mp3 Song016 mp3 Disc List MP3 DISC DISC 02 DISC 03 DISC 04 DISC 05 DISC 06 Hold While playing an MP3 disc you can select and start playing a track in the disc using the Lists Disc List ...

Page 525: ...rack Repeats current track Folder Randomly plays all tracks of current folder then tracks of next folders Folder Repeats all tracks of the current folder Disc Randomly plays all tracks of the current disc Disc Repeats all tracks of the current disc All Randomly plays all tracks of all loaded discs You can use the following buttons on the remote controller to operate the CD changer For details page...

Page 526: ...ted component and start playing the source Navigation screen When you connect a Navigation System to the unit you can view the navigation screen regardless of the source Preparation Make sure AV Input setting is selected for Navigation page 52 To watch the navigation screen touch DISP repeatedly page 9 The aspect ratio of the navigation screen is fixed to Full regardless of the Aspect setting page...

Page 527: ...he Line Input Adapter KS U57 not supplied or AUX Input Adapter KS U58 not supplied EXT IN EXT INPUT FLAT Preparation Make sure External Input is selected for External Input page 52 Select External Input Ÿ Turn on the connected component and start playing the source A Sound mode page 46 B Assigned title page 47 ...

Page 528: ...is temporarily canceled Storing your own adjustments You can store your adjustments into User1 User2 and User3 1 Follow steps and Ÿ on the left 2 Select the item you want to adjust 3 Adjust each setting 4 Select User1 User2 or User3 then store the setting Soundequalization Edit Store 03 60 0 Hz Equalizer Exit Edit Flat Hard Rock R B Pop Jazz Equalizer Exit Edit Flat Hard Rock R B Pop Jazz Edit Sto...

Page 529: ... Finish the procedure You can assign titles as follows FM AM stations Up to 16 characters up to 30 stations AV Input External Input Up to 16 characters If you try to assign a title to a 31st station Name Full flashes on the monitor Delete unwanted titles before assignment Ex Assigning title to AV Input Select AV Input For FM AM stations Select the band then tune into a station Ÿ Assigningtitlestot...

Page 530: ...lor of the monitor Blue Light Blue Red Orange Yellow Green Purple Dark Blue Dark Green Brown Light Brown Black Scroll Off Cancels Once Scrolls the source information once Auto Repeats scrolling 5 second intervals Holding DISP on the unit scrolls the information regardless of this setting Tag Display Off Cancels On Shows the Tag data while playing MP3 WMA WAV AAC tracks Dual Zone Bluetooth List Mod...

Page 531: ...o of the picture Aspect ratio of incoming signal 4 3 16 9 Full For 16 9 original pictures Auto For Disc Aspect ratio is automatically selected to match to the incoming signals For other video sources Aspect ratio is fixed at Regular Regular For 4 3 original pictures NTSC PAL This setting is valid only to the external monitor connected Select the color system of the external monitor NTSC PAL Turn o...

Page 532: ... monitor is 4 3 Refer to the illustrations on the left to see how the pictures are shown on the monitor OSD Position Select the position of the on screen bar 25 1 Higher position 2 Lower position File Type Select playback file type when a disc USB contains different types of files You can store this setting separately for each source Disc and USB Audio Plays back audio files Still Picture Plays ba...

Page 533: ... speaker when surround is deactivated Speaker Level You can adjust the output level of the activated speakers Speaker Size above monitoring the test tone Front Lch Center Ch Front Rch Rear Rch Subwoofer 2 Rear Lch Adjust the output level of each speaker in the range of 10dB to 10dB Initial 0dB Hold 6 to turn on and off the test tone Speaker Distance You can adjust the speaker output timing Front L...

Page 534: ...d 4 CD changer or iPod 40 41 External Input Any other than the above 45 Others Beep Off Cancels On Activates the key touch tone Telephone Muting 5 Off Cancels Muting1 Muting2 Select either one which mutes the sounds while using the cellular phone Illumination You can turn off the touch pad controls and monitor lights while turning on the unit 5 Touch pad controls Monitor Normal Always lights Proxi...

Page 535: ...t when the subwoofer is connected Crossover Adjust the crossover frequency between the front rear speakers and the subwoofer 80Hz 120Hz 150Hz Amplifier Gain You can change the maximum volume level of this unit Off Deactivates the built in amplifier Low Power Select this if the maximum power of the speakers is less than 50 W High Power Rear Speaker 7 You can activate deactivate the rear speakers Of...

Page 536: ...can adjust Panorama and Center Width 2 Mode 3 Menu items Selectable settings reference page Mono Only for FM bands Off On 12 SSM Only for FM bands 12 Title Entry Only for FM AM stations AV Input and External Input 47 Repeat Random Only for Disc USB USB iPod Changer iPod and Bluetooth 17 30 37 39 40 43 AudioBooks Only for USB iPod Normal Faster Slower 39 List The accessible lists differ depending o...

Page 537: ...onnect the current device before connecting another device 32 Delete Pairing Only for the registered devices Delete the registered devices 33 New Pairing Enter the PIN code to establish the connection 32 Once the connection is established it is registered in the unit You can connect the unit and the device by using Phone Connect Audio Connect above from the next time on 1 Selectableonlyfor Disc an...

Page 538: ...opy the phone book memory of a cellular phone into the unit You can register up to 50 phone numbers 35 MIC Setting Adjust the built in microphone volume 01 02 03 Phone Volume Adjust the phone volume 00 to 30 or 50 1 Initial 15 Initialize Initialize all settings you have made in Bluetooth Yes Initializes the settings No Cancels Information The following information is shown Name The unit name Addre...

Page 539: ... the edges Do not touch its recording surface When storing a disc into its case gently insert the disc around the center holder with the printed surface facing up Make sure to store discs into the cases after use Maintenance To keep discs clean A dirty disc may not play correctly If a disc does become dirty wipe it with a soft cloth in a straight line from center to edge Do not use any solvent for...

Page 540: ...change the source playback also stops without ejecting the disc Next time you select Disc for the playback source disc play starts from where it stopped previously Playing Recordable Rewritable discs This unit can recognize a total of 5 000 files and 250 folders a maximum of 999 files per folder Use only finalized discs This unit can play back multi session discs however unclosed sessions will be ...

Page 541: ...ncy 48 kHz 44 1 kHz 32 kHz for MPEG1 24 kHz 22 05 kHz 16 kHz for MPEG2 48 kHz 44 1 kHz 32 kHz 22 05 kHz for WMA 44 1 kHz for WAV 48 kHz 44 1 kHz for AAC This unit can show ID3 Tag Version 1 0 1 1 2 2 2 3 2 4 for MP3 This unit can also show WAV WMA AAC Tag This unit can play back files recorded in VBR variable bit rate Files recorded in VBR have a discrepancy in elapsed time indication This unit ca...

Page 542: ...files in a USB device properly when using a USB extension cord This unit cannot assure proper functions or supply power to all types of the devices This unit can recognize a total of 5 000 files and 250 folders a maximum of 999 files per folder This unit can recognize a total of 25 characters for file folder names For MPEG1 2 files The maximum bit rate for video signals average is 2 Mbps Bluetooth...

Page 543: ... using the USB 2 0 cable or USB Audio and Video cable Menu items If you change the Amplifier Gain setting from High Power to Low Power while the volume level is set higher than 30 the unit automatically changes the volume level to VOL 30 After you change any of Menu Language Audio Language Subtitle settings turn off then on the power and re insert the disc or insert another disc so that your setti...

Page 544: ...Characters you can enter for titles In addition to the roman alphabet A Z a z you can use the following characters to assign titles page 47 When Руccĸий is selected for Language page 49 Upper and lower cases Numbers and symbols When any language other than Руccĸий is selected for Language page 49 Upper and lower cases Numbers and symbols About sounds reproduced through the rear terminals Speaker o...

Page 545: ...nskrit TR Turkish BN Bengali Bangla HU Hungarian MG Malagasy SD Sindhi TS Tsonga BO Tibetan HY Armenian MI Maori SG Sangho TT Tatar BR Breton IA Interlingua MK Macedonian SH Serbo Croatian TW Twi CA Catalan IE Interlingue ML Malayalam SI Singhalese UK Ukrainian CO Corsican IK Inupiak MN Mongolian SK Slovak UR Urdu CS Czech IN Indonesian MO Moldavian SL Slovenian UZ Uzbek CY Welsh IS Icelandic MR M...

Page 546: ...troller does not work Deactivate Dual Zone page 26 While Dual Zone is activated the remote controller only functions for operating the DVD CD player No Signal appears Change the source Start the playback on the external component connected to VIDEO IN plug Check the cords and connections Signal input is too weak Mecha Error Push Reset appears on the monitor and the control panel does not move Rese...

Page 547: ...op playback while driving on rough roads Change the disc No playback picture appears on the monitor Parking brake lead is not connected properly Installation Connection Manual No picture appears on the external monitor Connect the video cord correctly Select the correct input on the external monitor Eject Error or Loading Error appears on the monitor Changing the source by pressing SRC will solve ...

Page 548: ...upted The tracks have not been properly copied into the USB device Copy tracks again into the USB device and try again Bluetooth Bluetooth device does not detect the unit Search from the Bluetooth device again Reset the unit When Open appears on the monitor search from the Bluetooth device again The unit does not make pairing with the Bluetooth device Enter the same PIN code for both the unit and ...

Page 549: ...set 08 appears on the monitor Check the connection between the adapter and this unit The iPod s controls do not work after disconnecting from this unit Reset the iPod Restricted Device appears on the monitor Check whether the connected iPod is compatible with this unit page 61 No operations are available while playing back a track containing artwork Operate the unit after the artwork is loaded pag...

Page 550: ...ut composite 1 Vp p 75 Ω Other Terminals Input LINE IN VIDEO IN USB input terminal Antenna input Output 2nd AUDIO OUT VIDEO OUT Others CD changer FM AM TUNER Frequency Range FM 87 5 MHz to 108 0 MHz AM 531 kHz to 1 602 kHz FM Tuner Usable Sensitivity 11 3 dBf 1 0 μV 75 Ω 50 dB Quieting Sensitivity 16 3 dBf 1 8 μV 75 Ω Alternate Channel Selectivity 400 kHz 65 dB Frequency Response 40 Hz to 15 000 H...

Page 551: ...tible File System FAT 32 16 12 Max Current Less than 500 mA 5 V BLUETOOTH Version Bluetooth 1 2 certified Output Power 4 dBm Max Power class 2 Service Area Within 10 m Profile HFP Hands Free Profile 1 5 OPP Object Push Profile 1 1 A2DP Advanced Audio Distribution Profile 1 2 AVRCP Audio Video Remote Control Profile 1 3 GENERAL Power Requirements Operating Voltage DC 14 4 V 11 V to 16 V allowance G...

Page 552: ...EN 0208MNMMDWJEIN 2008 Victor Company of Japan Limited Having TROUBLE with operation Please reset your unit Refer to page of How to reset your unit ...

Page 553: ...ting to prevent the speakers from being damaged see page 53 of the INSTRUCTIONS To prevent short circuits cover the terminals of the UNUSED leads with insulating tape The heat sink becomes very hot after use Be careful not to touch it when removing this unit L Rubber cushion F Crimp connector I Washer ø5 J Lock nut M5 M Mounting bolt M5 x 20 mm K Handles H Batteries 1 When you stand the unit be ca...

Page 554: ...o metallic body or chassis of the car Parking brake switch inside the car Parking brake Connecting the parking brake lead A Connecting the reverse gear signal lead for rear view camera REVERSE GEAR SIGNAL Locate the reverse lamp lead in the trunk To reverse lamp Reverse lamp lead Reverse lamp lead To car battery Purple with white stripe Reverse lamps Extension lead not supplied Crimp connector not...

Page 555: ...use block connecting to the car battery bypassing the ignition switch constant 12 V To an accessory terminal in the fuse block To automatic antenna if any 250 mA max Fuse block Red To car light control switch To cellular phone system To the remote lead of other equipment 200 mA max Ignition switch White with black stripe White Gray with black stripe Gray Green with black stripe Green Purple with b...

Page 556: ... 5 mm stereo mini jack AUX input adapter KS U58 When connecting an external component CD CH KS PD100 KS U57 KS U58 Apple iPod 8 When using the cable make sure iPod Off is selected for AV Input see page 52 of the INSTRUCTIONS KS U20K USB 2 0 cable Connecting the iPod to the USB terminal You can connect the iPod to the USB terminal using the following cables To listen to the music USB 2 0 cable supp...

Page 557: ...ENGLISH For installation and connections refer to the separate manual INSTRUCTIONS LVT1798 004A UT For canceling the display demonstration see page 7 DVD CD RECEIVER KD AVX44 ...

Page 558: ...he steering wheel and gearshift lever operations it may obstruct the operation of safety devices such as air bags it may obstruct visibility DO NOT operate the unit while driving If you need to operate the unit while driving be sure to look around carefully The driver must not watch the monitor while driving The driver must not put on the headphones while driving The monitor built in this unit has...

Page 559: ...protection technology must be authorized by Macrovision and is intended for home and other limited viewing uses only unless otherwise authorized by Macrovision Reverse engineering or disassembly is prohibited Contents INTRODUCTION Playable disc type 4 Before operations 5 OPERATIONS Basic operations AV menu 6 Basic operations Control panel 8 Basic operations Remote controller RM RK252 10 Listening ...

Page 560: ... Rewritable CD R RW Compliant to ISO 9660 level 1 level 2 Romeo Joliet CD DA MP3 WMA WAV AAC 4 JPEG DivX MPEG1 MPEG2 MPEG4 1 IfyouinsertaDVDVideodiscofanincorrectRegionCode Regioncodeerror appearsonthemonitor 2 DVD Rrecordedinmulti borderformatisalsoplayable exceptforduallayerdiscs DVD RWduallayerdiscsarenotplayable 3 Itispossibletoplaybackfinalized R RW Videoformatonly discs RWdoublelayerdiscsare...

Page 561: ... Beforeoperations Touch pad controls How to operate the unit by the touch pad controls You can operate the unit by touching the appropriate part of the touch pad controls To adjust the volume move your finger on the touch pad knob as illustrated below to display the animation on the monitor then press 5 or repeatedly You can also adjust the volume by just continuing to move your finger on the touc...

Page 562: ... the touch pad controls and monitor are turned on Ÿ Enter AV Menu Non available items will be shaded Select an icon to enter the setup screen In this manual English indications are used for purpose of explanation You can select the indication language on the monitor page 49 Setup AV Menu Enter Through Sound Fader Balance Volume Adjust Subwoofer Level High Pass Filter Crossover High Pass Filter Exi...

Page 563: ...Tag Display Setup Display Clock Disc Setup 1 Disc Setup 2 Input Demonstration Exit Off On 6 7 Time Set Exit Hours 3 00PM Time Set Exit Minutes 3 35PM Setup AV Menu Enter Setup Display Clock Disc Setup 1 Disc Setup 2 Input 1 00AM Clock Time Set Time Format OSD Clock Canceling the display demonstration and setting the clock ...

Page 564: ...ource Basicoperations Controlpanel 1 Selects sources 1 Tuner Disc USB or USB iPod Changer iPod or External Input Bluetooth AV Input You can also select sources by touching 5 4 after holding SRC for entering Source Menu 2 Ejects the disc 3 Enters or exits AV Menu Activates Voice Dialling Hold While talking Adjusts the built in microphone volume 4 Tuner Searches for stations Disc USB USB iPod Change...

Page 565: ...mation Ex When the playback source is a DVD video disc Playback picture screen only for video sources DVD 01 02 0 01 20 MULTI DIGITAL CHAP RPT C T VIDEO 3 45PM DVD 01 02 0 01 20 MULTI DIGITAL CHAP RPT C T VIDEO 3 45 PM Source information screen Playback picture and the source information screen Navigation screen This screen is displayed when Navigation is selected for AV Input page 52 Back to the ...

Page 566: ...al lighting IMPORTANT When Dual Zone is activated page 26 the remote controller functions only for operating the DVD CD player Basicoperations Remotecontroller RM RK252 Main elements and features R03 LR03 AAA 1 Turns on the power Turns off the power Hold Attenuates the sound when the power is on 2 Disc USB and USB iPod Reverse search 3 Adjusts the volume level Adjusts the volume level through the ...

Page 567: ...selecting mode Selects an item Then press to confirm the selection Skips 10 items at a time Hold Bluetooth 5 Selects group folder 4 Reverse skip forward skip Reverse search forward search Hold q Disc USB and USB iPod Forward search w Selects the source e Disc USB and USB iPod Starts and pauses playback Bluetooth Starts playback Answers incoming calls r Changes the aspect ratio of the playback pict...

Page 568: ...46 C Preset no D Frequency E Assigned station name page 47 F FM reception indicator Select Tuner Ÿ Select the band TUNER FM1 P1 87 5 MHz FLAT MO ABC Radio Listeningtotheradio When an FM stereo broadcast is hard to receive 1 2 3 Mono Exit Off On Off Mode Mono SSM Title Entry Mode AV Menu Enter Search for a station Auto Search Manual Search Hold either or until Manual Search appears on the monitor t...

Page 569: ...eset number 4 Selecting preset stations On the remote 1 2 On the unit To select directly To select from the Preset List 1 2 For FM Each time you hold 5 you can change the bands 3 Select the preset number Mode Start Mono SSM Title Entry Mode AV Menu Enter FM1 Enter Store 87 5 89 9 97 9 105 9 108 0 87 5 1 2 3 4 5 6 Hold FM1 Enter Store 87 5 89 9 97 9 105 9 108 0 87 5 1 2 3 4 5 6 Hold TUNER FLAT No N...

Page 570: ...or the unit cannot accept the operation you have tried to do In some cases without showing operations will not be accepted 0 Ejects the disc 3 8 Starts and pauses playback BAND Stops playback Open the front panel Ÿ Insert the disc Playback starts automatically Caution Do not place your finger behind the control panel Caution on volume setting Discs and connected USB devices produce very little noi...

Page 571: ...apter no Playing time E Playback mode 4 Touch Selects chapter Hold Reverse forward search 1 5 Selects program no Play List no DISP Touch if necessary page 9 4 Touch Selects track Hold Reverse forward search for DivX MPEG 2 5 Touch Selects folder Hold Displays Folder List DISP Touch if necessary page 9 DVD 01 02 0 01 20 FLAT DIGITAL C P VR PRG A Audio format B VR PRG Original program VR PL Play Lis...

Page 572: ...no Playing time CD 02 0 01 20 FLAT Current Track Title Artist Name Disc Title 4 Touch Selects track Hold Reverse forward search 1 A Sound surround mode pages 22 and 46 B Track no Playing time C Track title only for CD Text Artist Name Disc title 2 CD 01 02 0 01 20 FLAT Current Folder Name Current File Name mp3 MP3 RPT 4 Touch Selects track Hold Reverse forward search 1 5 Touch Selects folder Hold ...

Page 573: ...r Repeats current chapter Program Repeats current program not available for Playlist playback Track Repeats current track for VCD PBC not in use Disc All Randomly plays all tracks for VCD PBC not in use Track Repeats current track Folder Randomly plays all tracks of current folder then tracks of next folders Folder Repeats all tracks of the current folder Disc All Randomly plays all tracks Track R...

Page 574: ...ctivate the prohibition No Eject appears To cancel the prohibition repeat the same procedure to select EJECT OK Hold Folder List My Best Cinema Pops My Best2 Favorite Song Cinema2 Folder List My Best Cinema Pops My Best2 Favorite Song Cinema2 File List Enter Song011 mp3 Song012 mp3 Song013 mp3 Song014 mp3 Song015 mp3 Song016 mp3 Operations using the remote controller RM RK252 Also functions as CLR...

Page 575: ... Searchspeed x2 x5 x10 x20 x60 2 Slowmotionspeed 1 32 1 16 1 8 1 4 1 2 3 Searchspeed x2 x10 Stops playback Starts or pauses playback Reverse forward search 1 No sound can be heard Forward slow motion 2 during pause No sound can be heard Reverse slow motion does not work Select chapter during playback or pause Reverse forward search 3 Hold Selects program Selects Play List during playback or pause ...

Page 576: ...track within the same folder Selects folder Changes the aspect ratio of the playback pictures While playing Back advance the scenes by 5 minutes For DivX6 Using menu driven features 1 2 Select the item you want to start playback 3 1st press 1st press 2nd press 3rd press 2nd press Current playback position Twice Also functions as CLR clear Erases a misentry if pressed while holding SHIFT ...

Page 577: ...he playback pictures Twice Stops playback Starts or pauses playback Reverse forward search 3 Forward slow motion 4 during pause No sound can be heard Reverse slow motion does not work Selects track Reverse forward search 5 Hold No sound can be heard Selects track Changes the aspect ratio of the playback pictures Stops playback Starts or pauses playback Reverse forward search 3 Selects track Revers...

Page 578: ...l Zone is in use MULTI For multi channel encoded sources such as Dolby Digital 3 and DTS 4 When activated MULTI is shown on the source information screen Dolby Pro Logic II Movie Music For 2 channel sources except for DivX MPEG1 MPEG2 discs 3 ManufacturedunderlicensefromDolbyLaboratories Dolby ProLogic andthedouble Dsymbolare trademarksofDolbyLaboratories 4 DTS and DTSDigitalSurround areregistered...

Page 579: ...gnalsofDivX MPEG1 MPEG2discs Surround On Exit Auto Through Dolby PLII Movie Dolby PLII Music To change the Dolby PLIIMusic setting In step 4 in the left column 1 Select Dolby PLIIMusic 2 Enter each sub screen then select the desired setting EX When Panorama is selected in step 1 Panorama Select On to add wraparound sound effect Center Width Adjust the center image so it may be heard only from the ...

Page 580: ...nu appears For entering time numbers To move the entry position To select a number Repeat steps Ÿ and to set other items if needed To remove the on screen bar Operations using the on screen bar DVD VCD DivX MPEG1 MPEG2 JPEG These operations are possible on the monitor using the remote controller ...

Page 581: ...disc type DVD V T02 C03 TOTAL 1 25 58 TIME TITLE CHAP RPT C RPT T02 C03 PG 001 C 002 PL 003 C 004 TRACK 01 F001 T001 F002 F002 5 Time indication Elapsed playing time of the disc Remaining title time for DVD Remaining disc time for others Elapsed playing time of the current chapter track 2 Remaining time of the current chapter track 2 6 Playback status Play Reverse forward search Reverse forward sl...

Page 582: ...e you can only operate the DVD CD player using the remote controller 1 2 3 Off Deactivates Dual Zone On Activates Dual Zone without applying Headphone Surround The DUAL indicator lights up On Surround On Activates Dual Zone and applies Headphone Surround Headphone Surround appears and the DUAL SURROUND indicator lights up When Dual Zone is activated the main source is changed to Disc To select a d...

Page 583: ... of tracks in the current folder total number of tracks on the disc 8 Track information only for MP3 WMA WAV AAC 9 Track list p Current track highlighted To select a folder or track 1 Select Folder column or Track column on the control screen 2 Select a folder or track If necessary press 6 to start playback MODE REPEAT TRACK TIME 00 14 Track 6 14 Track Information Cloudy Fair Fog Hail Indian summe...

Page 584: ...gramorPlayListmaynot bedisplayeddependingontherecordingequipment Folder 144 240 Track 144 198 Page 4 7 fol120 fol121 fol122 fol123 fol124 fol125 fol126 fol127 fol128 fol129 fol150 fol151 fol152 fol153 fol154 fol155 fol156 fol157 fol158 fol159 fol140 fol141 fol142 fol143 fol144 fol145 fol146 fol147 fol148 fol149 fol130 fol131 fol132 fol133 fol134 fol135 fol136 fol137 fol138 fol139 file0141 wma file...

Page 585: ...ck DISP Touch if necessary page 9 BAND Stops playback Connect a USB device USB is selected as the source and playback starts automatically This unit can play JPEG MPEG1 MPEG2 1 MP3 WMA WAV AAC 2 files stored on a USB mass storage class device You can operate the USB device in the same way you operate the files on discs pages 17 to 25 You cannot select USB when Dual Zone is in use All tracks on the...

Page 586: ...cator lights up on the source information screen To cancel select Off in step 4 You can use Repeat or Random playback mode Ex To select Track Repeat 1 2 3 Repeat Set Off Track Folder Off Mode Repeat Random Mode AV Menu Enter Caution Avoid using the USB device if it might hinder your safety driving Do not pull out and attach the USB device repeatedly while Now Reading is flashing on the monitor Do ...

Page 587: ...king a call from phone book from call history Redial and Received Call by dialing number by preset numbers by voice command Receiving the SMS Playing back a Bluetooth audio player Refer also to the instructions supplied with the Bluetooth device Connecting a Bluetooth device for the first time Pairing and PIN Code When you connect a Bluetooth device to the unit for the first time make pairing betw...

Page 588: ...h device While Open is flashing on the monitor Enter the same PIN code as entered in the above step on the device to be connected Now connection is established and you can use the device through the unit turns blue and the following icon appears when the connection is established Appears when the Bluetooth phone is connected Appears when the Bluetooth audio player is connected Appears when the Blu...

Page 589: ... P901i P6200 Delete Enter No Yes Bluetooth AV Menu Enter Phone Connect Bluetooth Dial Menu Device Menu Settings Making a call You can make hands free calls using the unit The sound comes out from the connected speakers 1 2 3 The built in microphone is behind the upper left hand corner of the unit Bluetooth AV Menu Enter Redial Bluetooth Dial Menu Device Menu Settings Continued on the next page ...

Page 590: ...ENU page 56 When a call comes in The source is automatically changed to Bluetooth When Auto Answer is activated The unit answers the incoming calls automatically page 56 When Auto Answer is deactivated press SRC or touch any control to answer the incoming call To end the call or reject an incoming call Hold SRC or any control Answering a waiting call If your cellular phone is equipped with the cal...

Page 591: ...phone numbers names listed in step 1 Select a number Move the entry position Hold Delete Enter No One All Redial Dial Store 08945671234 12312341234 Delete To copy the phone book You can copy the phone book memory of a cellular phone into the unit 1 2 3 4 Enter a PIN code to the unit You can enter any number you like 1 digit to 16 digit number Some cellular phones have their own PIN code Enter the ...

Page 592: ...try Phonebook Full appears on the monitor Delete unwanted names before copying page 35 Presetting the phone numbers You can preset up to six phone numbers 1 Display the phone number you want to preset by using Redial Received Calls Phonebook or Phone Number 2 3 Select a preset number 4 Store the phone number The phone number selected in step 1 is now stored in preset number 5 You can use the follo...

Page 593: ...a new device See page 32 for connecting disconnecting a registered device See page 33 for deleting a registered device When the sound is stopped or interrupted during the use of a Bluetooth device turn off then turn on the unit If the sound is not yet restored connect the device again Connecting disconnecting a registered device on page 32 Selecting playback modes You can use Repeat or Random play...

Page 594: ...rts automatically When you connect the iPod to the USB terminal USB iPod is selected as the source and playback starts automatically Search Mode Music Videos Shuffle Songs Search Mode Music Videos Shuffle Songs When connected with the USB cable Hold ListeningtotheiPod You can connect the iPod using the following cable or adapter Cable adapter To operate To listen to the music USB 2 0 cable supplie...

Page 595: ...tion screen To cancel select Off in step 4 Youcanalsoactivatetheplaybackmodethrough SearchMode Toactivate select ShuffleSongs thentouch6in step2onpage38 Changing the play speed of the audiobooks You can change the play speed of the audiobooks Follow steps 1 to 3 in the left column In step 3 1 2 Select the desired speed Selecting playback modes You can use Repeat or Random playback mode Ex To selec...

Page 596: ...to the previous menu touch 5 Selecting playback modes Operations are exactly the same as explained on page 39 AudioBooks isnotdisplayedinstep3 Pauses playback To resume touch again A Source name B Sound mode page 46 C Track no Playing time Preparation When operating through the CD changer jack make sure iPod is selected for the external input setting page 52 Select iPod Playback starts automatical...

Page 597: ...anger 4 Touch Selects track Hold Reverse forward search 5 Touch Selects folder MP3 only Hold Displays Disc List A MP3 indicator MP3 only B Sound mode page 46 C Disc no Folder no Track no Playing time D Current track title Artist name Disc title No Name appears for conventional CDs It is recommended to use a JVC MP3 compatible CD changer with your unit You can play only CDs CD DA and MP3 discs Disc...

Page 598: ...Each List can also be accessed through AV Menu List Disc List Folder List File List Folder List My Best Cinema Pops My Best2 Favorite Song Cinema2 File List Enter Song011 mp3 Song012 mp3 Song014 mp3 Song014 mp3 Song015 mp3 Song016 mp3 Disc List MP3 DISC DISC 02 DISC 03 DISC 04 DISC 05 DISC 06 Hold While playing an MP3 disc you can select and start playing a track in the disc using the Lists Disc L...

Page 599: ...cs Track Repeats current track Folder Randomly plays all tracks of current folder then tracks of next folders Folder Repeats all tracks of the current folder Disc Randomly plays all tracks of the current disc Disc Repeats all tracks of the current disc All Randomly plays all tracks of all loaded discs You can use the following buttons on the remote controller to operate the CD changer For details ...

Page 600: ...nnected component and start playing the source Navigation screen When you connect a Navigation System to the unit you can view the navigation screen regardless of the source Preparation Make sure AV Input setting is selected for Navigation page 52 To watch the navigation screen touch DISP repeatedly page 9 The aspect ratio of the navigation screen is fixed to Full regardless of the Aspect setting ...

Page 601: ...ng the Line Input Adapter KS U57 not supplied or AUX Input Adapter KS U58 not supplied EXT IN EXT INPUT FLAT Preparation Make sure External Input is selected for External Input page 52 Select External Input Ÿ Turn on the connected component and start playing the source A Sound mode page 46 B Assigned title page 47 ...

Page 602: ...ode is temporarily canceled Storing your own adjustments You can store your adjustments into User1 User2 and User3 1 Follow steps and Ÿ on the left 2 Select the item you want to adjust 3 Adjust each setting 4 Select User1 User2 or User3 then store the setting Soundequalization Edit Store 03 60 0 Hz Equalizer Exit Edit Flat Hard Rock R B Pop Jazz Equalizer Exit Edit Flat Hard Rock R B Pop Jazz Edit...

Page 603: ...itle Finish the procedure You can assign titles as follows FM AM stations Up to 16 characters up to 30 stations AV Input External Input Up to 16 characters If you try to assign a title to a 31st station Name Full flashes on the monitor Delete unwanted titles before assignment Ex Assigning title to AV Input Select AV Input For FM AM stations Select the band then tune into a station Ÿ Assigningtitle...

Page 604: ...d color of the monitor Blue Light Blue Red Orange Yellow Green Purple Dark Blue Dark Green Brown Light Brown Black Scroll Off Cancels Once Scrolls the source information once Auto Repeats scrolling 5 second intervals Holding DISP on the unit scrolls the information regardless of this setting Tag Display Off Cancels On Shows the Tag data while playing MP3 WMA WAV AAC tracks Dual Zone Bluetooth List...

Page 605: ...ratio of the picture Aspect ratio of incoming signal 4 3 16 9 Full For 16 9 original pictures Auto For Disc Aspect ratio is automatically selected to match to the incoming signals For other video sources Aspect ratio is fixed at Regular Regular For 4 3 original pictures NTSC PAL This setting is valid only to the external monitor connected Select the color system of the external monitor NTSC PAL Tu...

Page 606: ...rnal monitor is 4 3 Refer to the illustrations on the left to see how the pictures are shown on the monitor OSD Position Select the position of the on screen bar 25 1 Higher position 2 Lower position File Type Select playback file type when a disc USB contains different types of files You can store this setting separately for each source Disc and USB Audio Plays back audio files Still Picture Play...

Page 607: ...nter speaker when surround is deactivated Speaker Level You can adjust the output level of the activated speakers Speaker Size above monitoring the test tone Front Lch Center Ch Front Rch Rear Rch Subwoofer 2 Rear Lch Adjust the output level of each speaker in the range of 10dB to 10dB Initial 0dB Hold 6 to turn on and off the test tone Speaker Distance You can adjust the speaker output timing Fro...

Page 608: ... iPod 4 CD changer or iPod 40 41 External Input Any other than the above 45 Others Beep Off Cancels On Activates the key touch tone Telephone Muting 5 Off Cancels Muting1 Muting2 Select either one which mutes the sounds while using the cellular phone Illumination You can turn off the touch pad controls and monitor lights while turning on the unit 5 Touch pad controls Monitor Normal Always lights P...

Page 609: ...elect when the subwoofer is connected Crossover Adjust the crossover frequency between the front rear speakers and the subwoofer 80Hz 120Hz 150Hz Amplifier Gain You can change the maximum volume level of this unit Off Deactivates the built in amplifier Low Power Select this if the maximum power of the speakers is less than 50 W High Power Rear Speaker 7 You can activate deactivate the rear speaker...

Page 610: ...you can adjust Panorama and Center Width 2 Mode 3 Menu items Selectable settings reference page Mono Only for FM bands Off On 12 SSM Only for FM bands 12 Title Entry Only for FM AM stations AV Input and External Input 47 Repeat Random Only for Disc USB USB iPod Changer iPod and Bluetooth 17 30 37 39 40 43 AudioBooks Only for USB iPod Normal Faster Slower 39 List The accessible lists differ dependi...

Page 611: ...Disconnect the current device before connecting another device 32 Delete Pairing Only for the registered devices Delete the registered devices 33 New Pairing Enter the PIN code to establish the connection 32 Once the connection is established it is registered in the unit You can connect the unit and the device by using Phone Connect Audio Connect above from the next time on 1 Selectableonlyfor Dis...

Page 612: ...ok Copy the phone book memory of a cellular phone into the unit You can register up to 50 phone numbers 35 MIC Setting Adjust the built in microphone volume 01 02 03 Phone Volume Adjust the phone volume 00 to 30 or 50 1 Initial 15 Initialize Initialize all settings you have made in Bluetooth Yes Initializes the settings No Cancels Information The following information is shown Name The unit name A...

Page 613: ...c by the edges Do not touch its recording surface When storing a disc into its case gently insert the disc around the center holder with the printed surface facing up Make sure to store discs into the cases after use Maintenance To keep discs clean A dirty disc may not play correctly If a disc does become dirty wipe it with a soft cloth in a straight line from center to edge Do not use any solvent...

Page 614: ...you change the source playback also stops without ejecting the disc Next time you select Disc for the playback source disc play starts from where it stopped previously Playing Recordable Rewritable discs This unit can recognize a total of 5 000 files and 250 folders a maximum of 999 files per folder Use only finalized discs This unit can play back multi session discs however unclosed sessions will...

Page 615: ...equency 48 kHz 44 1 kHz 32 kHz for MPEG1 24 kHz 22 05 kHz 16 kHz for MPEG2 48 kHz 44 1 kHz 32 kHz 22 05 kHz for WMA 44 1 kHz for WAV 48 kHz 44 1 kHz for AAC This unit can show ID3 Tag Version 1 0 1 1 2 2 2 3 2 4 for MP3 This unit can also show WAV WMA AAC Tag This unit can play back files recorded in VBR variable bit rate Files recorded in VBR have a discrepancy in elapsed time indication This uni...

Page 616: ...ack files in a USB device properly when using a USB extension cord This unit cannot assure proper functions or supply power to all types of the devices This unit can recognize a total of 5 000 files and 250 folders a maximum of 999 files per folder This unit can recognize a total of 25 characters for file folder names For MPEG1 2 files The maximum bit rate for video signals average is 2 Mbps Bluet...

Page 617: ...when using the USB 2 0 cable or USB Audio and Video cable Menu items If you change the Amplifier Gain setting from High Power to Low Power while the volume level is set higher than 30 the unit automatically changes the volume level to VOL 30 After you change any of Menu Language Audio Language Subtitle settings turn off then on the power and re insert the disc or insert another disc so that your s...

Page 618: ... 62 Characters you can enter for titles In addition to the roman alphabet A Z a z you can use the following characters to assign titles page 47 When Руccĸий is selected for Language page 49 Upper and lower cases Numbers and symbols When any language other than Руccĸий is selected for Language page 49 Upper and lower cases Numbers and symbols About sounds reproduced through the rear terminals Speak...

Page 619: ...A Sanskrit TR Turkish BN Bengali Bangla HU Hungarian MG Malagasy SD Sindhi TS Tsonga BO Tibetan HY Armenian MI Maori SG Sangho TT Tatar BR Breton IA Interlingua MK Macedonian SH Serbo Croatian TW Twi CA Catalan IE Interlingue ML Malayalam SI Singhalese UK Ukrainian CO Corsican IK Inupiak MN Mongolian SK Slovak UR Urdu CS Czech IN Indonesian MO Moldavian SL Slovenian UZ Uzbek CY Welsh IS Icelandic ...

Page 620: ... controller does not work Deactivate Dual Zone page 26 While Dual Zone is activated the remote controller only functions for operating the DVD CD player No Signal appears Change the source Start the playback on the external component connected to VIDEO IN plug Check the cords and connections Signal input is too weak Mecha Error Push Reset appears on the monitor and the control panel does not move ...

Page 621: ...d Stop playback while driving on rough roads Change the disc No playback picture appears on the monitor Parking brake lead is not connected properly Installation Connection Manual No picture appears on the external monitor Connect the video cord correctly Select the correct input on the external monitor Eject Error or Loading Error appears on the monitor Changing the source by pressing SRC will so...

Page 622: ...terrupted The tracks have not been properly copied into the USB device Copy tracks again into the USB device and try again Bluetooth Bluetooth device does not detect the unit Search from the Bluetooth device again Reset the unit When Open appears on the monitor search from the Bluetooth device again The unit does not make pairing with the Bluetooth device Enter the same PIN code for both the unit ...

Page 623: ...n Reset 08 appears on the monitor Check the connection between the adapter and this unit The iPod s controls do not work after disconnecting from this unit Reset the iPod Restricted Device appears on the monitor Check whether the connected iPod is compatible with this unit page 61 No operations are available while playing back a track containing artwork Operate the unit after the artwork is loaded...

Page 624: ...Output composite 1 Vp p 75 Ω Other Terminals Input LINE IN VIDEO IN USB input terminal Antenna input Output 2nd AUDIO OUT VIDEO OUT Others CD changer FM AM TUNER Frequency Range FM 87 5 MHz to 108 0 MHz AM 531 kHz to 1 602 kHz FM Tuner Usable Sensitivity 11 3 dBf 1 0 μV 75 Ω 50 dB Quieting Sensitivity 16 3 dBf 1 8 μV 75 Ω Alternate Channel Selectivity 400 kHz 65 dB Frequency Response 40 Hz to 15 0...

Page 625: ...ompatible File System FAT 32 16 12 Max Current Less than 500 mA 5 V BLUETOOTH Version Bluetooth 1 2 certified Output Power 4 dBm Max Power class 2 Service Area Within 10 m Profile HFP Hands Free Profile 1 5 OPP Object Push Profile 1 1 A2DP Advanced Audio Distribution Profile 1 2 AVRCP Audio Video Remote Control Profile 1 3 GENERAL Power Requirements Operating Voltage DC 14 4 V 11 V to 16 V allowan...

Page 626: ...EN CT 0208MNMMDWJEIN 2008 Victor Company of Japan Limited Having TROUBLE with operation Please reset your unit Refer to page of How to reset your unit ...

Page 627: ...ܓ ӕ π ß H Batteries ྐЖ µ µÕ Ë Heat sink ಞᇊ ºËπ ÈÕπ Required space for installation ϰ ᄕ ڐ æ Èπ Ë Ë ß ËµÈÕß È π µ µ Èß Control panel վࡒ ػ ÀπÈ ªí G Remote controller ჲ µ Õπ LVT1798 006A U UT 0208MNMMDWJEIN EN CT TH 2008 Victor Company of Japan Limited Parts list for installation and connection Έ ء ϰ ો ྒྷڅ έ Ë πª Õ À µ µ Èß ËÕ µËÕ π The following parts are provided for this unit After checking them ple...

Page 628: ...en installing the unit You cannot install the unit on the car which has any obstacles in the space shown in Required space for installation on page 1 Caution when installing Fit the unit into the mounting sleeve by using four corners of the trim plate DO NOT press the panel shaded in the illustration 30 Flat type screws M5 x 8 mm 2 Ꮓᒘീਐ M5 x 8 mm 2 ŸÀ M5 x 8 2 Fit the protrusions outside the unit ...

Page 629: ... if any 250 mA max вбੂ ለ ࠜЉ ఛʨ 250 mA Õ øøÈ Õ µ π µ À π Ÿß 250 mA Fuse block ۘᎳീవ ºßøî Red и ß Brown ሶи πÈ µ Light green ଠႋи ÕËÕπ To car light control switch вԆԾԾጜ վළᘕ µ Ï ÿ ø Õß πµ Ï To cellular phone system в ྐੂޟ Ԧ µËÕ æ Ï ËÕπ To the remote lead of other equipment 200 mA max в ɾ ࡖށ ᛏ క ڄ ჲ ለ ఛʨ 200 mA µËÕ È Õª ÏÕË π π Ÿß 200 mA Ignition switch ᓭ ළᘕ Ï ÿ White with black stripe ΎиઘЉ෨и ঙ White Ύи G...

Page 630: ...Are the terminals of L and R speakers grounded in common Noise interfere with sounds Is the rear ground terminal connected to the car s chassis using shorter and thicker cords Unit becomes hot Is the speaker output lead grounded Are the terminals of L and R speakers grounded in common This unit does not work at all Have you reset your unit To car battery вԆԾྐЖ µËÕ µ µÕ Ë πµÏ Extension lead not sup...

Page 631: ...EN MONITOR not supplied 9 ʭᅛܳ Ε ԅЉ క Õ È ß 9 π È Ë È ÀÈ æ ÈÕ ËÕß Video cord not supplied ඁᏁྐង ԅЉ క Õ Ë È ÀÈ æ ÈÕ ËÕß 7 To listen to disc playback sound while in Dual Zone operations see page 26 of INSTRUCTIONS 7 ࠜ Ϛᕻࡌੇ ዬѕЂ γၪᆑ ڄ ᑵࡖ ቁ ኌ 26 ࡗ ݣڄ Ε é 7 ËÕµÈÕß øíß ºËπ Ï Õ ŸË π À ß π Dual Zone ÿÀπÈ 26 Õß ŸË Õ Èß π A B 5 Audio cord not supplied 5 ࡖᏁྐង ԅЉ క 5 ÕÕ Õ Ë È ÀÈ æ ÈÕ ËÕß Remote lead ჲ ለ µ Ë To t...

Page 632: ...2 0 cable USB 2 0 ྐង È USB 2 0 Connecting the iPod to the USB terminal You can connect the iPod to the USB terminal using the following cables To listen to the music USB 2 0 cable supplied for the iPod To watch the video USB Audio and Video cable for iPod KS U20K not supplied 8 USB device USB Õÿª Ï USB USB device USB Õÿª Ï USB Apple iPod Apple iPod Apple iPod iPod ݵ Apple Inc ᙧ س Ϛࠀ մ ࣁٌ ੋڄ ᆤé iPo...

Page 633: ...n et les raccordements se référer au manuel séparé INSTRUCTIONS MANUAL DE INSTRUCCIONES MANUEL D INSTRUCTIONS LVT1800 003A EU DVD CD RECEIVER RECEPTOR CON DVD CD RÉCEPTEUR DVD CD KD AVX22 For canceling the display demonstration see page 7 Para cancelar la demonstración en pantalla consulte la página 7 Pour annuler la démonstration des affichages référez vous à la page 7 ...

Page 634: ...ble in a location where it may obstruct the steering wheel and gearshift lever operations it may obstruct the operation of safety devices such as air bags it may obstruct visibility DO NOT operate the unit while driving If you need to operate the unit while driving be sure to look around carefully The driver must not watch the monitor while driving The driver must not put on the headphones while d...

Page 635: ... technology must be authorized by Macrovision and is intended for home and other limited viewing uses only unless otherwise authorized by Macrovision Reverse engineering or disassembly is prohibited Contents INTRODUCTION Playable disc type 4 Before operations 5 OPERATIONS Basic operations AV menu 6 Basic operations Control panel 8 Basic operations Remote controller RM RK252 10 Listening to the rad...

Page 636: ... Rewritable CD R RW Compliant to ISO 9660 level 1 level 2 Romeo Joliet CD DA MP3 WMA WAV AAC 4 JPEG DivX MPEG1 MPEG2 MPEG4 1 IfyouinsertaDVDVideodiscofanincorrectRegionCode Regioncodeerror appearsonthemonitor 2 DVD Rrecordedinmulti borderformatisalsoplayable exceptforduallayerdiscs DVD RWduallayerdiscsarenotplayable 3 Itispossibletoplaybackfinalized R RW Videoformatonly discs RWdoublelayerdiscsare...

Page 637: ...pen When Illumination is set to Normal page 53 Beforeoperations Touch pad controls How to operate the unit by the touch pad controls You can operate the unit by touching the appropriate part of the touch pad controls To adjust the volume move your finger on the touch pad knob as illustrated below to display the animation on the monitor then press 5 or repeatedly You can also adjust the volume by j...

Page 638: ... the touch pad controls and monitor are turned on Ÿ Enter AV Menu Non available items will be shaded Select an icon to enter the setup screen In this manual English indications are used for purpose of explanation You can select the indication language on the monitor page 49 Setup AV Menu Enter Through Sound Fader Balance Volume Adjust Subwoofer Level High Pass Filter Crossover High Pass Filter Exi...

Page 639: ...isplay Setup Display Clock Disc Setup 1 Disc Setup 2 Tuner Demonstration Exit Off On 6 7 Time Set Exit Hours 18 00 Time Set Exit Minutes 18 35 Setup AV Menu Enter Setup Display Clock Disc Setup 1 Disc Setup 2 Tuner 0 00 Clock Time Set Time Format OSD Clock Clock Adjust Canceling the display demonstration and setting the clock ...

Page 640: ... Resets the unit Use only when the internal system malfunctions r Detaches the control panel page 9 1 Youcannotselectthesesourcesiftheyarenotready 2 Byholding5 youcandisplaythelistaccessible fortheselectedsource Basicoperations Controlpanel 1 Selects sources 1 Tuner DAB Disc USB or USB iPod Changer iPod or External Input AV Input You can also select sources by touching 5 4 after holding SRC for en...

Page 641: ...screen only for video sources DVD 01 02 0 01 20 MULTI DIGITAL CHAP RPT C T VIDEO 15 45 DVD 01 02 0 01 20 MULTI DIGITAL CHAP RPT C T VIDEO 15 45 Source information screen Playback picture and the source information screen Navigation screen This screen is displayed when Navigation is selected for AV Input page 52 Back to the beginning To attach the control panel To tilt the control panel Hold 0 unti...

Page 642: ...g The unit is equipped with the steering wheel remote control function See the Installation Connection Manual separate volume for connection IMPORTANT When Dual Zone is activated page 30 the remote controller functions only for operating the DVD CD player Basicoperations Remotecontroller RM RK252 Main elements and features R03 LR03 AAA 1 Turns on the power Turns off the power Hold Attenuates the s...

Page 643: ...enu selecting buttons 4 4 Reverse skip forward skip Reverse search forward search Hold In menu selecting mode Selects an item Then press to confirm the selection Skips 10 items at a time Hold p Disc USB and USB iPod Forward search q Selects the source w Disc USB and USB iPod Starts and pauses playback e Changes the aspect ratio of the playback pictures r Tuner and DAB Selects the bands Disc and US...

Page 644: ...tedly The ST indicator lights up when receiving an FM stereo broadcast with sufficient signal strength TUNER FM1 P1 87 5 MHz FLAT AF TP MO 15 45 Bayern Radio Pop Music Listeningtotheradio A Band B Sound mode page 46 C Preset no D Frequency E PS station name for FM RDS If no signal is coming in No Name appears F PTY code for FM RDS G Tuner related function indicators ...

Page 645: ...ations with the strongest signals are searched and stored automatically in the FM band When an FM stereo broadcast is hard to receive 1 2 3 4 Reception improves but the stereo effect will be lost The MO indicator lights up To restore the stereo effect select Off in step 4 Mono Exit Off On Off Mode Mono SSM PTy Standby Mode AV Menu Enter Mode Start Mono SSM PTy Standby Mode AV Menu Enter ...

Page 646: ...t To select directly 1 2 To select from the Preset List 1 2 For FM Each time you hold 5 you can change the bands 3 Select the preset number Hold FM1 Enter Store 87 5 89 9 97 9 105 9 108 0 87 5 1 2 3 4 5 6 The Preset List can also be accessed through AV Menu List or FM1 Enter Store 87 5 89 9 97 9 105 9 108 0 87 5 1 2 3 4 5 6 FM1 Enter Store 87 5 89 9 97 9 105 9 108 0 87 5 1 2 3 4 5 6 Hold FM1 Enter...

Page 647: ...earch Start Memory Pop Music Rock Music Easy Listening Serious Classics Current Affairs Varied Speech 1 2 3 4 5 6 PTy Search Start Memory Cultures Science Varied Speech Pop Music Rock Music Eash Listening Hold TUNER FM1 XX X MHz FLAT 15 45 Science PTy Search Storing your favorite programme types You can store your favorite PTY codes into the PTY Preset List 1 Follow steps 1 and 2 in the left colum...

Page 648: ...e changes to the preset TA volume level if the current level is lower than the preset level page 52 Lights up Not yet activated Tune in to another station providing the RDS signals Flashes Touch T P to deactivate Goes off PTY Standby Reception Indicator Enter AV Menu Mode PTy Standby right column and page 55 PTY The unit will temporarily switch to your favorite PTY programme from any source other ...

Page 649: ...u can change the Network Tracking Reception setting AF Regional on page 52 When the DAB tuner is connected refer also to Tracing the same programme Alternative Frequency Reception DAB AF page 43 A Automatic station selection Programme Search Usually when you select preset stations the preset station is tuned in If the signals from the FM RDS preset station are not sufficient for good reception thi...

Page 650: ...nitor the unit cannot accept the operation you have tried to do In some cases without showing operations will not be accepted 0 Ejects the disc 3 8 Starts and pauses playback BAND Stops playback Open the front panel Ÿ Insert the disc Playback starts automatically Caution Do not place your finger behind the control panel Caution on volume setting Discs and connected USB devices produce very little ...

Page 651: ...er no Playing time E Playback mode 4 Touch Selects chapter Hold Reverse forward search 1 5 Selects program no Play List no DISP Touch if necessary page 9 4 Touch Selects track Hold Reverse forward search for DivX MPEG 2 5 Touch Selects folder Hold Displays Folder List DISP Touch if necessary page 9 DVD 01 02 0 01 20 FLAT DIGITAL C P VR PRG 15 45 A Audio format B VR PRG Original program VR PL Play ...

Page 652: ...d surround mode pages 26 and 46 B Track no Playing time C Track title only for CD Text Artist Name Disc title 2 CD 01 02 0 01 20 FLAT 15 45 Current Folder Name Current File Name mp3 MP3 RPT 4 Touch Selects track Hold Reverse forward search 1 5 Touch Selects folder Hold Displays Folder List A Audio format MP3 WMA WAV AAC B Sound surround mode pages 26 and 46 C Folder no Track no Playing time D Curr...

Page 653: ...r Repeats current chapter Program Repeats current program not available for Playlist playback Track Repeats current track for VCD PBC not in use Disc All Randomly plays all tracks for VCD PBC not in use Track Repeats current track Folder Randomly plays all tracks of current folder then tracks of next folders Folder Repeats all tracks of the current folder Disc All Randomly plays all tracks Track R...

Page 654: ...ctivate the prohibition No Eject appears To cancel the prohibition repeat the same procedure to select EJECT OK Hold Folder List My Best Cinema Pops My Best2 Favorite Song Cinema2 Folder List My Best Cinema Pops My Best2 Favorite Song Cinema2 File List Enter Song011 mp3 Song012 mp3 Song013 mp3 Song014 mp3 Song015 mp3 Song016 mp3 Operations using the remote controller RM RK252 Also functions as CLR...

Page 655: ... Searchspeed x2 x5 x10 x20 x60 2 Slowmotionspeed 1 32 1 16 1 8 1 4 1 2 3 Searchspeed x2 x10 Stops playback Starts or pauses playback Reverse forward search 1 No sound can be heard Forward slow motion 2 during pause No sound can be heard Reverse slow motion does not work Select chapter during playback or pause Reverse forward search 3 Hold Selects program Selects Play List during playback or pause ...

Page 656: ...track within the same folder Selects folder Changes the aspect ratio of the playback pictures While playing Back advance the scenes by 5 minutes For DivX6 Using menu driven features 1 2 Select the item you want to start playback 3 1st press 1st press 2nd press 3rd press 2nd press Current playback position Twice Also functions as CLR clear Erases a misentry if pressed while holding SHIFT ...

Page 657: ...he playback pictures Twice Stops playback Starts or pauses playback Reverse forward search 3 Forward slow motion 4 during pause No sound can be heard Reverse slow motion does not work Selects track Reverse forward search 5 Hold No sound can be heard Selects track Changes the aspect ratio of the playback pictures Stops playback Starts or pauses playback Reverse forward search 3 Selects track Revers...

Page 658: ...l Zone is in use MULTI For multi channel encoded sources such as Dolby Digital 3 and DTS 4 When activated MULTI is shown on the source information screen Dolby Pro Logic II Movie Music For 2 channel sources except for DivX MPEG1 MPEG2 discs 3 ManufacturedunderlicensefromDolbyLaboratories Dolby ProLogic andthedouble Dsymbolare trademarksofDolbyLaboratories 4 DTS and DTSDigitalSurround areregistered...

Page 659: ...und Surround Off Surround On Surround On Exit Auto Through Dolby PLII Movie Dolby PLII Music To change the Dolby PLIIMusic setting In step 4 in the left column 1 Select Dolby PLII Music 2 Enter each sub screen then select the desired setting EX When Panorama is selected in step 1 Panorama Select On to add wraparound sound effect Center Width Adjust the center image so it may be heard only from the...

Page 660: ...nu appears For entering time numbers To move the entry position To select a number Repeat steps Ÿ and to set other items if needed To remove the on screen bar Operations using the on screen bar DVD VCD DivX MPEG1 MPEG2 JPEG These operations are possible on the monitor using the remote controller ...

Page 661: ...disc type DVD V T02 C03 TOTAL 1 25 58 TIME TITLE CHAP RPT C RPT T02 C03 PG 001 C 002 PL 003 C 004 TRACK 01 F001 T001 F002 F002 5 Time indication Elapsed playing time of the disc Remaining title time for DVD Remaining disc time for others Elapsed playing time of the current chapter track 2 Remaining time of the current chapter track 2 6 Playback status Play Reverse forward search Reverse forward sl...

Page 662: ...This surrounddoesnotworkforDivX MPEG1 MPEG2discs DualZoneoperations You can enjoy disc playback on the external monitor connected to the VIDEO OUT and 2nd AUDIO OUT plugs while listening to any source other than USB through the speakers When Dual Zone is in use you can only operate the DVD CD player using the remote controller 1 2 3 Off Deactivates Dual Zone On Activates Dual Zone without applying...

Page 663: ... disc For DivX MPEG1 MPEG2 JPEG while not playing Ex MP3 WMA 1 Current folder highlighted bar 2 Current folder no total folder no 3 Folder list Iftagdataincludes JacketPicture baselineJPEG it willbedisplayed IfyoupressOSD theplaybackmode selectionwindowappears page32 4 Selected playback mode page 32 5 Elapsed playing time of the current track not displayed for JPEG 6 Operation status 7 Current tra...

Page 664: ...E 00 14 Track 6 14 Track Information Cloudy Fair Fog Hail Indian summer Rain Shower Snow Thunder Typhoon Wind Winter sky Album Four seasons Artist Robert M Smith Title Rain T RPT Selecting playback modes You can also change the playback modes using the playback mode selection window For JPEG Random cannot be selected 1 2 Except for JPEG Select a playback mode 3 Select your desired option 4 Selecta...

Page 665: ...alprogramorPlayListmaynot bedisplayeddependingontherecordingequipment Folder 144 240 Track 144 198 Page 4 7 fol120 fol121 fol122 fol123 fol124 fol125 fol126 fol127 fol128 fol129 fol150 fol151 fol152 fol153 fol154 fol155 fol156 fol157 fol158 fol159 fol140 fol141 fol142 fol143 fol144 fol145 fol146 fol147 fol148 fol149 fol130 fol131 fol132 fol133 fol134 fol135 fol136 fol137 fol138 fol139 file0141 wma...

Page 666: ... DISP Touch if necessary page 9 BAND Stops playback Connect a USB device USB is selected as the source and playback starts automatically This unit can play JPEG MPEG1 MPEG2 1 MP3 WMA WAV AAC 2 files stored on a USB mass storage class device You can operate the USB device in the same way you operate the files on discs pages 21 to 29 You cannot select USB when Dual Zone is in use All tracks on the U...

Page 667: ... indicator lights up on the source information screen To cancel select Off in step 4 You can use Repeat or Random playback mode Ex To select Track Repeat 1 2 3 Repeat Set Off Track Folder Off Mode Repeat Random Mode AV Menu Enter Caution Avoid using the USB device if it might hinder your safety driving Do not pull out and attach the USB device repeatedly while Now Reading is flashing on the monito...

Page 668: ...K not supplied When connected with the USB cable below Make sure iPod Off is selected for AV Input page 52 USB iPod 01 0 01 20 FLAT 15 45 Track Title Album Title Artist Name A Source name B Sound mode page 46 C Track or video no Playing time 6 Starts pauses playback 5 Moves to the previous next item of a category ex another album artist playlist etc 1 DISP Touch if necessary page 9 1 5 maynotfunct...

Page 669: ...uch6in step2onpage36 Changing the play speed of the audiobooks You can change the play speed of the audiobooks Follow steps 1 to 3 in the left column In step 3 1 2 Select the desired speed 3 Select an item EX When Music is selected in step 2 Repeat the procedure to select the desired track video 4 Confirm the selection Selecting playback modes You can use Repeat or Random playback mode Ex To selec...

Page 670: ...the previous menu touch 5 Selecting playback modes Operations are exactly the same as explained on page 37 AudioBooks isnotdisplayedinstep3 Pauses playback To resume touch again A Source name B Sound mode page 46 C Track no Playing time Preparation When operating through the CD changer jack make sure iPod is selected for the external input setting page 52 Select iPod Playback starts automatically ...

Page 671: ...r is selected for the external input setting page 52 Select Changer Ÿ Enter Disc List Each time you hold the button you can display the other list of the remaining discs Disc List MP3 DISC DISC 02 DISC 03 DISC 04 DISC 05 DISC 06 Disc List Enter MP3 DISC DISC 02 DISC 03 DISC 04 DISC 05 DISC 06 Each List can also be accessed through AV Menu List Disc List Folder List File List Hold Folder List My Be...

Page 672: ...rent folder Disc Randomly plays all tracks of the current disc Disc Repeats all tracks of the current disc All Randomly plays all tracks of all loaded discs 4 When one of the playback modes is selected the corresponding indicator lights up on the source information screen To cancel select Off in step 4 You can use Repeat or Random playback mode Ex To select Track Repeat 1 2 3 Repeat Set Off Track ...

Page 673: ...gnals together with their regular programme signals DRC will reinforce the low level sounds to improve your listening The DRC indicator will light up while tuning in a service with the DRC signals 1 2 3 4 As the number increases the effect becomes stronger A TEXT indicator B Sound mode page 46 C Band D Preset No E Frequency F Service label G Ensemble label H PTY code I DAB indicators Standby Recep...

Page 674: ...service you want to preset 3 Display the Preset List 4 Select a preset number 5 Store the service Preset List can also be accessed through AV Menu List Selecting preset services On the remote 1 2 Hold DAB1 Enter Store Service Label No Serv FFH No Serv HRS HRH 1 2 3 4 5 6 DAB1 Enter Store Service Label No Serv FFH No Serv HRS HRH 1 2 3 4 5 6 DAB1 Enter Store Service Label No Serv FFH No Serv HRS HR...

Page 675: ...52 Activating deactivating Announcement Standby Reception Announcement Standby Reception allows the unit to switch temporarily to your favorite service announcement type Announcement Standby Reception Indicator Enter AV Menu Mode Announce Standby below and page 55 ANN The unit will temporarily switch to your favorite service from any source other than FM AM Lights up Not yet activated Tune in to a...

Page 676: ... connected component and start playing the source Navigation screen When you connect a Navigation System to the unit you can view the navigation screen regardless of the source Preparation Make sure AV Input setting is selected for Navigation page 52 To watch the navigation screen touch DISP repeatedly page 9 The aspect ratio of the navigation screen is fixed to Full regardless of the Aspect setti...

Page 677: ...the Line Input Adapter KS U57 not supplied or AUX Input Adapter KS U58 not supplied EXT IN EXT INPUT FLAT 15 45 Preparation Make sure External Input is selected for External Input page 52 Select External Input Ÿ Turn on the connected component and start playing the source A Sound mode page 46 B Assigned title page 47 ...

Page 678: ...ode is temporarily canceled Storing your own adjustments You can store your adjustments into User1 User2 and User3 1 Follow steps and Ÿ on the left 2 Select the item you want to adjust 3 Adjust each setting 4 Select User1 User2 or User3 then store the setting Soundequalization Edit Store 03 60 0 Hz Equalizer Exit Edit Flat Hard Rock R B Pop Jazz Equalizer Exit Edit Flat Hard Rock R B Pop Jazz Edit...

Page 679: ...lable characters page 60 To erase the whole characters hold DISP 2 Repeat step 1 until you finish entering the title Finish the procedure You can assign titles to AV Input and External Input You can enter up to 16 characters Ex Assigning title to AV Input Select AV Input Ÿ Assigningtitlestothesources Mode Title Entry Title Entry Store AV In Name AV INPUT A a 0 Mode AV Menu Enter ...

Page 680: ...und color of the monitor Blue Light Blue Red Orange Yellow Green Purple Dark Blue Dark Green Brown Light Brown Black Scroll Off Cancels Once Scrolls the source information once Auto Repeats scrolling 5 second intervals Holding DISP on the unit scrolls the information regardless of this setting Tag Display Off Cancels On Shows the Tag data while playing MP3 WMA WAV AAC tracks Dual Zone List Mode Di...

Page 681: ...pears and you cannot adjust this setting Aspect 3 You can change the aspect ratio of the picture Aspect ratio of incoming signal 4 3 16 9 Full For 16 9 original pictures Auto For Disc Aspect ratio is automatically selected to match to the incoming signals For other video sources Aspect ratio is fixed at Regular Regular For 4 3 original pictures Language 4 Select the indication language shown on th...

Page 682: ... 4 3 Pan Scan Select when the aspect ratio of the external monitor is 4 3 Refer to the illustrations on the left to see how the pictures are shown on the monitor OSD Position Select the position of the on screen bar 29 1 Higher position 2 Lower position File Type Select playback file type when a disc USB contains different types of files You can store this setting separately for each source Disc a...

Page 683: ...nter speaker when surround is deactivated Speaker Level You can adjust the output level of the activated speakers Speaker Size above monitoring the test tone Front Lch Center Ch Front Rch Rear Rch Subwoofer 2 Rear Lch Adjust the output level of each speaker in the range of 10dB to 10dB Initial 0dB Hold 6 to turn on and off the test tone Speaker Distance You can adjust the speaker output timing Fro...

Page 684: ...On 43 Input AV Input 3 You can determine the use of LINE IN and VIDEO IN plugs Off Select when no component is connected AV Input is skipped while selecting the source iPod Off Select when connecting the iPod using the USB Audio and Video cable for iPod 36 Audio Video Select when connecting an AV component such as a VCR Audio Select when connecting an audio component such as a portable audio playe...

Page 685: ...lize all settings you have made in AV Menu Hold 6 then reset the unit 3 Equalizer Flat Hard Rock R B Pop Jazz Dance Country Reggae Classic User1 User2 User3 46 1 Dependsontheamplifiergaincontrol page54 2 SelectableonlywhenaDABtunerisconnected 3 Notselectablewhen AVInput isselectedasthesource 4 TheREVERSEGEARSIGNALleadconnectionisrequired Installation ConnectionManual Therearviewthrough thecameraap...

Page 686: ...d the others Subwoofer Level 1 Adjust the subwoofer output level 06 to 08 Initial 00 High Pass Filter Through Select when the subwoofer is not connected On Select when the subwoofer is connected Crossover Adjust the crossover frequency between the front rear speakers and the subwoofer 80Hz 120Hz 150Hz Amplifier Gain You can change the maximum volume level of this unit Off Deactivates the built in ...

Page 687: ...RC 1 DRC 2 DRC 3 41 Announce Standby Only for DAB Off Transport News 43 When you activate Announcement Standby Reception you can change the announcement type for Announcement Standby Reception AudioBooks Only for USB iPod Normal Faster Slower 37 List The accessible lists differ depending on the source 14 22 36 42 Dual Zone Off On On Surround On 30 1 Thissettingtakeseffectonlywhensurroundisdeactiva...

Page 688: ...he edges Do not touch its recording surface When storing a disc into its case gently insert the disc around the center holder with the printed surface facing up Make sure to store discs into the cases after use Maintenance To keep discs clean A dirty disc may not play correctly If a disc does become dirty wipe it with a soft cloth in a straight line from center to edge Do not use any solvent for e...

Page 689: ...ce If you change the source playback also stops without ejecting the disc Next time you select Disc for the playback source disc play starts from where it stopped previously Playing Recordable Rewritable discs This unit can recognize a total of 5 000 files and 250 folders a maximum of 999 files per folder Use only finalized discs This unit can play back multi session discs however unclosed session...

Page 690: ...cy 48 kHz 44 1 kHz 32 kHz for MPEG1 24 kHz 22 05 kHz 16 kHz for MPEG2 48 kHz 44 1 kHz 32 kHz 22 05 kHz for WMA 44 1 kHz for WAV 48 kHz 44 1 kHz for AAC This unit can show ID3 Tag Version 1 0 1 1 2 2 2 3 2 4 for MP3 This unit can also show WAV WMA AAC Tag This unit can play back files recorded in VBR variable bit rate Files recorded in VBR have a discrepancy in elapsed time indication This unit can...

Page 691: ...ith 2 or more partitions Depending on the shape of the USB devices and connection ports some USB devices may not be attached properly or the connection might be loose When connecting a USB device refer also to its instructions Connect only one USB device to the unit at a time Do not use a USB hub This unit may not recognize a USB device connected through a USB card reader When connecting with a US...

Page 692: ... for the main source Disc 2nd AUDIO OUT 2 channel signal is emitted when Dual Zone is activated When playing a multi channel encoded disc multi channel signals are downmixed Characters you can enter for titles In addition to the roman alphabet A Z a z you can use the following characters to assign titles page 47 When Руccĸий is selected for Language page 49 Upper and lower cases Numbers and symbol...

Page 693: ...A Sanskrit TR Turkish BN Bengali Bangla HU Hungarian MG Malagasy SD Sindhi TS Tsonga BO Tibetan HY Armenian MI Maori SG Sangho TT Tatar BR Breton IA Interlingua MK Macedonian SH Serbo Croatian TW Twi CA Catalan IE Interlingue ML Malayalam SI Singhalese UK Ukrainian CO Corsican IK Inupiak MN Mongolian SK Slovak UR Urdu CS Czech IN Indonesian MO Moldavian SL Slovenian UZ Uzbek CY Welsh IS Icelandic ...

Page 694: ... activated the remote controller only functions for operating the DVD CD player No Signal appears Change the source Start the playback on the external component connected to VIDEO IN plug Check the cords and connections Signal input is too weak Mecha Error Push Reset appears on the monitor and the control panel does not move Reset the unit page 3 The touch pad controls do not respond properly Illu...

Page 695: ...picture appears on the monitor Parking brake lead is not connected properly Installation Connection Manual No picture appears on the external monitor Connect the video cord correctly Select the correct input on the external monitor Eject Error or Loading Error appears on the monitor Changing the source by pressing SRC will solve this error File playback Disc cannot be played back Change the disc R...

Page 696: ...nitor Readout time varies depending on the USB device Do not use too many hierarchy folders and empty folders Folder that is physically empty or folder that contains data but does not contain valid MP3 WMA WAV AAC track Turn off the power then on again Do not pull out or connect the USB device repeatedly while Now Reading is displayed on the monitor Correct characters are not displayed e g album n...

Page 697: ...ter the artwork is loaded page 59 CD changer No Disc appears on the monitor Insert a disc into the magazine No Magazine appears on the monitor Insert the magazine Cannot play this disc Check the disc appears on the monitor Disc does not include playable files Replace the disc with playable files Reset 08 appears on the monitor Connect this unit and the CD changer correctly and press the reset butt...

Page 698: ...r Terminals Input LINE IN VIDEO IN USB input terminal Aerial input Output 2nd AUDIO OUT VIDEO OUT Others CD changer OE REMOTE FM AM TUNER Frequency Range FM 87 5 MHz to 108 0 MHz AM MW 522 kHz to 1 620 kHz LW 144 kHz to 279 kHz FM Tuner Usable Sensitivity 11 3 dBf 1 0 μV 75 Ω 50 dB Quieting Sensitivity 16 3 dBf 1 8 μV 75 Ω Alternate Channel Selectivity 400 kHz 65 dB Frequency Response 40 Hz to 15 ...

Page 699: ... 0 Full Speed Data Transfer Rate Full Speed Maximum 12 Mbytes Low Speed Maximum 1 5 Mbytes Compatible Device Mass storage class Compatible File System FAT 32 16 12 Max Current Less than 500 mA 5 V GENERAL Power Requirements Operating Voltage DC 14 4 V 11 V to 16 V allowance Grounding System Negative ground Allowable Operating Temperature 0 C to 40 C Dimensions W H D Installation Size approx 182 mm...

Page 700: ...et your unit Tiene PROBLEMAS con la operación Por favor reinicialice su unidad Consulte la página de Cómo reposicionar su unidad Vous avez des PROBLÈMES de fonctionnement Réinitialisez votre appareil Référez vous à la page intitulée Comment réinitialiser votre appareil 2008 Victor Company of Japan Limited ...

Page 701: ...tionnement est connecté au système de frein de stationnement intégré à la voiture Remarques sur les connexions électriques Remplacer le fusible par un de la valeur précisée Si le fusible saute souvent consulter votre revendeur d autoradios JVC Il est recommandé de connecter des enceintes avec une puissance de plus de 50 W les enceintes arrière et les enceintes avant avec une impédance comprise ent...

Page 702: ... the fan No tape las rejillas de ventilación Ne bloquez pas le ventilateur INSTALLATION IN DASH MOUNTING The following illustration shows a typical installation If you have any questions or require information regarding installation kits consult your JVC IN CAR ENTERTAINMENT dealer or a company supplying kits If you are not sure how to install this unit correctly have it installed by a qualified t...

Page 703: ...don d alimentation fourni comme montré sur l illustration Contactez votre revendeur automobile autorisé avant d installer l appareil ELECTRICAL CONNECTIONS To prevent short circuits we recommend that you disconnect the battery s negative terminal and make all electrical connections before installing the unit Be sure to ground this unit to the car s chassis again after installation CONEXIONES ELECT...

Page 704: ...onnecter un appareil extérieur voir le diagramme 4 Not included for this unit 4 No suministrado con esta unidad 4 Non fourni avec cet appareil Ignition switch Interruptor de encendido Interrupteur d allumage Fuse block Bloque de fusibles Porte fusible White with black stripe Blanco con rayas negras Blanc avec bande noire White Blanco Blanc Gray with black stripe Gris con rayas negras Gris avec ban...

Page 705: ...onnectez les enceintes de cet appareil et connectez les à l amplificateur Laissez les fils d enceintes de cet appareil inutilisés Vous pouvez désactiver l amplificateur intégré et envoyer les signaux audio uniquement à un ou plusieurs amplificateurs extérieurs afin d obtenir un son clair et pour éviter un échauffement interne de l appareil Voir le MANUEL D INSTRUCTIONS Remote lead Cable remoto Fil...

Page 706: ...apter for iPod KS PD100 Portable audio player with line output jacks Line Input Adapter KS U57 Portable audio player with 3 5 mm stereo mini jack AUX Input Adapter KS U58 When connecting two components it is recommended that you connect them in series as explained below Lors de la connexion des appareils extérieurs référez vous aussi aux manuels fournis avec les appareils et les adaptateurs PRECAU...

Page 707: ...підключень наведені у окремій інструкції INSTRUCTIONS ИНСТРУКЦИИ ПО ЭКСПЛУАТАЦИИ ІНСТРУКЦІЇ LVT1800 005A EE DVD CD RECEIVER ПРИЕМНИК ДЛЯ ВОСПРОИЗВЕДЕНИЯ ДИСКОВ DVD И КОМПАКТ ДИСКОВ ПРИЙМАЧ З ПРОГРАВАЧЕМ DVD CD ДИСКІВ KD AVX22 For canceling the display demonstration see page 7 Информацию об отмене демонстрации функций дисплея см на стр 7 Інформацію щодо відміни демонстрації функцій дисплею див на с...

Page 708: ...ble in a location where it may obstruct the steering wheel and gearshift lever operations it may obstruct the operation of safety devices such as air bags it may obstruct visibility DO NOT operate the unit while driving If you need to operate the unit while driving be sure to look around carefully The driver must not watch the monitor while driving The driver must not put on the headphones while d...

Page 709: ... technology must be authorized by Macrovision and is intended for home and other limited viewing uses only unless otherwise authorized by Macrovision Reverse engineering or disassembly is prohibited Contents INTRODUCTION Playable disc type 4 Before operations 5 OPERATIONS Basic operations AV menu 6 Basic operations Control panel 8 Basic operations Remote controller RM RK252 10 Listening to the rad...

Page 710: ... Rewritable CD R RW Compliant to ISO 9660 level 1 level 2 Romeo Joliet CD DA MP3 WMA WAV AAC 4 JPEG DivX MPEG1 MPEG2 MPEG4 1 IfyouinsertaDVDVideodiscofanincorrectRegionCode Regioncodeerror appearsonthemonitor 2 DVD Rrecordedinmulti borderformatisalsoplayable exceptforduallayerdiscs DVD RWduallayerdiscsarenotplayable 3 Itispossibletoplaybackfinalized R RW Videoformatonly discs RWdoublelayerdiscsare...

Page 711: ...pen When Illumination is set to Normal page 53 Beforeoperations Touch pad controls How to operate the unit by the touch pad controls You can operate the unit by touching the appropriate part of the touch pad controls To adjust the volume move your finger on the touch pad knob as illustrated below to display the animation on the monitor then press 5 or repeatedly You can also adjust the volume by j...

Page 712: ... the touch pad controls and monitor are turned on Ÿ Enter AV Menu Non available items will be shaded Select an icon to enter the setup screen In this manual English indications are used for purpose of explanation You can select the indication language on the monitor page 49 Setup AV Menu Enter Through Sound Fader Balance Volume Adjust Subwoofer Level High Pass Filter Crossover High Pass Filter Exi...

Page 713: ...isplay Setup Display Clock Disc Setup 1 Disc Setup 2 Tuner Demonstration Exit Off On 6 7 Time Set Exit Hours 18 00 Time Set Exit Minutes 18 35 Setup AV Menu Enter Setup Display Clock Disc Setup 1 Disc Setup 2 Tuner 0 00 Clock Time Set Time Format OSD Clock Clock Adjust Canceling the display demonstration and setting the clock ...

Page 714: ... Resets the unit Use only when the internal system malfunctions r Detaches the control panel page 9 1 Youcannotselectthesesourcesiftheyarenotready 2 Byholding5 youcandisplaythelistaccessible fortheselectedsource Basicoperations Controlpanel 1 Selects sources 1 Tuner DAB Disc USB or USB iPod Changer iPod or External Input AV Input You can also select sources by touching 5 4 after holding SRC for en...

Page 715: ...screen only for video sources DVD 01 02 0 01 20 MULTI DIGITAL CHAP RPT C T VIDEO 15 45 DVD 01 02 0 01 20 MULTI DIGITAL CHAP RPT C T VIDEO 15 45 Source information screen Playback picture and the source information screen Navigation screen This screen is displayed when Navigation is selected for AV Input page 52 Back to the beginning To attach the control panel To tilt the control panel Hold 0 unti...

Page 716: ...g The unit is equipped with the steering wheel remote control function See the Installation Connection Manual separate volume for connection IMPORTANT When Dual Zone is activated page 30 the remote controller functions only for operating the DVD CD player Basicoperations Remotecontroller RM RK252 Main elements and features R03 LR03 AAA 1 Turns on the power Turns off the power Hold Attenuates the s...

Page 717: ...enu selecting buttons 4 4 Reverse skip forward skip Reverse search forward search Hold In menu selecting mode Selects an item Then press to confirm the selection Skips 10 items at a time Hold p Disc USB and USB iPod Forward search q Selects the source w Disc USB and USB iPod Starts and pauses playback e Changes the aspect ratio of the playback pictures r Tuner and DAB Selects the bands Disc and US...

Page 718: ...ndicator lights up when receiving an FM stereo broadcast with sufficient signal strength TUNER FM1 P1 87 5 MHz FLAT AF TP MO 15 45 Bayern Radio Pop Music Listeningtotheradio A Band B Sound mode page 46 C Preset no D Frequency E PS station name for FM Radio Data System If no signal is coming in No Name appears F PTY code for FM Radio Data System G Tuner related function indicators ...

Page 719: ...ations with the strongest signals are searched and stored automatically in the FM band When an FM stereo broadcast is hard to receive 1 2 3 4 Reception improves but the stereo effect will be lost The MO indicator lights up To restore the stereo effect select Off in step 4 Mono Exit Off On Off Mode Mono SSM PTy Standby Mode AV Menu Enter Mode Start Mono SSM PTy Standby Mode AV Menu Enter ...

Page 720: ...t To select directly 1 2 To select from the Preset List 1 2 For FM Each time you hold 5 you can change the bands 3 Select the preset number Hold FM1 Enter Store 87 5 89 9 97 9 105 9 108 0 87 5 1 2 3 4 5 6 The Preset List can also be accessed through AV Menu List or FM1 Enter Store 87 5 89 9 97 9 105 9 108 0 87 5 1 2 3 4 5 6 FM1 Enter Store 87 5 89 9 97 9 105 9 108 0 87 5 1 2 3 4 5 6 Hold FM1 Enter...

Page 721: ...umentary PTy Search Start Memory Pop Music Rock Music Easy Listening Serious Classics Current Affairs Varied Speech 1 2 3 4 5 6 PTy Search Start Memory Cultures Science Varied Speech Pop Music Rock Music Eash Listening Hold TUNER FM1 XX X MHz FLAT 15 45 Science PTy Search Storing your favorite programme types You can store your favorite PTY codes into the PTY Preset List 1 Follow steps 1 and 2 in ...

Page 722: ...he preset TA volume level if the current level is lower than the preset level page 52 Lights up Not yet activated Tune in to another station providing the Radio Data System signals Flashes Touch T P to deactivate Goes off PTY Standby Reception Indicator Enter AV Menu Mode PTy Standby right column and page 55 PTY The unit will temporarily switch to your favorite PTY programme from any source other ...

Page 723: ...u can change the Network Tracking Reception setting AF Regional on page 52 When the DAB tuner is connected refer also to Tracing the same programme Alternative Frequency Reception DAB AF page 43 A Automatic station selection Programme Search Usually when you select preset stations the preset station is tuned in If the signals from the FM Radio Data System preset station are not sufficient for good...

Page 724: ...nitor the unit cannot accept the operation you have tried to do In some cases without showing operations will not be accepted 0 Ejects the disc 3 8 Starts and pauses playback BAND Stops playback Open the front panel Ÿ Insert the disc Playback starts automatically Caution Do not place your finger behind the control panel Caution on volume setting Discs and connected USB devices produce very little ...

Page 725: ...er no Playing time E Playback mode 4 Touch Selects chapter Hold Reverse forward search 1 5 Selects program no Play List no DISP Touch if necessary page 9 4 Touch Selects track Hold Reverse forward search for DivX MPEG 2 5 Touch Selects folder Hold Displays Folder List DISP Touch if necessary page 9 DVD 01 02 0 01 20 FLAT DIGITAL C P VR PRG 15 45 A Audio format B VR PRG Original program VR PL Play ...

Page 726: ...d surround mode pages 26 and 46 B Track no Playing time C Track title only for CD Text Artist Name Disc title 2 CD 01 02 0 01 20 FLAT 15 45 Current Folder Name Current File Name mp3 MP3 RPT 4 Touch Selects track Hold Reverse forward search 1 5 Touch Selects folder Hold Displays Folder List A Audio format MP3 WMA WAV AAC B Sound surround mode pages 26 and 46 C Folder no Track no Playing time D Curr...

Page 727: ...r Repeats current chapter Program Repeats current program not available for Playlist playback Track Repeats current track for VCD PBC not in use Disc All Randomly plays all tracks for VCD PBC not in use Track Repeats current track Folder Randomly plays all tracks of current folder then tracks of next folders Folder Repeats all tracks of the current folder Disc All Randomly plays all tracks Track R...

Page 728: ...ctivate the prohibition No Eject appears To cancel the prohibition repeat the same procedure to select EJECT OK Hold Folder List My Best Cinema Pops My Best2 Favorite Song Cinema2 Folder List My Best Cinema Pops My Best2 Favorite Song Cinema2 File List Enter Song011 mp3 Song012 mp3 Song013 mp3 Song014 mp3 Song015 mp3 Song016 mp3 Operations using the remote controller RM RK252 Also functions as CLR...

Page 729: ... Searchspeed x2 x5 x10 x20 x60 2 Slowmotionspeed 1 32 1 16 1 8 1 4 1 2 3 Searchspeed x2 x10 Stops playback Starts or pauses playback Reverse forward search 1 No sound can be heard Forward slow motion 2 during pause No sound can be heard Reverse slow motion does not work Select chapter during playback or pause Reverse forward search 3 Hold Selects program Selects Play List during playback or pause ...

Page 730: ...track within the same folder Selects folder Changes the aspect ratio of the playback pictures While playing Back advance the scenes by 5 minutes For DivX6 Using menu driven features 1 2 Select the item you want to start playback 3 1st press 1st press 2nd press 3rd press 2nd press Current playback position Twice Also functions as CLR clear Erases a misentry if pressed while holding SHIFT ...

Page 731: ...he playback pictures Twice Stops playback Starts or pauses playback Reverse forward search 3 Forward slow motion 4 during pause No sound can be heard Reverse slow motion does not work Selects track Reverse forward search 5 Hold No sound can be heard Selects track Changes the aspect ratio of the playback pictures Stops playback Starts or pauses playback Reverse forward search 3 Selects track Revers...

Page 732: ...l Zone is in use MULTI For multi channel encoded sources such as Dolby Digital 3 and DTS 4 When activated MULTI is shown on the source information screen Dolby Pro Logic II Movie Music For 2 channel sources except for DivX MPEG1 MPEG2 discs 3 ManufacturedunderlicensefromDolbyLaboratories Dolby ProLogic andthedouble Dsymbolare trademarksofDolbyLaboratories 4 DTS and DTSDigitalSurround areregistered...

Page 733: ...und Surround Off Surround On Surround On Exit Auto Through Dolby PLII Movie Dolby PLII Music To change the Dolby PLIIMusic setting In step 4 in the left column 1 Select Dolby PLII Music 2 Enter each sub screen then select the desired setting EX When Panorama is selected in step 1 Panorama Select On to add wraparound sound effect Center Width Adjust the center image so it may be heard only from the...

Page 734: ...nu appears For entering time numbers To move the entry position To select a number Repeat steps Ÿ and to set other items if needed To remove the on screen bar Operations using the on screen bar DVD VCD DivX MPEG1 MPEG2 JPEG These operations are possible on the monitor using the remote controller ...

Page 735: ...disc type DVD V T02 C03 TOTAL 1 25 58 TIME TITLE CHAP RPT C RPT T02 C03 PG 001 C 002 PL 003 C 004 TRACK 01 F001 T001 F002 F002 5 Time indication Elapsed playing time of the disc Remaining title time for DVD Remaining disc time for others Elapsed playing time of the current chapter track 2 Remaining time of the current chapter track 2 6 Playback status Play Reverse forward search Reverse forward sl...

Page 736: ...This surrounddoesnotworkforDivX MPEG1 MPEG2discs DualZoneoperations You can enjoy disc playback on the external monitor connected to the VIDEO OUT and 2nd AUDIO OUT plugs while listening to any source other than USB through the speakers When Dual Zone is in use you can only operate the DVD CD player using the remote controller 1 2 3 Off Deactivates Dual Zone On Activates Dual Zone without applying...

Page 737: ... disc For DivX MPEG1 MPEG2 JPEG while not playing Ex MP3 WMA 1 Current folder highlighted bar 2 Current folder no total folder no 3 Folder list Iftagdataincludes JacketPicture baselineJPEG it willbedisplayed IfyoupressOSD theplaybackmode selectionwindowappears page32 4 Selected playback mode page 32 5 Elapsed playing time of the current track not displayed for JPEG 6 Operation status 7 Current tra...

Page 738: ...E 00 14 Track 6 14 Track Information Cloudy Fair Fog Hail Indian summer Rain Shower Snow Thunder Typhoon Wind Winter sky Album Four seasons Artist Robert M Smith Title Rain T RPT Selecting playback modes You can also change the playback modes using the playback mode selection window For JPEG Random cannot be selected 1 2 Except for JPEG Select a playback mode 3 Select your desired option 4 Selecta...

Page 739: ...alprogramorPlayListmaynot bedisplayeddependingontherecordingequipment Folder 144 240 Track 144 198 Page 4 7 fol120 fol121 fol122 fol123 fol124 fol125 fol126 fol127 fol128 fol129 fol150 fol151 fol152 fol153 fol154 fol155 fol156 fol157 fol158 fol159 fol140 fol141 fol142 fol143 fol144 fol145 fol146 fol147 fol148 fol149 fol130 fol131 fol132 fol133 fol134 fol135 fol136 fol137 fol138 fol139 file0141 wma...

Page 740: ... DISP Touch if necessary page 9 BAND Stops playback Connect a USB device USB is selected as the source and playback starts automatically This unit can play JPEG MPEG1 MPEG2 1 MP3 WMA WAV AAC 2 files stored on a USB mass storage class device You can operate the USB device in the same way you operate the files on discs pages 21 to 29 You cannot select USB when Dual Zone is in use All tracks on the U...

Page 741: ... indicator lights up on the source information screen To cancel select Off in step 4 You can use Repeat or Random playback mode Ex To select Track Repeat 1 2 3 Repeat Set Off Track Folder Off Mode Repeat Random Mode AV Menu Enter Caution Avoid using the USB device if it might hinder your safety driving Do not pull out and attach the USB device repeatedly while Now Reading is flashing on the monito...

Page 742: ...K not supplied When connected with the USB cable below Make sure iPod Off is selected for AV Input page 52 USB iPod 01 0 01 20 FLAT 15 45 Track Title Album Title Artist Name A Source name B Sound mode page 46 C Track or video no Playing time 6 Starts pauses playback 5 Moves to the previous next item of a category ex another album artist playlist etc 1 DISP Touch if necessary page 9 1 5 maynotfunct...

Page 743: ...uch6in step2onpage36 Changing the play speed of the audiobooks You can change the play speed of the audiobooks Follow steps 1 to 3 in the left column In step 3 1 2 Select the desired speed 3 Select an item EX When Music is selected in step 2 Repeat the procedure to select the desired track video 4 Confirm the selection Selecting playback modes You can use Repeat or Random playback mode Ex To selec...

Page 744: ...the previous menu touch 5 Selecting playback modes Operations are exactly the same as explained on page 37 AudioBooks isnotdisplayedinstep3 Pauses playback To resume touch again A Source name B Sound mode page 46 C Track no Playing time Preparation When operating through the CD changer jack make sure iPod is selected for the external input setting page 52 Select iPod Playback starts automatically ...

Page 745: ...r is selected for the external input setting page 52 Select Changer Ÿ Enter Disc List Each time you hold the button you can display the other list of the remaining discs Disc List MP3 DISC DISC 02 DISC 03 DISC 04 DISC 05 DISC 06 Disc List Enter MP3 DISC DISC 02 DISC 03 DISC 04 DISC 05 DISC 06 Each List can also be accessed through AV Menu List Disc List Folder List File List Hold Folder List My Be...

Page 746: ...rent folder Disc Randomly plays all tracks of the current disc Disc Repeats all tracks of the current disc All Randomly plays all tracks of all loaded discs 4 When one of the playback modes is selected the corresponding indicator lights up on the source information screen To cancel select Off in step 4 You can use Repeat or Random playback mode Ex To select Track Repeat 1 2 3 Repeat Set Off Track ...

Page 747: ...gnals together with their regular programme signals DRC will reinforce the low level sounds to improve your listening The DRC indicator will light up while tuning in a service with the DRC signals 1 2 3 4 As the number increases the effect becomes stronger A TEXT indicator B Sound mode page 46 C Band D Preset No E Frequency F Service label G Ensemble label H PTY code I DAB indicators Standby Recep...

Page 748: ...or the service you want to preset 3 Display the Preset List 4 Select a preset number 5 Store the service Preset List can also be accessed through AV Menu List Selecting preset services On the remote 1 2 Hold DAB1 Enter Store Service Label No Serv FFH No Serv HRS HRH 1 2 3 4 5 6 DAB1 Enter Store Service Label No Serv FFH No Serv HRS HRH 1 2 3 4 5 6 DAB1 Enter Store Service Label No Serv FFH No Serv...

Page 749: ...uency Reception page 52 Activating deactivating Announcement Standby Reception Announcement Standby Reception allows the unit to switch temporarily to your favorite service announcement type Announcement Standby Reception Indicator Enter AV Menu Mode Announce Standby below and page 55 ANN The unit will temporarily switch to your favorite service from any source other than FM AM Lights up Not yet a...

Page 750: ... connected component and start playing the source Navigation screen When you connect a Navigation System to the unit you can view the navigation screen regardless of the source Preparation Make sure AV Input setting is selected for Navigation page 52 To watch the navigation screen touch DISP repeatedly page 9 The aspect ratio of the navigation screen is fixed to Full regardless of the Aspect setti...

Page 751: ...the Line Input Adapter KS U57 not supplied or AUX Input Adapter KS U58 not supplied EXT IN EXT INPUT FLAT 15 45 Preparation Make sure External Input is selected for External Input page 52 Select External Input Ÿ Turn on the connected component and start playing the source A Sound mode page 46 B Assigned title page 47 ...

Page 752: ...ode is temporarily canceled Storing your own adjustments You can store your adjustments into User1 User2 and User3 1 Follow steps and Ÿ on the left 2 Select the item you want to adjust 3 Adjust each setting 4 Select User1 User2 or User3 then store the setting Soundequalization Edit Store 03 60 0 Hz Equalizer Exit Edit Flat Hard Rock R B Pop Jazz Equalizer Exit Edit Flat Hard Rock R B Pop Jazz Edit...

Page 753: ...lable characters page 60 To erase the whole characters hold DISP 2 Repeat step 1 until you finish entering the title Finish the procedure You can assign titles to AV Input and External Input You can enter up to 16 characters Ex Assigning title to AV Input Select AV Input Ÿ Assigningtitlestothesources Mode Title Entry Title Entry Store AV In Name AV INPUT A a 0 Mode AV Menu Enter ...

Page 754: ...und color of the monitor Blue Light Blue Red Orange Yellow Green Purple Dark Blue Dark Green Brown Light Brown Black Scroll Off Cancels Once Scrolls the source information once Auto Repeats scrolling 5 second intervals Holding DISP on the unit scrolls the information regardless of this setting Tag Display Off Cancels On Shows the Tag data while playing MP3 WMA WAV AAC tracks Dual Zone List Mode Di...

Page 755: ...pears and you cannot adjust this setting Aspect 3 You can change the aspect ratio of the picture Aspect ratio of incoming signal 4 3 16 9 Full For 16 9 original pictures Auto For Disc Aspect ratio is automatically selected to match to the incoming signals For other video sources Aspect ratio is fixed at Regular Regular For 4 3 original pictures Language 4 Select the indication language shown on th...

Page 756: ...tterbox 4 3 Pan Scan Select when the aspect ratio of the external monitor is 4 3 Refer to the illustrations on the left to see how the pictures are shown on the monitor OSD Position Select the position of the on screen bar 29 1 Higher position 2 Lower position File Type Select playback file type when a disc USB contains different types of files You can store this setting separately for each source...

Page 757: ...nter speaker when surround is deactivated Speaker Level You can adjust the output level of the activated speakers Speaker Size above monitoring the test tone Front Lch Center Ch Front Rch Rear Rch Subwoofer 2 Rear Lch Adjust the output level of each speaker in the range of 10dB to 10dB Initial 0dB Hold 6 to turn on and off the test tone Speaker Distance You can adjust the speaker output timing Fro...

Page 758: ...On 43 Input AV Input 3 You can determine the use of LINE IN and VIDEO IN plugs Off Select when no component is connected AV Input is skipped while selecting the source iPod Off Select when connecting the iPod using the USB Audio and Video cable for iPod 36 Audio Video Select when connecting an AV component such as a VCR Audio Select when connecting an audio component such as a portable audio playe...

Page 759: ...lize all settings you have made in AV Menu Hold 6 then reset the unit 3 Equalizer Flat Hard Rock R B Pop Jazz Dance Country Reggae Classic User1 User2 User3 46 1 Dependsontheamplifiergaincontrol page54 2 SelectableonlywhenaDABtunerisconnected 3 Notselectablewhen AVInput isselectedasthesource 4 TheREVERSEGEARSIGNALleadconnectionisrequired Installation ConnectionManual Therearviewthrough thecameraap...

Page 760: ...d the others Subwoofer Level 1 Adjust the subwoofer output level 06 to 08 Initial 00 High Pass Filter Through Select when the subwoofer is not connected On Select when the subwoofer is connected Crossover Adjust the crossover frequency between the front rear speakers and the subwoofer 80Hz 120Hz 150Hz Amplifier Gain You can change the maximum volume level of this unit Off Deactivates the built in ...

Page 761: ...RC 1 DRC 2 DRC 3 41 Announce Standby Only for DAB Off Transport News 43 When you activate Announcement Standby Reception you can change the announcement type for Announcement Standby Reception AudioBooks Only for USB iPod Normal Faster Slower 37 List The accessible lists differ depending on the source 14 22 36 42 Dual Zone Off On On Surround On 30 1 Thissettingtakeseffectonlywhensurroundisdeactiva...

Page 762: ...he edges Do not touch its recording surface When storing a disc into its case gently insert the disc around the center holder with the printed surface facing up Make sure to store discs into the cases after use Maintenance To keep discs clean A dirty disc may not play correctly If a disc does become dirty wipe it with a soft cloth in a straight line from center to edge Do not use any solvent for e...

Page 763: ...ce If you change the source playback also stops without ejecting the disc Next time you select Disc for the playback source disc play starts from where it stopped previously Playing Recordable Rewritable discs This unit can recognize a total of 5 000 files and 250 folders a maximum of 999 files per folder Use only finalized discs This unit can play back multi session discs however unclosed session...

Page 764: ...cy 48 kHz 44 1 kHz 32 kHz for MPEG1 24 kHz 22 05 kHz 16 kHz for MPEG2 48 kHz 44 1 kHz 32 kHz 22 05 kHz for WMA 44 1 kHz for WAV 48 kHz 44 1 kHz for AAC This unit can show ID3 Tag Version 1 0 1 1 2 2 2 3 2 4 for MP3 This unit can also show WAV WMA AAC Tag This unit can play back files recorded in VBR variable bit rate Files recorded in VBR have a discrepancy in elapsed time indication This unit can...

Page 765: ...ith 2 or more partitions Depending on the shape of the USB devices and connection ports some USB devices may not be attached properly or the connection might be loose When connecting a USB device refer also to its instructions Connect only one USB device to the unit at a time Do not use a USB hub This unit may not recognize a USB device connected through a USB card reader When connecting with a US...

Page 766: ... for the main source Disc 2nd AUDIO OUT 2 channel signal is emitted when Dual Zone is activated When playing a multi channel encoded disc multi channel signals are downmixed Characters you can enter for titles In addition to the roman alphabet A Z a z you can use the following characters to assign titles page 47 When Руccĸий is selected for Language page 49 Upper and lower cases Numbers and symbol...

Page 767: ...A Sanskrit TR Turkish BN Bengali Bangla HU Hungarian MG Malagasy SD Sindhi TS Tsonga BO Tibetan HY Armenian MI Maori SG Sangho TT Tatar BR Breton IA Interlingua MK Macedonian SH Serbo Croatian TW Twi CA Catalan IE Interlingue ML Malayalam SI Singhalese UK Ukrainian CO Corsican IK Inupiak MN Mongolian SK Slovak UR Urdu CS Czech IN Indonesian MO Moldavian SL Slovenian UZ Uzbek CY Welsh IS Icelandic ...

Page 768: ... activated the remote controller only functions for operating the DVD CD player No Signal appears Change the source Start the playback on the external component connected to VIDEO IN plug Check the cords and connections Signal input is too weak Mecha Error Push Reset appears on the monitor and the control panel does not move Reset the unit page 3 The touch pad controls do not respond properly Illu...

Page 769: ...picture appears on the monitor Parking brake lead is not connected properly Installation Connection Manual No picture appears on the external monitor Connect the video cord correctly Select the correct input on the external monitor Eject Error or Loading Error appears on the monitor Changing the source by pressing SRC will solve this error File playback Disc cannot be played back Change the disc R...

Page 770: ...nitor Readout time varies depending on the USB device Do not use too many hierarchy folders and empty folders Folder that is physically empty or folder that contains data but does not contain valid MP3 WMA WAV AAC track Turn off the power then on again Do not pull out or connect the USB device repeatedly while Now Reading is displayed on the monitor Correct characters are not displayed e g album n...

Page 771: ...ter the artwork is loaded page 59 CD changer No Disc appears on the monitor Insert a disc into the magazine No Magazine appears on the monitor Insert the magazine Cannot play this disc Check the disc appears on the monitor Disc does not include playable files Replace the disc with playable files Reset 08 appears on the monitor Connect this unit and the CD changer correctly and press the reset butt...

Page 772: ...r Terminals Input LINE IN VIDEO IN USB input terminal Aerial input Output 2nd AUDIO OUT VIDEO OUT Others CD changer OE REMOTE FM AM TUNER Frequency Range FM 87 5 MHz to 108 0 MHz AM MW 522 kHz to 1 620 kHz LW 144 kHz to 279 kHz FM Tuner Usable Sensitivity 11 3 dBf 1 0 μV 75 Ω 50 dB Quieting Sensitivity 16 3 dBf 1 8 μV 75 Ω Alternate Channel Selectivity 400 kHz 65 dB Frequency Response 40 Hz to 15 ...

Page 773: ... 0 Full Speed Data Transfer Rate Full Speed Maximum 12 Mbytes Low Speed Maximum 1 5 Mbytes Compatible Device Mass storage class Compatible File System FAT 32 16 12 Max Current Less than 500 mA 5 V GENERAL Power Requirements Operating Voltage DC 14 4 V 11 V to 16 V allowance Grounding System Negative ground Allowable Operating Temperature 0 C to 40 C Dimensions W H D Installation Size approx 182 mm...

Page 774: ...агрузите Ваше устройство Для получения информации о перезагрузке Вашего устройства обратитесь на соответствующую страницу Маєте ПРОБЛЕМУ з функціонуванням Повторно налаштуйте систему Див сторінку Як повторно налаштувати пристрій 2008 Victor Company of Japan Limited Bіктор Компані оф Джепен Лімітед 12 3 чоме Морійя чо Канагава ку Йокогама Канагава 221 8520 Японія ...

Page 775: ...рухом Якщо автомобіль не на ручному гальмі на екрані монітора з являється напис Parking Brake і зображення не буде виводитися Це попередження з являється тільки тоді коли провід ручного гальма з єднаний з ручним гальмом автомобіля Зауваження щодо електричних з єднань Заміняти запобіжник можна тільки запобіжником із вказаними у специфікації номінальними характеристиками Якщо запобіжники часто виход...

Page 776: ...ослабте кріплення тильної частини Do not block the fan Не закрывайте вентилятор Не блокуйте вентилятор INSTALLATION IN DASH MOUNTING The following illustration shows a typical installation If you have any questions or require information regarding installation kits consult your JVC IN CAR ENTERTAINMENT dealer or a company supplying kits If you are not sure how to install this unit correctly have i...

Page 777: ...дажам автомобильных систем Вам можливо прийдеться внести зміни до з єднання провідників шнура живлення згідно з ілюстрацією Перед тим як встановлювати цей пристрій зв яжіться з уповноваженим дилером вашого авто ELECTRICAL CONNECTIONS To prevent short circuits we recommend that you disconnect the battery s negative terminal and make all electrical connections before installing the unit Be sure to g...

Page 778: ...external component see diagram К внешнему устройству см схему До зовнішнього компоненту див схему 4 Not included for this unit 4 Не входит в комплект 4 Не входить до комплекту постачання цього пристрою Ignition switch Переключатель зажигания Перемикач запалювання Fuse block Блок предохранителя Блок запобіжників White with black stripe Белый с черной полосой Білий з чорною смужкою White Белый Білий...

Page 779: ...цього пристрою приєднайте їх до підсилювача Залиште провідники гучномовців такими що не використовуються Можна відключити вбудований підсилювач і спрямувати звуковий сигнал тільки до зовнішнього підсилювача щоб одержати якісний звук і запобігти збільшенню температури в середині пристрою Див ІНСТРУКЦІЇ Remote lead Провод внешнего устройства Провідник зовнішнього пристрою JVC Amplifier JVC усилитель...

Page 780: ...necting two components it is recommended that you connect them in series as explained below Apple iPod Apple iPod Програвач Apple iPod Connecting external components Подключение внешних устройств З єднує зовнішні компоненти KS U20K CD changer jack Разъем устройства автоматической смены компакт дисков Гніздо пристрою зміни CD дисків Apple iPod Apple iPod Програвач Apple iPod USB 2 0 cable Кабель US...

Reviews: