background image

Cautions

.

.

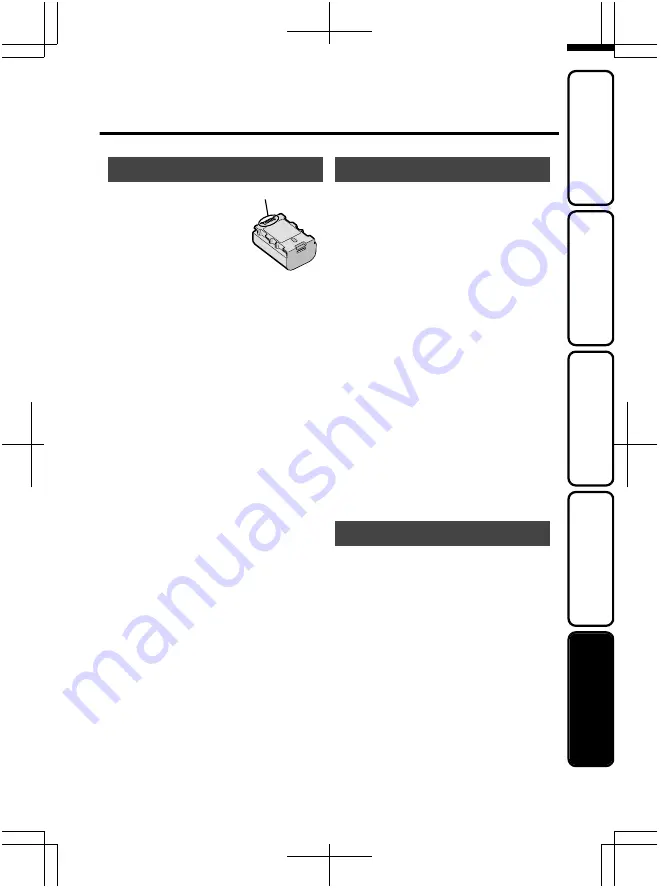
Battery Pack

The suppl

i

ed battery pack 

i

s a 

l

i

th

i

u

m

-

i

on battery

.

 Before us

i

ng 

the suppl

i

ed battery pack or an 

opt

i

onal battery pack, be sure 

to read the follow

i

ng caut

i

ons

:

To avo

i

d hazards

...

do not

 burn

.

...


do not

 short-c

i

rcu

i

t the ter

mi

nals

.

 Keep 

i

t away

fro

m


m

etall

i

c ob

j

ects when not 

i

n use

.

 When 

transport

i

ng, carry the battery 

i

n a plast

i

c bag

.

...


do not


m

od

i

fy or d

i

sasse

m

ble

.

...


do not

 expose the battery to te

m

peratures 

exceed

i

ng 60°C, as th

i

m

ay cause the

battery to overheat, explode or catch fire

.

...

 use only spec

i

fied chargers

.

To prevent da

m

age and prolong serv

i

ce l

i

fe

...

 do not sub

j

ect to unnecessary shock

.

...

 charge w

i

th

i

n the te

m

perature range of 10°C 

to 35°C

.

 Cooler te

m

peratures

requ

i

re longer charg

i

ng t

im

e, or 

i

n so

m

e cases 

stop charg

i

ng at all

.

War

m

er te

m

peratures prevent co

m

plete

charg

i

ng, or 

i

n so

m

e cases stop charg

i

ng at all

.

...

 store 

i

n a cool, dry place

.

 Extended exposure 

to h

i

gh te

m

peratures w

i

ll 

i

ncrease natural

d

i

scharge and shorten serv

i

ce l

i

fe

.

...

 fully charge and then fully d

i

scharge the battery

every 6 

m

onths when stor

i

ng the battery pack

over a long per

i

od of t

im

e

.

...

 re

m

ove fro

m

 charger or powered un

i

t when not

i

n use, as so

m

m

ach

i

nes use current even

when sw

i

tched off

.

Record

i

ng Med

i

u

m

Be sure to follow the gu

i

del

i

nes below 

to prevent corrupt

i

on or da

m

age to your

recorded data.

 Do not bend or drop the record

i

ng

m

ed

i

u

m

or sub

j

ect 

i

t to strong pressure, 

j

olts or 

v

i

brat

i

ons

.

Do not splash the record

i

ng 

m

ed

i

u

m

 w

i

th 

water

.

 Do not use, replace, or store the record

i

ng 

m

ed

i

u

m


i

n locat

i

ons that are exposed to 

strong stat

i

c electr

i

c

i

ty or electr

i

cal no

i

se

.

 Do not turn off the ca

m

corder power or 

re

m

ove the battery or AC adapter dur

i

ng

shoot

i

ng, playback, or when otherw

i

se 

access

i

ng the record

i

ng 

m

ed

i

u

m.

 Do not br

i

ng the record

i

ng

m

ed

i

u

m

 near 

ob

j

ects that have a strong 

m

agnet

i

c field or 

that e

mi

t strong electro

m

agnet

i

c waves

.

 Do not store the record

i

ng 

m

ed

i

u

m


i

n

 locat

i

ons w

i

th h

i

gh te

m

perature or h

i

gh

 hu

mi

d

i

ty

.

Do not touch the 

m

etal parts

.

LCD Mon

i

tor

To prevent da

m

age to the LCD 

m

on

i

tor, 

DO NOT

...

 push

i

t strongly or apply any shocks

.

...

 place the ca

m

corder w

i

th LCD 

m

on

i

tor on the

botto

m.

To prolong serv

i

ce l

i

fe

...

 avo

i

d rubb

i

ng 

i

t w

i

th coarse cloth

.

Ter

mi

nals

When for

m

att

i

ng or eras

i

ng data us

i

ng 

the ca

m

corder, only the file ad

mi

n

i

strat

i

on


i

nfor

m

at

i

on 

i

s changed

.

 The data 

i

s not

co

m

pletely erased fro

m

 the hard d

i

sk

.

 If you

want to co

m

pletely erase all of the data, 

we reco

mm

end e

i

ther us

i

ng co

mm

erc

i

ally

ava

i

lable software that 

i

s spec

i

ally des

i

gned for

that purpose, or by phys

i

cally destroy

i

ng the

ca

m

corder w

i

th a ha

mm

er etc

.

.

For more information, refer to the Detailed User Guide

http://manual.jvc.co.jp/index.html/

21

Getting Started

Recording

Playback

Copying

Further

Information

Summary of Contents for Enverio GZ-MS210 PEK

Page 1: ... use of this product Some features explained in this manual only apply to the specific camera model identified This product comes with a Basic User Guide this manual and a Detailed User Guide Detailed User Guide Explains the ways of shooting in various situations and the useful features Access the following website on your PC http manual jvc co jp index html Getting Started Recording Playback Copy...

Page 2: ...tion to the mains supply in the United Kingdom DO NOT cut off the mains plug from this equipment If the plug fitted is not suitable for the power points in your home or the cable is too short to reach a power point then obtain an appropriate safety approved extension lead or consult your dealer BE SURE to replace the fuse only with an identical approved type as originally fitted and to replace the...

Page 3: ...ons between pieces of equipment are properly made and in accordance with the manufacturer s instructions Switch off and withdraw the mains plug when making or changing connections DO consult your dealer if you are ever in doubt about the installation operation or safety of your equipment DO be careful with glass panels or doors on equipment DON T continue to operate the equipment if you are in any...

Page 4: ...e the Detailed User Guide on your PC to find out more about the advanced operations Access the following address on your PC http manual jvc co jp index html Verifying the Accessories AC Adapter AP V30M 1 Power Cord 1 Battery Pack BN VG107E USB Cable Type A Mini Type B AV Cable CD ROM 2 Basic User Guide this manual Core Filter GZ MS250 GZ MS230 only SD cards are sold separately For details on the t...

Page 5: ...video and still image modes N UPLOAD EXPORT Upload Export to iTunes Button Recording Takes videos in YouTube or iTunes format Playback Changes the video to YouTube or iTunes format O Power Information Button Recording Displays the remaining time as well as the battery power during continuous recording Playback Displays file information Press and hold to turn the power on off while the LCD monitor ...

Page 6: ...attery packs If you use any other battery packs besides JVC battery packs safety and performance cannot be guaranteed Charging time Approx 1 h 50 m using supplied battery pack If the battery pack is charged outside the room temperature range of 10 C to 35 C charging may take a longer time or it may not start Attaching the Core Filter to the DC cord The core filter reduces interference Connect the ...

Page 7: ...0 GZ MS230 Models with Built in Memory When a commercially available SD card is inserted recordings can still be made to the card without stopping when the remaining recording time on the built in memory runs out 1Close the LCD monitor Label 3Insert an SD card 2Open the cover Turn off the power of this unit before inserting or removing a card Base For more information refer to the Detailed User Gui...

Page 8: ... this unit before inserting or removing a card Slot B Slot A To remove the card Push the card inward once then pull it out straight Base NOTE Operations are confirmed on the following SD cards Manufacturer Panasonic TOSHIBA SanDisk ATP Video Class 4 or higher compatible SDHC card 4 GB to 32 GB Still Image SD card 256 MB to 2 GB SDHC card 4 GB to 32 GB Using cards other than those specified above m...

Page 9: ...n used on other devices Format initialize the card using FORMAT SD CARD from media settings All data on the card will be deleted when it is formatted Copy all files on the card to a PC before formatting Touch to display the menu Select MEDIA SETTINGS with the slider and touch Select FORMAT SD CARD and touch MEDIA SETTINGS REC MEDIA FOR VIDEO REC MEDIA FOR IMAGE FORMAT BUILT IN MEM FORMAT SD CARD E...

Page 10: ... the cursor 4 After setting the date and time touch 5 Select the region where you live and touch The city name and time difference is displayed GMT 1 1 2009 10 00 CLOCK AREA SETTING SAVE QUIT NOTE Touch the slider and buttons around the screen with your fingers The slider and buttons do not function if you touch them with your fingernails or with gloves on The displays on the screen do not work ev...

Page 11: ...me as steps 3 5 on the previous page To change the display language The language on the display can be changed Display the menu Touch Select DISPLAY SETTINGS and touch VIDEO DISPLAY SETTINGS CLOCK ADJUST BASIC SETTINGS CONNECTION SETTINGS SET QUIT 761 59 6 4 Select LANGUAGE and touch DISPLAY SETTINGS LANGUAGE DATE DISPLAY STYLE MONITOR BRIGHTNESS LCD BACKLIGHT SET QUIT Select the desired language ...

Page 12: ...The mode changes between auto and manual with every touch 4 Start recording Press again to stop Wide angle Telephoto Zooming 1Open the lens cover Indications during video recording Remaining Recording Time Video Quality Record Standby Scene Counter Recording in Progress Recording Media GZ MS210 Battery Indicator NOTE The estimated recording time of the supplied battery pack is approximately 50 min...

Page 13: ...vement with the unit on a tripod Complete stabilization may not be possible if camera shake is excessive Still Image Recording AV Press fully Press halfway Press Lights up during still image recording 1 Select still image mode 3 Take a still image 2 Set the focus on the subject Lights up in green when focused Indications during still image recording 832 Remaining Number of Shots Image Quality Reco...

Page 14: ... stop Select YES when the confirmation message appears and touch Media being played back To capture a still image during playback Pause the playback and press the SNAPSHOT button Usable operation buttons during playback Display During video playback During still image playback Playback pause Start pause slideshow Stop returns to thumbnail display Stop returns to thumbnail display Advances to the ne...

Page 15: ... menu to ON Alternatively set ON SCREEN DISPLAY in the playback menu to DISPLAY ALL or DISPLAY DATE ONLY When images look unnatural on the TV Images do not appear on the TV properly Disconnect the cable and connect again Restart this unit by turning off and on Images are projected vertically on the TV Set VIDEO OUTPUT in the connection settings menu to 4 3 Images are projected horizontally on the ...

Page 16: ...pter is connected 2 Select the playback mode AV Press 3 Prepare to record Preparation on TV and VCR DVD recorder Switch to a compatible external input Insert compatible blank DVD or VHS to dub Preparation on this unit Set VIDEO OUTPUT in the connection settings menu to the aspect ratio 4 3 or 16 9 of the connecting TV To include the date during dubbing set DISPLAY ON TV in the connection settings ...

Page 17: ...ady Product Name Model Serial Number Problem Error Message PC Manufacturer Model Desktop Laptop CPU OS Memory MB GB Available Hard Disk Space GB Please note that it may take some time to respond to your questions depending on their subject matter JVC cannot answer questions regarding basic operation of your PC or questions regarding specifications or performance of the OS other applications or driv...

Page 18: ...NDARD 1450 2930 5930 9999 Video 640 480 4 3 FINE 1450 2930 5930 9999 STANDARD 2080 4180 8480 9999 640 360 16 9 FINE 1820 3660 7420 9999 STANDARD 2430 4880 9890 9999 Up to 9999 still images may be recorded on the SD cards with at least 4 GB capacity regardless of image size and quality Approximate Recording Time Using Battery Battery Pack Actual Recording Time Continuous Recording Time BN VG107E 50...

Page 19: ...e the AC adapter and battery pack from this unit reattach them and turn on the power again Trouble Trouble Action Page Power POWER CHARGE lamp starts blinking when the monitor is closed The battery pack is being charged P 6 Recording Recording cannot be performed Check the button P 12 Set to the recording mode with the button P 14 Recording stops by itself Turn off this unit wait for a while and t...

Page 20: ...ts up This is not a malfunction This unit may become warm when used for a long time Warning Indications Warning Indications Action Page RECORDING FAILURE Turn off and on this unit again P 10 UNSUPPORTED SCENE Video UNSUPPORTED FILE Still image Make use of a file recorded with this unit Files recorded with other devices may not be playable If the file was recorded with this unit then it is corrupte...

Page 21: ...prevent corruption or damage to your recorded data Do not bend or drop the recording medium or subject it to strong pressure jolts or vibrations Do not splash the recording medium with water Do not use replace or store the recording medium in locations that are exposed to strong static electricity or electrical noise Do not turn off the camcorder power or remove the battery or AC adapter during sh...

Page 22: ... floor To protect the unit DO NOT allow it to become wet drop the unit or strike it against hard objects subject it to shock or excessive vibration during transportation keep the lens directed at extremely bright objects for long periods expose the lens to direct sunlight swing it excessively when using the hand strap swing the soft camera case excessively when the camera is inside it place the cam...

Page 23: ... 800x Zoom Still image Optical zoom Up to 39x Video recording format SD VIDEO standard Video MPEG 2 Audio Dolby Digital 2 ch Still image recording format JPEG standard Recording media Built in Memory 32GB SD SDHC card commercially available Built in Memory 8 GB SD SDHC card commercially available SD SDHC card 1 or 2 cards commercially available Clock battery Rechargeable battery AC Adapter AP V30M...

Page 24: ... 16 D Date Time Setting 10 Deleting Files 14 F Format SD Card 9 L Language Setting 11 LCD Monitor 21 M Menu Settings 17 N Number of Images 18 R Recordable Time 18 Recording Media for Image 13 S SD Card 8 18 V Viewing Files on TV 15 Z Zoom 12 1109MNH SW VM EK 2009 Victor Company of Japan Limited ...

Reviews: