background image

4

Settings

38

Setting Menu (Continued)

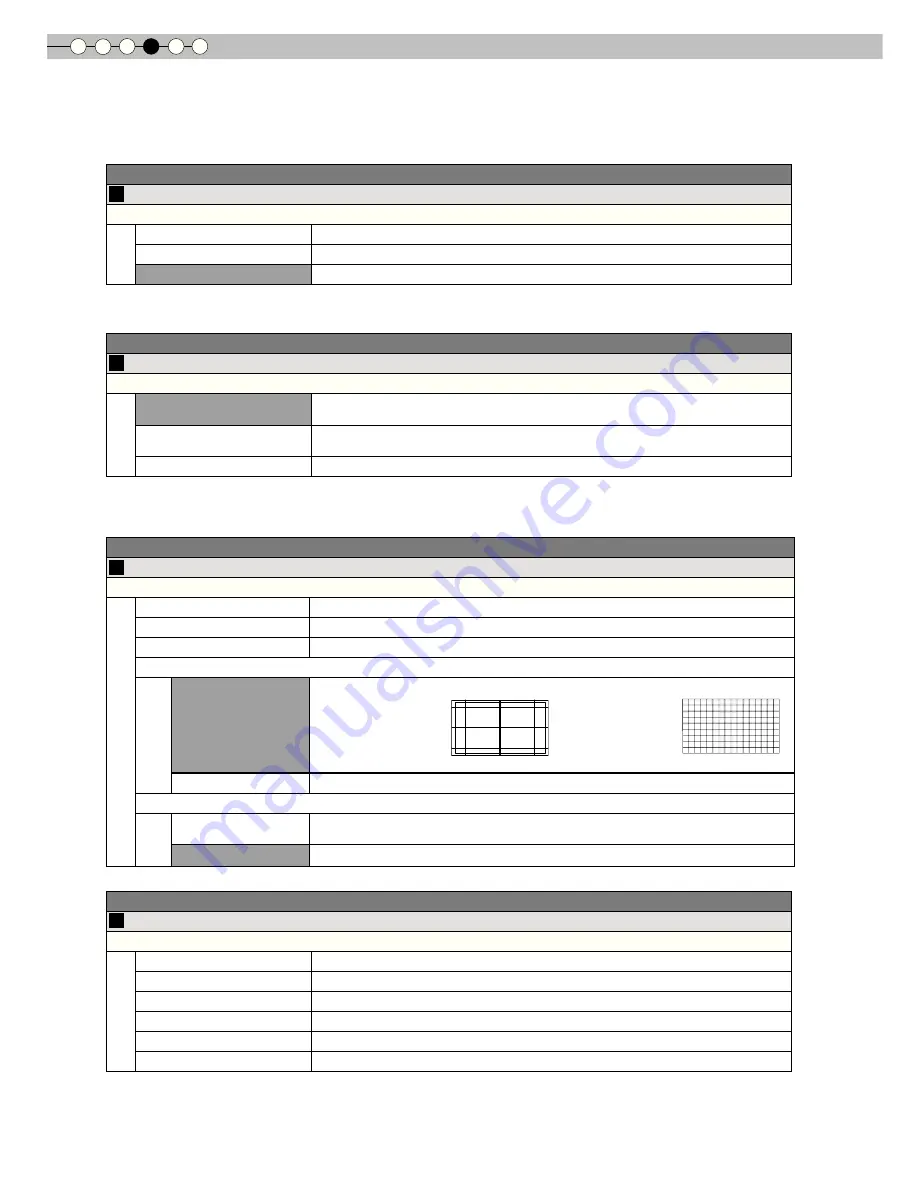
Input Signal > Mask

20


Mask

Masks (Hides) the outer area of the projected image.

2.5%

Mask 2.5% of the screen.

5%

Mask 5% of the screen.

Off

No masking.


Masking is available only when high deinition images are input.

Input Signal > Film Mode

21


Film Mode

Selects this to view movies shot on ilm.

Auto

After determining if the picture is 24 frame ilm or 60 frames (50 frames) video, 

changes the setting to the optimal progressive conversion.

Film

Corrects unnatural movement of material pulldown processed from 24 frames to 60 
frames (50 frames) and returned to 24 frames.

Off

Sets the appropriate progressive conversion for video.


Only 480i/576i/1080i may be selected.


Select 

Auto

 or 

Off

 if it begins to function improperly. Particularly, with video it does not operate properly.

Installation > Lens Control

22


Lens Control

Controls the individual motorized function of the lens when setting up the projector

Focus

Function for adjusting the lens focus.

Zoom

Function for adjusting the lens zoom.

Shift

Function for adjusting lens shift. (Press the up/down/left/right button to shift the screen).

Image Pattern

On

Displays the image pattern in conjunction with the above setting items.

    Display


Display for 

Focus

:

    for 

Zoom

 and 

Shift

:                                              


(Picture of big green grids)                 (Picture of small green grids)

Off

Without displaying the image pattern, displays the external input signal.

Lock

On

Disables lens adjustment. 
A warning message appears when the [LENS] button on the remote control is pressed.

Off

Enables lens adjustment.

Installation > Pixel Adjust

23


Pixel Adjust

Makes ine adjustments of 1 pixel unit for each minor color shift in the horizontal/vertical direction of the image.

Horiz. Red

(Move red to left) 1 to 7 (Move red to right)

Horiz. Green

(Move green to left) 1 to 7 (Move green to right)

Horiz. Blue

(Move blue to left) 1 to 7 (Move blue to right)

Vert. Red

(Move red down) 1 to 5 (Move red up)

Vert. Green

(Move green down) 1 to 5 (Moves green up)

Vert. Blue

(Move blue down) 1 to 5 (Move blue up)


The horizontal and vertical directions are reversed when the image is lipped to the left or right, or lipped up or down.


To adjust, use still images with distinct outlines.


As the adjustments are minor, the effect may be dificult to see for some images.

Summary of Contents for DLA-RS15

Page 1: ...rie que aparece en la parte inferior lateral de la caja Conserve esta información como referencia para uso ulterior Modelo Nº DLA RS15 Nº de serie Pour utilisation par le client Entrer ci dessous le N de série qui est situé sous le boîtier Garder cette information comme référence pour le futur N de modèle DLA RS15 N de série DLA RS15 D ILA PROJECTOR INSTRUCTIONS PC007281399 0 ENGLISH FRANÇAIS ESPA...

Page 2: ... never be blocked by placing the product on bed sofa rug or similar surface It should not be placed in a built in installation such as a bookcase or rack unless proper ventilation is provided and the manufacturer s instructions have been adhered to This product has a High Intensity Discharge HID lamp that contains mercury Disposal of these materials may be regulated in your community due to enviro...

Page 3: ...hibits a distinct change in performance this indicates a need for service When replacement parts are required be sure the service technician has used replacement parts specified by the manufacturer or with same characteristics as the original part Unauthorized substitutions may result in fire electric shock or other hazards Upon completion of any service or repairs to this product ask the service ...

Page 4: ...ountry Consult your product dealer Power cord For United Kingdom For European continent countries IMPORTANT Europe only The wires in the mains lead on this product are colored in accordance with the following cord Green and yellow Earth Blue Neutral Brown Live As these colors may not correspond with the colored making identifying the terminals in your plug proceed as follows The wire which is colo...

Page 5: ... Customer This apparatus is in conformance with the valid European directives and standards regarding electromagnetic compatibility and electrical safety European representative of Victor Company of Japan Limited is JVC Technical Services Europe GmbH Postfach 10 05 04 61145 Friedberg Germany ...

Page 6: ...b des Batteriesymbols gibt an dass diese Batterie Blei enthält FRANÇAIS Informations relatives à l élimination des appareils et des piles usagés à l intention des utilisateurs Union européenne seulement Si ces symboles figurent sur les produits cela signifie qu ils ne doivent pas être jetés comme déchets ménagers Si vous voulez jeter ce produit ou cette pile veuillez considérer le système de colle...

Page 7: ...riati per il riciclaggio corretto Nota Il simbolo Pb sotto il simbolo delle batterie indica che questa batteria contiene piombo PORTUGUÊS Informação para os utilizadores acerca da eliminação de equipamento usado e pilhas Apenas União Europeia Estes símbolos indicam que o equipamento com estes símbolos não deve ser eliminado juntamente com o restante lixo doméstico Se pretende eliminar o produto ou...

Page 8: ...uolella oleva Pb merkintä tarkoittaa että akku sisältää lyijyä SVENSKA Information för användare gällande bortskaffning av gammal utrustning och batterier Endast den Europeiska unionen Dessa symboler indikerar att utrustning med dessa symboler inte ska hanteras som vanligt hushållsavfall Om du vill bortskaffa produkten eller batteriet ska du använda uppsamlingssystem eller inrättningar för lämplig...

Page 9: ...te rie znamená že tato baterie obsahuje olovo POLSKI Informacje dla użytkowników dotyczące poz bywania się zużytego sprzętu i baterii Tylko kraje Unii Europejskiej Te symbole oznaczają że sprzętu nie należy wyrzucać razem z odpadami gospodarczymi Jeśli trzeba po zbyć się tego produktu lub ba terii proszę skorzystać z systemu odbioru lub urządzeń do zbiórki odpadów elektronicznych w celu odpowiedni...

Page 10: ...nce 22 Basic Operation Projecting Image 24 Convenient Features during Projection 26 Setting the Screen Size 26 Masking the Surrounding Area of an Image 26 Settings The structure of the Settings menu 28 Setting Menu 30 Procedures for Menu Operation 30 Setting Menu 31 Customizing Projected Images 42 Changing the Initial Setting of Picture Mode 42 Registering User deined Picture Mode 43 Registering U...

Page 11: ...luded Optional Accessories Please check with your authorized dealer for details Replacement Lamp BHL5010 S Lamp Unit Replacement Filter black in appearance PB006560999 Inner Filter About this Manual Describes the limitations of the functions or usage Indicates good to know information Describes operational precautions P11 Indicates relevant pages for reference BACK TEST LIGHT ASPECT HIDE INFO HDMI...

Page 12: ...nt Remote Sensor P15 Air Inlet Lens Cover opened P24 Lens Cover closed CAUTION Do not place your fingers in the gap at the lens during lens shift adjustment This may cause injuries if your ingers are caught in between the gap P25 Do not let your ingers or other objects get caught in between the lens cover while closing the cover This can cause injuries or malfunction ...

Page 13: ...nge Lamp warning P47 Light on Red Standby mode Light on Green During projection Blinking Green Image is temporarily hidden P25 Blinking Red Cool Down mode P25 To turn on off the power To switch input P24 To hide the image temporarily P25 Right button Left button Down button To display the menu P30 To return to the previous menu Up button WARNING LAMP STANDBY ON INPUT HIDE MENU BACK OK Manual butto...

Page 14: ...COMP LENS STAND BY MENU CINEMA 3 MENU POSITION CINEMA 1 NATURAL STAGE DYNAMIC USER1 GAMMA C TEMP USER2 LENS AP PIC ADJ CINEMA 2 INPUT PICTURE MODE ON To select input mode P24 To adjust color temperature P42 To hide the image temporarily P25 To switch picture mode P42 To display information P41 Lens Aperture P42 To select or conirm To illuminate buttons on the remote control for 7 seconds To change...

Page 15: ...e Range of Remote Control Unit When directing the remote control toward this unit When aiming the remote control towards the remote sensor on this unit ensure that the distance to the sensor in front or at the rear of this unit is within 7 m If the remote control fails to work properly move closer to this unit When relecting off a screen Ensure that the total of distance A between this unit and sc...

Page 16: ...displayed depending on the devices and cables to be connected For HDMI cable sold separately only use one that is HDMI approved It may not be possible to connect to this unit depending on the dimension of the connector cover of the cables to be connected G B R SYNC S VIDEO VIDEO RS 232C TRIGGER HDMI 1 HDMI 2 Y CB PB CR PR To connect via HDMI terminal P18 To connect RS 232C terminal external contro...

Page 17: ...S VIDEO VIDEO RS 232C HDMI 1 HDMI 2 Y CB PB CR PR TRIGGER This unit To component video input terminals Component video cable sold separately BD DVD player CR PR red CB PB blue Y green Component video output terminals SYNC B R G SYNC S VIDEO RS 232C VIDEO HDMI 1 HDMI 2 Y CB PB CR PR This unit To video input terminal To S video input terminal S video cable sold separately video cable sold separately...

Page 18: ...DMI 2 Y CB PB CR PR This unit To HDMI 1 or HDMI 2 input terminal HDMI DVI conversion cable sold separately DVI output terminal Connecting Continued Notebook PC If noise is produced take PCs desktop computer away from this unit Reducing the length of the cable is recommended if there is no picture If noise is produced take PCs Notebook PC away from this unit Use only HDMI approved equipment Reducin...

Page 19: ...r information on compatible input signals see Speciications P58 RS 232C G B R SYNC S VIDEO VIDEO HDMI 1 HDMI 2 Y CB PB CR PR This unit To RGB video input terminals RGB video cable sold separately R Red B Blue G Green Includes sync signals RGB video output terminals Device equipped with RGB output RS 232C This unit BD DVD player for European market SCART terminal SCART RCA cable sold separately To ...

Page 20: ...other devices such as headphones etc Otherwise this may cause a malfunction of the other devices or injury Using beyond the rated value will cause malfunction Exercise adequate caution to prevent short circuit as the trigger terminal outputs a voltage of 12V Screen Connecting via Trigger Cable CAUTION Trigger cable sold separately To Trigger output terminal This unit Trigger input terminal Φ3 5 ...

Page 21: ... position center Up Down position Shifting range of projected image 0 left right position center Lens shift correlation chart Left Right Shift 0 5 10 15 20 25 30 34 Up Down Shift 80 74 66 57 47 34 18 0 80 34 34 80 Lens center Approximately 34 maximum of the projected image Approximately 34 maximum of the projected image Approximately 80 maximum of the projected image 1 0 1 0 1 0 1 0 Approximately ...

Page 22: ...to Approx 8 60m 70 Approx 1 78m Approx 2 09m to Approx 4 28m 150 Approx 3 81m Approx 4 53m to Approx 9 22m 80 Approx 2 03m Approx 2 40m to Approx 4 89m 160 Approx 4 06m Approx 4 84m to Approx 9 84m 90 Approx 2 29m Approx 2 70m to Approx 5 51m 170 Approx 4 32m Approx 5 14m to Approx 10 45m 100 Approx 2 54m Approx 3 01m to Approx 6 13m 180 Approx 4 57m Approx 5 45m to Approx 11 07m 110 Approx 2 79m ...

Page 23: ...ENGLISH 23 Getting Started Preparation Basic Operation Troubleshooting Settings Others MEMO ...

Page 24: ...image focus size zoom and position shift 1 Adjust the focus Adjust the image size zoom 1 Connect to this unit 2 Connect to the power outlet Light on Green Power Cord Supplied Light on Red ON 1 2 STANDBY ON STANDBY ON HDMI 1 HDMI 2 COMP Video S Video Adjust accordingly by pressing the up down buttons BACK Back Operate Select Exit MENU Focus Lens Control LENS Adjust accordingly by pressing the up do...

Page 25: ...emporarily Press the button again to display image The power cannot be turned off when the image is temporarily hidden About Cool Down mode The Cool Down mode is a function to cool down the lamp for approximately 60 seconds after projection is complete This function prevents the internal parts of the unit from deformation or damage due to overheating of the lamp It also prevents lamp blowout and p...

Page 26: ...urrounding Area of an Image Images for which quality at the outer area has deteriorated can be projected by masking hiding the surrounding area of the projected image 1 Project the image ASPECT 4 3 16 9 zoom Image for which quality at the outer area has deteriorated BACK TEST LIGHT ASPECT HIDE INFO HDMI 1 VIDEO HDMI 2 S VIDEO COMP LENS STAND BY MENU CINEMA 3 MENU POSITION CINEMA 1 NATURAL STAGE DY...

Page 27: ...mma Advanced Lens Aperture Picture Adjust Natural Reset Video S Video COMP Aspect Video Aspect Computer V stretch Picture Position Over scan Film Mode Exit MENU BACK Back Select Operate HDMI 16 9 Auto Auto Off Off Mask Off 5 Off 2 5 Input Signal 自动 Exit MENU BACK Back Select Operate Off Off 5 16 9 Video S Video COMP Aspect Video Aspect Computer V stretch Picture Position Over scan Film Mode HDMI A...

Page 28: ...f the image Setting Sharpness NR CTI Clear Motion Drive 09 Lens Aperture Sets the lens aperture Setting 1 2 3 10 Reset Reset the setting Input Signal 11 HDMI Conigures HDMI input signal Setting Input Color Space Control with HDMI 12 COMP Conigures the input signal for the component video input terminals Setting Y Pb Cb Pr Cr RGB SCART 13 Video S Video Conigures the Video S Video input signals Sett...

Page 29: ...ssible positions for displaying the menu are at the four corners or at center of the screen 28 Menu Display Sets the duration for displaying the menu Setting 15sec On 29 Line Display Sets whether to display the input setting when switching the input Setting 5 sec Off 30 Source Display Sets whether to display the source of input signals when changing the input Setting On Off 31 Logo Sets whether to...

Page 30: ...eset 4 3 4 3 16 9 Zoom Exit MENU BACK Back Select Operate Off Off 5 Video S Video COMP Aspect Computer Aspect Video V stretch Picture Position Over scan Film Mode HDMI Auto Auto Mask Input Signal 4 3 16 9 16 9 Zoom Exit MENU BACK Back Select Operate Off Off 5 Video S Video COMP Aspect Computer Aspect Video V stretch Picture Position Over scan Film Mode HDMI Auto Auto Mask Input Signal 1 Select 2 C...

Page 31: ...ors Cinema 3 This is the picture setting that gives a cool tone It is best suited for viewing animated movies and science iction movies Natural This is the picture setting for natural hues and tones It is best suited for viewing dramas and video Stage This is the picture setting best suited for watching live concerts and stage performances Dynamic This is the picture setting best suited for viewin...

Page 32: ...to 50 More green Blue Less blue 50 to 50 More blue Custom 2 Correction Value Based on this selection of Correction Value 5800K 6500K 7500K 9300K H B adjusts the following Gains and Offsets Gain Bright part Red Less red 50 to 50 More red Green Less green 50 to 50 More green Blue Less blue 50 to 50 More blue Offset Dark part Red Less red 50 to 50 More red Green Less green 50 to 50 More green Blue Le...

Page 33: ...itable for normal circumstances but other settings can be selected according to your preferences This setting can also be conigured from the remote control P14 Gamma Adjustment 1 Select the reference gamma curve coeficient 1 8 2 6 in Correction Value 2 Select the color to be adjusted in the gamma adjustment screen 3 Adjust the gamma curve in the gamma curve adjustment screen 4 To end If gamma curv...

Page 34: ...ttle residual image Soft Strong 09 Lens Aperture Lens Aperture 1 Dark 2 Medium 3 Bright 10 Reset Reset the setting In case of HD signals or PC signals NR and CTI cannot be set With regard to Clear Motion Drive it is not possible to set the PC signal Furthermore depending on the scene the picture may become abnormal In this case please select off Abbreviations NR Noise Reduction RNR Random Noise Re...

Page 35: ...Conigures the input signal for the component video input terminals Color Space Y Pb Cb Pr Cr Select this when the component video signals are input RGB Select this when the RGB video signals are input SCART Select this when RGB video signals and sync signals are input via the SCART interface for European markets The setting is available only if the component video terminals are selected Input Sign...

Page 36: ...pixel ratio The PC screen can be shown in the original size Full Enlarges the PC signal horizontally vertically This setting can also be conigured from the remote control P14 This setting cannot be set in the case of SD or HD signals Input Signal V Stretch when HD or SD video signals are input 16 V Stretch When set to On the projected 2 35 1 image will be stretched vertically to the panel resoluti...

Page 37: ...5 of the screen Off No masking Masking is available only when high deinition images are input Input Signal Film Mode 20 Film Mode Selects this to view movies shot on ilm Auto After determining if the picture is 24 frame ilm or 60 frames 50 frames video changes the setting to the optimal progressive conversion Film Corrects unnatural movement of material pulldown processed from 24 frames to 60 fram...

Page 38: ...ed to left 1 to 7 Move red to right Horiz Green Move green to left 1 to 7 Move green to right Horiz Blue Move blue to left 1 to 7 Move blue to right Vert Red Move red down 1 to 5 Move red up Vert Green Move green down 1 to 5 Moves green up Vert Blue Move blue down 1 to 5 Move blue up The horizontal and vertical directions are reversed when the image is lipped to the left or right or lipped up or d...

Page 39: ...enu Position 27 Menu Position Sets the display position of the menu The possible positions for displaying the menu are at the four corners or at center of the screen This can also be displayed by the remote control P14 Display Setup Menu Display 28 Menu Display Sets the duration for displaying the menu 15 sec Display for 15 seconds On Always display Display Setup Line Display 29 Line Display Sets ...

Page 40: ...nces select this setting 150W High Select this when it is dificult to see the image in a bright room 200W The setting cannot be changed within approximately 90 seconds after this unit has been turned on Settings cannot be changed within approximately 60 seconds after they are made Function Trigger 34 Trigger Conigures the output of Trigger terminal Off Do not activate On Power Move the screen UP D...

Page 41: ...ric pressure higher than 900 meters above sea level On Enable Off Disable Information Input Displays the currently selected video input Source Displays the type of the current video input signal If PC signal is input this item cannot be displayed Resolution In the case of PC signal the resolution is displayed H Frequency In the case of PC signal the horizontal frequency is displayed V Frequency In...

Page 42: ...ample To adjust Contrast 1 Display the setting menu 2 Select Picture Adjust Contrast 3 Adjust the setting 4 To end the adjustments 3 Other items can also be adjusted To end CINEMA 3 CINEMA 1 NATURAL STAGE DYNAMIC CINEMA 2 Contrast 0 Exit MENU BACK Back Select Operate 6500K 2 0 0 0 0 Picture Mode Contrast Brightness Color Tint Color Temp Gamma Advanced Lens Aperture Picture Adjust Reset Natural Nor...

Page 43: ...the Initial Setting of Picture Mode for procedures on adjusting the picture quality P42 2 Display the setting menu 3 Select Picture Adjust Picture Mode Natural Register the setting Exit MENU BACK Back Select Operate 6500K 2 Normal 0 0 0 0 Picture Mode Contrast Brightness Color Tint Color Temp Gamma Advanced Lens Aperture Picture Adjust Natural Reset Cinemaˎ Cinemaˍ Stage Dynamic Userˍ Userˎ Cinema...

Page 44: ...that insert the plug again P12 to 13 Is the ilter dirty Clean the ilter P51 Video image does not appear Is the correct external input selected Select the correct external input P24 Is the AV device properly connected Connect the AV device properly P16 to 20 Is the power of the AV device turned on Turn on the power of the AV device and play the video P24 Are the correct signals being output from th...

Page 45: ...rrect distance from the screen P21 to 22 Video images are missing Has setting been performed for screen mask Set Mask in the setting menu to Off P27 37 19 Is the display out of position Alter the Picture Position value in the setting menu to ensure that images are not missing P36 17 Remote control does not work Are batteries installed correctly Match the polarities or correctly when inserting the ...

Page 46: ... cannot be used in this unit has been input Input video signals that can be used The names of input terminals such as COMP will be displayed in yellow This message is displayed when the accumulated lamp time has exceeded 2900 hours To clear the message press the Back button Get ready a new lamp unit and replace as soon as possible Reset the lamp time after replacing the lamp P48 to 50 COMP No Inpu...

Page 47: ...second 3 times 0 75 second Internal temperature is too high abnormal internal temperature 13 0 25 second 4 times 0 75 second External temperature is too high abnormal external temperature 14 0 25 second 1 time 0 75 second Abnormal electrical circuit abnormal startup of drive circuit Blinking orange 15 0 25 second 2 times 0 75 second Abnormal electrical circuit abnormal communication of the drive c...

Page 48: ...ses rapidly If the picture becomes dark the tint becomes strange or the image lickers promptly the lamp unit for a new one Purchasing the Lamp Unit Loosen the screws on the lamp unit Loosen the screws with a screwdriver Please consult your authorized dealer Lamp Unit Part No BHL5010 S Pull out the lamp unit Grasp the handle and pull out the lamp unit Procedure for Lamp Replacement MEMO CAUTION Pul...

Page 49: ... touch the surface of a new lamp This may shorten the lamp life and cause lamp blowout Tighten the screws of the new lamp unit Tighten the screws with a screwdriver Do not place the removed lamp unit at locations that is reachable by children or near combustible items Dispose used lamp units in the same way as luorescent lamps Follow your local community rules for disposal Attach the lamp cover In...

Page 50: ...er that the unit switches to standby mode Replacing the Lamp Continued Resetting Lamp Time WARNING LAMP STANDBY ON Reset the lamp time only when you have replaced the lamp Never reset the service time when the lamp is still in use Otherwise the approximate standard for gauging replacement time may be inaccurate and lamp blowout may occur Light on Red CAUTION BACK TEST LIGHT ASPECT HIDE INFO HDMI 1...

Page 51: ...neutral detergent After washing the ilter with water make sure that it is completely dry before reinstalling Otherwise electric shock or malfunctions may occur Do not clean the ilter with a vacuum cleaner or air duster The ilter is soft and may be damaged Replace with a new ilter A dirty ilter will dirty the internal parts of the unit and cause shadows on the video image To purchase a new ilter or...

Page 52: ... start of communication Binary code Type Description 21 Operating command PC This unit 3F Reference command PC This unit 40 Response command This unit PC 06 ACK This unit PC When the command is accepted without error it returns to PC Unit ID This code speciies the unit The binary code is ixed at 8901 RS 232C Speciications Pin No Signal Function Signal Direction 2 RxD Receive data PC This unit 3 Tx...

Page 53: ...on 30 Turn off the power Standby mode 4950 Input During power on 30 S VIDEO 31 VIDEO 32 COMP 36 HDMI 1 37 HDMI 2 5243 Remote Control Sends the same code as the supplied remote control Remote control code P54 Reference command and data Binary code Command Type Data description 5057 Power supply During standby or power on 30 Standby mode 31 Power on mode 32 During Cool Down mode 34 Warning mode 4950...

Page 54: ...ON 37 33 30 35 CINEMA 2 37 33 36 38 STAND BY 37 33 30 36 CINEMA 1 37 33 36 39 HIDE 37 33 31 44 NATURAL 37 33 36 41 LENS AP 37 33 32 30 DYNAMIC 37 33 36 42 MENU 37 33 32 45 USER 1 37 33 36 43 OK 37 33 32 46 USER 2 37 33 36 44 LENS 37 33 33 30 HDMI 1 37 33 37 30 37 33 33 34 HDMI 2 37 33 37 31 37 33 33 36 PIC ADJ 37 33 37 32 MENU POSITION 37 33 34 32 INFO 37 33 37 34 VIDEO 37 33 34 41 GAMMA 37 33 37 ...

Page 55: ...57 0A When power is turned off standby mode from power on mode Input COMP PC This unit 21 89 01 49 50 32 0A This unit PC 06 89 01 49 50 0A When video input is set to component Remote Control MENU PC This unit 21 89 01 52 43 37 33 32 45 0A This unit PC 06 89 01 52 43 0A When the same operation as pressing the MENU button on the remote control is made Reference command Type Command Description Power...

Page 56: ...r to suck up the dirt Otherwise use a cloth to wipe off the dirt If dirt is allowed to accumulate in the air inlets the internal temperature cannot be adjusted and this may cause a malfunction Dirt on the lens Clean the dirt using commercial blowers or lens cleaning papers for cleaning glasses and cameras Do not use luid type cleaning agents This may lead to peeling of the surface coating ilm P13 ...

Page 57: ...ew length is 23 mm Use screws shorter than 23 mm but longer than 13 mm Using other screws will result in malfunctioning or cause the unit to drop When mounting to a pedestal ensure suficient space foot height of 10 mm or higher around the unit so that the air inlets are not blocked Do not tilt this unit more than 5 degrees from side to side when using Regardless whether the unit is still under gua...

Page 58: ...OMPONENT 1 line RCA pin jack x 3 Y 1 0V p p 75Ω CB PB CR PR 0 7V p p 75Ω HDMI Input HDMI 1 HDMI 2 2 line HDMI 19 pin x 2 HDCP compliant 3 Compatible with the HDMIv1 3a standard Trigger Output 12V 100mA Power Requirements AC 110V 240V 50 60 Hz Power Consumption 310 W Standby mode 0 7 W Operation Environment Temperature 5 to 35 Humidity 20 to 80 No condensation Storage Temperature 10 to 60 Installat...

Page 59: ...40 000 1 056 628 800 600 4 XGA 60 1024 X 768 48 363 60 004 65 000 1 344 806 1 024 768 5 WXGA 60 1280 X 768 47 760 60 000 79 998 1 675 796 1 280 768 6 WXGA 60 1440 X 900 55 919 59 999 106 470 1 904 932 1 440 900 7 SXGA 60 1280X1024 63 981 60 020 108 000 1 688 1 066 1 280 1 024 8 WSXGA 60 1680X1050 65 222 60 002 147 140 2 256 1 087 1 680 1 050 9 WUXGA 60 1920X1200 74 038 59 95 154 000 2 080 1 235 1 ...

Page 60: ...tings Page 28 Caution Page 2 Ceiling Mount Page 2 57 Settings Menu Structure Page 28 Projection Distance Distance Chart Page 22 Input Signal PC Compatibility Page 59 Video Compatibility Page 58 Filter Air Intake Filter Page 13 Replacement Filter Number Page 11 51 Cleaning and Replacement Page 51 Focus Adjustment Page 24 Message Meaning Page 46 Lamp Replacement Page 48 Replacement Lamp Number Page ...

Page 61: ...1108TTH AO AO 2009 Victor Company of Japan Limited DLA RS15 D ILA PROJECTOR PROYECTOR D ILA PROJECTEUR D ILA ...

Page 62: ...rie que aparece en la parte inferior lateral de la caja Conserve esta información como referencia para uso ulterior Modelo Nº DLA RS25 Nº de serie Pour utilisation par le client Entrer ci dessous le N de série qui est situé sous le boîtier Garder cette information comme référence pour le futur N de modèle DLA RS25 N de série DLA RS25 D ILA PROJECTOR INSTRUCTIONS PC007182799 0 ENGLISH FRANÇAIS ESPA...

Page 63: ... never be blocked by placing the product on bed sofa rug or similar surface It should not be placed in a built in installation such as a bookcase or rack unless proper ventilation is provided and the manufacturer s instructions have been adhered to This product has a High Intensity Discharge HID lamp that contains mercury Disposal of these materials may be regulated in your community due to enviro...

Page 64: ...bits a distinct change in performance this indicates a need for service When replacement parts are required be sure the service technician has used replacement parts specified by the manufacturer or with same characteristics as the original part Unauthorized substitutions may result in fire electric shock or other hazards Upon completion of any service or repairs to this product ask the service te...

Page 65: ...on this product are colored in accordance with the following cord Green and yellow Earth Blue Neutral Brown Live As these colors may not correspond with the colored making identifying the terminals in your plug proceed as follows The wire which is colored green and yellow must be connected to the terminal which is marked M with the letter E or the safety earth or colored green or green and yellow ...

Page 66: ...t Hinweis Das Zeichen Pb unterhalb des Batteriesymbols gibt an dass diese Batterie Blei enthält FRANÇAIS Informations relatives à l élimination des appareils et des piles usagés à l intention des utilisateurs Union européenne seulement Si ces symboles figurent sur les produits cela signifie qu ils ne doivent pas être jetés comme déchets ménagers Si vous voulez jeter ce produit ou cette pile veuill...

Page 67: ... Nota Il simbolo Pb sotto il simbolo delle batterie indica che questa batteria contiene piombo PORTUGUÊS Informação para os utilizadores acerca da eliminação de equipamento usado e pilhas Apenas União Europeia Estes símbolos indicam que o equipamento com estes símbolos não deve ser eliminado juntamente com o restante lixo doméstico Se pretende eliminar o produto ou a pilha utilize os sistemas de r...

Page 68: ...kkoja Huomautus Akkusymbolin alapuolella oleva Pb merkintä tarkoittaa että akku sisältää lyijyä SVENSKA Information för användare gällande bortskaffning av gammal utrustning och batterier Endast den Europeiska unionen Dessa symboler indikerar att utrustning med dessa symboler inte ska hanteras som vanligt hushållsavfall Om du vill bortskaffa produkten eller batteriet ska du använda uppsamlingssyst...

Page 69: ...sahuje olovo POLSKI Informacje dla użytkowników dotyczące poz bywania się zużytego sprzętu i baterii Tylko kraje Unii Europejskiej Te symbole oznaczają że sprzętu nie należy wyrzucać razem z odpadami gospodarczymi Jeśli trzeba po zbyć się tego produktu lub ba terii proszę skorzystać z systemu odbioru lub urządzeń do zbiórki odpadów elektronicznych w celu odpowiedniego ponowne go ich przetworzenia ...

Page 70: ...or and luminance levels In addition THX has created a battery of signal processing tests that challenge the projector s scaling motion conversion and de interlacing capabilities This type of in depth analysis predicts how the projector will present a variety of high definition and standard definition content The JVC projector also features THX Movie Mode a pre calibrated video setting for watching...

Page 71: ...Screen Size and Projection Distance 22 Basic Operation Projecting Image 24 Convenient Features during Projection 26 Setting the Screen Size 26 Masking the Surrounding Area of an Image 26 Settings The structure of the Settings menu 28 Setting Menu 30 Procedures for Menu Operation 30 Setting Menu 31 Customizing Projected Images 42 Changing the Initial Setting of Picture Mode 42 Registering User dein...

Page 72: ...cluded Optional Accessories Please check with your authorized dealer for details Replacement Lamp BHL5010 S Lamp Unit Replacement Filter black in appearance PB006560999 Inner Filter About this Manual Describes the limitations of the functions or usage Indicates good to know information Describes operational precautions P11 Indicates relevant pages for reference BACK TEST LIGHT ASPECT HIDE PC HDMI ...

Page 73: ...nt Remote Sensor P15 Air Inlet Lens Cover opened P24 Lens Cover closed CAUTION Do not place your fingers in the gap at the lens during lens shift adjustment This may cause injuries if your ingers are caught in between the gap P25 Do not let your ingers or other objects get caught in between the lens cover while closing the cover This can cause injuries or malfunction ...

Page 74: ...nge Lamp warning P47 Light on Red Standby mode Light on Green During projection Blinking Green Image is temporarily hidden P25 Blinking Red Cool Down mode P25 To turn on off the power To switch input P24 To hide the image temporarily P25 Right button Left button Down button To display the menu P30 To return to the previous menu Up button WARNING LAMP STANDBY ON INPUT HIDE MENU BACK OK Manual butto...

Page 75: ...T HIDE PC HDMI 1 VIDEO HDMI 2 S VIDEO COMP LENS STAND BY MENU CINEMA 3 GAMMA C TEMP USER2 THX LENS AP PIC ADJ PICTURE MODE INPUT CINEMA 1 CINEMA 2 NATURAL STAGE DYNAMIC USER1 ON To select input mode P24 To adjust color temperature P42 To hide the image temporarily P25 To switch picture mode P42 Lens Aperture P42 To select or conirm To illuminate buttons on the remote control for 7 seconds To switc...

Page 76: ...e Range of Remote Control Unit When directing the remote control toward this unit When aiming the remote control towards the remote sensor on this unit ensure that the distance to the sensor in front or at the rear of this unit is within 7 m If the remote control fails to work properly move closer to this unit When relecting off a screen Ensure that the total of distance A between this unit and sc...

Page 77: ... images may not be displayed depending on the devices and cables to be connected For HDMI cable sold separately only use one that is HDMI approved It may not be possible to connect to this unit depending on the dimension of the connector cover of the cables to be connected To connect via HDMI terminal P18 To connect RS 232C terminal external control P52 To connect via component video terminals P17...

Page 78: ...36 12 Connecting via Video Cable and S Video Cable SYNC This unit To component video input terminals Component video cable sold separately BD DVD player CR PR red CB PB blue Y green Component video output terminals SYNC This unit To video input terminal To S video input terminal S video cable sold separately video cable sold separately Video output S video output VCR and camcorder ...

Page 79: ...ut terminal HDMI DVI conversion cable sold separately DVI output terminal Connecting Continued Notebook PC If noise is produced take PCs desktop computer away from this unit Reducing the length of the cable is recommended if there is no picture If noise is produced take PCs Notebook PC away from this unit Use only HDMI approved equipment Reducing the length of the cable is recommended if there is ...

Page 80: ... the setting menu to RGB P36 12 For information on compatible input signals see Speciications P58 This unit To RGB video input terminals RGB video cable sold separately R Red B Blue G Green Includes sync signals RGB video output terminals Device equipped with RGB output RS 232C This unit BD DVD player for European market SCART terminal SCART RCA cable sold separately To RGB video and sync signal i...

Page 81: ... value will cause malfunction Exercise adequate caution to prevent short circuit as the trigger terminal outputs a voltage of 12V Screen Connecting via Trigger Cable CAUTION Trigger cable sold separately To Trigger output terminal This unit Trigger input terminal Φ3 5 To PC input terminal PC cable sold separately VGA output terminal Notebook PC Connecting via PC Cable This unit For information on ...

Page 82: ... position center Up Down position Shifting range of projected image 0 left right position center Lens shift correlation chart Left Right Shift 0 5 10 15 20 25 30 34 Up Down Shift 80 74 66 57 47 34 18 0 Approximately 34 maximum of the projected image Approximately 34 maximum of the projected image Approximately 80 maximum of the projected image 1 0 1 0 1 0 1 0 Approximately 80 maximum of the projec...

Page 83: ...to Approx 8 60m 70 Approx 1 78m Approx 2 09m to Approx 4 28m 150 Approx 3 81m Approx 4 53m to Approx 9 22m 80 Approx 2 03m Approx 2 40m to Approx 4 89m 160 Approx 4 06m Approx 4 84m to Approx 9 84m 90 Approx 2 29m Approx 2 70m to Approx 5 51m 170 Approx 4 32m Approx 5 14m to Approx 10 45m 100 Approx 2 54m Approx 3 01m to Approx 6 13m 180 Approx 4 57m Approx 5 45m to Approx 11 07m 110 Approx 2 79m ...

Page 84: ...ENGLISH 23 Getting Started Preparation Basic Operation Troubleshooting Settings Others MEMO ...

Page 85: ...sts image focus size zoom and position shift 1 Adjust the focus Adjust the image size zoom 1 Connect to this unit 2 Connect to the power outlet Light on Green Power Cord Supplied Light on Red ON BACK TEST LIGHT ASPECT HIDE PC HDMI 1 VIDEO HDMI 2 S VIDEO COMP LENS STAND BY MENU CINEMA 3 GAMMA C TEMP USER2 THX LENS AP PIC ADJ PICTURE MODE INPUT CINEMA 1 CINEMA 2 NATURAL STAGE DYNAMIC USER1 ON 1 2 ST...

Page 86: ... button again to display image The power cannot be turned off when the image is temporarily hidden About Cool Down mode The Cool Down mode is a function to cool down the lamp for approximately 60 seconds after projection is complete This function prevents the internal parts of the unit from deformation or damage due to overheating of the lamp It also prevents lamp blowout and premature shortening ...

Page 87: ... the Surrounding Area of an Image Images for which quality at the outer area has deteriorated can be projected by masking hiding the surrounding area of the projected image 1 Project the image ASPECT 4 3 16 9 zoom Image for which quality at the outer area has deteriorated BACK TEST LIGHT ASPECT HIDE PC HDMI 1 VIDEO HDMI 2 S VIDEO COMP LENS STAND BY MENU CINEMA 3 GAMMA C TEMP USER2 THX LENS AP PIC ...

Page 88: ...r Temp Gamma Advanced Lens Aperture Picture Adjust Natural Reset 0 Video S Video COMP Picture Position Exit MENU BACK Back Select Operate HDMI Film Mode Auto Over scan Off Aspect Video Aspect Computer V stretch 16 9 Auto Off Mask Off 5 Off 2 5 Input Signal PC Exit MENU BACK Back Select Operate Video S Video COMP Off 16 9 Aspect Video Aspect Computer V stretch Picture Position HDMI Auto 自动 Input Si...

Page 89: ...ement Clear Motion Drive 09 Lens Aperture Sets the lens aperture Setting 15 to 0 10 Reset Reset the setting Input Signal 11 HDMI Conigures HDMI input signal Setting Input Color Space Control with HDMI 12 COMP Conigures the input signal for the component video input terminals Setting Y Pb Cb Pr Cr RGB SCART 13 Video S Video Conigures the Video S Video input signals Setting NTSC Setup Level Color Sy...

Page 90: ...ssible positions for displaying the menu are at the four corners or at center of the screen 29 Menu Display Sets the duration for displaying the menu Setting 15sec On 30 Line Display Sets whether to display the input setting when switching the input Setting 5 sec Off 31 Source Display Sets whether to display the source of input signals when changing the input Setting On Off 32 Logo Sets whether to...

Page 91: ...tural Reset 0 Zoom Exit MENU BACK Back Select Operate Video S Video COMP Picture Position HDMI Off 5 Over scan Film Mode Auto Mask Input Signal 4 3 4 3 16 9 Off Aspect Computer Aspect Video V stretch Auto PC 4 3 16 9 16 9 Zoom Exit MENU BACK Back Select Operate Off Off 5 Video S Video COMP Aspect Computer Aspect Video V stretch Picture Position Over scan Film Mode HDMI Auto Auto Mask Input Signal ...

Page 92: ... picture setting that gives a cool tone It is best suited for viewing animated movies and science iction movies Natural This is the picture setting for natural hues and tones It is best suited for viewing dramas and video Stage This is the picture setting best suited for watching live concerts and stage performances Dynamic This is the picture setting best suited for viewing the picture in a room ...

Page 93: ...Green Less green 50 to 50 More green Blue Less blue 50 to 50 More blue Custom 2 Correction Value Based on this selection of Correction Value 5800K 6500K 7500K 9300K H B adjusts the following Gains and Offsets Gain Bright part Red Less red 50 to 50 More red Green Less green 50 to 50 More green Blue Less blue 50 to 50 More blue Offset Dark part Red Less red 50 to 50 More red Green Less green 50 to 5...

Page 94: ...ngs can be selected according to your preferences This setting can also be conigured from the remote control P14 Gamma Adjustment 1 Select the reference gamma curve coeficient 1 8 2 6 in Correction Value 2 Select the color to be adjusted in the gamma adjustment screen 3 Adjust the gamma curve in the gamma curve adjustment screen 4 To end If gamma curve is adjusted repeatedly calculation errors wil...

Page 95: ...I Color Transient Improvement Color Management Off The image color cannot be adjusted Custom 1 Custom 2 Custom 3 Pause Off Video mode On Still mode Color Management Adjustment Values of each color can be adjusted Red Yellow Green Cyan Blue and Magenta All Reset Return to the factory settings Clear Motion Drive Off For movies when set to 1080p24Hz image or 21 ilm mode it improves fast moving pictur...

Page 96: ...is when the dynamic range of the input images is 0 255 Color Space Auto Automatically conigures the input signals YCbCr 4 4 4 Select this when the Y Cb Cr 4 4 4 video signals are input YCbCr 4 2 2 Select this when the Y Cb Cr 4 2 2 video signals are input RGB Select this when the RGB video signals are input Control with HDMI On Enables CEC communications Off Disables CEC communications The setting...

Page 97: ...e color system is NTSC4 43 PAL Select this when the color system is PAL PAL M Select this when the color system is PAL M PAL N Select this when the color system is PAL N SECAM Select this when the color system is SECAM The setting is available only when the Video or S Video input image is projected Input Signal PC 14 PC Conigures PC input Auto Alignment Automatically adjusts Tracking Phase and Pic...

Page 98: ...signal corresponding to the panel at one dot per pixel ratio The PC screen can be shown in the original size Full Enlarges the PC signal horizontally vertically This setting can also be conigured from the remote control P14 This setting cannot be set in the case of SD or HD signals Input Signal V Stretch when HD or SD video signals are input 18 V Stretch When set to On the projected 2 35 1 image w...

Page 99: ...ift Function for adjusting lens shift Press the up down left right button to shift the screen Image Pattern On Displays the image pattern in conjunction with the above setting items Display Display for Focus for Zoom and Shift Picture of big green grids Picture of small green grids Off Without displaying the image pattern displays the external input signal Lock On Disables lens adjustment A warnin...

Page 100: ...nsated P21 Installation Screen Adjust 26 Screen Adjust Corrects skewed white balance derived from the relective characteristics of the screen MODE Off Makes no correction Normally set to off A Corrects to slightly reddish B Corrects to slightly greenish C Corrects to slightly bluish Display Setup Back Color 27 Back Color Conigures the screen color displayed when there is no input signal Blue Sets ...

Page 101: ...onds Off Do not display Display Setup Language 33 Language Sets the language of the menu display Japanese English English Deutsch German Español Spanish Italiano Italian Français French Português Portuguese Nederlands Dutch Svenska Swedish Norsk Norwegian Русский Russian Chinese Function Lamp Power 34 Lamp Power Conigures the output of the light source lamp Normal For normal circumstances select t...

Page 102: ...o power off after 2 hours 3 hours Auto power off after 3 hours 4 hours Auto power off after 4 hours Function High Altitude Mode 38 High Altitude Mode Selects this when using the projector in a location of low atmospheric pressure higher than 900 meters above sea level On Enable Off Disable Information Input Displays the currently selected video input Source Displays the type of the current video i...

Page 103: ...ality Example To adjust Contrast 1 Display the setting menu 2 Select Picture Adjust Contrast 3 Adjust the setting 4 To end the adjustments 3 Other items can also be adjusted To end CINEMA 3 CINEMA 1 NATURAL STAGE DYNAMIC CINEMA 2 Contrast 0 Exit MENU BACK Back Select Operate 6500K 0 0 0 0 Picture Mode Contrast Brightness Color Tint Color Temp Gamma Advanced Lens Aperture Picture Adjust Reset Natur...

Page 104: ...e Initial Setting of Picture Mode for procedures on adjusting the picture quality P42 2 Display the setting menu 3 Select Picture Adjust Picture Mode Natural Register the setting Exit MENU BACK Back Select Operate 6500K Normal 0 0 0 0 Picture Mode Contrast Brightness Color Tint Color Temp Gamma Advanced Lens Aperture Picture Adjust Natural Reset Cinemaˎ Cinemaˍ Stage Dynamic Userˍ Userˎ THX Cinema...

Page 105: ...at insert the plug again P12 to 13 Is the ilter dirty Clean the ilter P51 Video image does not appear Is the correct external input selected Select the correct external input P24 Is the AV device properly connected Connect the AV device properly P16 to 20 Is the power of the AV device turned on Turn on the power of the AV device and play the video P24 Are the correct signals being output from the ...

Page 106: ...rrect distance from the screen P21 to 22 Video images are missing Has setting been performed for screen mask Set Mask in the setting menu to Off P27 38 20 Is the display out of position Alter the Picture Position value in the setting menu to ensure that images are not missing P36 15 Remote control does not work Are batteries installed correctly Match the polarities or correctly when inserting the ...

Page 107: ... cannot be used in this unit has been input Input video signals that can be used The names of input terminals such as COMP will be displayed in yellow This message is displayed when the accumulated lamp time has exceeded 2900 hours To clear the message press the Back button Get ready a new lamp unit and replace as soon as possible Reset the lamp time after replacing the lamp P48 to 50 COMP No Inpu...

Page 108: ...second 3 times 0 75 second Internal temperature is too high abnormal internal temperature 13 0 25 second 4 times 0 75 second External temperature is too high abnormal external temperature 14 0 25 second 1 time 0 75 second Abnormal electrical circuit abnormal startup of drive circuit Blinking orange 15 0 25 second 2 times 0 75 second Abnormal electrical circuit abnormal communication of the drive c...

Page 109: ...es rapidly If the picture becomes dark the tint becomes strange or the image lickers promptly the lamp unit for a new one Purchasing the Lamp Unit Loosen the screws on the lamp unit Loosen the screws with a screwdriver Please consult your authorized dealer Lamp Unit Part No BHL5010 S Pull out the lamp unit Grasp the handle and pull out the lamp unit Procedure for Lamp Replacement MEMO CAUTION Pull...

Page 110: ... touch the surface of a new lamp This may shorten the lamp life and cause lamp blowout Tighten the screws of the new lamp unit Tighten the screws with a screwdriver Do not place the removed lamp unit at locations that is reachable by children or near combustible items Dispose used lamp units in the same way as luorescent lamps Follow your local community rules for disposal Attach the lamp cover In...

Page 111: ...ds After that the unit switches to standby mode Replacing the Lamp Continued BACK TEST LIGHT ASPECT HIDE PC HDMI 1 VIDEO HDMI 2 S VIDEO COMP LENS STAND BY MENU CINEMA 3 GAMMA C TEMP USER2 THX LENS AP PIC ADJ PICTURE MODE INPUT CINEMA 1 CINEMA 2 NATURAL STAGE DYNAMIC USER1 ON Resetting Lamp Time WARNING LAMP STANDBY ON Reset the lamp time only when you have replaced the lamp Never reset the service...

Page 112: ...neutral detergent After washing the ilter with water make sure that it is completely dry before reinstalling Otherwise electric shock or malfunctions may occur Do not clean the ilter with a vacuum cleaner or air duster The ilter is soft and may be damaged Replace with a new ilter A dirty ilter will dirty the internal parts of the unit and cause shadows on the video image To purchase a new ilter or...

Page 113: ... start of communication Binary code Type Description 21 Operating command PC This unit 3F Reference command PC This unit 40 Response command This unit PC 06 ACK This unit PC When the command is accepted without error it returns to PC Unit ID This code speciies the unit The binary code is ixed at 8901 RS 232C Speciications Pin No Signal Function Signal Direction 2 RxD Receive data PC This unit 3 Tx...

Page 114: ...0 Turn off the power Standby mode 4950 Input During power on 30 S VIDEO 31 VIDEO 32 COMP 33 VGA 36 HDMI 1 37 HDMI 2 5243 Remote Control Sends the same code as the supplied remote control Remote control code P54 Reference command and data Binary code Command Type Data description 5057 Power supply During standby or power on 30 Standby mode 31 Power on mode 32 During Cool Down mode 34 Warning mode 4...

Page 115: ...3 30 35 CINEMA 2 37 33 36 38 STAND BY 37 33 30 36 CINEMA 1 37 33 36 39 HIDE 37 33 31 44 NATURAL 37 33 36 41 LENS AP 37 33 32 30 DYNAMIC 37 33 36 42 MENU 37 33 32 45 USER 1 37 33 36 43 OK 37 33 32 46 USER 2 37 33 36 44 LENS 37 33 33 30 THX 37 33 36 45 37 33 33 34 HDMI 1 37 33 37 30 37 33 33 36 HDMI 2 37 33 37 31 MENU POSITION 37 33 34 32 PIC ADJ 37 33 37 32 PC 37 33 34 36 GAMMA 37 33 37 35 VIDEO 37...

Page 116: ...57 0A When power is turned off standby mode from power on mode Input COMP PC This unit 21 89 01 49 50 32 0A This unit PC 06 89 01 49 50 0A When video input is set to component Remote Control MENU PC This unit 21 89 01 52 43 37 33 32 45 0A This unit PC 06 89 01 52 43 0A When the same operation as pressing the MENU button on the remote control is made Reference command Type Command Description Power...

Page 117: ...r to suck up the dirt Otherwise use a cloth to wipe off the dirt If dirt is allowed to accumulate in the air inlets the internal temperature cannot be adjusted and this may cause a malfunction Dirt on the lens Clean the dirt using commercial blowers or lens cleaning papers for cleaning glasses and cameras Do not use luid type cleaning agents This may lead to peeling of the surface coating ilm P13 ...

Page 118: ...crew length is 23 mm Use screws shorter than 23 mm but longer than 13 mm Using other screws will result in malfunctioning or cause the unit to drop When mounting to a pedestal ensure suficient space foot height of 10 mm or higher around the unit so that the air inlets are not blocked Do not tilt this unit more than 5 degrees from side to side when using Regardless whether the unit is still under g...

Page 119: ...ONENT 1 line RCA pin jack x 3 Y 1 0V p p 75Ω CB PB CR PR 0 7V p p 75Ω HDMI Input HDMI 1 HDMI 2 2 line HDMI 19 pin x 2 HDCP compliant 3 Compatible with the HDMIv1 3a standard PC Input 1 line D Sub 15 pin VGA Trigger Output 12V 100mA Power Requirements AC 110V 240V 50 60 Hz Power Consumption 310W Standby mode 0 7W Operation Environment Temperature 5 to 35 Humidity 20 to 80 No condensation Storage Te...

Page 120: ... 525 640 480 2 VGA 72 640 X 480 37 900 72 000 31 500 832 520 640 480 3 VGA 75 640 X 480 37 500 75 000 31 500 840 500 640 480 4 VGA 85 640 X 480 43 300 85 000 36 000 832 509 640 480 5 SVGA 56 800 X 600 35 200 56 000 36 000 1024 625 800 600 6 SVGA 60 800 X 600 37 900 60 000 40 000 1056 628 800 600 7 SVGA 72 800 X 600 48 100 72 000 50 000 1040 666 800 600 8 SVGA 75 800 X 600 46 900 75 000 49 500 1056...

Page 121: ...6 Others 60 Speciications Continued 365 236 64 5 225 4 Φ42 12 95 167 297 477 5 90 6 42 5 105 198 Lens center Lamp cover Unit mm Top Surface Bottom Surface Front Dimensions Back Surface ...

Page 122: ...Page 24 Installation Angle Page 21 Settings Page 28 Caution Page 2 Ceiling Mount Page 2 57 Settings Menu Structure Page 28 Projection Distance Distance Chart Page 22 Input Signal PC Compatibility Page 59 Video Compatibility Page 58 Filter Air Intake Filter Page 13 Replacement Filter Number Page 11 51 Cleaning and Replacement Page 51 Focus Adjustment Page 24 Message Meaning Page 46 Lamp Replacement...

Page 123: ...1108TTH AO AO 2009 Victor Company of Japan Limited DLA RS25 D ILA PROJECTOR PROYECTOR D ILA PROJECTEUR D ILA ...

Page 124: ...rie que aparece en la parte inferior lateral de la caja Conserve esta información como referencia para uso ulterior Modelo Nº DLA RS35 Nº de serie Pour utilisation par le client Entrer ci dessous le N de série qui est situé sous le boîtier Garder cette information comme référence pour le futur N de modèle DLA RS35 N de série DLA RS35 D ILA PROJECTOR INSTRUCTIONS PC007182999 0 ENGLISH FRANÇAIS ESPA...

Page 125: ... never be blocked by placing the product on bed sofa rug or similar surface It should not be placed in a built in installation such as a bookcase or rack unless proper ventilation is provided and the manufacturer s instructions have been adhered to This product has a High Intensity Discharge HID lamp that contains mercury Disposal of these materials may be regulated in your community due to enviro...

Page 126: ...bits a distinct change in performance this indicates a need for service When replacement parts are required be sure the service technician has used replacement parts specified by the manufacturer or with same characteristics as the original part Unauthorized substitutions may result in fire electric shock or other hazards Upon completion of any service or repairs to this product ask the service te...

Page 127: ...on this product are colored in accordance with the following cord Green and yellow Earth Blue Neutral Brown Live As these colors may not correspond with the colored making identifying the terminals in your plug proceed as follows The wire which is colored green and yellow must be connected to the terminal which is marked M with the letter E or the safety earth or colored green or green and yellow ...

Page 128: ...t Hinweis Das Zeichen Pb unterhalb des Batteriesymbols gibt an dass diese Batterie Blei enthält FRANÇAIS Informations relatives à l élimination des appareils et des piles usagés à l intention des utilisateurs Union européenne seulement Si ces symboles figurent sur les produits cela signifie qu ils ne doivent pas être jetés comme déchets ménagers Si vous voulez jeter ce produit ou cette pile veuill...

Page 129: ... Nota Il simbolo Pb sotto il simbolo delle batterie indica che questa batteria contiene piombo PORTUGUÊS Informação para os utilizadores acerca da eliminação de equipamento usado e pilhas Apenas União Europeia Estes símbolos indicam que o equipamento com estes símbolos não deve ser eliminado juntamente com o restante lixo doméstico Se pretende eliminar o produto ou a pilha utilize os sistemas de r...

Page 130: ...kkoja Huomautus Akkusymbolin alapuolella oleva Pb merkintä tarkoittaa että akku sisältää lyijyä SVENSKA Information för användare gällande bortskaffning av gammal utrustning och batterier Endast den Europeiska unionen Dessa symboler indikerar att utrustning med dessa symboler inte ska hanteras som vanligt hushållsavfall Om du vill bortskaffa produkten eller batteriet ska du använda uppsamlingssyst...

Page 131: ...sahuje olovo POLSKI Informacje dla użytkowników dotyczące poz bywania się zużytego sprzętu i baterii Tylko kraje Unii Europejskiej Te symbole oznaczają że sprzętu nie należy wyrzucać razem z odpadami gospodarczymi Jeśli trzeba po zbyć się tego produktu lub ba terii proszę skorzystać z systemu odbioru lub urządzeń do zbiórki odpadów elektronicznych w celu odpowiedniego ponowne go ich przetworzenia ...

Page 132: ...or and luminance levels In addition THX has created a battery of signal processing tests that challenge the projector s scaling motion conversion and de interlacing capabilities This type of in depth analysis predicts how the projector will present a variety of high definition and standard definition content The JVC projector also features THX Movie Mode a pre calibrated video setting for watching...

Page 133: ...Screen Size and Projection Distance 22 Basic Operation Projecting Image 24 Convenient Features during Projection 26 Setting the Screen Size 26 Masking the Surrounding Area of an Image 26 Settings The structure of the Settings menu 28 Setting Menu 30 Procedures for Menu Operation 30 Setting Menu 31 Customizing Projected Images 42 Changing the Initial Setting of Picture Mode 42 Registering User dein...

Page 134: ...cluded Optional Accessories Please check with your authorized dealer for details Replacement Lamp BHL5010 S Lamp Unit Replacement Filter black in appearance PB006560999 Inner Filter About this Manual Describes the limitations of the functions or usage Indicates good to know information Describes operational precautions P11 Indicates relevant pages for reference BACK TEST LIGHT ASPECT HIDE PC HDMI ...

Page 135: ...nt Remote Sensor P15 Air Inlet Lens Cover opened P24 Lens Cover closed CAUTION Do not place your fingers in the gap at the lens during lens shift adjustment This may cause injuries if your ingers are caught in between the gap P25 Do not let your ingers or other objects get caught in between the lens cover while closing the cover This can cause injuries or malfunction ...

Page 136: ...nge Lamp warning P47 Light on Red Standby mode Light on Green During projection Blinking Green Image is temporarily hidden P25 Blinking Red Cool Down mode P25 To turn on off the power To switch input P24 To hide the image temporarily P25 Right button Left button Down button To display the menu P30 To return to the previous menu Up button WARNING LAMP STANDBY ON INPUT HIDE MENU BACK OK Manual butto...

Page 137: ...T HIDE PC HDMI 1 VIDEO HDMI 2 S VIDEO COMP LENS STAND BY MENU CINEMA 3 GAMMA C TEMP USER2 THX LENS AP PIC ADJ PICTURE MODE INPUT CINEMA 1 CINEMA 2 NATURAL STAGE DYNAMIC USER1 ON To select input mode P24 To adjust color temperature P42 To hide the image temporarily P25 To switch picture mode P42 Lens Aperture P42 To select or conirm To illuminate buttons on the remote control for 7 seconds To switc...

Page 138: ...e Range of Remote Control Unit When directing the remote control toward this unit When aiming the remote control towards the remote sensor on this unit ensure that the distance to the sensor in front or at the rear of this unit is within 7 m If the remote control fails to work properly move closer to this unit When relecting off a screen Ensure that the total of distance A between this unit and sc...

Page 139: ... images may not be displayed depending on the devices and cables to be connected For HDMI cable sold separately only use one that is HDMI approved It may not be possible to connect to this unit depending on the dimension of the connector cover of the cables to be connected To connect via HDMI terminal P18 To connect RS 232C terminal external control P52 To connect via component video terminals P17...

Page 140: ...36 12 Connecting via Video Cable and S Video Cable SYNC This unit To component video input terminals Component video cable sold separately BD DVD player CR PR red CB PB blue Y green Component video output terminals SYNC This unit To video input terminal To S video input terminal S video cable sold separately video cable sold separately Video output S video output VCR and camcorder ...

Page 141: ...ut terminal HDMI DVI conversion cable sold separately DVI output terminal Connecting Continued Notebook PC If noise is produced take PCs desktop computer away from this unit Reducing the length of the cable is recommended if there is no picture If noise is produced take PCs Notebook PC away from this unit Use only HDMI approved equipment Reducing the length of the cable is recommended if there is ...

Page 142: ... the setting menu to RGB P36 12 For information on compatible input signals see Speciications P58 This unit To RGB video input terminals RGB video cable sold separately R Red B Blue G Green Includes sync signals RGB video output terminals Device equipped with RGB output RS 232C This unit BD DVD player for European market SCART terminal SCART RCA cable sold separately To RGB video and sync signal i...

Page 143: ... value will cause malfunction Exercise adequate caution to prevent short circuit as the trigger terminal outputs a voltage of 12V Screen Connecting via Trigger Cable CAUTION Trigger cable sold separately To Trigger output terminal This unit Trigger input terminal Φ3 5 To PC input terminal PC cable sold separately VGA output terminal Notebook PC Connecting via PC Cable This unit For information on ...

Page 144: ... position center Up Down position Shifting range of projected image 0 left right position center Lens shift correlation chart Left Right Shift 0 5 10 15 20 25 30 34 Up Down Shift 80 74 66 57 47 34 18 0 Approximately 34 maximum of the projected image Approximately 34 maximum of the projected image Approximately 80 maximum of the projected image 1 0 1 0 1 0 1 0 Approximately 80 maximum of the projec...

Page 145: ...to Approx 8 60m 70 Approx 1 78m Approx 2 09m to Approx 4 28m 150 Approx 3 81m Approx 4 53m to Approx 9 22m 80 Approx 2 03m Approx 2 40m to Approx 4 89m 160 Approx 4 06m Approx 4 84m to Approx 9 84m 90 Approx 2 29m Approx 2 70m to Approx 5 51m 170 Approx 4 32m Approx 5 14m to Approx 10 45m 100 Approx 2 54m Approx 3 01m to Approx 6 13m 180 Approx 4 57m Approx 5 45m to Approx 11 07m 110 Approx 2 79m ...

Page 146: ...ENGLISH 23 Getting Started Preparation Basic Operation Troubleshooting Settings Others MEMO ...

Page 147: ...sts image focus size zoom and position shift 1 Adjust the focus Adjust the image size zoom 1 Connect to this unit 2 Connect to the power outlet Light on Green Power Cord Supplied Light on Red ON BACK TEST LIGHT ASPECT HIDE PC HDMI 1 VIDEO HDMI 2 S VIDEO COMP LENS STAND BY MENU CINEMA 3 GAMMA C TEMP USER2 THX LENS AP PIC ADJ PICTURE MODE INPUT CINEMA 1 CINEMA 2 NATURAL STAGE DYNAMIC USER1 ON 1 2 ST...

Page 148: ... button again to display image The power cannot be turned off when the image is temporarily hidden About Cool Down mode The Cool Down mode is a function to cool down the lamp for approximately 60 seconds after projection is complete This function prevents the internal parts of the unit from deformation or damage due to overheating of the lamp It also prevents lamp blowout and premature shortening ...

Page 149: ... the Surrounding Area of an Image Images for which quality at the outer area has deteriorated can be projected by masking hiding the surrounding area of the projected image 1 Project the image ASPECT 4 3 16 9 zoom Image for which quality at the outer area has deteriorated BACK TEST LIGHT ASPECT HIDE PC HDMI 1 VIDEO HDMI 2 S VIDEO COMP LENS STAND BY MENU CINEMA 3 GAMMA C TEMP USER2 THX LENS AP PIC ...

Page 150: ...r Temp Gamma Advanced Lens Aperture Picture Adjust Natural Reset 0 Video S Video COMP Picture Position Exit MENU BACK Back Select Operate HDMI Film Mode Auto Over scan Off Aspect Video Aspect Computer V stretch 16 9 Auto Off Mask Off 5 Off 2 5 Input Signal PC Exit MENU BACK Back Select Operate Video S Video COMP Off 16 9 Aspect Video Aspect Computer V stretch Picture Position HDMI Auto 自动 Input Si...

Page 151: ...ement Clear Motion Drive 09 Lens Aperture Sets the lens aperture Setting 15 to 0 10 Reset Reset the setting Input Signal 11 HDMI Conigures HDMI input signal Setting Input Color Space Control with HDMI 12 COMP Conigures the input signal for the component video input terminals Setting Y Pb Cb Pr Cr RGB SCART 13 Video S Video Conigures the Video S Video input signals Setting NTSC Setup Level Color Sy...

Page 152: ...ssible positions for displaying the menu are at the four corners or at center of the screen 29 Menu Display Sets the duration for displaying the menu Setting 15sec On 30 Line Display Sets whether to display the input setting when switching the input Setting 5 sec Off 31 Source Display Sets whether to display the source of input signals when changing the input Setting On Off 32 Logo Sets whether to...

Page 153: ...tural Reset 0 Zoom Exit MENU BACK Back Select Operate Video S Video COMP Picture Position HDMI Off 5 Over scan Film Mode Auto Mask Input Signal 4 3 4 3 16 9 Off Aspect Computer Aspect Video V stretch Auto PC 4 3 16 9 16 9 Zoom Exit MENU BACK Back Select Operate Off Off 5 Video S Video COMP Aspect Computer Aspect Video V stretch Picture Position Over scan Film Mode HDMI Auto Auto Mask Input Signal ...

Page 154: ... picture setting that gives a cool tone It is best suited for viewing animated movies and science iction movies Natural This is the picture setting for natural hues and tones It is best suited for viewing dramas and video Stage This is the picture setting best suited for watching live concerts and stage performances Dynamic This is the picture setting best suited for viewing the picture in a room ...

Page 155: ...Green Less green 50 to 50 More green Blue Less blue 50 to 50 More blue Custom 2 Correction Value Based on this selection of Correction Value 5800K 6500K 7500K 9300K H B adjusts the following Gains and Offsets Gain Bright part Red Less red 50 to 50 More red Green Less green 50 to 50 More green Blue Less blue 50 to 50 More blue Offset Dark part Red Less red 50 to 50 More red Green Less green 50 to 5...

Page 156: ...ngs can be selected according to your preferences This setting can also be conigured from the remote control P14 Gamma Adjustment 1 Select the reference gamma curve coeficient 1 8 2 6 in Correction Value 2 Select the color to be adjusted in the gamma adjustment screen 3 Adjust the gamma curve in the gamma curve adjustment screen 4 To end If gamma curve is adjusted repeatedly calculation errors wil...

Page 157: ...I Color Transient Improvement Color Management Off The image color cannot be adjusted Custom 1 Custom 2 Custom 3 Pause Off Video mode On Still mode Color Management Adjustment Values of each color can be adjusted Red Yellow Green Cyan Blue and Magenta All Reset Return to the factory settings Clear Motion Drive Off For movies when set to 1080p24Hz image or 21 ilm mode it improves fast moving pictur...

Page 158: ...is when the dynamic range of the input images is 0 255 Color Space Auto Automatically conigures the input signals YCbCr 4 4 4 Select this when the Y Cb Cr 4 4 4 video signals are input YCbCr 4 2 2 Select this when the Y Cb Cr 4 2 2 video signals are input RGB Select this when the RGB video signals are input Control with HDMI On Enables CEC communications Off Disables CEC communications The setting...

Page 159: ...e color system is NTSC4 43 PAL Select this when the color system is PAL PAL M Select this when the color system is PAL M PAL N Select this when the color system is PAL N SECAM Select this when the color system is SECAM The setting is available only when the Video or S Video input image is projected Input Signal PC 14 PC Conigures PC input Auto Alignment Automatically adjusts Tracking Phase and Pic...

Page 160: ...signal corresponding to the panel at one dot per pixel ratio The PC screen can be shown in the original size Full Enlarges the PC signal horizontally vertically This setting can also be conigured from the remote control P14 This setting cannot be set in the case of SD or HD signals Input Signal V Stretch when HD or SD video signals are input 18 V Stretch When set to On the projected 2 35 1 image w...

Page 161: ...ift Function for adjusting lens shift Press the up down left right button to shift the screen Image Pattern On Displays the image pattern in conjunction with the above setting items Display Display for Focus for Zoom and Shift Picture of big green grids Picture of small green grids Off Without displaying the image pattern displays the external input signal Lock On Disables lens adjustment A warnin...

Page 162: ...nsated P21 Installation Screen Adjust 26 Screen Adjust Corrects skewed white balance derived from the relective characteristics of the screen MODE Off Makes no correction Normally set to off A Corrects to slightly reddish B Corrects to slightly greenish C Corrects to slightly bluish Display Setup Back Color 27 Back Color Conigures the screen color displayed when there is no input signal Blue Sets ...

Page 163: ...onds Off Do not display Display Setup Language 33 Language Sets the language of the menu display Japanese English English Deutsch German Español Spanish Italiano Italian Français French Português Portuguese Nederlands Dutch Svenska Swedish Norsk Norwegian Русский Russian Chinese Function Lamp Power 34 Lamp Power Conigures the output of the light source lamp Normal For normal circumstances select t...

Page 164: ...o power off after 2 hours 3 hours Auto power off after 3 hours 4 hours Auto power off after 4 hours Function High Altitude Mode 38 High Altitude Mode Selects this when using the projector in a location of low atmospheric pressure higher than 900 meters above sea level On Enable Off Disable Information Input Displays the currently selected video input Source Displays the type of the current video i...

Page 165: ...ality Example To adjust Contrast 1 Display the setting menu 2 Select Picture Adjust Contrast 3 Adjust the setting 4 To end the adjustments 3 Other items can also be adjusted To end CINEMA 3 CINEMA 1 NATURAL STAGE DYNAMIC CINEMA 2 Contrast 0 Exit MENU BACK Back Select Operate 6500K 0 0 0 0 Picture Mode Contrast Brightness Color Tint Color Temp Gamma Advanced Lens Aperture Picture Adjust Reset Natur...

Page 166: ...e Initial Setting of Picture Mode for procedures on adjusting the picture quality P42 2 Display the setting menu 3 Select Picture Adjust Picture Mode Natural Register the setting Exit MENU BACK Back Select Operate 6500K Normal 0 0 0 0 Picture Mode Contrast Brightness Color Tint Color Temp Gamma Advanced Lens Aperture Picture Adjust Natural Reset Cinemaˎ Cinemaˍ Stage Dynamic Userˍ Userˎ THX Cinema...

Page 167: ...at insert the plug again P12 to 13 Is the ilter dirty Clean the ilter P51 Video image does not appear Is the correct external input selected Select the correct external input P24 Is the AV device properly connected Connect the AV device properly P16 to 20 Is the power of the AV device turned on Turn on the power of the AV device and play the video P24 Are the correct signals being output from the ...

Page 168: ...rrect distance from the screen P21 to 22 Video images are missing Has setting been performed for screen mask Set Mask in the setting menu to Off P27 38 20 Is the display out of position Alter the Picture Position value in the setting menu to ensure that images are not missing P36 15 Remote control does not work Are batteries installed correctly Match the polarities or correctly when inserting the ...

Page 169: ... cannot be used in this unit has been input Input video signals that can be used The names of input terminals such as COMP will be displayed in yellow This message is displayed when the accumulated lamp time has exceeded 2900 hours To clear the message press the Back button Get ready a new lamp unit and replace as soon as possible Reset the lamp time after replacing the lamp P48 to 50 COMP No Inpu...

Page 170: ...second 3 times 0 75 second Internal temperature is too high abnormal internal temperature 13 0 25 second 4 times 0 75 second External temperature is too high abnormal external temperature 14 0 25 second 1 time 0 75 second Abnormal electrical circuit abnormal startup of drive circuit Blinking orange 15 0 25 second 2 times 0 75 second Abnormal electrical circuit abnormal communication of the drive c...

Page 171: ...es rapidly If the picture becomes dark the tint becomes strange or the image lickers promptly the lamp unit for a new one Purchasing the Lamp Unit Loosen the screws on the lamp unit Loosen the screws with a screwdriver Please consult your authorized dealer Lamp Unit Part No BHL5010 S Pull out the lamp unit Grasp the handle and pull out the lamp unit Procedure for Lamp Replacement MEMO CAUTION Pull...

Page 172: ... touch the surface of a new lamp This may shorten the lamp life and cause lamp blowout Tighten the screws of the new lamp unit Tighten the screws with a screwdriver Do not place the removed lamp unit at locations that is reachable by children or near combustible items Dispose used lamp units in the same way as luorescent lamps Follow your local community rules for disposal Attach the lamp cover In...

Page 173: ...ds After that the unit switches to standby mode Replacing the Lamp Continued BACK TEST LIGHT ASPECT HIDE PC HDMI 1 VIDEO HDMI 2 S VIDEO COMP LENS STAND BY MENU CINEMA 3 GAMMA C TEMP USER2 THX LENS AP PIC ADJ PICTURE MODE INPUT CINEMA 1 CINEMA 2 NATURAL STAGE DYNAMIC USER1 ON Resetting Lamp Time WARNING LAMP STANDBY ON Reset the lamp time only when you have replaced the lamp Never reset the service...

Page 174: ...neutral detergent After washing the ilter with water make sure that it is completely dry before reinstalling Otherwise electric shock or malfunctions may occur Do not clean the ilter with a vacuum cleaner or air duster The ilter is soft and may be damaged Replace with a new ilter A dirty ilter will dirty the internal parts of the unit and cause shadows on the video image To purchase a new ilter or...

Page 175: ... start of communication Binary code Type Description 21 Operating command PC This unit 3F Reference command PC This unit 40 Response command This unit PC 06 ACK This unit PC When the command is accepted without error it returns to PC Unit ID This code speciies the unit The binary code is ixed at 8901 RS 232C Speciications Pin No Signal Function Signal Direction 2 RxD Receive data PC This unit 3 Tx...

Page 176: ...0 Turn off the power Standby mode 4950 Input During power on 30 S VIDEO 31 VIDEO 32 COMP 33 VGA 36 HDMI 1 37 HDMI 2 5243 Remote Control Sends the same code as the supplied remote control Remote control code P54 Reference command and data Binary code Command Type Data description 5057 Power supply During standby or power on 30 Standby mode 31 Power on mode 32 During Cool Down mode 34 Warning mode 4...

Page 177: ...3 30 35 CINEMA 2 37 33 36 38 STAND BY 37 33 30 36 CINEMA 1 37 33 36 39 HIDE 37 33 31 44 NATURAL 37 33 36 41 LENS AP 37 33 32 30 DYNAMIC 37 33 36 42 MENU 37 33 32 45 USER 1 37 33 36 43 OK 37 33 32 46 USER 2 37 33 36 44 LENS 37 33 33 30 THX 37 33 36 45 37 33 33 34 HDMI 1 37 33 37 30 37 33 33 36 HDMI 2 37 33 37 31 MENU POSITION 37 33 34 32 PIC ADJ 37 33 37 32 PC 37 33 34 36 GAMMA 37 33 37 35 VIDEO 37...

Page 178: ...57 0A When power is turned off standby mode from power on mode Input COMP PC This unit 21 89 01 49 50 32 0A This unit PC 06 89 01 49 50 0A When video input is set to component Remote Control MENU PC This unit 21 89 01 52 43 37 33 32 45 0A This unit PC 06 89 01 52 43 0A When the same operation as pressing the MENU button on the remote control is made Reference command Type Command Description Power...

Page 179: ...r to suck up the dirt Otherwise use a cloth to wipe off the dirt If dirt is allowed to accumulate in the air inlets the internal temperature cannot be adjusted and this may cause a malfunction Dirt on the lens Clean the dirt using commercial blowers or lens cleaning papers for cleaning glasses and cameras Do not use luid type cleaning agents This may lead to peeling of the surface coating ilm P13 ...

Page 180: ...crew length is 23 mm Use screws shorter than 23 mm but longer than 13 mm Using other screws will result in malfunctioning or cause the unit to drop When mounting to a pedestal ensure suficient space foot height of 10 mm or higher around the unit so that the air inlets are not blocked Do not tilt this unit more than 5 degrees from side to side when using Regardless whether the unit is still under g...

Page 181: ...ONENT 1 line RCA pin jack x 3 Y 1 0V p p 75Ω CB PB CR PR 0 7V p p 75Ω HDMI Input HDMI 1 HDMI 2 2 line HDMI 19 pin x 2 HDCP compliant 3 Compatible with the HDMIv1 3a standard PC Input 1 line D Sub 15 pin VGA Trigger Output 12V 100mA Power Requirements AC 110V 240V 50 60 Hz Power Consumption 310W Standby mode 0 7W Operation Environment Temperature 5 to 35 Humidity 20 to 80 No condensation Storage Te...

Page 182: ... 525 640 480 2 VGA 72 640 X 480 37 900 72 000 31 500 832 520 640 480 3 VGA 75 640 X 480 37 500 75 000 31 500 840 500 640 480 4 VGA 85 640 X 480 43 300 85 000 36 000 832 509 640 480 5 SVGA 56 800 X 600 35 200 56 000 36 000 1024 625 800 600 6 SVGA 60 800 X 600 37 900 60 000 40 000 1056 628 800 600 7 SVGA 72 800 X 600 48 100 72 000 50 000 1040 666 800 600 8 SVGA 75 800 X 600 46 900 75 000 49 500 1056...

Page 183: ...6 Others 60 Speciications Continued 365 236 64 5 225 4 Φ42 12 95 167 297 477 5 90 6 42 5 105 198 Lens center Lamp cover Unit mm Top Surface Bottom Surface Front Dimensions Back Surface ...

Page 184: ...Page 24 Installation Angle Page 21 Settings Page 28 Caution Page 2 Ceiling Mount Page 2 57 Settings Menu Structure Page 28 Projection Distance Distance Chart Page 22 Input Signal PC Compatibility Page 59 Video Compatibility Page 58 Filter Air Intake Filter Page 13 Replacement Filter Number Page 11 51 Cleaning and Replacement Page 51 Focus Adjustment Page 24 Message Meaning Page 46 Lamp Replacement...

Page 185: ...1108TTH AO AO 2009 Victor Company of Japan Limited DLA RS35 D ILA PROJECTOR PROYECTOR D ILA PROJECTEUR D ILA ...

Reviews: