background image

11

Note

When using a 4:3 source on a Wide Angle screen there
are black bars on the left and right of the image. The
sidebars can be changed to gray using the Blanking Level
control located in the Display menu. If filling the entire screen
is desired, select Letterbox. The image will fill the screen
but the top and bottom 1/3 of the image will be cut off
(overscanned).

When watching 2:35 aspect ratio movies on a 16:9 (1:77)
screen, it is normal to see black bars at the top and bottom
of the image.

The screen shape used in the installation must be set in
the Setup Menu during installation for proper Aspect Ratio
mapping. Anamorphic Aspect Ratio with 4:3 screens and
the Wide-4:3 settings are not available on units with scan
rates, 540p, 600p and Frame Doubling. See Setup section
for details.

Do not leave the 4:3 image with a Wide Angle
screen on for long periods of time on a
projector or plasma display. This can cause
permanent image burn-in. Image burn-in is
not covered by warranty

Picture Menu

Use these commands to fine-tune the image.

After tuning the image, if the power is turned off without
storing the profile, the factory default value will be re-
stored.

Brightness

Factory 50
Adjust the brightness of the picture image.

Contrast

Factory 50
Adjusts the contrast of the picture image.

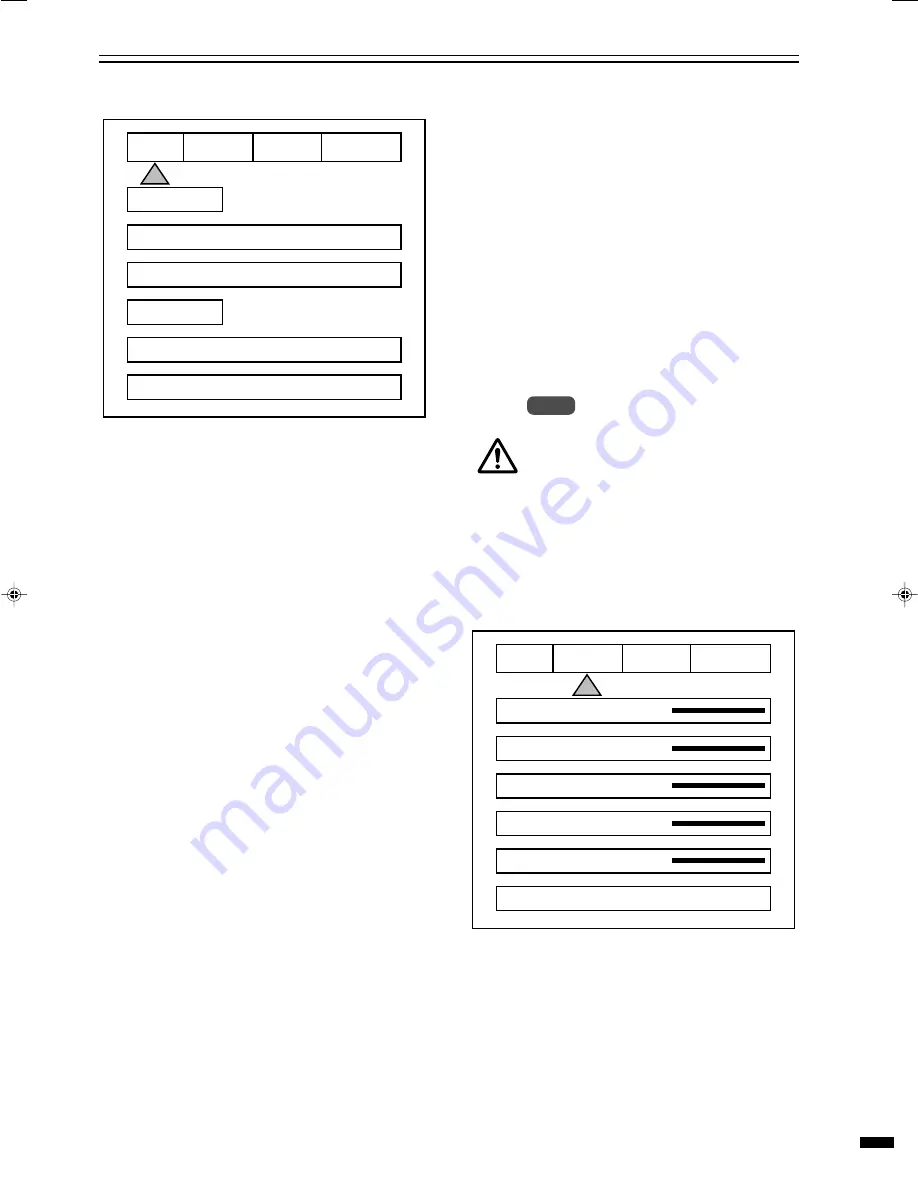
INPUT

PICTURE

INPUTS

DVI

ASPECT

ANAMORPHIC

PROFILE

RECALL

PATTERNS

DISPLAY

STORE

FORMATS

F  1  2  3  4

1  2  3  4

INPUT

PICTURE

BRIGHTNESS

50

CONTRAST

50

COLOR

50

TINT

50

4

NORMAL

ADVANCED COLOR SYS

PATTERNS

DISPLAY

DETAIL

Input Menu

Formats

1. Input Select: OSD

Video-S-Video- RGB-YCrCb-DVI

The Pass-Thru input cannot be selected from the OSD
since an OSD is not available on that input. Use the
Input button on the remote to select it. The DVI Input
will not display an OSD unless there is a source con-
nected to it.

2. Aspect Ratio

4:3-Letterbox-Anamorphic

This selection should match the aspect ratio of the
source, not the display. The aspect ratio of the display
should be selected in the Setup menu.

Profiles

1. Profile: Factory-1-2-3-4-5-6-7-8

2. Store: 1-2-3-4-5-6-7-8

To store a Profile (in the Input Menu):

1. Press Menu button on the remote

2. Make all required adjustments.

3. Use the Function Up/down keys to select Profile

4. Use the Value Left/Right keys to select Profile

5. Press Enter

To recall a Profile (in the Input menu):

1. Press Menu button on the remote

2. Use the Function Up/Down keys to select Recall

3. Use the Value Left/Right keys to select profile

1-8

4. Press Store

5. There are separate banks of eight Profiles for

NTSC and PAL

Summary of Contents for D-ILA LD-HD2KE

Page 1: ...entioned model The performance cannot be guaranteed when using with other models This processor is used as a dedicated machine and this manual instruction manual may contain de scription of features as well as specifications not used by the processor This product LD HD2KE is exclusively for the above mentioned model The performance cannot be guaranteed when using with other models This processor i...

Page 2: ...nded power outlet If you are unable to insert the plug into the outlet contact your electrician to install the proper outlet Do not defeat the safety purpose of the grounded plug Power supply cords should be routed so that they are not likely to be walked on or pinched by items placed upon or against them Pay particular attention to cords at doors plugs receptacles and the point where they exit fr...

Page 3: ...utions may result in fire electric shock or other hazards Upon completion of any service or repairs to this product ask the service technician to perform safety checks to de termine that the product is in proper operating condition The product should be placed more than one foot away from heat sources such as radiators heat registers stoves and other products including amplifiers that produce heat...

Page 4: ...4 SAFETY PRECAUTIONS 2 QUICK START 5 INSTALLATION 6 SETUP 8 IR REMOTE OSD 10 RS232 13 HELP MENUS 16 SPECIFICATIONS 17 TABLE OF CONTENTS ...

Page 5: ...serted into the power outlet Upon completion of ini tialization this unit switches to the Standby mode LED turns red 3 Press the Power Standby button on this unit or Power button on the remote Once the unit is turned on the LED turns green 4 Press the Menu button on the remote for 5 seconds or more to display the Setup Menu on this unit s display panel After the Setup Menu is displayed use the Fun...

Page 6: ...al processor and then output at the se lected scan rate If the output is set to analog RGBHV or digital DVI the unit will automatically transcode the YPrPb HDTV to RGBHV Note on DVDs For proper aspect ratio and to insure the highest quality image from the DVD player be sure to set the DVD screen shape to 16 9 in the DVD player s Setup menu See the DVD player s owner s manual for details 4 High sca...

Page 7: ...Since HDTV ready satellite receivers offer different signal types they require special attention for connection to the processor Every receiver is different so be sure to consult the receivers manual for details For this manual we will assume the receiver being used operates as follows 1 Non HDTV material is output from the receiver via an S video connection 2 HDTV material is output via YPrPb out...

Page 8: ...p Func tions can only be viewed on the front panel LCD not from the OSD Press the Function Up or Down to select the available Functions Press the Value Up or Down keys to change values or to select options SETUP MENU FUNCTIONS SET SCANRATE Select the required scanrate by using the right and left arrows When the desired rate is displayed on the LCD display press the STORE key This unit will ask you...

Page 9: ... HDTV signals via the D15 input or the YprPb BNC inputs can be transcoded to RGB when this feature is enabled SET COMPONENT INPUT STANDARD DVD Default Professional Betacam Only use professional setting when using a device that conforms to SMTPE Betacam levels SET RGB INPUT SYNC Sync on Green Default Composite Sync SET DVI INPUT H SYNC For setting the H Sync Normal Default Wide SET OSD ON SCREEN DI...

Page 10: ...ol the processor Adjustments can be made three different ways 1 Press the Menu button to activate the OSD and use the Function and Value keys to make changes Press Menu again to remove OSD 2 Press the direct access key Brightness etc and then adjust using the left right value keys 3 Press the direct access key and then enter a three digit number i e 040 for 40 4 For direct access to the RGB input ...

Page 11: ...d Brightness Factory 50 Adjust the brightness of the picture image Contrast Factory 50 Adjusts the contrast of the picture image INPUT PICTURE INPUTS DVI ASPECT ANAMORPHIC PROFILE RECALL PATTERNS DISPLAY STORE FORMATS F 1 2 3 4 1 2 3 4 INPUT PICTURE BRIGHTNESS 50 CONTRAST 50 COLOR 50 TINT 50 4 NORMAL ADVANCED COLOR SYS PATTERNS DISPLAY DETAIL 䡵 Input Menu Formats 1 Input Select OSD Video S Video R...

Page 12: ... of this setting to fine tune the image This control is very effective to increase detail in poor quality video material It is rec ommended that adjustments be made in small increments until the desired results are achieved and then store these custom settings in the Profiles It is important to not use too much Detail since the image will start to look artificial Typically digital displays will ne...

Page 13: ...ABLE PATTERNS Gray Step Check gray scale Cb Ramp Check linearity of Cb channel Cr Ramp Check linearity of Cr channel Y Ramp Check linearity of Y channel Black Full Black screen Green Screen Check for defective pixels Red Screen Check for defective pixels Blue Screen Check for defective pixels Convergence Check convergence of display Border Use for H V positioning Multiburst To check bandwidth Wind...

Page 14: ...rs 2 Reverse Color Bars 3 10 step Grayscale 4 Luma Ramp 5 Cb Ramp 6 Cr Ramp 7 Green 8 Red 9 Blue 10 Convergence 11 Active Boarder 12 Multiburst 13 100 Window 14 PLUGE Test Pattern Selection COMMAND A B C D DVI EXT FST HELP K OFF ON P PM PY R ST T TP TPHELP V X Y DESCRIPTION Input Aspect Ratio for all sources Brightness Contrast Detail DVI Input Pass through Input Report Current System Status Displ...

Page 15: ...Profile Store NTSC Profile Scan Rate Help Table Top Blanking Video Input Disabled Video Input Enabled Vsync Polarity Screen Shape YCrCb Input Disabled YCrCb Input Enabled S Video Input Disabled S Video Input Enabled OPTIONS OR RANGE 0 192 0 252 0 255 1 On 0 OFF 1 On 0 OFF 0 50 25 default 0 200 0 1 0 RGB 1 YPrPb 0 Analog 1 Digital 000 192 1 8 1 8 000 192 0 Neg 1 Pos 0 4 3 1 Widescreen 2 Wide 4 3 SR...

Page 16: ...LOR BARS TP4 LUMA RAMP TP6 CR RAMP TP8 GREEN SCREEN TP10 BLUE SCREEN TP12 ACTIVE BORDER TP14 WHITE WINDOW TEST PATTERN HELP MENU Output Scan Rate 1920 x 540P 720 x 576P 800 x 600P 1280 x 720P 1280 x 720P 1024 x 768P 1024 x 768P 1366 x 768P 1440 x 960P 1280 x 1024P 1365 x 1024P 1400 x 1050P 1920 x 1080P 1920 x 1080P HELP MENUS 59 94 Hz 50 00 Hz 59 94 Hz 59 94 Hz 50 00 Hz 75 00 Hz 59 94 Hz 59 94 Hz ...

Page 17: ...igger 100mA Tip V Case GND AC 100 V 240 V 50 Hz 60 Hz Power consumption 1 0 A Temperature 41 F to 95 F 5 C to 35 C Humidity 20 to 80 No condensation Storage Temperature 14 F to 140 F 10 C to 60 C Approx 1 3 4 x approx 17 x approx 11 4 5 Approx 45 mm x 438 mm x 303 mm Excluding carrying handle lens and protrusion portion Approx 13 9 lbs Approx 6 3 kg Page 6 䡵 Model Name Article Name 䡵 Colour System...

Page 18: ...18 MEMO ...

Page 19: ......

Page 20: ...LD HD2KU LD HD2KE VICTOR COMPANY OF JAPAN LIMITED Printed in Japan 0504 SW VP 2004 VICTOR COMPANY OF JAPAN LIMITED DIGITAL VIDEO PROCESSOR ...

Reviews: