background image

RIGHT

LEFT

REAR

CENTER

VOLTAGE

SELECTOR

110V

127V

220V

230V 
-240V

ANTENNA

CD OPTICAL

DIGITAL

OUTPUT

AUX

AM EXT

FM

RIGHT

LEFT

IN

OUT

SUB WOOFER

OUT

FM

AM LOOP

(75    )

SPEAKERS

RIGHT

LEFT

VIDEO 

OUT

CAUTION:
SPEAKER IMPEDANCE
6 ~ 16

VOLTAGE

SELECTOR

127V

220V

230V 
-240V

110V

EN, CH, AR

J

V

C

0699RRDFLEJEM

VICTOR COMPANY OF JAPAN, LIMITED

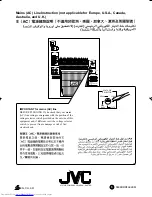
Mains (AC) Line Instruction (not applicable for Europe, U.S.A., Canada,
Australia, and U.K.)

IMPORTANT for mains (AC) line

BEFORE PLUGGING IN, do check that your mains
(AC) line voltage corresponds with the position of the
voltage selector switch provided on the outside of this
equipment and, if different, reset the voltage selector
switch, to prevent from a damage or risk of fire/
electric shock.

Cover-MX-J777V/f

6/23/99, 5:30 PM

2

Summary of Contents for CA-MXJ777V

Page 1: ...ILITY CENTER MODE DELAY TIME FM MODE SHIFT PRO LOGIC 3 STEREO TEST TONE TAPE A TAPE B REC PAUSE CENTER LEVEL REAR LEVEL BALANCE FADE MUTING RM SMXJ777U REMOTE CONTROL SLEEP ECHO SOUND MODE R L HIGHTLIGHT SUBTITLE ON SCREEN V INTRO PREV NEXT SELECT STILL KEY CONTROL VOCAL MASKING STANDBY CD1 CD1 CD2 CD3 CD2 CD3 PHONES MIC LEVEL MIN MAX 1 2 MIC PANEL OPEN CLOSE TAPE CD AUX FM AM EJECT EJECT PLAY REC...

Page 2: ...Cualquierquesealaposición de ajuste del interruptor la alimentación no es cortada completamente La alimentación puede ser controlada remotamente Precaução Interruptor Desconectar o cabo de alimentação para desligar a alimentaçãoporcompleto Qualquerquesejaaposição de ajuste do interruptor a alimentação não é completamente cortada A alimentação pode ser controlada remotamente Warnings Cautions and O...

Page 3: ...oisture PRECAUCIÓN Para reducir riesgos de choques eléctricos incendio etc 1 No extraiga los tornillos los cubiertas ni la caja 2 No exponga este aparato a la lluvia o a la humedad PRECAUÇÃO Para reduzir riscos de choques elétricos incêndio etc 1 Não remova parafusos e tampas ou desmonte a caixa 2 Não exponha este aparelho à chuva nem à umidade ...

Page 4: ...spacio libre 2 Laterales parte superior parte trasera No se debería colocar nada en las áreas y las distancias que se detallan a continuación 3 Parte inferior Coloque el aparato sobre una superficie recta Debe haber buena circulación de aire para ello coloque el aparato sobre una base a una altura mínima de 10 cm Precaução Ventilação adequada Para evitar riscos de choques elétricos e incêndios e p...

Page 5: ...3 PRECAUCIÓN No abra la tapa superior En el interior de la unidad no existen piezas reparables por el usuario deje todo servicio técnico en manos de personal calificado 1 PRODUTO LASER CLASSE 1 2 PERIGO O laser emite uma rediação invisível que é perigosa casooaparelhoestejaabertoeatravainoperante ou danificada Evite exposição direta ao feixe dos raios 3 CUIDADO Não abra a caixa do aparelho Não exi...

Page 6: ...amp room If the unit is brought directly from a cold to a warm place Should this occur the unit may malfunction In this case leave the unit turned on for a few hours until the moisture evaporates unplug the AC power cord and then plug it in again Others Should any metallic object or liquid fall into the unit unplug the unit and consult your dealer before operating any further If you are not going ...

Page 7: ...function Menu Play 14 Basic Concept of the PBC function 14 Playing Video CDs SVCDs without the PBC function Continous Play 15 Resuming Play 15 Special Plays for a Video CD 15 Playing a multiplex sound CD 16 Using SUBTITLE 16 Listening to FM and AM Broadcasts 17 Tuning in a Station 17 Presetting Stations 17 Tuning in a Preset Station 17 Playing Back Tapes 18 Playing Back a Tape 18 Locating the Begi...

Page 8: ...s in the battery compartment when you are not going to use the remote control for an extended period of time Otherwise it will be damaged from battery leakage Connecting Antennas FM antenna FM 75 ANTENNA AM LOOP FM AM EXT 2 3 1 2 3 1 20 mm 13 16 in 10 mm 7 16 in Outdoor FM antenna not supplied FM antenna supplied Extend the FM antenna supplied horizontally If reception is poor Connect the outdoor ...

Page 9: ...wer cord FM 75 ANTENNA AM LOOP FM AM EXT 2 3 1 Vinyl covered wire not supplied AM loop antenna supplied Connecting Speakers You can connect a pair of front speakers one center speaker a pair of rear speakers and one subwoofer To connect front speakers RIGHT LEFT SPEAKERS 1 2 3 Speaker cord Speaker cord Red Black Left speaker Right speaker 1 Press and hold the clamp of the speaker terminal on the r...

Page 10: ... IN OUT SUB WOOFER OUT FM AM LOOP 75 SPEAKERS RIGHT LEFT VIDEO OUT CAUTION SPEAKER IMPEDANCE 6 16 STEREO RECEIVER MODEL NO MX J777V UNIT NO MX J777V AC 110 127 220 230 240V 50 60Hz 85W RIGHT LEFT REAR CENTER Center speaker Right rear speaker Left rear speaker To input VCR or other equipment You can connect the following equipment to this system TV with a video input jack used as a monitor of video...

Page 11: ... for your area with the voltage selector on the rear of the unit RIGHT LEFT REAR CENTER VOLTAGE SELECTOR 110V 127V 220V 230V 240V ANTENNA CD OPTICAL DIGITAL OUTPUT AUX AM EXT FM RIGHT LEFT IN OUT SUB WOOFER OUT FM AM LOOP 75 SPEAKERS RIGHT LEFT VIDEO OUT CAUTION SPEAKER IMPEDANCE 6 16 STEREO RECEIVER MODEL NO MX J777V UNIT NO MX J777V AC 110 127 220 230 240V 50 60Hz 85W LINE VOLTS 110V 127V 220V 2...

Page 12: ...med even while the unit is on standby To switch off the power supply completely unplug the AC power cord from the AC outlet When you unplug the AC power cord or if a power failure occurs The clock is reset to 0 00 right away while the tuner preset stations see page 17 will be erased in a few days Setting the Clock Before operating the unit any further first set the clock built in this unit 1 Press...

Page 13: ...E MUTING Continued D CLUB Dance CLUB OFF Cancelled HALL STADIUM ROCK POP CLASSIC MANUAL1 MANUAL2 MANUAL3 Reinforcing the Bass Sound The SignalAdaptive Bass function provided for this unit can enhance the bass sound while listening to any source at low volume You can use this effect only for playback To turn on the function press S A BASS m repeatedly until SA BASS1 or SA BASS2 appears on the displ...

Page 14: ...s If the setting is cancelled before you finish start from step 1 again If you want to add the surround elements in your SEA pattern select one of the surround modes D CLUB HALL or STADIUM before starting the procedure below On the unit On the unit ONLY 1 Press and hold SEA CONTROL k until SEA CONT appears on the display Current level appears TUNING SET SEA CONTROL SOUND MODE PRESET PREV NEXT SET ...

Page 15: ...tinuous Play You can play CDs continuously 1 Place CDs 2 Press one of the disc number buttons CD 1 CD 2 and CD 3 r 1 for the disc you want to play CD play starts from the first track of the selected disc Playing Back Audio CDs Playing Back Audio CDs CD1 CD2 CD3 2 3 1 1 5 9 13 2 6 10 14 3 7 11 4 8 12 Tracks of the currently playing disc Track number Elapsed playing time Pressing CD 6 y _ instead of...

Page 16: ...r you want Ex For track number 5 press 5 For track number 15 press 10 then 5 For track number 20 press 10 then 10 For track number 32 press 10 10 10 then 2 Programming the Playing Order of the Tracks Program Play You can arrange the order in which the tracks play before you start playing You can program up to 32 tracks To use Repeat play see page 12 for Program play press REPEAT n after starting P...

Page 17: ...nnot go back to the previous tracks during Random play If you press or on the remote control you can go to next random tracks RANDOM PLAY starts playing from the current tray and then subsequently to the next tray when all the tracks from the current tray are finished Repeating Tracks or CDs Repeat Play You can have all the CDs the program or the individual track currently playing repeat as many t...

Page 18: ...f another disc tray the open tray will close automatically and the new disc will slide out When you place a CD onto the currently selected tray whose disc number shown on the CD indicator reading of the CD starts After the reading is completed the total number of tracks and total playing time will appear then the playing time of the first track If you place a video CD VIDEO CD will appear before t...

Page 19: ...menu 1 2 3 3 Sub menu 4 5 6 1 Sub sub menu 1 2 3 2 Still Picture Playback 3 Moving Pictures 4 Moving Pictures Concept of PBC Flow 4 Select the item you want to view On the unit On the unit Press VCD NUMBER to select larger item numbers or press VCD NUMBER to select smaller item number Then press CD 6 y _ to start the disc On the remote control On the remote control Press the number buttons to sele...

Page 20: ...stop NOTE 1 Resume play will not work when the CD tray has been opened 2 It is advisable to turn off the PBC function to use resuming play if not it will resume at PBC menu Special Plays for a Video CD You can use the following special play modes for video CDs both with and without PBC function The following functions can only be executed with the buttons on the remote control Frame by Frame Playb...

Page 21: ...he highlight scene not its beginning During the video intro or highlight play image shown on the display may be partially distorted resulting from noises or incorrect manufacturing of the disc Playing a multiplex sound CD This function is used for multiplex sound discs See manuals attached to discs for detail information Operation By pressing the MPX l button consecutively channel multiplexing mod...

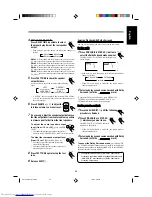
Page 22: ...tations you want into memory by following the presetting method There is a time limit in doing the following steps If the setting is cancelled before you finish start from step 1 again 1 Tune in the station you want to preset See Tuning in a Station above TUNING FM MODE MHz 2 Press SET k 3 Press PRESET to select a preset number 4 Press SET k again The tuned station in step 1 is stored in the prese...

Page 23: ...on the display lights up like To cancel Reverse Mode press the button again so that the Reverse Mode indicator on the display lights up like When Reverse Mode is on with cassettes in both decks A and B After the reverse 2 side of the tape finishes playing the tape in the other deck starts playing Locating the Beginning of a Song Music Scan You can use Music Scan to locate the beginning of a song M...

Page 24: ...mode Dolby Pro Logic and Dolby 3 Stereo On the remote control On the remote control ONLY 1 Press and hold SHIFT 9 until the following procedure is finished 2 Press PRO LOGIC c or 3 STEREO c whichever you want to use The PRO LOGIC c or 3 STEREO c indicator lights up on the display Each time you press the button the indicator turns on and off Respective Dolby Surround also turns on and off SHIFT 3 S...

Page 25: ...djust the rear speaker output level when using Dolby 3 Stereo 8 Press TEST TONE again to stop the test tone 9 Release SHIFT 9 CENTER LEVEL REAR LEVEL TEST TONE Enjoying Playback with Dolby Surround You can use the settings you have already stored in memory On the unit On the unit 1 Press PRO LOGIC 3 STEREO c button to select the Dolby Surround mode you want The PRO LOGIC or 3 STEREO indicator ligh...

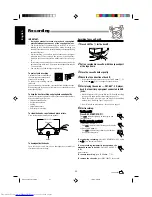
Page 26: ...the consent of the copyright owner The recording level is automatically set correctly so it is not affected by the VOLUME control Thus during recording you can adjust the sound you are actually listening to without affecting the recording level While recording you can hear sound modes and or the Signal Adaptive Bass effect through the speaker or headphones However the sound is recorded without the...

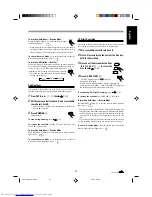
Page 27: ...SHED appears on the display and the CD player and deck B stop To stop during CD Direct Recording press 7 z To remove the cassette press EJECT 0 o for deck B To record on both sides Reverse Mode Press REVERSE MODE a so that the Reverse Mode indicator lights up as When using the Reverse Mode for CD Direct Recording start recording in the forward 3 direction first When the tape reaches its end while ...

Page 28: ... the button the tracks to be recorded on the front side SIDE A and on the reverse side SIDE B alternate 4 Put a recordable cassette of appropriate length into deck B 5 Press REVERSE MODE a so that the Reverse Mode indicator lights up as Without turning on the Reverse Mode recording will stop when the front side of the tape is recorded 6 Press CD REC START f The indicator lights up on the display D...

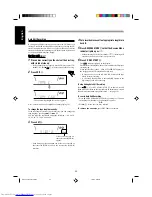
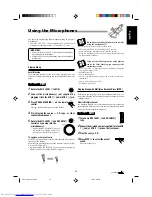
Page 29: ...he MIC LEVEL 8 and VOLUME t controls Avoid pointing the microphone s towards the speakers When two microphones are connected turn off the On Off switch on the unused microphone If you use the following sources as the playing source for Vocal Masking you cannot get the satisfactory results Radio programs a radio signal is not as reliable as the signals coming from a tape or CD Monaural sources Poor...

Page 30: ...el returns to key 0 When the next track is selected or the next tray is selected the key level also returns to key 0 The music key cannot be changed while recording Once the source is changed the key level returns to key 0 The Sound Mode will be cancelled if the Multiplex sound is selected MIC LEVEL MIN MAX MIC LEVEL MIN MAX VOLUME Microphone mixing When you sing along with CDs follow the procedur...

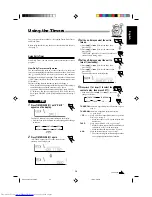
Page 31: ...TIME REC Clock setting See page 7 2 Press TIMER CLOCK h again ON TIME appears for 2 seconds then the unit enters on time setting mode TIMER CLOCK DAILY DAILY 3 Set the on time you want the unit to turn on 1 Press 4 or to set the hour then press SET k 2 Press 4 or to set the minute then press SET k OFF TIME appears for 2 seconds then the unit enters off time setting mode 4 Set the off time you want...

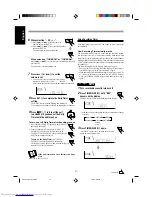
Page 32: ... the timer press CANCEL However this does not always work If CANCEL does not work press TIMER CLOCK h repeatedly and start from step 1 again On the unit On the unit ONLY 1 Put a recordable cassette into deck B 2 Press TIMER CLOCK h until REC appears on the display The REC indicator also starts flashing on the display TIMER CLOCK REC Each time you press the button the timer setting modes change as ...

Page 33: ...EV NEXT SET SEA CONTROL STANDBY TIMER CLOCK CANCEL DEMO SET SEA CONTROL Using Sleep Timer With Sleep Timer you can fall asleep to music You can set Sleep Timer when the unit is turned on How Sleep Timer actually works The unit automatically turns off after the specified time length passes On the remote control On the remote control ONLY 1 Press SLEEP The time length until the shut off time appears...

Page 34: ...nable to operate the unit from the remote control unit Cause Connections are incorrect or loose Antennas are disconnected The AM loop antenna is too close to the unit The FM antenna is not properly extended and positioned The disc is scratched or dirty The AC power cord is not plugged in Trays are locked The disc is placed upside down Power supply from the AC power cord has been cut off while the ...

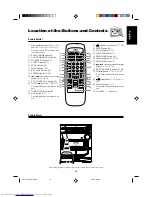
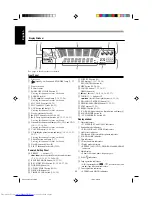
Page 35: ... these buttons also turns on the unit 2 SOUND MODE button 8 3 VOCAL MASKING button 24 4 ON SCREEN button 15 5 V INTRO button 15 6 TAPE A button 18 7 TAPE B button 18 8 REC PAUSE button 21 9 SHIFT button 8 19 20 0 1 4 fast left reverse search button 11 12 14 18 KEY CONTROL I button 25 TAPE 2 3 button 7 18 21 22 Pressing this button also turns on the unit FADE MUTING button 8 AUX button 5 7 Pressing...

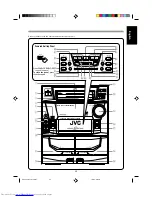
Page 36: ...EJECT 0 button for deck B 21 25 Powered Rolling Panel PRESET buttons 17 4 reverse search forward search buttons 7 9 11 12 15 23 25 26 28 30 a REVERSE MODE button 18 23 25 s REC START STOP button 21 22 24 27 30 d DUBBING button 24 f CD REC START button 22 25 g DECK A B button 18 h TIMER CLOCK button 7 26 30 j SUBTITLE button 16 k SET button 7 11 17 25 30 SEA CONTROL button 9 l MPX button 16 24 26 C...

Page 37: ...E REC START STOP DUBBING REVERSE MODE CD REC START DECK A B PRESET PRO LOGIC 3 STEREO PROGRAM RANDOM TUNING EDIT S A BASS REPEAT SET CANCEL SOUND MODE TIMER CLOCK DEMO SEA CONTROL z x c v b n a s d f g h j k l m SUBTITLE MPX VCD NUMBER PREV NEXT SELECT MIC LEVEL MIN MAX 1 2 MIC Become familiar with the buttons and controls on your unit Powered Rolling Panel Press PANELOPEN CLOSE 5 to open the pane...

Page 38: ... Arabia At 9 kHz intervals 531 1 602 kHz At 10 kHz intervals 530 1 600 kHz For other countries At 9 kHz intervals 531 1 710 kHz At 10 kHz intervals 530 1 710 kHz CD player CD Capacity 3 CDs Dynamic range 85 dB Signal to noise ratio 90 dB Wow and flutter Immeasurable Cassette deck Frequency response Normal type I 50 14 000 Hz CrO2 type II 50 14 000 Hz Metal type IV 50 14 000 Hz only for playback Wo...

Page 39: ...V 240V 110V EN CH AR J VC 0699RRDFLEJEM VICTOR COMPANY OF JAPAN LIMITED Mains AC Line Instruction not applicable for Europe U S A Canada Australia and U K IMPORTANT for mains AC line BEFORE PLUGGING IN do check that your mains AC line voltage corresponds with the position of the voltage selector switch provided on the outside of this equipment and if different reset the voltage selector switch to ...

Reviews: