background image

1

Introduction

Special cautions ..............................................2

Notes on handling............................................... 2
Supplied accessories.......................................... 2

About discs......................................................3

Playable disc types ............................................. 3
Disc structure...................................................... 4

Description of parts .........................................5

Front panel.......................................................... 5
Display window ................................................... 5
Rear panel .......................................................... 5

Getting started

Using the remote control .................................6

Putting the batteries in the remote control .......... 6
Operating the TV using the remote control......... 7

Connecting up .................................................8

Connecting antennas.......................................... 8
Connecting speakers .......................................... 9
Connecting other devices ................................. 10
Connecting with TV........................................... 11
Connecting the power cord............................... 11

Basic operations

Playing discs .................................................12

Playback ........................................................... 12
To switch the display ........................................ 13
Select an item on the disc by using the number 

buttons....................................................... 14

To stop playback............................................... 14
To pause playback............................................ 14
To advance picture frame-by-frame.................. 14
Fast reverse/Fast forward search ..................... 14
Playing back from a position 10 seconds before 

(One Touch Replay) .................................. 15

Slow Motion Playback....................................... 15
Skip to the beginning of the selection ............... 15
To change the brightness of the display window 

(DIMMER).................................................. 16

Adjusting the volume ........................................ 16
Adjusting sound quality..................................... 16
Turning off the sound temporarily (MUTING) ... 16

Playing audio/video files................................16

Playback ........................................................... 17
Repeat playback ............................................... 17

Resume Playback .........................................18
Select the scene to be played .......................19

Select the scene from the menu ....................... 19
Designate the time (Time search)..................... 20

Advanced operations

Program/Random Playback ..........................20

Play the disc in the desired order (Program 

Playback)................................................... 20

Playing the disc in a random order (Random 

Playback)................................................... 21

Repeat Playback ...........................................22

Playing the title/chapter/group/track/all tracks 

repeatedly (REPEAT) ................................ 22

Playing the designated part repeatedly (A-B 

Repeat Playback) ...................................... 23

Other convenient functions............................24

Selecting the subtitles........................................24
Selecting the audio language ............................24
Selecting a view angle.......................................24
Enlarging the picture (ZOOM) ...........................25
Adjusting the picture quality (VFP) ....................25
Making dialogues clear (CLEAR VOICE) ..........25
Creating realistic sound (3D PHONIC) ..............26
Adjusting playback level (DVD LEVEL) .............26
Enjoying better pictures (SCAN MODE)............26

Functions specific to DVD AUDIO................. 27

Playing the Bonus Group...................................27
Browsable Still Pictures (B.S.P.) .......................27

Using the menu bar .......................................28
Preferences ...................................................29

Basic operations ................................................29
LANGUAGE.......................................................29
PICTURE...........................................................29
AUDIO ...............................................................30
OTHERS............................................................30

Listening to the radio

Listening to a radio broadcast .......................31

Selecting a station .............................................31
Presetting stations .............................................31
Tuning in to a preset station ..............................31

Convenient functions

Playing Back from the PC .............................32
Listening to the sound of other audio device .... 33

Listening to the sound of external audio device .... 33
Listening to the sound of portable audio device....33
Adjusting the audio input level...........................34

Setting the Various Timer..............................34

Setting the built-in clock.....................................34
Setting the daily timer ........................................35
Auto Standby .....................................................36
Sleep Timer .......................................................36

Tray Lock.......................................................36

Reference

Troubleshooting.............................................37
Language codes............................................38
Specifications ................................................39

Table of contents

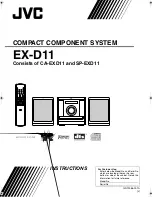
EX-D11[J].book  Page 1  Wednesday, March 22, 2006  1:17 PM

Summary of Contents for CA-EXD11

Page 1: ...s of CA EXD11 and SP EXD11 INSTRUCTIONS For Customer Use Enter below the Model No and Serial No which are located either on the rear bottom or side of the cabinet Retain this information for future reference Model No Serial No GNT0066 001A J ...

Page 2: ...e seulement For Canada pour le Canada THIS DIGITAL APPARATUS DOES NOT EXCEED THE CLASS B LIMITS FOR RADIO NOISE EMISSIONS FROM DIGITAL APPARATUS AS SET OUT IN THE INTERFERENCE CAUSING EQUIPMENT STANDARD ENTITLED DIGITAL APPARATUS ICES 003 OF THE DEPARTMENT OF COMMUNICATIONS CET APPAREIL NUMERIQUE RESPECTE LES LIMITES DE BRUITS RADIOELECTRIQUES APPLICABLES AUX APPAREILS NUMIRIQUES DE CLASSE B PRESC...

Page 3: ...Program Random Playback 20 Play the disc in the desired order Program Playback 20 Playing the disc in a random order Random Playback 21 Repeat Playback 22 Playing the title chapter group track all tracks repeatedly REPEAT 22 Playing the designated part repeatedly A B Repeat Playback 23 Other convenient functions 24 Selecting the subtitles 24 Selecting the audio language 24 Selecting a view angle 2...

Page 4: ... outlet Do not block the vents Blocking the vents may damage the system Care of the cabinet When cleaning the system use a soft cloth and follow the relevant instructions on the use of chemically coated cloths Do not use benzene thinner or other organic solvents including disinfectants These may cause deformation or discoloring If water gets inside the system Turn the system off and disconnect the...

Page 5: ... a malfunction of this system Notes on CD R and CD RW This system supports multi session discs up to 20 sessions This system cannot play packet write UDF format discs Some discs may not be played back because of their disc characteristics recording conditions or damage or stain on them Discs that cannot be played back DVD RAM CD ROM CD I CD I Ready Photo CD SACD etc Playing back these discs will g...

Page 6: ... pixels 25 fps 720 x 480 pixels 30 fps is recommended for the highest resolution This system also supports the resolutions of 352 x 576 480 x 576 352 x 288 pixels 25 fps and 352 x 480 480 x 480 352 x 240 pixels 30 fps The file format should be MP ML Main Profile at Main Level SP ML Simple profile at Main Level MP LL Main Profile at Low Level Audio streams should conform to MPEG1 Audio layer 2 or M...

Page 7: ... 12 31 32 12 33 STANDBY lamp Display window RESUME PRGM ALL SLEEP 3DPHONIC A STANDBY A B 12 3 1 RANDOM BONUS B S P STAUTO PROGRESSIVE SVCDVD A 13 18 26 27 27 13 20 21 17 22 35 36 36 31 26 25 Rear panel SPEAKER IMPEDANCE 4Ω 16Ω VIDEO S VIDEO COMPONENT Y PB PR VIDEO OUT R L R L PCM STREAM FM75Ω COAXIAL ANTENNA AUX 2 DVD OPTICAL DIGITAL OUT SUB WOOFER OUT SPEAKERS CAUTION AM EXT AM LOOP These holes d...

Page 8: ...mote control point it towards the front panel of the main unit If the remote control is operated from a direction that is extremely oblique or when there is an obstacle in the way signals may not be transmitted If the remote control sensor is exposed to a strong light such as direct sunlight correct operation may not be carried out USB FM AM 26 7 7 32 31 15 17 27 7 7 15 31 14 14 18 19 19 28 29 24 ...

Page 9: ...e You may not be able to operate a TV produced by the manufacturer shown above 5 Release TV For TV operation Operate the remote control by pointing it towards the TV 1 Make sure to slide the remote control mode selector to the TV side in advance NOTE When the batteries are replaced perform the manufacturer s code setting again Operating the TV using the remote control Manufacturer Code Manufacture...

Page 10: ...AM EXT AM LOOP Main unit rear panel If the antenna cord is covered with vinyl on the tip twist and pull the vinyl off and remove Connect the end of the antenna cord as shown above AM EXT AM LOOP Extend an electric wire horizontally preferably in a high place such as above a window or outdoors Connect the AM loop antenna cords together with the electric wire Main unit rear panel Electric wire Twist...

Page 11: ...the speakers NOTE Impedance of speaker that can be connected to the main unit is within a range of 4 Ω to 16 Ω In order to have a sufficient cooling effect leave a space of more than 1 cm 3 8 inches between the main unit and the speakers or other objects Connecting speakers R L SPEAKERS Speaker terminal Speaker cord Speaker cord supplied Speaker cord supplied Without black line Without black line ...

Page 12: ...fer to page 30 If connecting the main unit with equipment with the function of a Dolby Digital decoder the setting in D RANGE COMPRESSION of AUDIO page 30 will be invalid regarding sound from the digital audio output of the main unit Connecting other devices SUB WOOFER OUT With an amplifier built in subwoofer not supplied you can enjoy a more dynamic bass sound Refer to the manual of the subwoofer...

Page 13: ...ity pictures than when using the S Video cord CAUTION Use either the S Video cord or the component video cord If both cords are used pictures may not be played properly NOTE In order to enjoy pictures with Progressive mode page 26 the TV is required to have Progressive video input If the component video input jacks of your TV are BNC type use a plug adapter not supplied to convert the plugs Connec...

Page 14: ...t from the description Playback 1 3 2 page 5 Place a disc with the label side facing up Place an 8 cm 3 inches disc in to the hollow part in the center Press AUDIO The power will be turned on and the STANDBY lamp will go off Press AUDIO again to turn off the power Press DVD CD 3 The disc tray will close and playback will start Press 0OPEN CLOSE to open the disc tray to load a disc NOW READING Appe...

Page 15: ...ss DVD CD 3 Press RETURN to go back to the upper layer during the PBC playback of a VCD or SVCD Ex When a CD is played Ex When an MP3 WMA MPEG1 MPEG2 file is played Ex When an JPEG file is played Press DISPLAY Each time you press the button the display indication changes temporarily as follows For DVD VIDEO For DVD VR For DVD AUDIO For MP3 WMA When playing a WMA track WMA appears instead of MP3 Fo...

Page 16: ...ck Press 8 during playback To start normal playback again press DVD CD 3 For JPEG slide show pressing DVD CD 3 starts playback from the next file Press 8 during pause Each time you press the button picture will be advanced frame by frame Press 1 or y during playback Each time you press the button the speed increases X2 X5 X10 X20 X60 To restore the normal speed press DVD CD 3 NOTE For MP3 and WMA ...

Page 17: ... to select the title or group During playback of a MP3 WMA JPEG discs press x or cursor K to play the next file or press 4 or cursor 5 to play the previous file NOTE For a VCD or SVCD this operation can be carried out during playback without the PBC function Except for a DVD VIDEO this operation can also be carried out while the disc is stopped This operation may not be carried out for some discs ...

Page 18: ...sound will come out from the speakers headphones and the subwoofer Press MUTING again to restore the sound In this function the sound will not be restored by following operations Turn off the system directly Press AUDIO VOL directly NOTE Set the remote control mode selector to AUDIO before using the number buttons To change the brightness of the display window DIMMER Adjusting the volume Adjusting...

Page 19: ...ill be automatically canceled if there is a file that cannot be played page 3 Playback Current group total group number Current track file Tag information for MP3 WMA Playback mode PROGRAM RANDOM REPEAT Elapsed playing time of current track except for JPEG Playback status Current track file total track file number on current group Current group Total track file number on disc Repeat playback Repea...

Page 20: ...art playback from the stored position Press DVD CD 3 NOTE This function does not work in Program Playback or Random Playback The position where playback starts again may be a little different from the stopped position When a disc menu is displayed the Resume function may not work The system also stores the settings of the audio language the subtitle language and the angle selected when playback is...

Page 21: ...P MENU PG to display the original program or press MENU PL to display the play list 7 Original program 7 Play list The play list will not appear when a play list has not been recorded to the disc 2 Press 5 K to select the desired title 3 Press ENTER When you have selected the original program by pressing TOP MENU PG in step 1 playback will start from the selected title to the following titles When...

Page 22: ...s stopped or during playback without the PBC function 3 Time search for a DVD VIDEO is from the beginning of the title for a DVD AUDIO from the beginning of the track being played Time search for a VCD an SVCD and a CD is as follows When the disc is stopped time search is from the beginning of the disc When the disc is being played time search is within the track currently being played NOTE Set th...

Page 23: ...rack chapter number ALL is displayed and all of the tracks chapters in the selected group title are programmed 3 Press DVD CD 3 To resume normal playback press PLAY MODE repeatedly to show the playback indication on the display window on the main unit while the disc is stopped The program content will not be erased The following operations erase the program content Press CANCEL repeatedly Programs...

Page 24: ... LINK Playing the title chapter group track all tracks repeatedly REPEAT Repeat items On the TV On the display window Current chapter Current title Cancel Repeat items On the TV On the display window Current chapter Current original program All original programs Current play list Cancel Repeat items On the TV On the display window Current track Current group Cancel CHAP TITLE OFF CHAP PG ALL PL OF...

Page 25: ...int The icon on the menu bar will be 6 Press ENTER at the end point of the part to be repeated designating B point The icon on the menu bar will be and the part between A and B points will be played repeatedly A B Repeat Playback will be canceled by carrying out the following operations Press 7 Select and press ENTER twice Change the current track file NOTE A B Repeat Playback is possible only wit...

Page 26: ...io language will be alternated Also the audio language can be changed by pressing cursor 5 K For a language code such as AA refer to Language codes page 38 ST L and R displayed when playing a VCD SVCD or DVD VR respectively represent Stereo Left sound and Right sound 2 Wait for a few seconds or press ENTER to remove the window NOTE It is also possible to operate by using the menu bar page 28 1 Pre...

Page 27: ...of dark and bright portion is maintained BRIGHTNESS Adjust this if the picture is bright or dark on the whole CONTRAST Adjust this if the far and near position is unnatural SATURATION Adjust this if the picture is whitish or blackish TINT Adjust this if the appearance of flesh tone is unnatural SHARPNESS Adjust this if the picture is indistinct 6 Press ENTER To adjust other items go back to Step 3...

Page 28: ...l is changed the output level from the digital audio output terminal will not be changed In the Progressive mode better pictures can be enjoyed IMPORTANT In order to enjoy pictures in the Progressive mode connect this system and your TV with component video cord If your TV does not have component video input terminal leave the setting Interlace mode Press and hold SCAN MODE for 4 seconds when ther...

Page 29: ...orrect pin code is entered BONUS disappears and the playback of the bonus group starts If an incorrect pin code is entered try entering a correct pin code again There are some DVD AUDIO discs with still pictures recorded Among the still pictures there are pictures called B S P Browsable Still Pictures With these pictures it is possible to switch a picture as if turning over pages NOTE This operati...

Page 30: ... TOTAL Elapsed playing time of current title group T REM Remaining time of current title group TIME Elapsed playing time of current chapter track REM Remaining time of current chapter track DVD VR operating during playback TOTAL Elapsed playing time of current title group T REM Remaining time of current title group CD operating during playback VCD SVCD TIME Elapsed playing time of current track RE...

Page 31: ...ONITOR TYPE Select a display method suitable for your TV 16 9 Select this for an ordinary wide TV Select this when the aspect ratio of your TV is conventional 4 3 While viewing a wide screen picture the black bars appear on the top and bottom of the screen 4 3 PS Pan Scan Select this when the aspect ratio of your TV is conventional 4 3 While viewing a wide screen picture the left and right edges o...

Page 32: ... Dolby digital D Range Compression automatically works ON D Range Compression always works STREAM PCM STEREO AUTO OTHERS Items Contents initial setting RESUME Select OFF page 18 ON SCREEN GUIDE Select OFF page 15 ON ON Table of relationships of DIGITAL AUDIO OUTPUT preference items and output signal NOTE While playing some DVD digital signals may be emitted at 20 bits or 24 bits at their original ...

Page 33: ...ons in the system allows you to easily tune in to a station The system stores up to 30 FM stations and up to 15 AM stations 1 Select a station you want to store page 31 for how to select 2 Press MEMORY MEMORY is flashing on the display window for a while 3 Select the number you want to store by pressing number buttons while MEMORY is flashing Refer to How to use the number buttons page 15 You can ...

Page 34: ...ectly installed 1 Open the Control Panel on your PC Select Start Control Panel 2 Click System Hardware Device Manager Sound video and game controllers and Universal Serial Bus controllers 3 Check whether the following items appear USB Audio Device USB Composite Device If the items cannot be shown disconnect the USB cable and connect it again If it does not work yet turn off your PC and repeat from...

Page 35: ...ther source Changes the source to AUX 1 automatically If you change from AUX 1 to another source QP Link will be canceled While the system is on standby Turns on the system and activates the AUX 1 source automatically except when the display is turned off NOTE Changing from AUX 1 to another source while QP Link works will deactivate QP Link temporarily In this case the following reactivates QP Lin...

Page 36: ...necting an audio device other than a portable audio device to AUX 1 jack AUX LEVEL 2 Select this when listening to a portable audio device Without setting the built in clock you cannot use any timers To exit from the clock setting press CLOCK TIMER as required To correct a misentry during the procedure below pressing CANCEL can return to the previous step 1 Press CLOCK TIMER If you have already ad...

Page 37: ...ts playback 1 Press CLOCK TIMERrepeatedly to show DAILY 1 Each time you press the button the clock setting changes as follows 2 Press cursor 2 3 to adjust the hour of the timer on time then press SET QP LINK 3 Press cursor 2 3 to adjust the minute of the timer on time then press SET QP LINK 4 Repeat Step 2 and 3 to set the timer off time 5 Press cursor 2 3 to select the playback source then press ...

Page 38: ...s FM AM USB or AUX Auto Standby does not work When the time you specify elapses the system will be turned off by itself Press SLEEP Each time you press the button the time indicated on the display window on the main unit changes in minutes Changing the time Reselect the time by pressing SLEEP repeatedly Confirming the time Press SLEEP once while Sleep Timer is set Releasing Press SLEEP repeatedly ...

Page 39: ...ed A VCR is connected between the main unit and the TV set Connect the main unit directly to the TV set page 11 Although this system is connected to a non Progressive TV set DVD s scan mode is set to PROGRESSIVE Set the scan mode to INTERLACE page 26 7 The screen size is abnormal The screen size is set improperly Set MONITOR TYPE according to the TV set you are using page 29 7 The TV screen darken...

Page 40: ...m the outlet wait for a while and reconnect the system Code Language Code Language AA Afar MK Macedonian AB Abkhazian ML Malayalam AF Afrikaans MN Mongolian AM Ameharic MO Moldavian AR Arabic MR Marathi AS Assamese MS Malay MAY AY Aymara MT Maltese AZ Azerbaijani MY Burmese BA Bashkir NA Nauru BE Byelorussian NE Nepali BG Bulgarian NL Dutch BH Bihari NO Norwegian BI Bislama OC Occitan BN Bengali B...

Page 41: ...ound input AUX 1 400 mV 50 kΩ 200 mV 50 kΩ AUX 2 1 5 V 50 kΩ 750 mV 50 kΩ USB AUDIO x 1 Tuner FM tuner Receiving frequency 87 5 MHz to 108 0 MHz Antenna 75 Ω Unbalanced type AM MW tuner Receiving frequency 530 kHz to 1 710 kHz Antenna External antenna jack loop antenna Speaker Type Full range 1 way bass reflex type Magnetically shielded type Speaker 8 cm 33 16 inches wood cone x1 Frequency respons...

Page 42: ......

Page 43: ......

Page 44: ...2006 Victor Company of Japan Limited EN 0306ZZCMDWJSC EX D11 COMPACT T COMPONENT SYSTEM c ...

Page 45: ...COMPACT COMPONENT SYSTEM EX D11 Consists of CA EXD11 and SP EXD11 INSTRUCTIONS GNT0066 005B UW UG US UB A ...

Page 46: ... Standby on button in any position does not disconnect the mains line When the system is on standby the STANDBY lamp lights red When the system is turned on the STANDBY lamp goes off The power can be remote controlled IMPORTANT FOR LASER PRODUCTS 1 CLASS 1 LASER PRODUCT 2 CAUTION Do not open the top cover There are no user serviceable parts inside the unit leave all servicing to qualified service ...

Page 47: ...gnate the time Time search 20 Advanced operations Program Random Playback 20 Play the disc in the desired order Program Playback 20 Playing the disc in a random order Random Playback 21 Repeat Playback 22 Playing the title chapter group track all tracks repeatedly REPEAT 22 Playing the designated part repeatedly A B Repeat Playback 23 Other convenient functions 24 Selecting the subtitles 24 Select...

Page 48: ...the cabinet When cleaning the system use a soft cloth and follow the relevant instructions on the use of chemically coated cloths Do not use benzene thinner or other organic solvents including disinfectants These may cause deformation or discoloring If water gets inside the system Turn the system off and disconnect the power cord plug from the wall outlet then call the store where you made your pu...

Page 49: ...on CD R and CD RW This system supports multi session discs up to 20 sessions This system cannot play packet write UDF format discs Some discs may not be played back because of their disc characteristics recording conditions or damage or stain on them Discs that cannot be played back DVD RAM CD ROM CD I CD I Ready Photo CD SACD etc Playing back these discs will generate noise and damage the speaker...

Page 50: ...udio Layer 2 For ASF files This system supports ASF files whose resolution is 352 x 288 pixels or less The system supports ASF files recorded with the maximum bit rate of 384 kbps and an audio coder decoder of G 726 Some recorded files may not be able to playback depending on file characteristics kind of digital camera video camera or recording conditions For DivX files This system can play a DVD ...

Page 51: ... 12 31 32 12 33 STANDBY lamp Display window RESUME PRGM ALL SLEEP 3DPHONIC A STANDBY A B 12 3 1 RANDOM BONUS B S P STAUTO PROGRESSIVE SVCDVD A 13 18 26 27 27 13 20 21 17 22 35 36 36 31 26 25 Rear panel SPEAKER IMPEDANCE 4Ω 16Ω VIDEO S VIDEO COMPONENT Y PB PR VIDEO OUT R L R L PCM STREAM FM75Ω COAXIAL ANTENNA AUX 2 DVD OPTICAL DIGITAL OUT SUB WOOFER OUT SPEAKERS CAUTION AM EXT AM LOOP These holes d...

Page 52: ...mote control point it towards the front panel of the main unit If the remote control is operated from a direction that is extremely oblique or when there is an obstacle in the way signals may not be transmitted If the remote control sensor is exposed to a strong light such as direct sunlight correct operation may not be carried out USB FM AM 26 7 7 32 31 15 17 27 7 7 15 31 14 14 18 19 19 28 29 24 ...

Page 53: ...e You may not be able to operate a TV produced by the manufacturer shown above 5 Release TV For TV operation Operate the remote control by pointing it towards the TV 1 Make sure to slide the remote control mode selector to the TV side in advance NOTE When the batteries are replaced perform the manufacturer s code setting again Operating the TV using the remote control Manufacturer Code Manufacture...

Page 54: ...necting antennas AM EXT AM LOOP Main unit rear panel If the antenna cord is covered with vinyl on the tip twist and pull the vinyl off and remove Connect the end of the antenna cord as shown above AM EXT AM LOOP Extend an electric wire horizontally preferably in a high place such as above a window or outdoors Connect the AM loop antenna cords together with the electric wire Main unit rear panel El...

Page 55: ...e speakers NOTE Impedance of speaker that can be connected to the main unit is within a range of 4 Ω to 16 Ω In order to have a sufficient cooling effect leave a space of more than 1 cm between the main unit and the speakers or other objects Connecting speakers R L SPEAKERS Speaker terminal Speaker cord Speaker cord supplied Speaker cord supplied Without black line Without black line With black li...

Page 56: ...it See page 33 for details If an external device is not equipped with a stereo mini plug audio output use a plug adaptor to convert the stereo mini plug to the corresponding plug of the audio output CAUTION Connect the main unit directly with a TV or a monitor without routing through a VCR Otherwise it may cause picture distortion while playing Also when connecting the main unit to a TV with a VCR...

Page 57: ...AM stations 9 kHz apart and some countries use 10 kHz spacing Before doing the following procedure select AM as source then turn off the unit Use the buttons on the main unit To set the AM tuner to the 10 kHz spacing While holding press STANDBY ON To set the AM tuner to the 9 kHz spacing While holding 4 press STANDBY ON You can select the video output to match it to the color system of your TV PAL...

Page 58: ...n Playback 1 3 2 page 5 Place a disc with the label side facing up Place an 8 cm disc in to the hollow part in the center Press AUDIO The power will be turned on and the STANDBY lamp will go off Press AUDIO again to turn off the power Press DVD CD 3 The disc tray will close and playback will start Press 0OPEN CLOSE to open the disc tray to load a disc NOW READING Appears when the system is reading...

Page 59: ...k to the upper layer during the PBC playback of a VCD or SVCD Ex When a CD is played Ex When an MP3 WMA ASF DivX MPEG1 MPEG2 file is played Ex When an JPEG file is played Press DISPLAY Each time you press the button the display indication changes temporarily as follows For DVD VIDEO For DVD VR For DVD AUDIO For MP3 WMA For ASF DivX MPEG1 MPEG2 While playing a DivX or MPEG1 MPEG2 file DIV for DivX ...

Page 60: ...tart normal playback again press DVD CD 3 For JPEG slide show pressing DVD CD 3 starts playback from the next file Press 8 during pause Each time you press the button picture will be advanced frame by frame Press 1 or y during playback Each time you press the button the speed increases as follows DivX file disc X1 X2 X3 Except for DivX file disc X2 X5 X10 X20 X60 To restore the normal speed press ...

Page 61: ...carried out during playback without the PBC function Except for a DVD VIDEO this operation can also be carried out while the disc is stopped This operation may not be carried out for some discs Press cursor 2 or cursor 3 during playback Each time you press the button the playback position skips to the beginning of the previous or next interval Each interval is about 5 minutes or 30 seconds dependi...

Page 62: ...sound will come out from the speakers headphones and the subwoofer Press MUTING again to restore the sound In this function the sound will not be restored by following operations Turn off the system directly Press AUDIO VOL directly NOTE Set the remote control mode selector to AUDIO before using the number buttons To change the brightness of the display window DIMMER Adjusting the volume Adjusting...

Page 63: ...ode will be automatically canceled if there is a file that cannot be played page 3 Playback Current group total group number Current track file Tag information for MP3 WMA Playback mode PROGRAM RANDOM REPEAT Elapsed playing time of current track except for JPEG Playback status Current track file total track file number on current group Current group Total track file number on disc Repeat playback ...

Page 64: ...art playback from the stored position Press DVD CD 3 NOTE This function does not work in Program Playback or Random Playback The position where playback starts again may be a little different from the stopped position When a disc menu is displayed the Resume function may not work The system also stores the settings of the audio language the subtitle language and the angle selected when playback is...

Page 65: ...P MENU PG to display the original program or press MENU PL to display the play list 7 Original program 7 Play list The play list will not appear when a play list has not been recorded to the disc 2 Press 5 K to select the desired title 3 Press ENTER When you have selected the original program by pressing TOP MENU PG in step 1 playback will start from the selected title to the following titles When...

Page 66: ...s stopped or during playback without the PBC function 3 Time search for a DVD VIDEO is from the beginning of the title for a DVD AUDIO from the beginning of the track being played Time search for a VCD an SVCD and a CD is as follows When the disc is stopped time search is from the beginning of the disc When the disc is being played time search is within the track currently being played NOTE Set th...

Page 67: ...rack chapter number ALL is displayed and all of the tracks chapters in the selected group title are programmed 3 Press DVD CD 3 To resume normal playback press PLAY MODE repeatedly to show the playback indication on the display window on the main unit while the disc is stopped The program content will not be erased The following operations erase the program content Press CANCEL repeatedly Programs...

Page 68: ...ET QP LINK Playing the title chapter group track all tracks repeatedly REPEAT Repeat items On the TV On the display window Current chapter Current title Cancel Repeat items On the TV On the display window Current chapter Current original program All original programs Current play list Cancel Repeat items On the TV On the display window Current track Current group Cancel CHAP TITLE OFF CHAP PG ALL ...

Page 69: ...int The icon on the menu bar will be 6 Press ENTER at the end point of the part to be repeated designating B point The icon on the menu bar will be and the part between A and B points will be played repeatedly A B Repeat Playback will be canceled by carrying out the following operations Press 7 Select and press ENTER twice Change the current track file NOTE A B Repeat Playback is possible only wit...

Page 70: ... audio language can be changed by pressing cursor 5 K For a language code such as AA refer to Language codes page 38 ST L and R displayed when playing a VCD SVCD or DVD VR respectively represent Stereo Left sound and Right sound For a DivX disc only the number of the language is displayed on the TV screen 2 Wait for a few seconds or press ENTER to remove the window NOTE It is also possible to oper...

Page 71: ...al color is bright or dark The brightness of dark and bright portion is maintained BRIGHTNESS Adjust this if the picture is bright or dark on the whole CONTRAST Adjust this if the far and near position is unnatural SATURATION Adjust this if the picture is whitish or blackish TINT Adjust this if the appearance of flesh tone is unnatural SHARPNESS Adjust this if the picture is indistinct 6 Press ENT...

Page 72: ...Level is changed the output level from the digital audio output terminal will not be changed In the Progressive mode better pictures can be enjoyed IMPORTANT In order to enjoy pictures in the Progressive mode connect this system and your TV with component video cord If your TV does not have component video input terminal leave the setting Interlace mode Press and hold SCAN MODE for 4 seconds when ...

Page 73: ...orrect pin code is entered BONUS disappears and the playback of the bonus group starts If an incorrect pin code is entered try entering a correct pin code again There are some DVD AUDIO discs with still pictures recorded Among the still pictures there are pictures called B S P Browsable Still Pictures With these pictures it is possible to switch a picture as if turning over pages NOTE This operati...

Page 74: ... TOTAL Elapsed playing time of current title group T REM Remaining time of current title group TIME Elapsed playing time of current chapter track REM Remaining time of current chapter track DVD VR operating during playback TOTAL Elapsed playing time of current title group T REM Remaining time of current title group CD operating during playback VCD SVCD TIME Elapsed playing time of current track RE...

Page 75: ...TOR TYPE Select a display method suitable for your TV 16 9 Select this for an ordinary wide TV Select this when the aspect ratio of your TV is conventional 4 3 While viewing a wide screen picture the black bars appear on the top and bottom of the screen 4 3 PS Pan Scan Select this when the aspect ratio of your TV is conventional 4 3 While viewing a wide screen picture the left and right edges of t...

Page 76: ...ERS Items Contents initial setting RESUME Select OFF page 18 ON SCREEN GUIDE Select OFF page 15 DivX REGISTRATION The system has its own registration code You can confirm the registration code when necessary Once you have played back a disc in which the registration code of the system is overwritten for copyright protection ON ON Table of relationships of DIGITAL AUDIO OUTPUT preference items and ...

Page 77: ...ons in the system allows you to easily tune in to a station The system stores up to 30 FM stations and up to 15 AM stations 1 Select a station you want to store page 31 for how to select 2 Press MEMORY MEMORY is flashing on the display window for a while 3 Select the number you want to store by pressing number buttons while MEMORY is flashing Refer to How to use the number buttons page 15 You can ...

Page 78: ...y installed 1 Open the Control Panel on your PC Select Start Control Panel 2 Click System Hardware Device Manager Sound video and game controllers and Universal Serial Bus controllers 3 Check whether the following items appear USB Audio Device USB Composite Device If the items cannot be shown disconnect the USB cable and connect it again If it does not work yet turn off your PC and repeat from Ste...

Page 79: ...ther source Changes the source to AUX 1 automatically If you change from AUX 1 to another source QP Link will be canceled While the system is on standby Turns on the system and activates the AUX 1 source automatically except when the display is turned off NOTE Changing from AUX 1 to another source while QP Link works will deactivate QP Link temporarily In this case the following reactivates QP Lin...

Page 80: ...necting an audio device other than a portable audio device to AUX 1 jack AUX LEVEL 2 Select this when listening to a portable audio device Without setting the built in clock you cannot use any timers To exit from the clock setting press CLOCK TIMER as required To correct a misentry during the procedure below pressing CANCEL can return to the previous step 1 Press CLOCK TIMER If you have already ad...

Page 81: ...starts playback 1 Press CLOCK TIMERrepeatedly to show DAILY 1 Each time you press the button the clock setting changes as follows 2 Press cursor 2 3 to adjust the hour of the timer on time then press SET QP LINK 3 Press cursor 2 3 to adjust the minute of the timer on time then press SET QP LINK 4 Repeat Step 2 and 3 to set the timer off time 5 Press cursor 2 3 to select the playback source then pr...

Page 82: ...s FM AM USB or AUX Auto Standby does not work When the time you specify elapses the system will be turned off by itself Press SLEEP Each time you press the button the time indicated on the display window on the main unit changes in minutes Changing the time Reselect the time by pressing SLEEP repeatedly Confirming the time Press SLEEP once while Sleep Timer is set Releasing Press SLEEP repeatedly ...

Page 83: ...s distorted A VCR is connected between the main unit and the TV set Connect the main unit directly to the TV set page 10 Although this system is connected to a non Progressive TV set DVD s scan mode is set to PROGRESSIVE Set the scan mode to INTERLACE page 26 7 The screen size is abnormal The screen size is set improperly Set MONITOR TYPE according to the TV set you are using page 29 7 The TV scre...

Page 84: ...m the outlet wait for a while and reconnect the system Code Language Code Language AA Afar MK Macedonian AB Abkhazian ML Malayalam AF Afrikaans MN Mongolian AM Ameharic MO Moldavian AR Arabic MR Marathi AS Assamese MS Malay MAY AY Aymara MT Maltese AZ Azerbaijani MY Burmese BA Bashkir NA Nauru BE Byelorussian NE Nepali BG Bulgarian NL Dutch BH Bihari NO Norwegian BI Bislama OC Occitan BN Bengali B...

Page 85: ...Singapore Hong Kong South and Central America Australia 531 kHz to 1 710 kHz 9 kHz 530 kHz to 1 710 kHz 10 kHz For Middle East and South Africa 531 kHz to 1 602 kHz 9 kHz 530 kHz to 1 600 kHz 10 kHz Antenna External antenna jack loop antenna Speaker Type Full range 1 way bass reflex type Magnetically shielded type Speaker 8 cm wood cone x1 Frequency response 55 Hz to 20 000 Hz Power handling capac...

Page 86: ...2006 Victor Company of Japan Limited EN 0306ZZCMDWJSC EX D11 COMPACT T COMPONENT SYSTEM c ...

Page 87: ...COMPACT COMPONENT SYSTEM EX D11 Consists of CA EXD11 and SP EXD11 INSTRUCTIONS GNT0066 005D UW UG US UB A UA ...

Page 88: ... Standby on button in any position does not disconnect the mains line When the system is on standby the STANDBY lamp lights red When the system is turned on the STANDBY lamp goes off The power can be remote controlled IMPORTANT FOR LASER PRODUCTS 1 CLASS 1 LASER PRODUCT 2 CAUTION Do not open the top cover There are no user serviceable parts inside the unit leave all servicing to qualified service ...

Page 89: ...gnate the time Time search 20 Advanced operations Program Random Playback 20 Play the disc in the desired order Program Playback 20 Playing the disc in a random order Random Playback 21 Repeat Playback 22 Playing the title chapter group track all tracks repeatedly REPEAT 22 Playing the designated part repeatedly A B Repeat Playback 23 Other convenient functions 24 Selecting the subtitles 24 Select...

Page 90: ...abinet When cleaning the system use a soft cloth and follow the relevant instructions on the use of chemically coated cloths Do not use benzene thinner or other organic solvents including disinfectants These may cause deformation or discoloring If water gets inside the system Turn the system off and disconnect the power cord plug from the wall outlet then call the store where you made your purchas...

Page 91: ...on CD R and CD RW This system supports multi session discs up to 20 sessions This system cannot play packet write UDF format discs Some discs may not be played back because of their disc characteristics recording conditions or damage or stain on them Discs that cannot be played back DVD RAM CD ROM CD I CD I Ready Photo CD SACD etc Playing back these discs will generate noise and damage the speaker...

Page 92: ...udio Layer 2 For ASF files This system supports ASF files whose resolution is 352 x 288 pixels or less The system supports ASF files recorded with the maximum bit rate of 384 kbps and an audio coder decoder of G 726 Some recorded files may not be able to playback depending on file characteristics kind of digital camera video camera or recording conditions For DivX files This system can play a DVD ...

Page 93: ... 12 31 32 12 33 STANDBY lamp Display window RESUME PRGM ALL SLEEP 3DPHONIC A STANDBY A B 12 3 1 RANDOM BONUS B S P STAUTO PROGRESSIVE SVCDVD A 13 18 26 27 27 13 20 21 17 22 35 36 36 31 26 25 Rear panel SPEAKER IMPEDANCE 4Ω 16Ω VIDEO S VIDEO COMPONENT Y PB PR VIDEO OUT R L R L PCM STREAM FM75Ω COAXIAL ANTENNA AUX 2 DVD OPTICAL DIGITAL OUT SUB WOOFER OUT SPEAKERS CAUTION AM EXT AM LOOP These holes d...

Page 94: ...mote control point it towards the front panel of the main unit If the remote control is operated from a direction that is extremely oblique or when there is an obstacle in the way signals may not be transmitted If the remote control sensor is exposed to a strong light such as direct sunlight correct operation may not be carried out USB FM AM 26 7 7 32 31 15 17 27 7 7 15 31 14 14 18 19 19 28 29 24 ...

Page 95: ...e You may not be able to operate a TV produced by the manufacturer shown above 5 Release TV For TV operation Operate the remote control by pointing it towards the TV 1 Make sure to slide the remote control mode selector to the TV side in advance NOTE When the batteries are replaced perform the manufacturer s code setting again Operating the TV using the remote control Manufacturer Code Manufacture...

Page 96: ...necting antennas AM EXT AM LOOP Main unit rear panel If the antenna cord is covered with vinyl on the tip twist and pull the vinyl off and remove Connect the end of the antenna cord as shown above AM EXT AM LOOP Extend an electric wire horizontally preferably in a high place such as above a window or outdoors Connect the AM loop antenna cords together with the electric wire Main unit rear panel El...

Page 97: ...e speakers NOTE Impedance of speaker that can be connected to the main unit is within a range of 4 Ω to 16 Ω In order to have a sufficient cooling effect leave a space of more than 1 cm between the main unit and the speakers or other objects Connecting speakers R L SPEAKERS Speaker terminal Speaker cord Speaker cord supplied Speaker cord supplied Without black line Without black line With black li...

Page 98: ...it See page 33 for details If an external device is not equipped with a stereo mini plug audio output use a plug adaptor to convert the stereo mini plug to the corresponding plug of the audio output CAUTION Connect the main unit directly with a TV or a monitor without routing through a VCR Otherwise it may cause picture distortion while playing Also when connecting the main unit to a TV with a VCR...

Page 99: ...AM stations 9 kHz apart and some countries use 10 kHz spacing Before doing the following procedure select AM as source then turn off the unit Use the buttons on the main unit To set the AM tuner to the 10 kHz spacing While holding press STANDBY ON To set the AM tuner to the 9 kHz spacing While holding 4 press STANDBY ON You can select the video output to match it to the color system of your TV PAL...

Page 100: ...n Playback 1 3 2 page 5 Place a disc with the label side facing up Place an 8 cm disc in to the hollow part in the center Press AUDIO The power will be turned on and the STANDBY lamp will go off Press AUDIO again to turn off the power Press DVD CD 3 The disc tray will close and playback will start Press 0OPEN CLOSE to open the disc tray to load a disc NOW READING Appears when the system is reading...

Page 101: ...k to the upper layer during the PBC playback of a VCD or SVCD Ex When a CD is played Ex When an MP3 WMA ASF DivX MPEG1 MPEG2 file is played Ex When an JPEG file is played Press DISPLAY Each time you press the button the display indication changes temporarily as follows For DVD VIDEO For DVD VR For DVD AUDIO For MP3 WMA For ASF DivX MPEG1 MPEG2 While playing a DivX or MPEG1 MPEG2 file DIV for DivX ...

Page 102: ...tart normal playback again press DVD CD 3 For JPEG slide show pressing DVD CD 3 starts playback from the next file Press 8 during pause Each time you press the button picture will be advanced frame by frame Press 1 or y during playback Each time you press the button the speed increases as follows DivX file disc X1 X2 X3 Except for DivX file disc X2 X5 X10 X20 X60 To restore the normal speed press ...

Page 103: ...carried out during playback without the PBC function Except for a DVD VIDEO this operation can also be carried out while the disc is stopped This operation may not be carried out for some discs Press cursor 2 or cursor 3 during playback Each time you press the button the playback position skips to the beginning of the previous or next interval Each interval is about 5 minutes or 30 seconds dependi...

Page 104: ...sound will come out from the speakers headphones and the subwoofer Press MUTING again to restore the sound In this function the sound will not be restored by following operations Turn off the system directly Press AUDIO VOL directly NOTE Set the remote control mode selector to AUDIO before using the number buttons To change the brightness of the display window DIMMER Adjusting the volume Adjusting...

Page 105: ...ode will be automatically canceled if there is a file that cannot be played page 3 Playback Current group total group number Current track file Tag information for MP3 WMA Playback mode PROGRAM RANDOM REPEAT Elapsed playing time of current track except for JPEG Playback status Current track file total track file number on current group Current group Total track file number on disc Repeat playback ...

Page 106: ...art playback from the stored position Press DVD CD 3 NOTE This function does not work in Program Playback or Random Playback The position where playback starts again may be a little different from the stopped position When a disc menu is displayed the Resume function may not work The system also stores the settings of the audio language the subtitle language and the angle selected when playback is...

Page 107: ...P MENU PG to display the original program or press MENU PL to display the play list 7 Original program 7 Play list The play list will not appear when a play list has not been recorded to the disc 2 Press 5 K to select the desired title 3 Press ENTER When you have selected the original program by pressing TOP MENU PG in step 1 playback will start from the selected title to the following titles When...

Page 108: ...s stopped or during playback without the PBC function 3 Time search for a DVD VIDEO is from the beginning of the title for a DVD AUDIO from the beginning of the track being played Time search for a VCD an SVCD and a CD is as follows When the disc is stopped time search is from the beginning of the disc When the disc is being played time search is within the track currently being played NOTE Set th...

Page 109: ...rack chapter number ALL is displayed and all of the tracks chapters in the selected group title are programmed 3 Press DVD CD 3 To resume normal playback press PLAY MODE repeatedly to show the playback indication on the display window on the main unit while the disc is stopped The program content will not be erased The following operations erase the program content Press CANCEL repeatedly Programs...

Page 110: ...ET QP LINK Playing the title chapter group track all tracks repeatedly REPEAT Repeat items On the TV On the display window Current chapter Current title Cancel Repeat items On the TV On the display window Current chapter Current original program All original programs Current play list Cancel Repeat items On the TV On the display window Current track Current group Cancel CHAP TITLE OFF CHAP PG ALL ...

Page 111: ...int The icon on the menu bar will be 6 Press ENTER at the end point of the part to be repeated designating B point The icon on the menu bar will be and the part between A and B points will be played repeatedly A B Repeat Playback will be canceled by carrying out the following operations Press 7 Select and press ENTER twice Change the current track file NOTE A B Repeat Playback is possible only wit...

Page 112: ... audio language can be changed by pressing cursor 5 K For a language code such as AA refer to Language codes page 38 ST L and R displayed when playing a VCD SVCD or DVD VR respectively represent Stereo Left sound and Right sound For a DivX disc only the number of the language is displayed on the TV screen 2 Wait for a few seconds or press ENTER to remove the window NOTE It is also possible to oper...

Page 113: ...al color is bright or dark The brightness of dark and bright portion is maintained BRIGHTNESS Adjust this if the picture is bright or dark on the whole CONTRAST Adjust this if the far and near position is unnatural SATURATION Adjust this if the picture is whitish or blackish TINT Adjust this if the appearance of flesh tone is unnatural SHARPNESS Adjust this if the picture is indistinct 6 Press ENT...

Page 114: ...Level is changed the output level from the digital audio output terminal will not be changed In the Progressive mode better pictures can be enjoyed IMPORTANT In order to enjoy pictures in the Progressive mode connect this system and your TV with component video cord If your TV does not have component video input terminal leave the setting Interlace mode Press and hold SCAN MODE for 4 seconds when ...

Page 115: ...orrect pin code is entered BONUS disappears and the playback of the bonus group starts If an incorrect pin code is entered try entering a correct pin code again There are some DVD AUDIO discs with still pictures recorded Among the still pictures there are pictures called B S P Browsable Still Pictures With these pictures it is possible to switch a picture as if turning over pages NOTE This operati...

Page 116: ... TOTAL Elapsed playing time of current title group T REM Remaining time of current title group TIME Elapsed playing time of current chapter track REM Remaining time of current chapter track DVD VR operating during playback TOTAL Elapsed playing time of current title group T REM Remaining time of current title group CD operating during playback VCD SVCD TIME Elapsed playing time of current track RE...

Page 117: ...TOR TYPE Select a display method suitable for your TV 16 9 Select this for an ordinary wide TV Select this when the aspect ratio of your TV is conventional 4 3 While viewing a wide screen picture the black bars appear on the top and bottom of the screen 4 3 PS Pan Scan Select this when the aspect ratio of your TV is conventional 4 3 While viewing a wide screen picture the left and right edges of t...

Page 118: ...ERS Items Contents initial setting RESUME Select OFF page 18 ON SCREEN GUIDE Select OFF page 15 DivX REGISTRATION The system has its own registration code You can confirm the registration code when necessary Once you have played back a disc in which the registration code of the system is overwritten for copyright protection ON ON Table of relationships of DIGITAL AUDIO OUTPUT preference items and ...

Page 119: ...ons in the system allows you to easily tune in to a station The system stores up to 30 FM stations and up to 15 AM stations 1 Select a station you want to store page 31 for how to select 2 Press MEMORY MEMORY is flashing on the display window for a while 3 Select the number you want to store by pressing number buttons while MEMORY is flashing Refer to How to use the number buttons page 15 You can ...

Page 120: ...y installed 1 Open the Control Panel on your PC Select Start Control Panel 2 Click System Hardware Device Manager Sound video and game controllers and Universal Serial Bus controllers 3 Check whether the following items appear USB Audio Device USB Composite Device If the items cannot be shown disconnect the USB cable and connect it again If it does not work yet turn off your PC and repeat from Ste...

Page 121: ...ther source Changes the source to AUX 1 automatically If you change from AUX 1 to another source QP Link will be canceled While the system is on standby Turns on the system and activates the AUX 1 source automatically except when the display is turned off NOTE Changing from AUX 1 to another source while QP Link works will deactivate QP Link temporarily In this case the following reactivates QP Lin...

Page 122: ...necting an audio device other than a portable audio device to AUX 1 jack AUX LEVEL 2 Select this when listening to a portable audio device Without setting the built in clock you cannot use any timers To exit from the clock setting press CLOCK TIMER as required To correct a misentry during the procedure below pressing CANCEL can return to the previous step 1 Press CLOCK TIMER If you have already ad...

Page 123: ...starts playback 1 Press CLOCK TIMERrepeatedly to show DAILY 1 Each time you press the button the clock setting changes as follows 2 Press cursor 2 3 to adjust the hour of the timer on time then press SET QP LINK 3 Press cursor 2 3 to adjust the minute of the timer on time then press SET QP LINK 4 Repeat Step 2 and 3 to set the timer off time 5 Press cursor 2 3 to select the playback source then pr...

Page 124: ...s FM AM USB or AUX Auto Standby does not work When the time you specify elapses the system will be turned off by itself Press SLEEP Each time you press the button the time indicated on the display window on the main unit changes in minutes Changing the time Reselect the time by pressing SLEEP repeatedly Confirming the time Press SLEEP once while Sleep Timer is set Releasing Press SLEEP repeatedly ...

Page 125: ...s distorted A VCR is connected between the main unit and the TV set Connect the main unit directly to the TV set page 10 Although this system is connected to a non Progressive TV set DVD s scan mode is set to PROGRESSIVE Set the scan mode to INTERLACE page 26 7 The screen size is abnormal The screen size is set improperly Set MONITOR TYPE according to the TV set you are using page 29 7 The TV scre...

Page 126: ...m the outlet wait for a while and reconnect the system Code Language Code Language AA Afar MK Macedonian AB Abkhazian ML Malayalam AF Afrikaans MN Mongolian AM Ameharic MO Moldavian AR Arabic MR Marathi AS Assamese MS Malay MAY AY Aymara MT Maltese AZ Azerbaijani MY Burmese BA Bashkir NA Nauru BE Byelorussian NE Nepali BG Bulgarian NL Dutch BH Bihari NO Norwegian BI Bislama OC Occitan BN Bengali B...

Page 127: ...pore Hong Kong Thailand South and Central America Australia 531 kHz to 1 710 kHz 9 kHz 530 kHz to 1 710 kHz 10 kHz For Middle East and South Africa 531 kHz to 1 602 kHz 9 kHz 530 kHz to 1 600 kHz 10 kHz Antenna External antenna jack loop antenna Speaker Type Full range 1 way bass reflex type Magnetically shielded type Speaker 8 cm wood cone x1 Frequency response 55 Hz to 20 000 Hz Power handling c...

Page 128: ...2006 Victor Company of Japan Limited EN 0306ZZCMDWJSC EX D11 COMPACT T COMPONENT SYSTEM c ...

Reviews: