background image

OPERATION

-17-

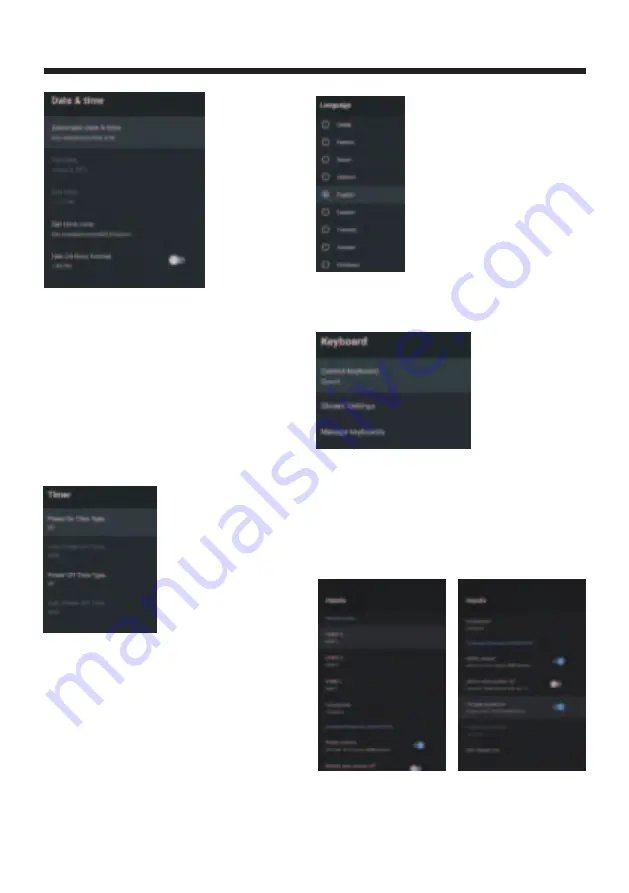
DATE&TIME

TIMER:

Power On Time Type:

Press

button


to


select


the


option


then


press


OK


button


to


choose ON/OFF/ONCE.

▼▲


Power On Time

:Press

button


to


select


the


option


then


press


OK


button


to


enter the 

sub-menu.

▼▲


Power Off Time Type

:Press

button


to


select


the


option


then


press


OK


button


to


choose ON/OFF/ONCE.

▼▲


Power Off Time

:Press

button


to


select


the


option


then


press


OK


button


to


enter the 

sub-menu.

▼▲


Automatic date&time

Press

 button to select the option then press 

OK button to enter the sub-menu.
(Optional:Use network-provided time,Off)

▼▲

Set


date

:Press

button


to


select


the


option


then


press


OK


button


to


enter


the


sub

-

menu

.

▼▲


Set


time

:Press

button


to


select


the


option


then


press


OK


button


to


enter


the


sub

-

menu

.

▼▲


Set


time


zone

:Press

button


to


select


the


option


then


press


OK


button


to


enter


the


sub

-

menu

.

▼▲


Use 24-hour format

:Press

button


to


select


the


option


then


press


OK


button


to


choose ON/OFF.

▼▲


Current keyboard

:Press

button


to


select


the


option


then


press


OK


button


to


enter the 

sub-menu.

▼▲


Manage keyboards

:Press

button


to


select


the option


then


press


OK


button


to


enter the 

sub-menu.

▼▲


Gboard Settings

:Press

button


to


select


the 

option


then


press


OK


button


to


enter the sub-menu.

▼▲


INPUTS

Language 

:Press

button


to


select


the


option


then


press


OK


button


to


enter the 

selected language.

▼▲


LANGUAGE:

KEYBOARD

Summary of Contents for AV-H323115A

Page 1: ...AV H323115A 32 Class RM C3416 ...

Page 2: ... cautions 5 Technical specifcations 6 Installation 7 Remote control 12 Operation 13 Troubleshooting 25 Table of Contents The terms HDMI HDMI High Definition Multimedia Interface and the HDMI Logo are trademarks or registered trademarks of HDMI Licensing Administrator Inc ...

Page 3: ... 2 WARNING AND PRECAUTIONS ...

Page 4: ...IMPORTANT SAFETY INSTRUCTIONS 3 ...

Page 5: ...IMPORTANT SAFETY INSTRUCTIONS 4 ...

Page 6: ...mponents Caution Do not trap the power supply cord under the television receiver Caution Never stand on lean on or suddenly push the television or its stand You should pay special attention to children Serious injury may result if it should fall Caution Do not place your television on an unstable cart stand shelf or table Serious injury to an individual and damage to the television may result if i...

Page 7: ...x 768 16 9 Brightness 200cd m Contrast Ratio 3000 1 Unit Size 722x180x468mm Unit Size Without Stand 722x62x426mm Net Weight 4 2KG Audio Output Power THD 10 2x8W High Definition Multimedia Interface HDMI x 3 AV IN x 1 RJ45 x 1 USB x 2 ANT x 1 48W AC 100 240V 50 60Hz PAL B G I D K SECAM B G D K L DVB T DVB T2 Signal Output HEADPHONE x 1 OPTICAL x 1 6 ...

Page 8: ...to the grooves on the bottom of the TV then align the screw holes on the bottom of the TV and the stands 2 Use the 4 provided screws to attach the stands to the TV 7 INSTALLATION Locate the TV where light does not shine onto the screen Total darkness or reflection on the screen can cause eyestrain A soft lighting environment is recommended for comfortable viewing Allow ample space between the TV a...

Page 9: ...INSTALLATION 8 200 100 M4 x 6 200 100 ...

Page 10: ...e to receive TV signal 7 HEADPHONE Connect headphones here Note that connecting headphones will mute the sound from the TVs built in speakers 2 Indicator LED RED STANDBY 3 Keyboard 3 2 1 8m 9 RM C3416 The control buttons on the TV are located on the bottom of the TV near the LED indicator KEYBOARD Bottom Control Key 1 Select the next channel or move up 2 Increase the volume level or move right 3 D...

Page 11: ...768 50 60 50 60 50 60 50 60 50 60 50 60 RESOLUTION V Freq Hz 1360 768 5 1280 768 2 800 600 6 1920 1080 10 Please note Aerial connections IEC female Connect the ANT terminal on the back of the TV to a good quality outdoor antenna Input impendance 75 unbalanced ...

Page 12: ...V EQUIPMENT It can be connected to the following appliances VCR multi disc player DVD camcorder video game stereo system etc Audio Video machine with HDMI interfaces Audio Receiver 1 WAN 2 3 4 Y W R VIDEO EQUIPMENT Y W R INSTALLATION HDMI1 ARC HDMI2 0 4Kx2K 11 ...

Page 13: ...9 22 24 23 17 14 INPUT ASPECT Adjust Aspect ratio of the TV Note Teletext functions are not available in Australia Press to confirm Press to return Press to Press to Press to start recording DTV Channel must have USB drive inserted INFO Press to display channel information Press to jump Press to implement 3 4 5 6 7 8 9 10 11 12 13 14 15 16 17 18 19 20 Activate Google Assistant voice command functi...

Page 14: ... to skip this step Press to select the the Wifi to connect press OK and enter the password to confirm the connection is successful You can also use Ethernet and skip select network t Accept the Google Terms of Service to improve he product experience select Accept to accept this condition Quickly set up your TV with your Android phone You can easily transfer your Android phone s Wi Fi network and ...

Page 15: ...alled on the TV the icons for the favourite applications are shown inside here Favourite applications can be added deleted order changed by users Apps Click to jump to Apps screen where all the installed applications are listed Notification Display the notifications Inputs Icon to select an input source Network Internet Icon to Setup Network Such as wifi Settings Various settings can be configured...

Page 16: ...utton to display TV options press s to elect the settings menu and press OK to confirm Second in the HOME interface press the key to select the icon of the circular settings menu press OK to confirm 2 Press 3 Press OK to enter setting button to select what you want set 2 Under Live TV press the INPUT button to display the list of input sources You can select the desired source Inputs Composite HDM...

Page 17: ... select what you want set 2 Press OK button to adjust 3 After finishing your adjustment Press BACK button to return to the previous menu ABOUT 1 Enter Menu Settings Channel Channels 2 Channel Scan directly enters the ATV DTV automatic search platform interface of Antenna Update Scan Automatically search for frequency points outside the station ACCOUNTS SIGN IN Sign in to your Google account press ...

Page 18: ...te Press button to select the option then press OK button to enter the sub menu Set time Press button to select the option then press OK button to enter the sub menu Set time zone Press button to select the option then press OK button to enter the sub menu Use 24 hour format Press button to select the option then press OK button to choose ON OFF Current keyboard Press button to select the option t...

Page 19: ...utton to enter sub menu Optional off 5 minutes 10 minutes 15 minutes 30 minutes 60 minutes Inputs Press button to select the option then press OK button to enter the sub menu HDMI control Press button to select the option then press OK button to choose ON OFF Device auto power off Press button to select the option then press OK button to choose ON OFF TV auto power on Press button to select the op...

Page 20: ...ase the parameter Press to increase the parameter Sound Surround Press button to select the option then press OK button to choose ON OFF Equalizer Detail Press button to select the option then press OK button to enter the sub menu Speakers Press button to select the option then press OK button to enter the sub menu Optional TV Speaker External Audio System Digital Output Press button to select the...

Page 21: ...ce to sleep Press button to select the option then press OK button to enter the sub menu Optional 30 minutes 1 hour 3 hours 6 hours 12 hours Never Start now Press button to select the option then press OK button to enter screen saver Usage diagnostics Press button to select the option then press OK button to choose ON OFF ACCESSIBILITY Audio Description Press button to select the option then press...

Page 22: ... enter the sub menu Reset Erase everything I including your Bluetooth remote control n this menu you can pair Bluetooth devices 1 Press the MENU and LEFT buttons at the bottom of the remote control for 5 seconds 2 When the LED starts to flash release it The remote controller will send the pairing signal to the TV and display the information of the remote c BT_VoiceRC_M3 ontrol on the right side of...

Page 23: ...ss the GUIDE key on the remote to open the EPG interface Program information will be displayed and you can operate the EPG menu through the Red Yellow Green Blue key Under the EPG menu you can also press PVR key to set up recording schedule ...

Page 24: ...key and the program will start to record Note A USB memory device must be connected to one of the USB ports in order to do any recording Under the Live TV press the menu key and down to select the Record menu Select Record List You can watch the recorded programs ...

Page 25: ...timedia Formats For DTV PVR USB stick Format FAT32 max 64G HDD Format FAT32 max 2T For media playback Format FAT32 NTFS max 2T Photo format JPEG JPG PNG BMP GIF Text format TXT Music format MP3 AC3 AAC WAV OGG FLAC M4A AMR Movie format AVI MKV MP4 MOV VOB DAT FLV MPG WMV TP TRP M2T M2V M4V MPEG 3GP MJPEG ...

Page 26: ...ntrast and brightness volume setup Press Standby key on the remote control for inspection No Colour Normal Audio Colour control Picture Breaking up Normal Audio or Weak Audio or Weak channel Normal Audio Antenna position direction or connection Symptom Distorted picture Normal Audio File not played from USB device Check that the file is in a compatible format Problem with internet access Check whet...

Page 27: ......

Page 28: ...Register your product at jvctv com au warranty registration ...

Reviews: