background image

COLOUR TELEVISION

INSTRUCTIONS

Thank you for purchasing this JVC
colour television.
To ensure your complete
understanding, please read this
manual thoroughly before operation.

AV-14A10
AV-14F10
AV-20N10
AV-21A10
AV-21D10
AV-21F10

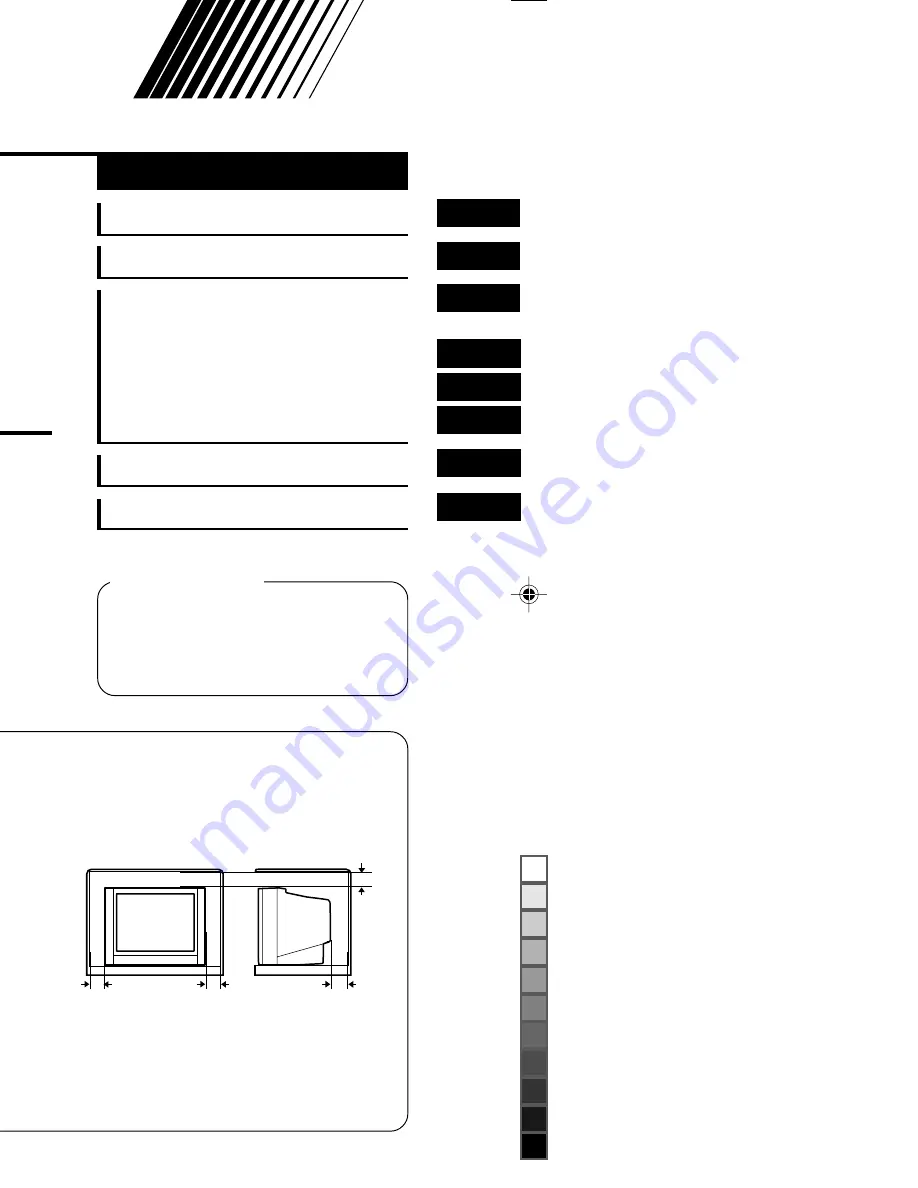
15 cm

10 cm

15 cm

10 cm

CAUTION:

• TO ENSURE PERSONAL SAFETY, OBSERVE THE FOLLOWING RULES

REGARDING THE USE OF THIS TV.

• Operate only from the power source specified on the TV.
• Avoid damaging the power plug and power cord.
• Avoid improper installation and never position this TV where good ventilation is

unattainable. When installing this TV
distance recommendations must be
maintained between the floor and
wall, as well as installment in a tightly
enclosed area or piece of furniture.
Adhere to the minimum distance
guidelines shown for safe operation.

• Do not allow objects or liquid into the cabinet openings.
• In the event of a fault, unplug this TV and call a service technician. Do not

attempt to repair it by yourself or remove the rear cover.

• When you don’t use this TV for a long period of time, be sure to disconnect the

power plug from the AC outlet.

LCT1039-001A-H
0701-Ki-NV-JMT

 2001 VICTOR COMPANY OF JAPAN, LIMITED

Locations ................................

2

Preparation .............................

3

Basic operation ......................

9

Remote control buttons
and functions ........................

10

Using the TV’s menus ..........

13

Using the button on the TV ...

16

Troubleshooting ...................

18

Specifications .......................

19

Contents

WARNING:

TO PREVENT FIRE OR SHOCK
HAZARD, DO NOT EXPOSE THIS
APPLIANCE TO RAIN OR
MOISTURE.

LCT1039-001A-H_cover

7/5/1, 4:51 PM

1

Black

Summary of Contents for AV-14A10

Page 1: ... d into the cabinet openings g this TV and call a service technician Do not lf or remove the rear cover for a long period of time be sure to disconnect the et Locations 2 Preparation 3 Basic operation 9 Remote control buttons and functions 10 Using the TV s menus 13 Using the button on theTV 16 Troubleshooting 18 Specifications 19 Contents WARNING TO PREVENT FIRE OR SHOCK HAZARD DO NOT EXPOSE THIS...

Page 2: ...R TV VIDEO CHANNEL SCAN OFF TIMER ECO SENSOR DISPLAY MENU VOLUME MUTING SOUND 5 6 9 3 2 1 8 4 7 0 CHANNEL REMOTE CONTROL UNIT RM C364GY 0 POWER button p 5 9 PICTURE MODE button p 10 Number buttons p 9 button p 9 MUTING button p 11 MENU buttons MENU buttons MENU buttons VOLUME buttons p 9 RM C364GY RM C360GY POWER 1 2 3 4 5 6 7 8 9 RETURN 0 PICTURE MODE SYSTEM COLOUR TV VIDEO CHANNEL SCAN OFF TIMER...

Page 3: ...ame time Disconnect one input or use one of the jacks as an output jack only for monitoring or recording The rod aerial is supplied with the AV 14A10 and AV 14F10 Connecting the aerial and VCR Connecting the aerial To install rod aerial Install into the top rear aerial holder Once installed it cannot be removed To RF output To video output To aerial input To audio output 3 2 VCR VHF UHF outdoor ae...

Page 4: ...ameter When you connect the headphones the TV speakers go off Illustration of AV 21D10 VIDEO IN OUT AUDIO VCR for recording VCR for playing To audio output To video output To audio input To video input Illustration of AV 21D10 MENU VIDEO AUDIO IN To audio output To video output Headphones Camcorder or TV game ...

Page 5: ...s If image does not appear Your TV is in the standby mode Press the POWER button on the remote control to turn your TV on You can also turn on your TV by pressing the CHANNEL button on your TV To turn your TV off Press the POWER button on the remote control Your TV enters the standby mode To turn the TV s main power off Press the Main power button on the TV 2 Connecting the power cord Insert the P...

Page 6: ...cally preset all TV channels that can be received by your TV to channels The Auto Channel Preset function does not preset a TV channel to the AV channel channel number 0 If the TV cannot preset the TV channel you want to view preset it manually For details see Manual Channel Preset on page 7 1 Press MENU to display the MENU 3 menu then select AUTO CH PRESET 2 Press MENU to start the Auto Channel P...

Page 7: ...ion to fine tune the TV station 1 Press MENU to select FINE 2 Hold VOLUME down to fine tune the TV station so that the best image is displayed on screen or indicates that the TV station is being fine tuned 5 Press MENU to select SOUND SYSTEM 6 Press VOLUME to select the appropriate sound system For the sound systems in each country or region refer to the table Broadcasting systems on page 19 7 Pre...

Page 8: ...to skip 5 Press VOLUME to select YES The channel you selected is set to be skipped To cancel the Skip select NO 6 Repeat steps 4 and 5 if you want to set another channel to skip 7 Press DISPLAY to turn the display off MENU 3 AUTO CH PRESET MANUAL CH PRESET LANGUAGE ENGLISH SELECT BY EXIT BY OPERATE BY D I SPLA Y MANUAL FINE SKIP NO SOUND SYSTEM B G EXIT SELECT BY PR 1 VL PROGRAM BY EXIT BY SEARCH ...

Page 9: ...STEM button to select the appropriate colour system For details see Colour System on page 10 3 Press VOLUME to adjust the sound If the sound is abnormal Repeatedly press the SOUND SYSTEM button to select the appropriate sound system For details see Sound System on page 10 4 To turn your TV off press POWER We recommend that you press the Main power button on the TV to turn the main power off if you...

Page 10: ...riate colour system manually Sound System If the sound is abnormal select the appropriate sound system Each press of the SOUND SYSTEM button changes the sound system as follows B G I D K For the sound systems in each country or region see the table Broadcasting Systems on page 19 You cannot select any sound system when in VIDEO mode Picture Mode You can select one of three picture adjustment modes...

Page 11: ... off the TV s main power Eco Sensor AV 14A10 does not have this function You can adjust this TV so that the screen automatically adjusts to the optimum contrast according to the brightness of your room This function reduces eye strain and the power consumption of this TV Repeatedly press the ECO SENSOR button to select the desired mode DIGITAL ECO SENSOR DISPLAY The Eco Sensor function will work I...

Page 12: ... Return Channel and you can view that channel at any time with one touch To set the channel to the Return Channel 1 Select the channel you want to set to the Return Channel 2 Press RETURN and hold until the message RETURN PLUS PROGRAMMED appears When you turn off the TV the Return Channel setting is cancelled To view the Return Channel Press the RETURN button You can view two channels current chan...

Page 13: ...rn off the TV s main power by pressing the Main power button the On Timer function is canceled If you do not turn off the TV after starting the On Timer function the channel will automatically switch to the channel set for the On Timer function When the time set for the On Timer function is reached The TV automatically turns on and the channel set for the On Timer function is displayed For safety ...

Page 14: ... then select CHILD LOCK MENU 2 AUTO SHUTOFF OFF CHILD LOCK OFF BLUE BACK ON SELECT BY EXIT BY OPERATE BY D I SPLA Y 2 Press MENU to select ON To cancel the Child Lock function select OFF 3 Press DISPLAY to turn the display off The Child Lock function is canceled when you turn the TV s main power off Auto Shutoff You can set your TV to turn off if no signals are received for about 15 minutes or lon...

Page 15: ...ignal is poor set the Blue Back function to OFF Even when the Blue Back function is set to OFF the sound may not be audible 3 Press DISPLAY to turn the display off Picture Adjustment You can adjust the picture as you like 1 Press MENU repeatedly to display the MENU 4 MENU 4 TINT COLOUR BRIGHT CONT SHARP SELECT BY EXIT BY OPERATE BY D I SPLA Y 2 Press MENU to select an item and press MENU to adjust...

Page 16: ...ower is on the light is red 6 POWER ON TIMER lamp When the Main power is on the light is green When On Timer function is on it is red 7 Main power button AV 21D10 MENU CHANNEL VOLUME ON TIMER POWER EXIT 1 2 3 5 4 7 AV 21A10 MENU POWER ON TIMER VOLUME EXIT CHANNEL 1 2 3 4 5 7 AV 14F10 AV 20N10 AV 21F10 MENU CHANNEL VOLUME POWER ON TIMER EXIT 1 2 3 4 5 7 AV 14A10 CHANNEL VOLUME MENU EXIT POWER ON TI...

Page 17: ...er Operating menus You can operate functions in menus using the front control buttons on the TV 1 Press MENU to display a menu 2 Press MENU repeatedly to display the menu you want to use 3 Press MENU to select the desired function or item 4 Press MENU or VOLUME to carry out the desired operation For details see the description for each function 5 Press VOLUME to turn the menu display off To turn t...

Page 18: ...sappears interference Reposition the aerial Spotted picture crosstalk Move the aerial away from the source of interference Replace the aerial cable with a coaxial cable which is less prone to interference Double picture ghost Reposition the aerial Replace with an aerial with good directionality Snowy picture Check the aerial connection and aim it correctly image noise Replace or repair the aerial ...

Page 19: ...eadphone jack mini jack dia 3 5 mm Design and specifications subject to change without notice Broadcasting Systems Asia Middle East Europe Oceania Africa Colour System Sound PAL PAL PAL SECAM SECAM PAL PAL PAL PAL PAL PAL SECAM B G D K I B G D K D K B G I B G I B G B G Country or Region Bahrain Kuwait Oman Qatar United Arab Emirates Yemen etc Indonesia Malaysia Singapore Thailand India etc China V...

Page 20: ......

Reviews: