JA34-BT1 Universal Radio Adapter with Bluetooth
®
Installation and Operating Manual
Rev D
Page 8
2.6.4.2
JA34-BT1 Universal Radio Adapter Adjustments (Blue block)
The blue block refers to the adjustments and settings for the JA34-BT1 Universal Radio Adapter.
Receive Input
The level of the RECEIVE INPUT may be adjusted from 1.50 to 10.00 Vrms. (Default
7.75 Vrms
)
Artificial Sidetone
The Artificial Sidetone may be selected as ON or OFF. When selected ON, the level of the MIC INPUT sidetone may
be adjusted from -12 to 0 dB. (Default
-10 dB
) (When OFF, the level is -35 dB)
Mic Bias
The MIC Bias may be ON or OFF. (Default
ON
)
Mic Output
The level of the MIC OUTPUT signal may be adjusted from 0.010 to 0.625 Vrms. (Default
0.250mVrms
)
Mic Output Load Impedance
The MIC OUTPUT impedance may be set to 8 Ohms or 150 Ohms. (Default
150 Ohms
)
Bluetooth
®
Transceiver
A custom Bluetooth
®
device name identifies the JA34-BT1 in the user's cell phone. The volume can be set to suit the
user's preference.
The Bluetooth
®
Profile is configured to provide both A2DP (Advanced Audio Distribution Profile) for playing audio from
a smartphone or other music source, and HFP (Hands Free Profile) for connecting to a cell phone.
If a device is attached, the 'Edit Name', 'Clear Pairing' and 'Set Defaults' buttons will be available for use.
2.6.4.3
Non-Aircraft Radio Selection (Orange block)
The appropriate Non-Aircraft Radio is selected from a drop-down list at the top of the block, and all relevant configuration
information is added automatically. Other Non-Aircraft Radios can be added to the list (see
).
2.6.5
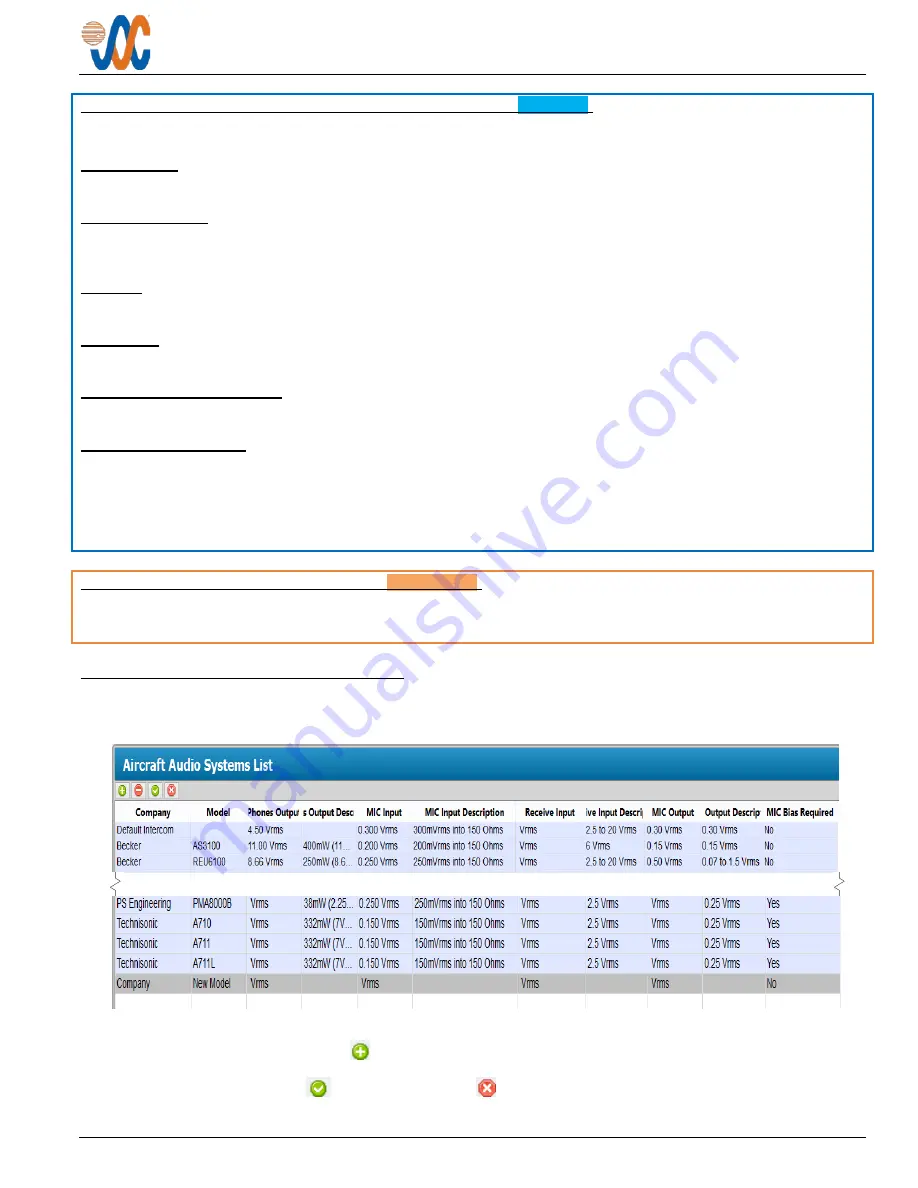
Aircraft Audio Systems List
This is a list of Aircraft Audio Systems, and shows the configuration information that will be added to the
JA34-BT1
Settings
page.
If it is desirable to add other Audio systems, click on the
Aircraft Audio Systems List
. A new audio system and its
parameters can be added by clicking on
(the ‘
New
Aircraft Audio System
' button). A new line will be added to
the bottom of the list, and double clicking on each part of the line will highlight it to allow changes. When the relevant
details have been added, use the
(‘
Save Changes
’) or (‘
Cancel All Changes
’) button as required. The added
system will then appear on the appropriate drop-down menu list.


