6.
Place the transceiver in the antistatic bag or on the antistatic mat placed on a flat,
stable surface.
7.
Place the dust cover over the empty port.
Related
Documentation
Installing a Transceiver
•
Connecting a Fiber-Optic Cable
Before you begin connecting a fiber-optic cable to an optical transceiver installed in a
device, ensure that you have taken the necessary precautions for safe handling of lasers
(see
Laser and LED Safety Guidelines and Warnings
).
To connect a fiber-optic cable to an optical transceiver installed in a device:
WARNING:
Do not look directly into a fiber-optic transceiver or into the ends
of fiber-optic cables. Fiber-optic transceivers and fiber-optic cables connected
to transceivers emit laser light that can damage your eyes.
1.
If the fiber-optic cable connector is covered with a rubber safety cap, remove the cap.
Save the cap.
2.
Remove the rubber safety cap from the optical transceiver. Save the cap.
3.
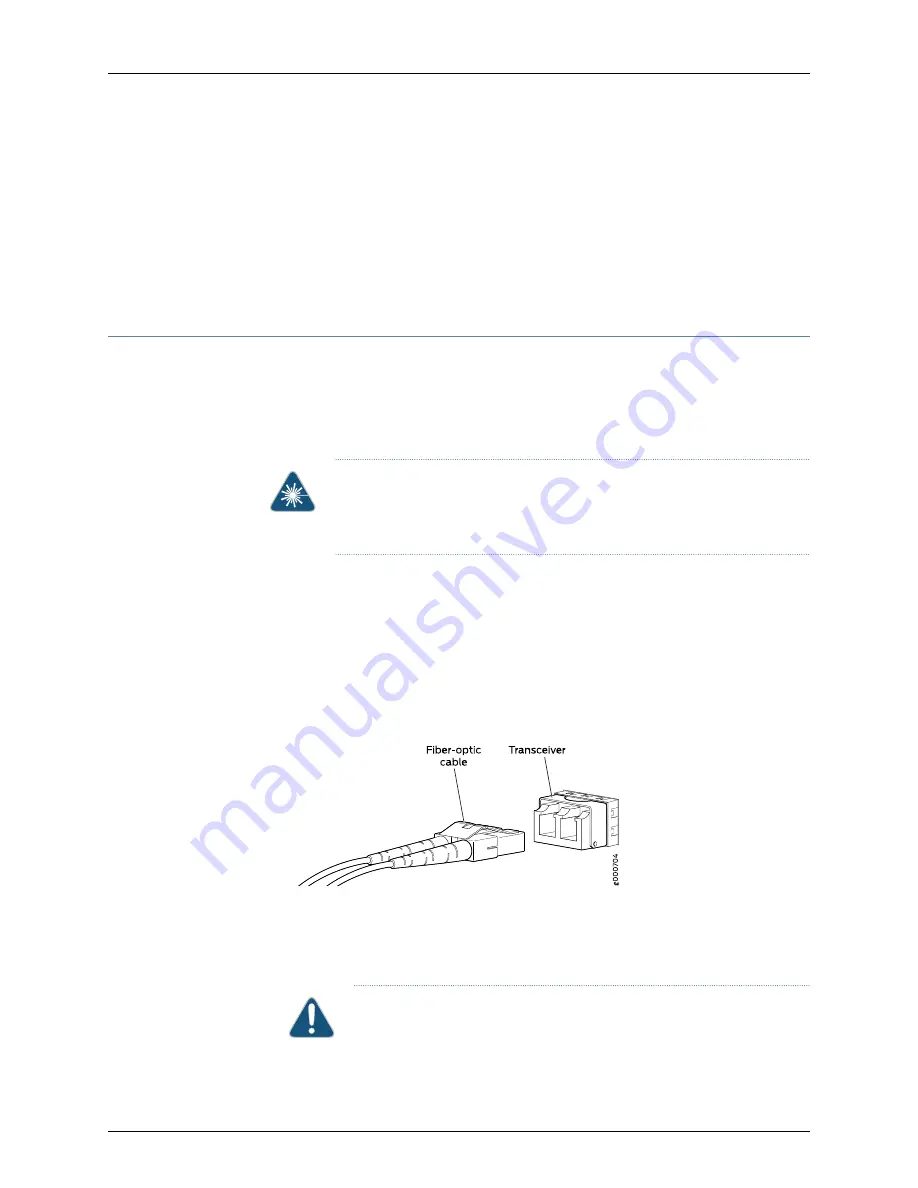
Insert the cable connector into the optical transceiver (see
).
Figure 51: Connecting a Fiber-Optic Cable to an Optical Transceiver
Installed in a Device
4.
Secure the cables so that they do not support their own weight. Place excess cable
out of the way in a neatly coiled loop. Placing fasteners on a loop helps cables maintain
their shape.
CAUTION:
Do not bend fiber-optic cables beyond their minimum bend
radius. An arc smaller than a few inches in diameter can damage the cables
and cause problems that are difficult to diagnose.
119
Copyright © 2017, Juniper Networks, Inc.
Chapter 15: Replacing Transceivers and Fiber-Optic Cables
Summary of Contents for QFX5110
Page 1: ...QFX5110 Switch Hardware Guide Modified 2017 08 28 Copyright 2017 Juniper Networks Inc ...
Page 8: ...Copyright 2017 Juniper Networks Inc viii QFX5110 Switch Hardware Guide ...
Page 12: ...Copyright 2017 Juniper Networks Inc xii QFX5110 Switch Hardware Guide ...
Page 20: ...Copyright 2017 Juniper Networks Inc xx QFX5110 Switch Hardware Guide ...
Page 22: ...Copyright 2017 Juniper Networks Inc 2 QFX5110 Switch Hardware Guide ...
Page 44: ...Copyright 2017 Juniper Networks Inc 24 QFX5110 Switch Hardware Guide ...
Page 52: ...Copyright 2017 Juniper Networks Inc 32 QFX5110 Switch Hardware Guide ...
Page 60: ...Copyright 2017 Juniper Networks Inc 40 QFX5110 Switch Hardware Guide ...
Page 62: ...Copyright 2017 Juniper Networks Inc 42 QFX5110 Switch Hardware Guide ...
Page 76: ...Copyright 2017 Juniper Networks Inc 56 QFX5110 Switch Hardware Guide ...
Page 80: ...Copyright 2017 Juniper Networks Inc 60 QFX5110 Switch Hardware Guide ...
Page 92: ...Copyright 2017 Juniper Networks Inc 72 QFX5110 Switch Hardware Guide ...
Page 94: ...Copyright 2017 Juniper Networks Inc 74 QFX5110 Switch Hardware Guide ...
Page 112: ...Copyright 2017 Juniper Networks Inc 92 QFX5110 Switch Hardware Guide ...
Page 122: ...Copyright 2017 Juniper Networks Inc 102 QFX5110 Switch Hardware Guide ...
Page 124: ...Copyright 2017 Juniper Networks Inc 104 QFX5110 Switch Hardware Guide ...
Page 128: ...Copyright 2017 Juniper Networks Inc 108 QFX5110 Switch Hardware Guide ...
Page 148: ...Copyright 2017 Juniper Networks Inc 128 QFX5110 Switch Hardware Guide ...
Page 156: ...Copyright 2017 Juniper Networks Inc 136 QFX5110 Switch Hardware Guide ...
Page 158: ...Copyright 2017 Juniper Networks Inc 138 QFX5110 Switch Hardware Guide ...
Page 164: ...Copyright 2017 Juniper Networks Inc 144 QFX5110 Switch Hardware Guide ...
Page 172: ...Copyright 2017 Juniper Networks Inc 152 QFX5110 Switch Hardware Guide ...
Page 178: ...Copyright 2017 Juniper Networks Inc 158 QFX5110 Switch Hardware Guide ...
Page 190: ...Copyright 2017 Juniper Networks Inc 170 QFX5110 Switch Hardware Guide ...
Page 216: ...Copyright 2017 Juniper Networks Inc 196 QFX5110 Switch Hardware Guide ...
Page 222: ...Copyright 2017 Juniper Networks Inc 202 QFX5110 Switch Hardware Guide ...


