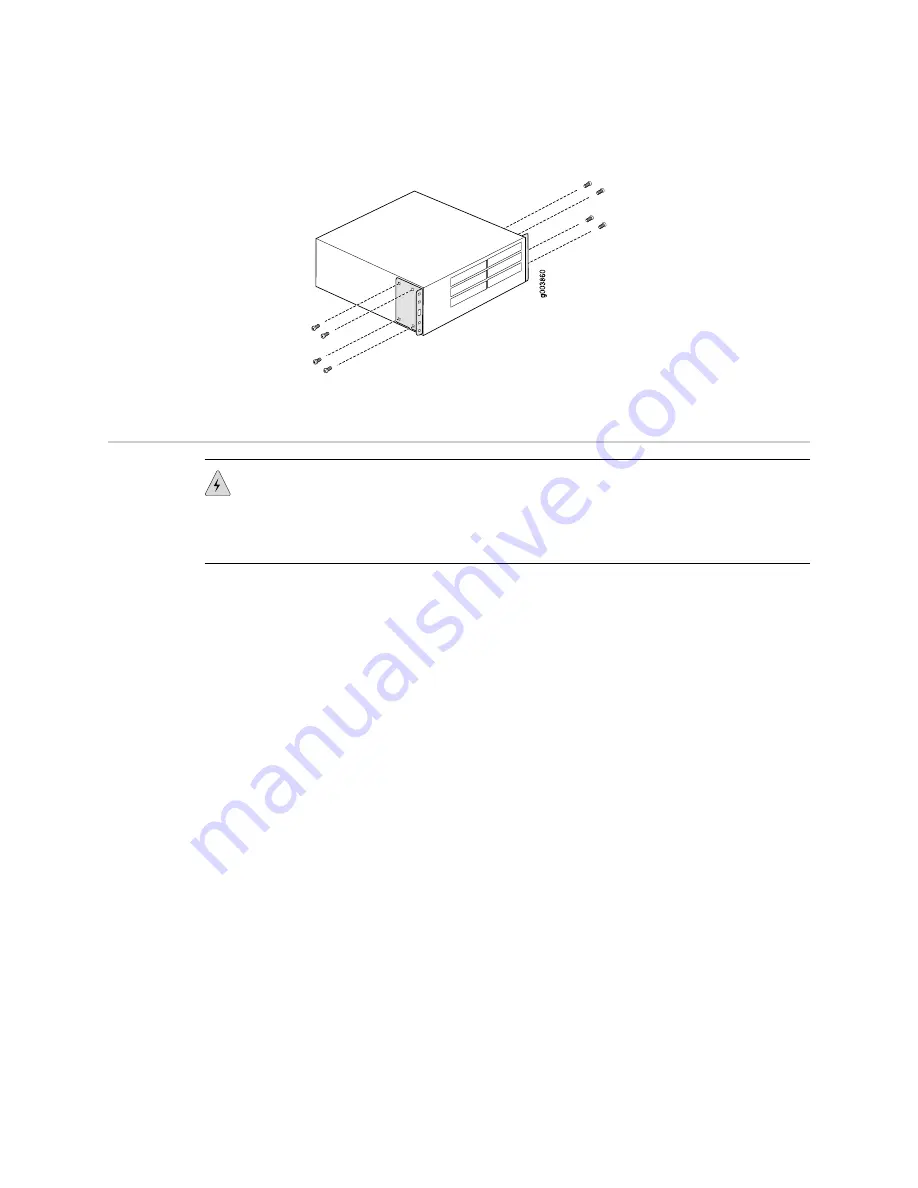
Figure 2: Attaching Mounting Brackets
Installing a Services Router
WARNING:
A DC-powered J2300 Services Router is intended for installation in a
dedicated equipment room where it is accessible by trained personnel only. Other
DC-powered Services Routers are intended for installation in a restricted access
location.
Installing J2300 Services Routers
To install a J2300 Services Router on a desk, attach the rubber feet to the underside
of the chassis.
To install a J2300 Services Router on a wall, attach the rubber feet to the chassis
underside, attach a mounting bracket to each side of the chassis, and attach the
brackets to the wall. (For instructions, see the
J2300, J4300, and J6300 Services Router
Getting Started Guide
.)
To install a J2300 router in a rack:
1.
Attach an electrostatic discharge (ESD) grounding strap to your bare wrist and
connect the strap to an outside ESD point.
2.
Make sure the rack is properly secured to the building in its permanent location.
3.
Attach a mounting bracket to each side of the router chassis.
4.
Have one person grasp each side of the router, lift the router, and position it in
the rack.
5.
Have a second person install a mounting screw into each of the bracket holes
that are aligned with the threaded holes in the rack.
Installing J2320 and J2350 Services Routers
To install the J2320 and J2350 router into a rack:
6
■
Installing a Services Router
J-series™ Services Router Quick Start


