


CHAPTER 10: Replacing Hardware Components
62
Replacing a DC Power Supply
Copyright © 2010, Juniper Networks, Inc.
3.
Attach an electrostatic discharge (ESD) grounding strap to your bare wrist and connect the
strap to the ESD point on the chassis. For more information about ESD, see “Preventing
Electrostatic Discharge Damage” on page 83.
4.
Remove the screws from the terminal studs.
5.
Remove the cable lugs from the terminal studs.
6.
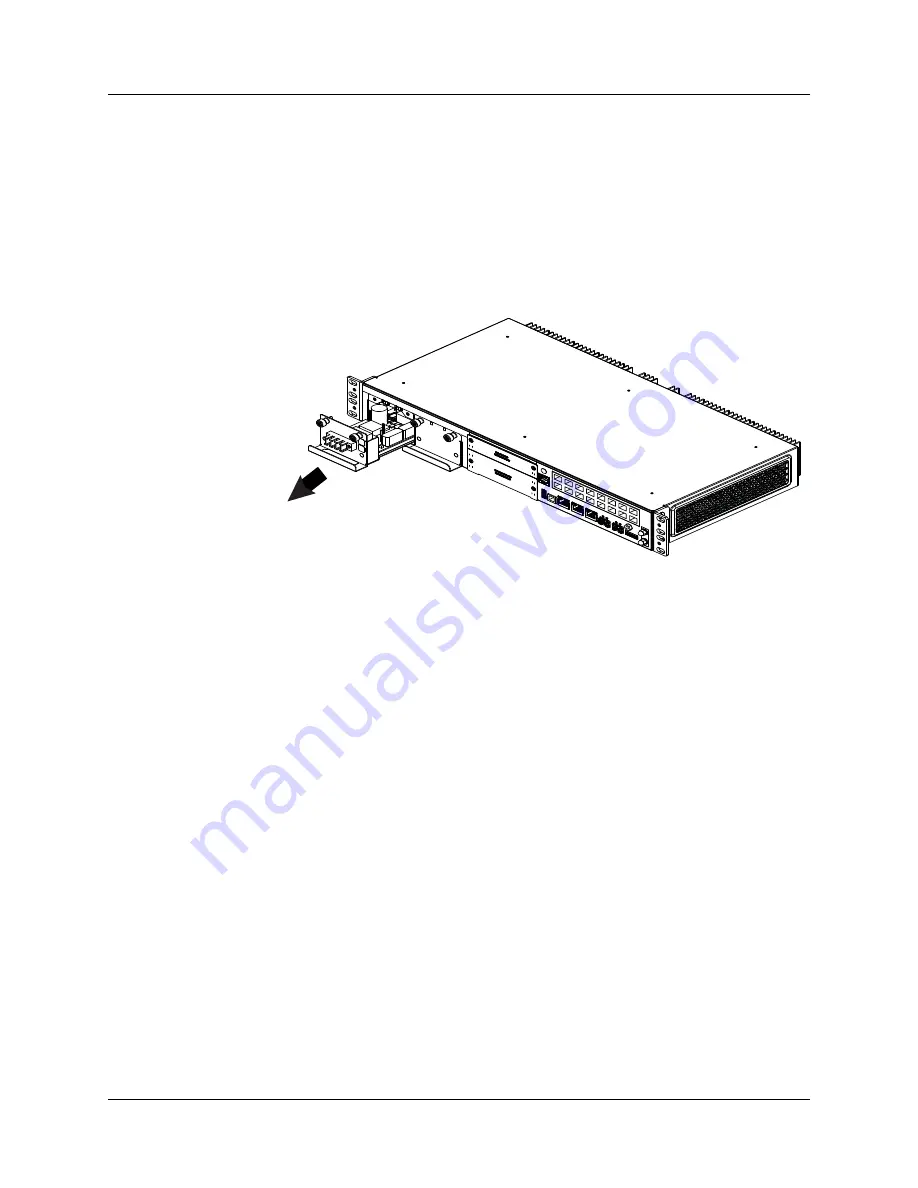
Loosen the thumbscrews at the top corners of the power supply.
7.
Pull the power supply straight out of the chassis.
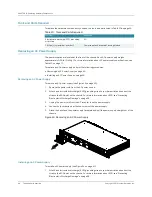
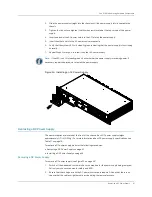
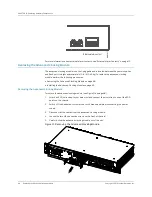
Figure 25: Removing a DC Power Supply
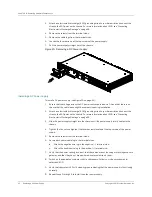
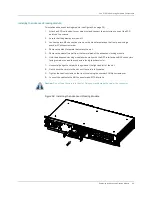
Installing a DC Power Supply
To install a DC power supply (see Figure 26 on page 63):
1.
Ensure that the voltage across the DC power source cable leads is 0 V and that there is no
chance that the cable leads might become active during installation.
2.
Attach an electrostatic discharge (ESD) grounding strap to your bare wrist and connect the
strap to the ESD point on the chassis. For more information about ESD, see “Preventing
Electrostatic Discharge Damage” on page 83.
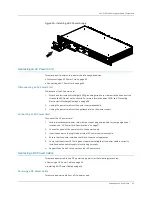
3.
Slide the power supply straight into the chassis until the power supply is fully seated in the
chassis.
4.
Tighten (but do not overtighten) the thumbscrews located at the top corners of the power
supply.
5.
Remove the screws from the terminal studs.
6.
Secure each power cable lug to the terminal studs.
a.
Attach the negative wire lug to the negative (–) terminal stud.
b.
Attach the positive wire lug to the positive (+) terminal stud.
7.
Verify that the power cabling is correct, that the cables are not touching or blocking access to
gateway, and that they do not drape where people could trip on them.
8.
Switch on the dedicated customer site circuit breakers. Follow your site's procedures for
safety and ESD.
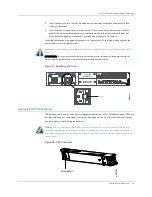
9.
Verify that the system LED is lit steadily green, indicating that the power supply is functioning
normally.
10.
Summary of Contents for BX7000
Page 10: ... x Copyright 2010 Juniper Networks Inc ...
Page 12: ... xii Copyright 2010 Juniper Networks Inc ...
Page 18: ...About This Guide xviii Requesting Support Copyright 2010 Juniper Networks Inc ...
Page 20: ... 2 Copyright 2010 Juniper Networks Inc ...
Page 66: ... 48 Copyright 2010 Juniper Networks Inc ...
Page 90: ... 72 Copyright 2010 Juniper Networks Inc ...
Page 122: ... 104 Hardware Compliance Copyright 2010 Juniper Networks Inc ...
Page 131: ...Copyright 2010 Juniper Networks Inc 113 Appendix E Declaration of Conformity ...
Page 132: ... 114 Copyright 2010 Juniper Networks Inc ...
Page 133: ...Copyright 2011 Juniper Networks Inc 115 PART 4 Index z Index on page 117 ...