


CHAPTER 4: Installing the Gateway
32
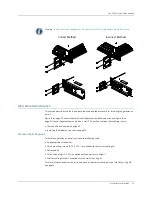
Rack-Mounted Installation
Copyright © 2010, Juniper Networks, Inc.
Installation Guidelines
Tools and Parts Required
To install the gateway in a rack, you need the following tools:
z
Screws—Use screws that are compatible with the equipment rack
z
An appropriate screwdriver
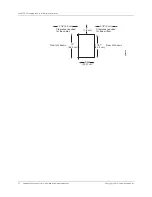
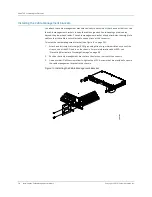
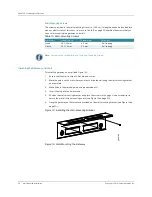
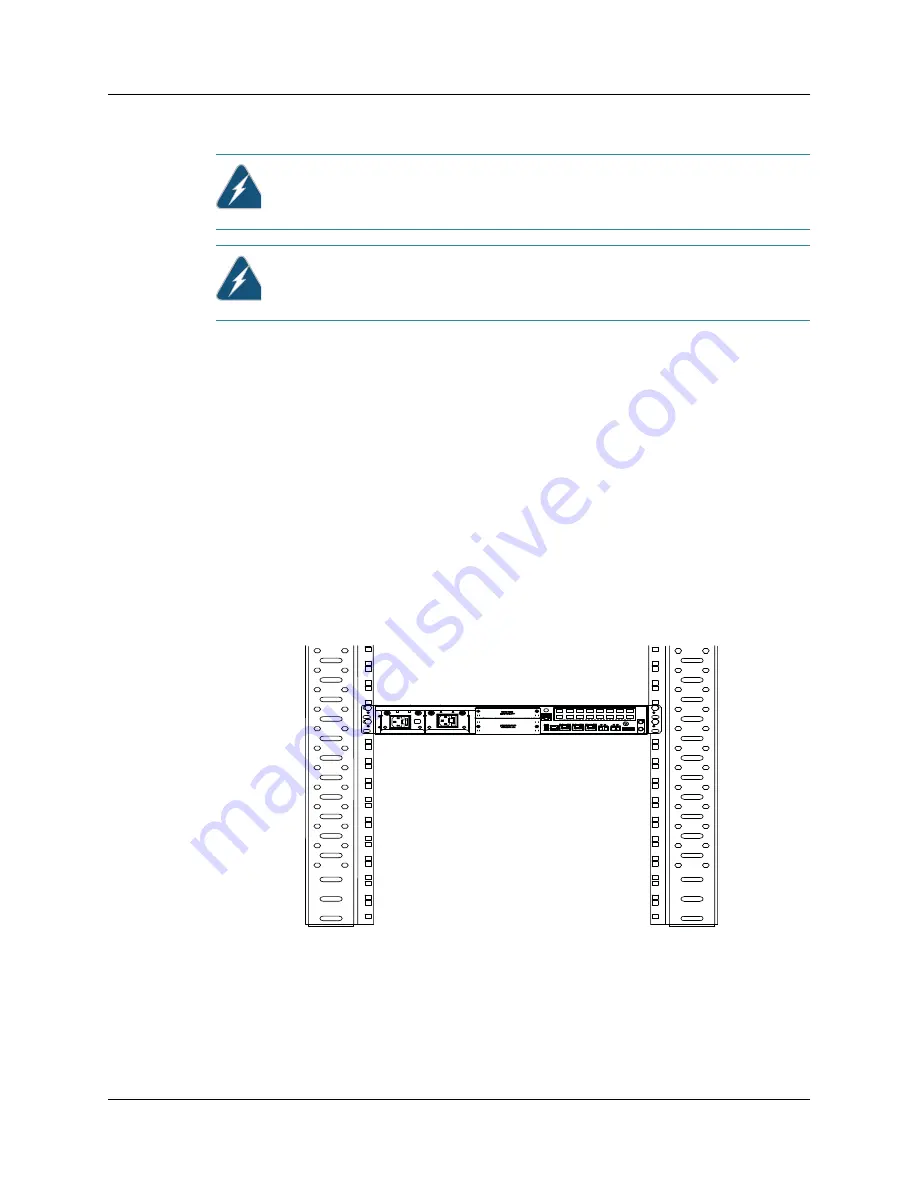
Installing the Gateway in a Rack
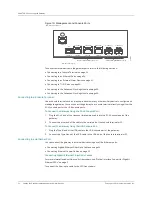
To install the gateway in the rack (see Figure 18 on page 32):
1.
Lift the gateway and position it in the rack.
2.
Ensure that the holes of the mounting brackets align evenly with the holes of the equipment
rack on both sides.
3.
Place the screws in the holes of the equipment rack, and secure them using an appropriate
screwdriver.
Figure 18: Rack-Mounting the Gateway
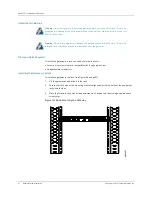
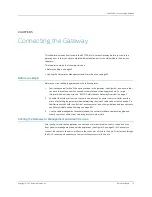
Warning:
Do not install more than three gateways adjacently in the same rack. This avoids
excessive pre-heating of the air flowing through the heatsinks of the upper units by the unit
directly below them.
Warning:
Do not place a gateway between two gateways deeper than 23 cms. This avoids
formation of hot air traps around the rear heatsink of the gateway.
g002907
Summary of Contents for BX7000
Page 10: ... x Copyright 2010 Juniper Networks Inc ...
Page 12: ... xii Copyright 2010 Juniper Networks Inc ...
Page 18: ...About This Guide xviii Requesting Support Copyright 2010 Juniper Networks Inc ...
Page 20: ... 2 Copyright 2010 Juniper Networks Inc ...
Page 66: ... 48 Copyright 2010 Juniper Networks Inc ...
Page 90: ... 72 Copyright 2010 Juniper Networks Inc ...
Page 122: ... 104 Hardware Compliance Copyright 2010 Juniper Networks Inc ...
Page 131: ...Copyright 2010 Juniper Networks Inc 113 Appendix E Declaration of Conformity ...
Page 132: ... 114 Copyright 2010 Juniper Networks Inc ...
Page 133: ...Copyright 2011 Juniper Networks Inc 115 PART 4 Index z Index on page 117 ...