background image

7

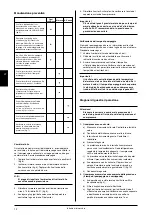
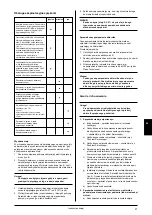
2.  Compressor operates, but pressure does not increase 

in tank (or increases too slowly):


a)  The cap on the intake tube has not been removed and  
 

replaced by the intake filter (fig. 2).


b)  Intake filter is clogged. Replace.


c)  Leaks in fittings, tubes or pneumatic equipment. Check  
 

with soapy water. Pressure drop is not to exceed 1 bar  


per hour.


d)  Clogged non­return valve or pressure pipe. Clean or   
 

replace the parts (fig. 10).


e)  Air leaks from the unloader valve when the compressor  
 

is operating. Check or replace the unloader valve (fig. 9).


f)  Defective valve plate. Contact your JUN­AIR distributor.

3.  Loud noise from compressor:


a)  Most likely broken suspension spring(s). Replace the  
 

spring and ensure that motor position is horizontal.


b)  The internal pressure pipe touches the rib cover or    
 

the cylinder block. Dismount the rib cover and bend the  


pressure pipe away.

4.  Compressor gets very hot and/or uses a lot of oil:


a)  Incorrect oil level. The level must appear in the oil level  
 

glass (fig. 5).


b)  Wrong oil has been filled in the compressor. Use only  
 

SJ­27 synthetic lubricant which has the correct viscosity.


c)  Leaks. See point 2c.


d)  Clogged intake filter. See point 2b.


e)  Too high ambient temperature. Do not install the  


compressor in a cabinet unless adequately ventilated  


(fig. 1).


f)  The compressor is overloaded (i.e. it is operating more  
 

than 50% of the operation time). Contact your JUN­AIR  


distributor.

5.  Compressor starts when no air is being used:


a)  Leaks. See point 2c.

6.  Compressor starts and stops more frequently than 

usual:


a)  Condensate in the air receiver. Empty the receiver by  
 

means of the drain cock (fig. 6).


b)  Leaks. See point 2c.

Pressure vessel

Pressure tested at:

       4­25 liter: 


40­50 liter:

Directions for use

Application 

Receiver for compressed air.

Receiver specifications  See name plate.
Installation 

Tubes, etc. must be made of suitable  


materials.

Placement 

Observe the working temperature of  


the receiver.


Ensure that sufficient room for  


inspection/maintenance is available  


in a horizontal position.


The receiver must be kept in a  


horizontal position.

Corrosion protection 

The surface treatment must be  


maintained as required.


Internal inspection at least every    


5 years.


Drain moisture at least once a week.

Alternation/repair 

No welding must be made on  


pressurized parts.

Safety valve 

Ensures that PS will not be exceeded.


Never adjust to a higher pressure    


than PS.


The capacity of the valve must be    


calculated in accordance   


with the volume of air supplied by    


the compressor.


(PS = Maximum working pressure    


of the receiver)

Declaration of Conformity

NOTE: The declaration of conformity is only valid for units 
operating at 20 V/50 Hz, x400 V/50 Hz, 12 V DC or 24 V DC.

The manufacturer, JUN­AIR International A/S, declares that the 
products mentioned in this manual are in conformity with:
•  87/404/EEC ­ 90/488/EEC ­ 9/68/EEC Council Directive  
 

relating to Simple Pressure Vessels

•  89/92/EEC ­ 91/68/EEC ­ 9/44/EEC ­ 9/68/EEC  


Council Directive of Safety of Machinery

•  89/6/EEC Council Directive of Electric Magnetic  


Compatibility 

•  7/2/EEC Low­voltage Directive

Flemming Frisch Andersen
Test and Certification Administrator

24 bar

18.3 bar

Operating manual

GB

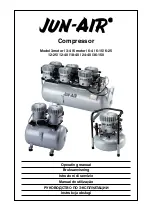
Summary of Contents for 12-25

Page 1: ...Operating manual Bruksanvisning Istruzioni di servizio Manual de utiliza o Instrukcja obs ugi Compressor Model 3 motor 3 4 6 motor 6 4 6 15 6 25 12 25 12 40 18 40 24 40 36 150...

Page 2: ......

Page 3: ...cnici 23 Dados t cnicos 23 23 Dane techniczne 23 Spare parts 30 Reservdelslista 30 Pezzi di ricambio 30 Pe as de reposi o 30 30 Cz ci zamienne 30 Drawings 33 Ritningar 33 Disegni 33 Diagramas 33 33 Sc...

Page 4: ......

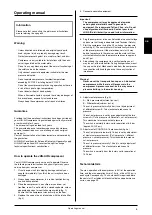
Page 5: ...he intake filter fig 2 5 Connect pneumatic equipment Important The compressor oil may be aggressive towards certain gasket materials used in pneumatic equipment We recommend Teflon Viton etc Do not us...

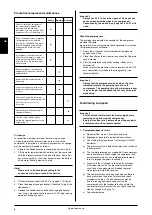
Page 6: ...types of oil may cause serious mechanical damage to the compressor Consequently the warranty only applies if SJ 27 oil is used Check the pumping time The pumping time indicates the condition of the c...

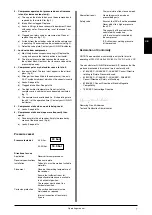
Page 7: ...s and stops more frequently than usual a Condensate in the air receiver Empty the receiver by means of the drain cock fig 6 b Leaks See point 2c Pressure vessel Pressure tested at 4 25 liter 40 50 lit...

Page 8: ...t plan 3 Placera kompressorn i ett dammfritt torrt och svalt men dock frostfritt rum Den f r ej placeras i ett st ngt sk p om det ej finns riktiga ventilations ppningar fig 1 4 Ers tt skyddshatten p i...

Page 9: ...sa omst ndigheter g ller ej garantin Kontrollera pumpningstiden Pumpningstiden kan ge en indikation p kompressorns tillst nd under f ruts ttning att det ej r l ckage i anl ggningen d r tryckluften kan...

Page 10: ...kranen fig 6 b L ckage Se punkt 2c Beh llare Beh llare tryckprovad vid 4 25 liter 40 50 liter Bruksanvisning Anv ndning Tryckluftsbeh llare Beh llarspecifikationer Se m rkskylt Installation Slangar m...

Page 11: ...ompressore in un locale secco e fresco al riparo dall umidit dalla polvere e dal gelo Non collocarlo in un armadio chiuso a meno che orifizi di ventilazione sufficenti siano previsti fig 1 Mettere il...

Page 12: ...un tempo di marcia abbastanza corto se si usa dell olio diverso dell olio SJ 27 raccommandato In questo caso la garanzia viene annullata Verificazione del tempo di pompaggio Il tempo di pompaggio pu...

Page 13: ...a 4 25 litri 40 50 litri Come va operato lo serbatoio Utilizzo Serbatoio per aria compressa Dati tecnici Vedasi piastra d identificazione Istallazione Controllare la temperatura d operazione Mettere...

Page 14: ...lquer irregularidade comunique imediatamente o seu distribuidor JUN AIR 2 Durante o transporte e utiliza o o compressor dever estar sempre nivelado 3 Instale o compressor em um local livre de p ventil...

Page 15: ...a D a ele o destino previsto pela autoridade ambiental local 3 Volte o motor posi o vertical e reabaste a com aproximadamente 750ml de SJ 27 fig 8 4 Recoloque a tampa substituindo o anel de veda o 5 T...

Page 16: ...o O n vel deve estar vis vel no visor entre as linhas indicadas fig 5 b O leo utilizado n o o SJ 27 Utilize exclusivamente o lubrificante original c Vazamentos nas conex es ou no equipamento pneum tic...

Page 17: ...17 53 35 C 95 F 0 C 32 F JUN AIR 2 5 JUN AIR JUN AIR International A S JUN AIR 1 2 3 1 4 2 5 I JUN AIR 6 7 0 1 3 6 87 psi 8 9 4 A B 6 B A 6 8 90 120 psi 50 15 8 120 psi 15 23 RU...

Page 18: ...18 max min SJ 27 5 2 6 10 7 1 4 8 2 8 3 SJ 27 0 75 8 4 5 SJ 27 SJ 27 1 0 2 3 8 1 a b c JUN AIR d e 4 f g 9 RU...

Page 19: ...JUN AIR 5 a 2c 6 a 6 b 2c 4 25 24 40 50 18 3 5 230 V 50 Hz 3x400 V 50 Hz 12 V DC or 24 V DC JUN AIR International A S 87 404 EEC 90 488 EEC 93 68 EEC 89 392 EEC 91 368 EEC 93 44 EEC 93 68 EEC 89 336 E...

Page 20: ...otowym rys 2 5 Pod cz instalacj pneumatyczn Uwaga Olej stosowany w kompresorach JUN AIR mo e spowodowa uszkodzenia uszczelnie wykonanych z niekt rych materia w Zalecamy stosowanie uszczelnie wykonanyc...

Page 21: ...o ci 5 Za pokryw upewniaj c si e o ring szczelnie dolega do kraw dzi dolnej cz ci obudowy WA NE Zawsze u ywaj oleju SJ 27 u ycie oleju innego typu mo e spowodowa powa ne uszkodzenia mechaniczne spr ar...

Page 22: ...pr arka uruchamia si i wy cza cz ciej ni zwykle a Kondensat w zbiorniku spr onego powietrza Opr nij zbiornik otwieraj c zaw r drena owy rys 6 b Nieszczelna instalacja Zobacz punkt 2c Zbiornik ci nieni...

Page 23: ...1 1 1 1 1 1 Weight kg 18 18 18 18 18 18 18 lbs 40 40 40 40 40 40 40 Dimensions mm 384 x 333 x 342 l x w x h inch 15 1 8 x 13 1 8 x 13 4 8 Noise level dB A 1m 35 35 35 35 35 35 35 Pumping time 0 8 bar...

Page 24: ...1 Dimensions mm 280 x 190 x 240 l x w x h inch 11 x 7 4 8 x 9 4 8 Noise level dB A 1m 45 45 45 45 45 45 45 Model 6 4 Voltage V 100 100 120 200 200 230 230 Frequency Hz 50 60 60 50 60 50 60 Motor HP 0...

Page 25: ...ions mm 378 x 378 x 485 l x w x h inch 14 7 8 x 14 7 8 x 19 1 8 Noise level dB A 1m 45 45 45 45 45 45 45 Pumping time 0 8 bar 0 120 psi sec 220 185 185 220 185 220 185 Model 6 25 Voltage V 100 100 120...

Page 26: ...x w x h mm 425 x 275 x 595 inch 16 6 8 x 10 7 8 x 23 3 8 Noise level dB A 1m 48 48 48 48 48 48 48 Pumping time 0 8 bar 0 120 psi sec 185 155 155 185 155 185 155 Model 12 40 Voltage V 100 100 120 200...

Page 27: ...ar 0 120 psi sec 185 185 150 185 150 Model 24 40 Voltage V 200 200 230 230 3 200 3 200 3 208 3 4002 3 4002 Frequency Hz 50 60 50 60 50 60 60 50 60 Motor HP 1 84 1 84 1 84 1 84 1 84 1 84 1 84 1 84 1 84...

Page 28: ...vailable upon request H here Druck lieferbar Pression sup rieure sur demande Presi n mayour sobre demanda Hogere druk op aanvraag H jere tryk kan leveres Neutral is required Null leiter ist erforderli...

Page 29: ...min 2 0 1 5 1 0 cu ft min 0 20 40 60 80 100 120 psig 50 Hz 60 Hz Model 6 240 140 1 2 3 0 4 5 6 7 8 bar Ltr min 8 0 7 0 5 0 cu ft min 0 20 40 60 80 100 120 psi 6 0 220 200 180 160 50 Hz 60 Hz Model 24...

Page 30: ...pipe f 6 motor 4550000 Copper washer f 6 motor 4551000 Suspension spring f 6 motor 4555000 Cylinder head f 6 motor 4556000 Bolt f cylinder head f 6 motor 4560100 Casing bottom f 3 motor 230V silver n...

Page 31: ...ex hose 1 8 80 82 cm 6463700 Flex hose 1 8 110 112 cm 6960500 Spacer 17 mm 6961000 Spacer 23 3 mm 11x1 mm 6961200 Spacer 27 mm 6961500 Spacer f transportation tap 4 motor 6973080 Unloader valve w 16 4...

Page 32: ......

Page 33: ...33 Motor spare parts model 3 Motor spare parts model 3 Drawings 0013101 0013001 Drawings...

Page 34: ...34 Motor spare parts model 6 Motor spare parts model 6 0015100 0015200 Drawings...

Page 35: ...35 Spare parts model 3 4 0015301 Drawings...

Page 36: ...36 Spare parts model 6 4 0015300 Drawings...

Page 37: ...37 Spare parts model 6 15 0015400 Drawings...

Page 38: ...38 Spare parts model 6 25 0015450 Drawings...

Page 39: ...39 Spare parts model 12 25 0019700 Drawings...

Page 40: ...40 Spare parts model 12 40 0200650 Drawings...

Page 41: ...41 Spare parts model 18 40 0200660 Drawings...

Page 42: ...42 Spare parts model 24 40 0200670 Drawings...

Page 43: ...43 Spare parts model 36 150 0016500 Drawings...

Page 44: ...44 Accessories 0991041 0991040 0015900 Drawings...

Page 45: ...45 Electrical drawing model 3 6070010 Drawings...

Page 46: ...46 Electrical drawing model 6 6070160 Drawings...

Page 47: ...47 Electrical drawing model 12 6070210 Drawings...

Page 48: ...48 Electrical drawing model 18 6070260 Drawings...

Page 49: ...49 Electrical drawing model 24 400V 50Hz 6070310 Drawings...

Page 50: ...50 Electrical drawing model 24 230V 50 60Hz 6070311 Drawings...

Page 51: ...51 Electrical drawing model 36 400V 50Hz 6070360 Drawings...

Page 52: ...52 Electrical drawing model 36 230V 50Hz 6070361 Drawings...

Page 53: ...53 Fig 1 Fig 2 Fig 3 Fig 4 Pictures illustrations Fig 5 Fig 6 Fig 7 Fig 8 Fig 9 Fig 10 Fig 4a Max pressure adjustment cut out Differential adjustment cut in Pictures illustrations...

Page 54: ......

Page 55: ......
Page 56: ...151 v 06 09 2008 JUN AIR INTERNATIONAL A S A Unit of IDEX Corporation Sundsholmen 3 5 9400 N rresundby Denmark www jun air com Phone 45 96 32 36 00 Telefax 45 96 32 36 01 E mail gastgroup dk idexcorp...

Reviews: