27
❶
D
C
B
A
Sewing in tape
The standard presser foot is equipped with a tape guide.
A tape can be sewn into the shoulder or side seams of gar-
ments made from knits or stretch fabrics to prevent stretch-
ing.
1.
Turn the handwheel toward you to bring the needle to its
upper end.
2. Lift the presser foot. Pass the tape through the tape guide
groove
A
and pull it out until the rear side of the presser
foot is reached. Then, lower the presser foot.
3. Loosen the guide adjustment screw
B
with the accessory
T-screwdriver.
Adjust the tape guide
C
to the tape width (
D
) and tighten
the guide adjustment screw.
4. Turn the handwheel by hand to sew the tape by two or
three stitches.
5. Place the material on which you want to sew the tape un-
der the presser foot.
6. Sew the tape while lightly supporting the tape by hand.
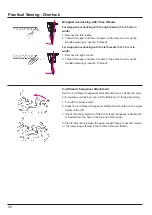
Practical Sewing - Overlock
Carrying out hemming and narrow overlocking
The sewing machine incorporates the hemming device to
enable roll hemming and narrow overlocking. The sewing
machine is able to overlock the material edges such as bot-
toms and sleeve cuffs beautifully while automatically folding
them inwardly.
Preparation for hemming
1.
Install the right needle only.
2.
Pull the overlocking width changeover knob toward you to
lower the overlocking claw.
3.
Set the cutting width adjusting dial at the scale mark “2.5
to 3.5”.
4.
When using filament thread or woolly nylon thread, set the
stitch length adjustment dial (stitch length) at “0.7 to 1.5”.
Roll hemming (A)
The roll hemming is the stitch system that laps the material
edge with the upper looper thread.
Narrow overlocking (B)
The narrow overlocking is the overlock stitch system over-
locking width of which is narrower than the standard one.
1
4
3
10
1
2
3
4
2
1
4
3
10
1
2
3
4
2
A
B
❷
❹
}
❸
❸
Summary of Contents for MO-2800
Page 39: ......


