


www.joy
-
it.net
Pascalstr. 8 47506 Neukirchen
-
Vluyn
2. USAGE WITH THE ARDUINO
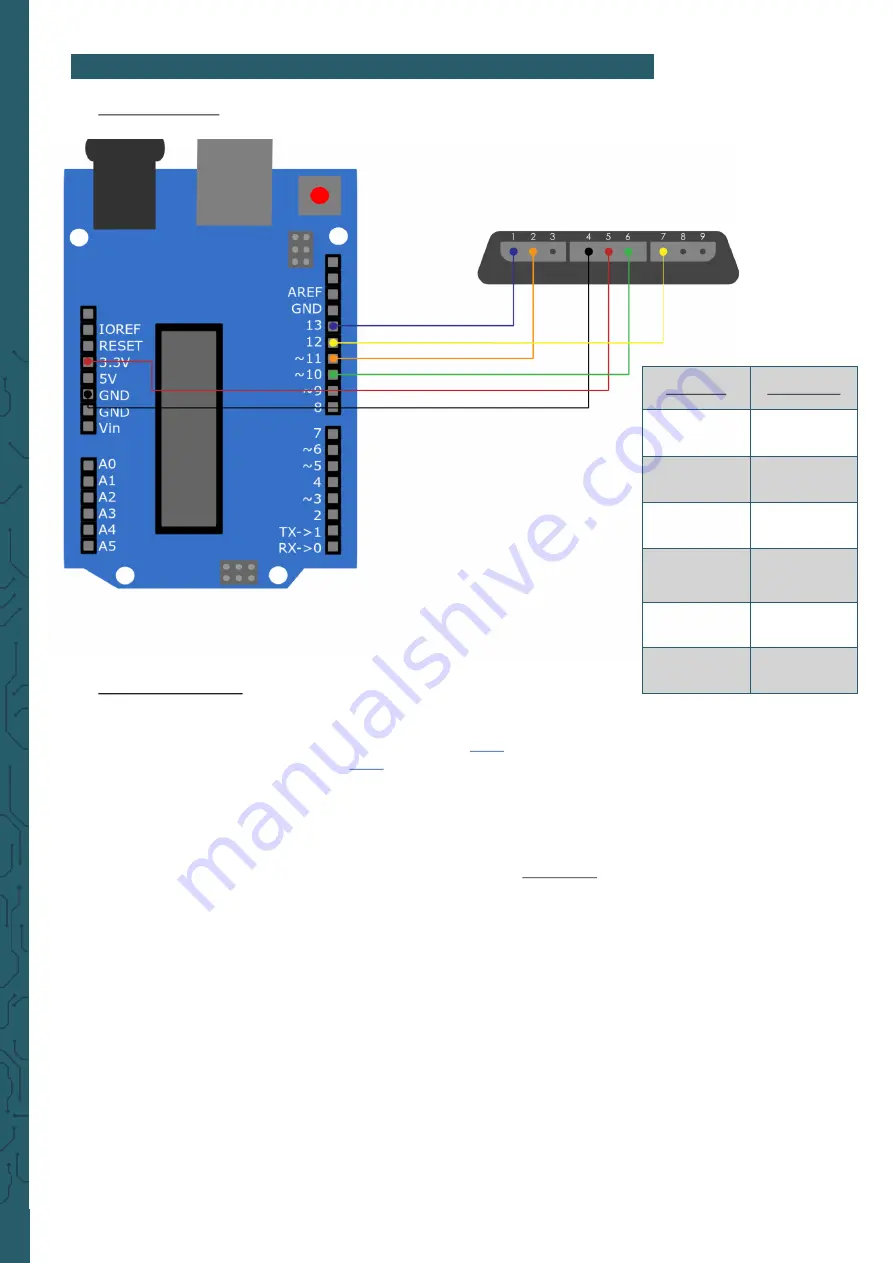
1. Connection
2. Code example
Below you will find a code example to test your gamepad. For this, we use
the following library, which you can download
. More information
about this library can be found
, this library is released under the
GNU General Public License.
Now download the library and copy the subfolder PS2X_lib into your
Arduino library folder. If this is not known, open your Arduino IDE and sel-
ect
File
→
Preferences.
In the Sketchbook location field, the path of your IDE is stored. From the-
re, select the
libraries folder. In this folder, you store the unpacked library
and restart your Arduino IDE.
Now you can start the sample code from the IDE by selecting
File
→
Exa-
mples
→
PS2X_lib
→
PS2X_Example. Now click Upload after connecting
your Arduino and putting batteries in the gamepad. Also, open the Serial
Monitor to see the output of the program. You open the Serial Monitor
under
Tools
→
Serial Monitor. There you set the baud rate to 57600 to see
the output.
Now you can see in the serial monitor which buttons you press. The X
button triggers the vibration motor and the arrow keys indicate the
strength of the pressure. L1 and R1 output the position of the joysticks.
Hint:
If your gamepad is not recognized, press the "Mode" button so that the
Mode LED lights up and reset the Arduino.
Arduino
Gamepad
3.3 V
5
(Power)
GND
4
(GND)
Pin 10
6
(Attention)
Pin 11
2
(Command)
Pin 13
1
(Data)
Pin 12
7
(Clock)


