background image

www.joy

-

it.net


Pascalstr. 8 47506 Neukirchen

-

Vluyn


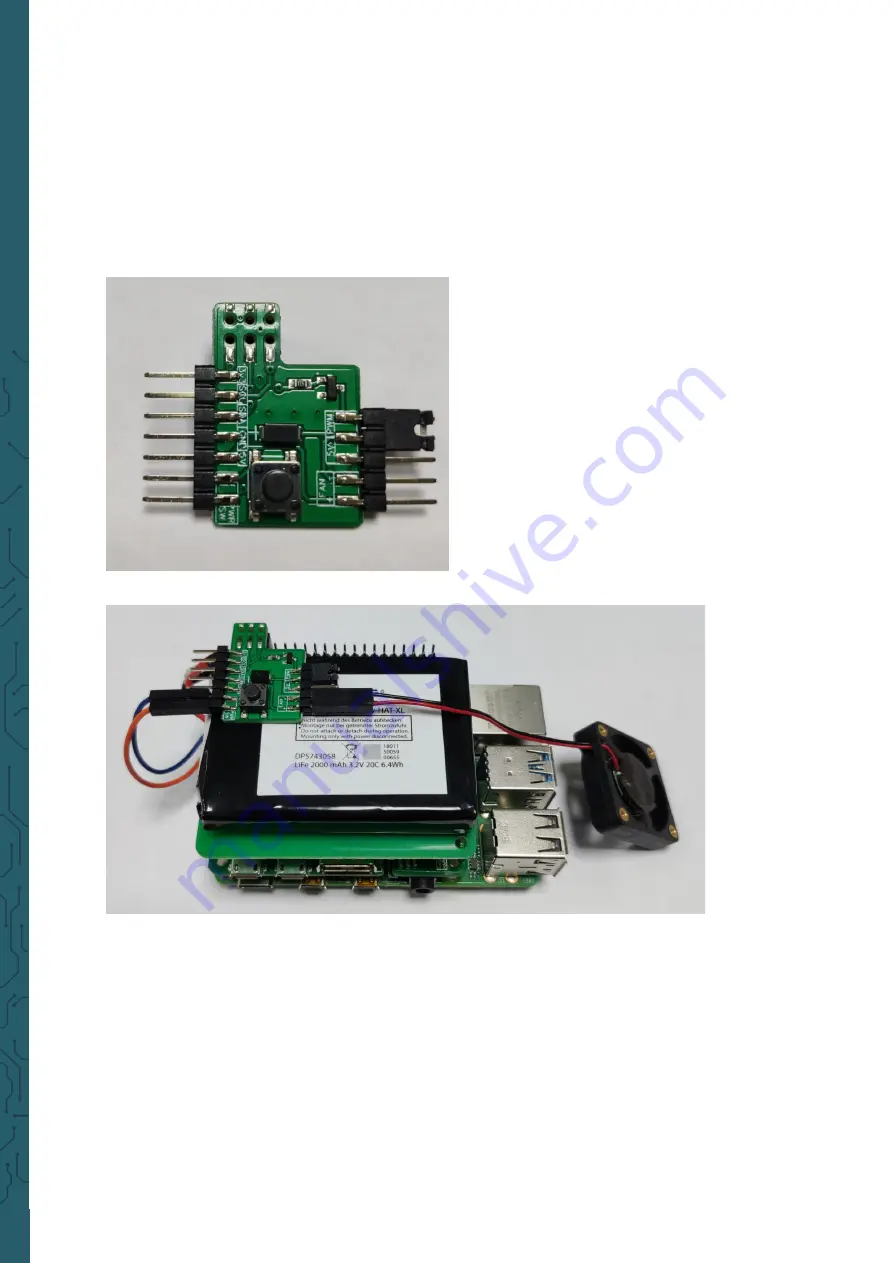
Now connect the fan to the lower two pins on the right side of the board. 

The red cable must be connected to the + pin and the black cable to the 


-

 pin. 


You can either connect the fan permanently to 5V, which will cause it to 

rotate continuously at full power, or you can control the fan speed with a 

PWM signal, which allows you to make the fan speed dependent on the 

CPU temperature of the Raspberry Pi. 


To do this, set the jumper on the right side to either 5V or PWM.


A Python script for PWM fan control can be found at the end of this manu-

al.


Summary of Contents for 251187

Page 1: ...adjusted that the Raspberry Pi will work with the Strom Pi perfectly If you get any difficulties with the usage with the device do not hesitate to conact us This high quality aluminium case offers spa...

Page 2: ...two supplied cables to your StromPi as shown in the picture below The case is delivered with the Raspberry Pi 4 side panels already screwed on and must first be disassembled If you want to install a R...

Page 3: ...ove the foil from the aluminium heat sink and put it on the CPU of the Raspberry Pis Now place your StromPi on the Raspberry Pi and connect the cable for the wide range power supply Please note that d...

Page 4: ...cuit board onto the first pins of the Battery HAT and connect the cables previously soldered to the StromPi to the lo wer two pins on the left side of the board It does not matter which cable is plugg...

Page 5: ...pin You can either connect the fan permanently to 5V which will cause it to rotate continuously at full power or you can control the fan speed with a PWM signal which allows you to make the fan speed...

Page 6: ...n Vluyn Now slide your Rasberry Pi into the housing Screw the fan to the case with the long black screws Make sure that no cable gets to the blades of the fan Now fix the Raspberry Pi with the thicker...

Page 7: ...8 47506 Neukirchen Vluyn Next screw on the back cover for the wide range input Now insert the cover for the GPIO ports Install the front cover for the USB and Ethernet ports Note that the Pi3 and Pi4...

Page 8: ...into the housing However do not tighten the screws until you have placed the housing in the desired position on the DIN rail For mounting on a DIN rail first hook the lower side and then press the up...

Page 9: ...time import sleep led PWMLED 2 PWM Pin GPIO2 startTemp 55 Temperature at which the fan switches on pTemp 4 Proportional part iTemp 0 2 Integral part fanSpeed 0 Fan speed sum 0 variable for i part whil...

Page 10: ...he following steps Enter the following command in the console sudo nano etc rc local Here you can add the script to the autostart The following command must be inserted before the exit 0 command pytho...

Page 11: ...urchase a new device Small appliances with no external dimensions greater than 25 cm can be disposed of in normal household quantities independently of the purchase of a new appliance Possibility of r...

Reviews: