background image

19

20

30

 !

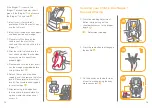
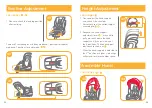
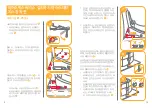
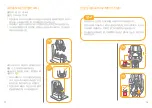
  When used forward facing, the  

  shoulder harness height must be  
  even with the child’s shoulders. 

30


!

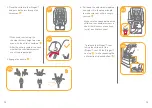
  After the child is seated, re-check      

  whether the shoulder harnesses 

    are at the proper height.
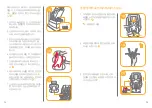
5. Engage the buckle. 

6. Pull down the adjustment webbing 

and adjust it to the proper length

    to make sure your child is snugly 

secured. 

29

!

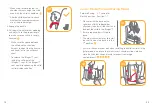
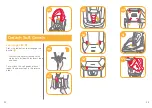
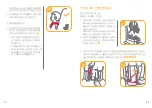
   Make sure the space between 

the child and the shoulder 
harness is about the thickness of 
one hand lay flat on children's 
chest.

!

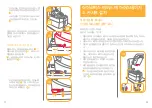
  To release the iStages™ seat, 

taking the child out of the 
iStages™ seat, lift the iStages™ 
seat up while squeezing the child 
restraint release button. 

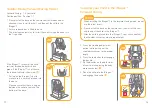
Junior Mode (Forward Facing Mode)

Forward Facing    3-7 years old
Recline position    Position 1-7

!  

Just use the vehicle seat belt when installing the child restraint in the

  junior mode, do not use the Infant Insert, shoulder straps, please 

store the shoulder straps, buckle in respective storage 
compartments. 

32


33


34


35


36

31

!  

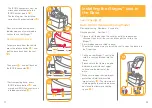
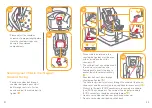
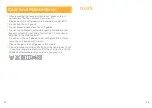
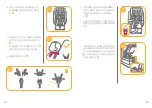
Please install the base on the 

vehicle seat (with rebound bar 
attached), then install the shell, and 
then put the child in the iStages™.

!  

Ensure rebound bar is fitted to 

base.

!  

The most convenient way to install 

the shell is when the base is in the 
7

th

 position. 

31

32

33

Summary of Contents for iStages

Page 1: ...iStages child restraint A C D Group 0 1 2 0 25kg KR...

Page 2: ...eat and the base This base can also be used with other certain Joie infant child restraints Please read all the instructions in this manual before installing and using the product IMPORTANT KEEP FOR F...

Page 3: ...rd facing as long as possible as rearward facing is the safest position WARNING DO NOT have your child in swaddled clothes when using this child restraint in baby or toddler mode because this may prev...

Page 4: ...uckles to become trapped or caught in the vehicle seat or door DO NOT continue to use this child restraint after it has suffered any crash Replace immediately as there may be invisible structural dama...

Page 5: ...child restraint If in doubt consult either the child restraint manufacturer or the retailer 3 Please refer to our vehicle fitting list on product as well as online at our website This is an ISOFIX CHI...

Page 6: ...ll infant insert while the baby is 0 6 months or until they outgrow the insert The infant insert increases side impact protection Remove the head support portion of the infant insert when the child s...

Page 7: ...6 1 2 Make sure that both ISOFIX connectors are securely attached to their ISOFIX anchor points The colors of the indicators on both ISOFIX connectors should be completely green 7 1 There are 9 adjus...

Page 8: ...2 Installing the iStages seat in the Base see images 14 38 Baby Mode Rearward Facing Mode Rearward Facing Newborn 4 years old Recline position Position 1 7 Please install the base on the vehicle seat...

Page 9: ...hether the shoulder harnesses are at correct from proper height 5 Please make sure the infant insert has the wedge assembled before using it for infant 16 6 Detach the snaps on the head support and th...

Page 10: ...proper height 5 Engage the buckle 23 22 23 24 6 Pull down the adjustment webbing and adjust it to the proper length to make sure your child is snugly secured 24 Make sure the space between the child...

Page 11: ...ed into the base Please ensure that there is no gap between the vehicle seat and the bottom of the base Securing your Child in the iStages Forward Facing 1 When installing the iStages in the forwards...

Page 12: ...ng the child out of the iStages seat lift the iStages seat up while squeezing the child restraint release button Junior Mode Forward Facing Mode Forward Facing 3 7 years old Recline position Position...

Page 13: ...d s shoulders 38 The child restraint can not be used if the vehicle safety belt buckle female buckle end is too long to anchor the child restraint securely 37 1 Shoulder belt must pass through shoulde...

Page 14: ...ages 42 1 Please adjust the head support and check if the shoulder harnesses are at the correct height according to 22 30 2 Squeeze the head support adjustment lever 42 1 meanwhile pull up or push dow...

Page 15: ...tton to disengage the buckle 46 Crotch strap cover attached to the crotch hole inside with fasteners loop and hook To re attach the soft goods please repeat the above steps in the reverse order Detach...

Page 16: ...l detergent gasoline or other organic solvent to wash the child restraint It may cause damage to the child restraint Do not twist the soft goods to dry with great force It may leave the soft goods wit...

Page 17: ...29 KR G 0 1 2 3 0 25kg 0 7 ECE R16 3 1 2 3 4 5 10 6 8 9 12 11 13 14 19 17 16 18 20 1 2 3 4 5 6 7 8 9 10 11 12 13 14 15 16 17 18 19 20 7 15...

Page 18: ...1 2 9kg...

Page 19: ...3 4 Tel 1800 8561...

Page 20: ...5 6 1 G2 15 25kg ECE R16 3 2 3 http kr joiebaby com A C D 25kg Group 0 1 2 1 2 4 3 5 6 1 2 4 3 5 6 1 2 3 AIRBAG 3 1 1 3 2...

Page 21: ...7 8 1 7 1 7 1 7 15 25kg 1 1 2 4 1 4 3 7 0 18kg 9 18kg 9kg 9kg 12kg 1 2...

Page 22: ...9 10 4 13 4 1 4 4 1 5 1 6 1 6 2 6 1 7 5 1 6 1 2 7 1 9 8 1 9 8 9 1 7 8 1...

Page 23: ...11 12 10 1 2 12 1 2 13 1 2 10 1 10 2 11 1 11 2 12 1 12 2 13 1 13 2 11 1 2 14 38 4 7 7 14 1 2 14 1 14 2...

Page 24: ...13 14 15 1 15 1 16 1 9kg 2 3 4 5 16 6 16 7 18 1 19 1 18 18 1 2 19 3 20 20 17...

Page 25: ...15 16 4 21 22 5 23 22 23 24 6 24 25 1 25 2 25 2 1 21...

Page 26: ...17 18 1 4 7 7 26 27 1 27 1 1 2 3 29 28...

Page 27: ...19 20 30 30 5 6 29 3 7 7 32 33 34 35 36 31 7 31 32 33...

Page 28: ...21 22 36 37 34 35 37 1 3 4 38 37 1 37 2 37 3 37 4 38...

Page 29: ...23 24 1 41 1 40 39 1 2 39 41 7 40 41 1 42 42 1 22 30 2 42 1 6 42 4 44 43 43 45...

Page 30: ...25 26 45 46 53 46 46 47 53 49 48 52 51 50...

Page 31: ...27 28 30 NOTE...

Page 32: ...P IM0307A Share the joy at joiebaby com gemm 0 0 13kg Joie Children s Products UK Ltd Venture Point Towers Business Park Rugeley Staffordshire WS15 1UZ...

Reviews: