background image

21

20

REAR F

ACING

REAR F

ACING

Installing the Restraint 

- Using Vehicle Belts

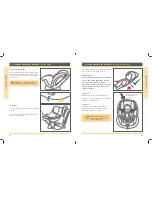
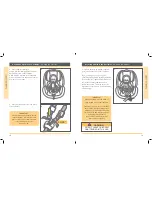
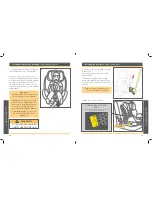
Place the restraint on the vehicle seat 
rearward facing.
See page 11 for recommended positions 
in the vehicle.
Pull the vehicle lap/sash belt out and pass 
through the slot in the restraint.
Pass the vehicle belts across the restraint 
seating surface and out the other side.
Engage the vehicle belt buckle. 

Pull the vehicle belts tight.

Connect the top tether strap. See page 36


for more information

Lap Belt

Sash Belt

NOTE: for clarity the illustrations show the vehicle belts on top of the cover. They 

can also be passed under the cover i.e. between the cover and the shell.

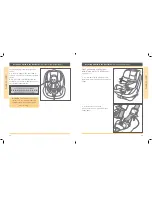
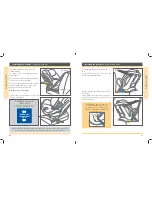
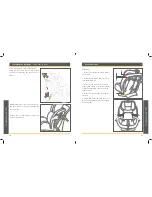
The installed restraint should look like 
this:
A) Vehicle belts securely connected to the 
belt buckle and pulled tight,

B) Lap and sash belt threaded under the 
steel lugs. 
Tether Strap connected to the anchorage 
and correctly tensioned. See page 36 for 
more information.

A

B

Installing the Restraint 

- Using Vehicle Belts

REARWARD FACING 

BELT PATH

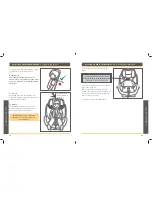
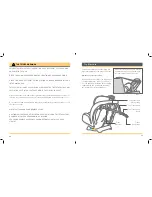
Look for this label showing the cor-

rect path for the vehicle belts

IMPORTANT: pass the vehicle 
belts underneath the steel lug 

protruding into each slot. These 

lugs are essential for holding the 

sash belt in place.

Steel Lug

REARWARD 

FACING BELT


PATH

Summary of Contents for Curve C 0925

Page 1: ...IMPORTANT KEEP THIS INSTRUCTION BOOKLET IN THE PLACE PROVIDED AT THE BACK OF THE CHILD RESTRAINT MODEL C 0925 instruction manual Curve...

Page 2: ...N THIS USER GUIDE AND IN YOUR VEHICLE OWNERS MANUAL Visit us at joiebaby com to download manuals and see more exciting Joie products Quick Reference Rearfacing 4 5 Quick Reference Forward facing 6 7 W...

Page 3: ...der Straps must always be at correct height and pulled tight See page 15 Harness Straps must not be twisted See page 19 Quick Release Buckle must always be securely fastened See page 18 Harness Tensio...

Page 4: ...eight shoulders must not be above the marker line See page 25 Vehicle Belts must always be secure and pulled tight See page 30 Tether Strap must always be used when the restraint is installed in a veh...

Page 5: ...shoulders reach the lower shoulder height marker approximately 12 months of age Then to be used in a forward facing position until the child s shoulders reach the upper shoulder height marker approxi...

Page 6: ...ot have been tested for use with this child restraint and if used may lower the level of protection of fered possibly leading to injury or death Any aftermarket accessory used should be compliant with...

Page 7: ...cline Angle Adjustment Handle 8 Crotch Pad 9 Shoulder Harness Strap 10 Shoulder Harness Strap Covers 11 Infant Body Support Features 17 19 18 20 12 13 15 21 14 12 Sash Belt Lock off Device 13 Head Sup...

Page 8: ...t Shoulder Strap height Requirement The shoulder straps must be positioned near to the child s shoulders but not lower than the child s shoulders The straps should be in the next avail able adjustment...

Page 9: ...line on the lower label they can use the restraint forward facing IMPORTANT Children are safer rear facing Joie recommends that they remain rear facing until they are 12 months of age Securing a Child...

Page 10: ...ulder strap webbing through the Quick Release Buckle Tongues upward towards the child s shoulder and then pull on the adjuster strap This may need to be repeated several times to get the webbing fitti...

Page 11: ...rations show the vehicle belts on top of the cover They can also be passed under the cover i e between the cover and the shell The installed restraint should look like this A Vehicle belts securely co...

Page 12: ...hildren but should be removed when they grow older than about 6 months DO NOT use the Liner if the child is so big that it is preventing them having some movement Shoulder and Crotch pads These are fo...

Page 13: ...handle and raise or lower the headrest as required Correct positioning of the shoulder straps is essential for your child s safety Headrest adjustor handle at back of headrest Securing a Child in the...

Page 14: ...ress button to open the quick release buckle Spread harness straps apart 3 Place child in restraint in seated position firmly against both the back and bottom of the restraint 4 Place buckle tongues i...

Page 15: ...11 for recommended positions in the vehicle Place the restraint on the vehicle seat forward facing Pull the vehicle lap sash belt out and thread it through the two forward facing vehicle belt slots at...

Page 16: ...trap See page 36 for more information Installing the Restraint Using Vehicle Belts Cover Removal To Remove 1 Remove the Infant Insert and Crotch Pad if fitted 2 Press the red button down to disen gage...

Page 17: ...krest pad E 4 Secure the press studs F and elastic loop fasteners G one is inside the shell F B B A A E E G G C The Next Restraint This restraint is suitable for a child of av erage size up to approxi...

Page 18: ...ck or off the side of the seat ALWAYS ATTACH HOOK AND REMOVE SLACK CAUTION CHILDREN CAN BE INJURED OR RESTRAINTS AND TOP TETHER STRAP DAMAGED BY UNSECURED CARGO IN A COLLISION SECURE OR REMOVE HAZARDO...

Page 19: ...tion If the car is fitted with a child restraint an chorage point Locate the anchorage point behind the rear seating position consult the vehicle owners handbook for location of the anchorage point Re...

Page 20: ...ues will push in easily and the second tongue will CLICK when it latches into place If the buckle does not appear to be working correctly get it checked or replaced by contacting the retailer from whe...

Page 21: ...0212A Oct 15 Australia Power Brands Pty Ltd ACN 081952561 Bambino International Division 82 Bellingara Road Miranda NSW 2228 P O Box 2145 Taren Point NSW 2229 Australia Phone 02 8543 5570 Fax 02 8543...

Reviews: