C-9500 Product Bulletin 3
Differential Adjustment
1.
Loosen the locknut.
2.
Using a screwdriver, slowly
rotate the differential
adjusting screw clockwise to
increase or
counterclockwise to
decrease the differential.
Turn the screw
approximately 1/8 of a turn
at a time.
3.
To check the differential,
observe the pressure on the
output gage for the point at
which the pressure drops to
zero. When the desired
differential is obtained,
retighten the locknut.
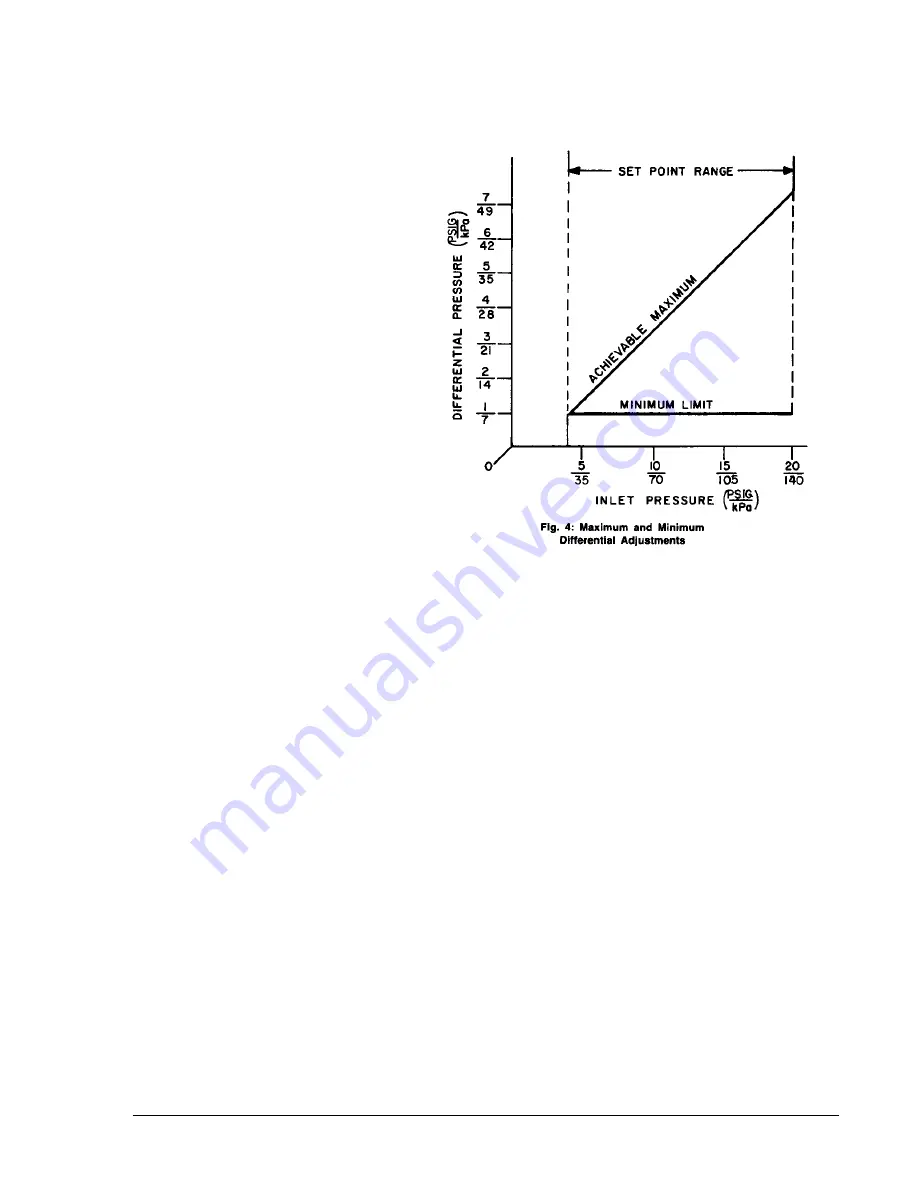
The maximum differential is
obtained by slowly turning the
screw clockwise into the body
until it stops, then backing it out
1/8 of a turn. Note: The screw
will stop because it contacts
the valve disc. Be careful not
to force the screw down onto
the disc. Refer to Fig. 4 for the
approximate maximum
differential pressures obtainable
for each respective set point.
Repair Information
If the C-9500 fails to operate
within its specifications, unit
replacement is required; field
repairs cannot be made.
Note: When checking or
replacing the C-9500, be sure
that the change in output
pressure will not upset the
system and cause damage (for
example allow a coil to freeze,
burn out a heater, collapse
duct work).


