background image

10

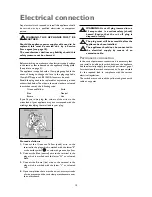
Any electrical work required to install this appliance should
be carried out by a qualified electrician or competent
person.

WARNING: THIS APPLIANCE MUST BE
EARTHED.

Should the appliance power supply cable need to be
replaced, this must be carried out  by a Service
Force agent (see page 18).
The manufacturer declines any liability should this
safety measure not be observed.

Before switching on, make sure the electricity supply voltage
is the same as that indicated on the appliance’s rating plate.
(See picture on page 5).
The appliance is supplied with a 13amp plug supplied. In the
event of having to change the fuse in the plug supplied, a
13amp ASTA approved BS 1363/A fuse must be used.
Should the plug need to be replaced for any reason, proceed
as described below.The wires in the mains lead are coloured
in accordance with the following code:

Green and Yellow  

- Earth

Blue - 

Neutral

Brown - 

Live

If you fit your own plug, the colours of the wires in the
mains lead of your appliance may not correspond with the
markings identifying the terminals in your plug.

Proceed as follows:
1.

Connect the Green and Yellow (earth) wire to the

terminal in the plug which is marked with the letter "E"

orthe earth symbol 

or coloured green and yellow.

2.

Connect the Blue (neutral) wire to the terminal in the

plug which is marked with the letter "N" or coloured

black.

3.

Connect the Brown (live) wire to the terminal in the

plug which is marked with the letter "L" or coloured

red.

4.

Upon completion there must be no cut, or stray strands

of wire present and the cord clamp must besecure over

the outer sheath.

WARNING: A cut off plug inserted into a
13 amp socket  is a serious safety (shock)
hazard. Ensure that the cut off plug is
disposed of safely.

The plug must still be accessible after the
appliance has been installed.

The appliance should not be connected to
the electrical supply by means of an

extension cable.

Permanent connection

In the case of permanent connection it is necessary that
you install a double pole switch between the appliance
and the electricity supply (mains), with a minimum gap of
3mm between the switch contacts and of a type suitable
for the required load in compliance with the current
electrical regulations.
The switch must not break the yellow and green earth
cable at any point.

Electrical connection

Summary of Contents for JLUCFRW6001

Page 1: ...JLUCFRW6001 refrigerator Instruction manual ...

Page 2: ...ed for domestic use only specifically for the storage of edible foodstuffs only It is not intended for commercial or industrial use Containers with flammable gases or liquids can leak at low temperatures Do not store any containers with flammable materials such as spray cans fire extinguisher refill cartridges etc in the refrigerator or the vicinity of the refrigerator or any other appliance Froze...

Page 3: ...crapped cut off the power supply cable and remove the door to prevent young children from being trapped inside This appliance does not contain gases which could damage the ozone layer in either its refrigerant circuit or insulation materials The symbol on the product or on its packaging indicates that this product may not be treated as household waste Instead it shall be handed over to the applica...

Page 4: ...epairs After Sales Service 18 Guide to using the Instruction Manual The following symbols will be found in the text to guide you throughout the instructions Safety precautions Hints useful information Environmental information This appliance complies with the following E E C Directives 73 23 EEC of 19 02 73 Low Voltage Directive and subsequent modifications 89 336 EEC of 03 05 89 Electromagnetic C...

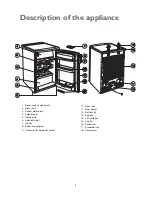
Page 5: ...shelf 13 Egg tray 14 Air circulation 15 Air grid 16 Condenser 17 Evaporator tray 18 Compressor 1 Frozen food compartment 2 Glass shelf 3 Defrost water drain 4 Salad drawer 5 Rating plate 6 Adjustable feet 7 Ice tray 8 Butter compartment 9 Interior light Thermostat control ...

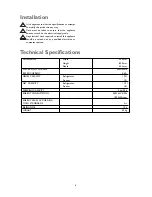
Page 6: ...g 24 h ENERGY CONSUMPTION 0 501 kWh 24h 183 kWh year ENERGY CLASS ACCORDING TO EU STANDARDS A RISING TIME 12 h WEIGHT 39 kg It is dangerous to alter the specifications or attempt to modify this product in any way Care must be taken to ensure that the appliance does not stand on the electrical supply cable Any electrical work required to install this appliance should be carried out by a qualified e...

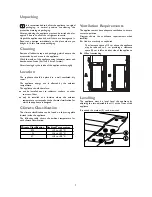
Page 7: ...hould therefore not be installed next to radiators cookers or other sources of heat only be installed at a location where the ambient temperature corresponds to the climate classification for which the appliance is designed Climate Classification The climate classification can be found on the rating plate located inside the appliance The following table shows the ambient temperature for each clima...

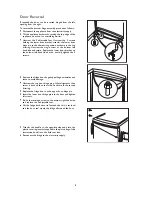
Page 8: ...ttom left hand side but do not fully tighten the 3 screws Remove the fridge door by gently pulling downwards and store to avoid damage Unscrew the top door hinge pin of the refrigerator then screw it back on the other side As shown in the second drawing Replace the fridge door on the upper door hinge pin Insert the lower door hinge pin into the door and tighten all screws Re fix the retained screw...

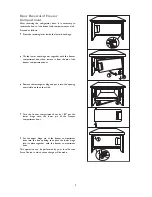
Page 9: ...it from the pin of the freezer compartment door Remove the rectangular plug and put it into the opening now visible on the other side Turn the freezer compartment door by 180 put the lower hinge onto the lower pin of the freezer compartment door Put the upper hinge pin of the freezer compartment door into the free opening then push the lower hinge into its place together with the freezer compartme...

Page 10: ...ur plug Proceed as follows 1 Connect the Green and Yellow earth wire to the terminal in the plug which is marked with the letter E orthe earth symbol or coloured green and yellow 2 Connect the Blue neutral wire to the terminal in the plug which is marked with the letter N or coloured black 3 Connect the Brown live wire to the terminal in the plug which is marked with the letter L or coloured red 4...

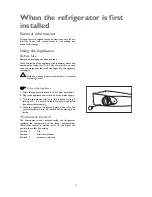
Page 11: ...roducts containing alcohol To Start the Appliance 1 Allow the appliance to stand for 2 hrs after installation 2 Plug in the appliance and switch on at the mains supply 3 Turn the thermostat control to the required setting A setting of 3 4 is usually suitable for normal operation see thermostat control 4 Leave the appliance for approximately 4 hours for the correct temperature to be reached before ...

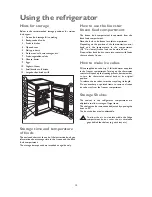
Page 12: ...nt Depending on the position of the thermostatic control knob and the temperature in the compartment 18 C or lower frozen food can be stored here Do not allow fresh food to come into contact with foods that are already frozen How to make ice cubes Fill the supplied ice cube tray full with water and place in the freezer compartment Turning up the thermostat control will speed up the freezing proces...

Page 13: ...t seal Packaging which is swollen or has traces of refrozen water droplets on the pack could indicate that the product has not been kept at a suitable temperature and that it may have lost its original quality Partially thawed food must not be refrozen it must be consumed within 24 hours Never exceed the storage times indicated by the manufacturer In the Event of a Power Failure If there is a powe...

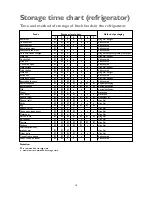
Page 14: ...Butter unopened X X X X X X X original packaging Butter opened X X X X X X X original packaging Milk X X X x x original packaging Cream X X x x plastic box Sour cream X X X X x x x plastic box Cheese hard X X X X X X X aluminium foil Cheese soft X X X X x x x cling film Curds X X X X x x x cling film Egg X X X X X X X Spinach sorrel X X x x cling film Green peas green beans X X X X x x x cling fil...

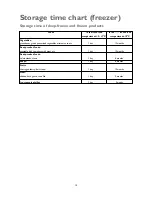
Page 15: ...s Ready cooked foods vegetable dish trimmings with meat etc 1 day 12 months Ready cooked foods sirloin steaks stews 1 day 6 months Soups 1 day 6 months Fruits cherry goosberry fruit cream 1 day 12 months Meat chicken duck goose tuna fish 1 day 5 months Ice cream ice lollies 1 day 3 weeks Storage time chart freezer Storage time of deep frozen and frozen products ...

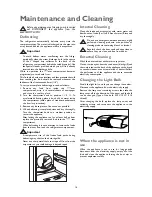
Page 16: ...ner door and the refrigerator compartment Important A temperature rise of the frozen food packs during defrosting may shorten their storage life Never use sharp metal tools to scrape off frost from the evaporator as you could damage it beyond repair Internal Cleaning Clean the inside and accessories with warm water and bicarbonate of soda 5 ml to 0 5 litre of water Rinse and dry thoroughly Do not ...

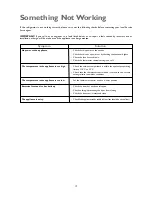
Page 17: ...rost and ice has built up The appliance is noisy Solution Check there is power at the socket Check there is not a power cut by checking the household lights Check the fuse has not blown Check the thermostat control setting is not off Check the ambient temperature is within the appliances operating limits of 10 C to 32 C Check that the thermostat control knob is turned to the correct setting relati...

Page 18: ...del and serial number of the appliance found on the rating plate see picture on page 5 So that you always have these numbers at hand we recommend you to make a note of them here Mod PNC S N Your Fridge Freezer is covered by a 3 year parts and labour guarantee see separate details given at point of sale Please retain your purchase receipt safely for the service engineer to verify the purchase detai...

Page 19: ...19 ...

Page 20: ...08 06 John Lewis Partnership 171 Victoria Street London SW1E 5NN www johnlewis com 200380415 ...

Reviews: