Cooker hood user guide
11
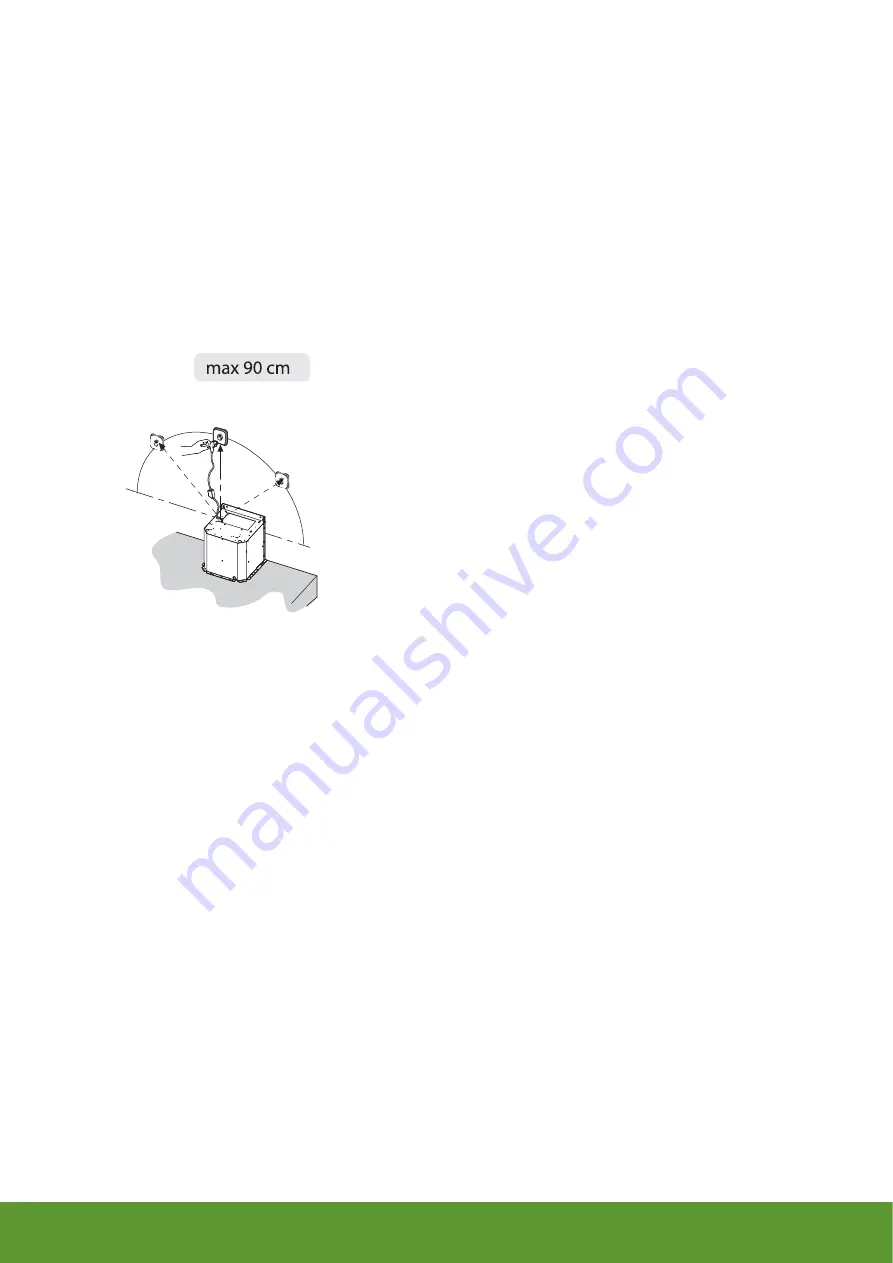
6 Insert screws to attach upper
fl
ue to lower
ue.
7 Insert
the
fi
lters, as described on page 8.
8 Connect your cooker hood to the electrical supply.
Your cooker hood is now ready for use.
Page 1: ...90cm Cooker hood Stainless steel Black Cream JLHDA911 JLHDA912 JLHDA913 User guide...
Page 2: ...Cooker hood user guide 2 2...
Page 3: ...ion 7 Controls 7 Indicators 7 Care cleaning and servicing 8 Care and cleaning 8 Cleaning and replacing filters 8 Aluminium filters 8 Charcoal filters not supplied 8 Replacing lights 9 Servicing 9 Inst...
Page 4: ...Safety is important To ensure your safety and the safety of others please read the Safety information before you operate this product Keep this information in a safe place for future reference In the...
Page 5: ...ailure to do so removes any liability from John Lewis Warnings Any installation work must be undertaken by a qualified electrician or competent person This is a class II electrical appliance and there...
Page 6: ...regularly to avoid oil build up Do not replace the filters while the cooker hood is operating Replacement filters should be bought from authorised dealers Do not use abrasive cleaning materials or sc...
Page 7: ...regular cooking we recommend using fan setting 1 or 2 If you are frying or cooking other dishes which generate a large amount of smoke or steam we recommend using fan setting 3 or intensive speed Ind...
Page 8: ...u regularly fry food To clean the aluminium filters 1 Open the panel A 2 Wash the filter in warm soapy water or in a dishwasher and dry it 3 Replace the filter in the cooker hood and press into positi...
Page 9: ...thorised service engineer Servicing This cooker hood should only be serviced by an authorised service engineer and only genuine spare parts should be used Under no circumstances should you attempt to...
Page 10: ...upper part must be placed outside the lower part If installing this cooker hood between adjoining wall cabinets the wall cabinets must not overhang the hob Before beginning installation remove the fil...
Page 11: ...r hood user guide 11 6 Insert screws to attach upper flue to lower flue 7 Insert the filters as described on page 8 8 Connect your cooker hood to the electrical supply Your cooker hood is now ready fo...
Page 12: ...ould be recycled John Lewis do not operate instore take back but as members of the Distributor Take Back scheme have funded the development and upgrade of recycling facilities across the UK Please tak...
Page 13: ...cooker hood has overheated Switch off the cooker hood and wait until it has cooled down The cooker hood is too close to the hob Re site the cooker hood at the correct height No electric current is rea...
Page 14: ...a fault occurs which you cannot resolve through following the advice and information contained within this User Guide the next step is to contact us on 0330 100 3637 You will be given details for you...
Page 15: ...ased may vary from the information in this table due to technical innovations Type Chimney Hood Dimensions 900 mm wide x 490 mm high Drive Mode HC30 Extraction Rate per hour 299 563 m3 718 m3 Int Numb...
Page 16: ...Contact Details John Lewis Partnership 171 Victoria Street London SW1E 5NN Please retain these instructions for further reference...