background image

13

Installation

Unpacking

Remove all transit packaging.

Positioning

The appliance should be located in a well-ventilated,
dry room. To ensure correct operation the appliance
should:

Not be exposed to direct sunlight.

Not be installed next to radiators, cookers or other
sources of heat.

Only be installed in a location where the ambient
temperature corresponds to the climate classifica-
tion for which the appliance is designed.

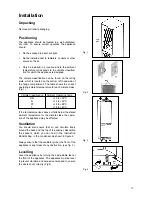
The climate classification can be found on the rating
plate, which is located on the bottom, left hand side of
the fridge compartment. The table shows the correct
operating ambient temperature for each climate class.
(Fig 1)

Climate Classification

Ambient Operating Temp.

SN

+10 to +32°C

N

+16 to +32°C

ST

+18 to +38°C

T

+18 to +43°C

If the temperature rises above or falls below the stated
ambient temperature for the climate class, the opera-
tion of the appliance may be affected.

Ventilation

You should also ensure that air can circulate freely
around the back and the top of the cabinet. 

Assemble

the spacers, which you can find in the Instruction
Booklet bag, in the condenser as shown in figure 2. 

Always ensure that the ventilator grill at the front of the
appliance is kept clear of any obstruction. (see fig. 3 )  

Levelling

Level the appliance by turning the 2 adjustable feet at
the front of the appliance. The appliance must be level
to prevent vibration and excessive noise and to ensure
the doors shut correctly. (Fig 4)

Fig. 3

Fig. 4

Fig. 1

rating
plate

Fig. 2

Summary of Contents for JLFFS2001

Page 1: ...JLFFW2001 JLFFS2002 Fridge Freezer Instruction Booklet 214 3679 60 ...

Page 2: ......

Page 3: ... 7 Refrigerator Compartment 7 Fresh Compartment 7 Food Storage 8 Energy Saving Advice 8 In the Event of a Power Failure 8 Maintenance and Cleaning 9 Something Not Working 10 Normal Operating Sounds 11 Repair After Sales Service 11 Instructions for the Installer Technical Specifications 12 Installation 13 Unpacking 13 Positioning 13 Ventilation 13 Levelling 13 Electrical Connection 14 Electrical Re...

Page 4: ...vice Force centre Any electrical work required to install this appliance should be carried out by a qualified electrician or competent person Parts which heat up should not be exposed Whe never possible the back of the appliance should be close to a wall but leaving the required distance for ventilation as stated in the installation instructions The appliance should be left for 2 hours after insta...

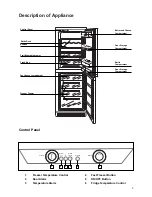
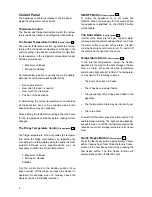
Page 5: ...re Alarm 6 Fridge Temperature Control 3 1 5 5 3 7 1 4 2 2 4 6 On Off Fridge Freezer Stand by Quick freeze Alarm off C Control Panel Shelves Bottle Rack Fruit Vegetable drawer Fresh Box Fast freeze compartment Freezer Drawer Butter and Cheese Compartment Door Storage Compartment Bottle Compartment Door Storage Compartment 1 2 3 4 5 6 ...

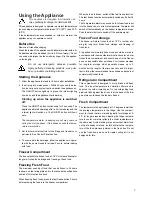
Page 6: ... standby position if you wish to switch off the fridge but leave the freezer in operation for example when on holiday Leave the doors shut when in Standby operation ON OFF Button Control panel To switch the appliance on or off press the ON OFF button continuously for 3 seconds When the appliance is switched on the ON OFF button will illuminate The Door Alarm Control panel If either of the doors ar...

Page 7: ...urs is shown on the rating plate and in the technical specifications section of this instruction book When freezing fresh foods press the fast freeze button 3 hours before placing the food into the freezer compartment When the food is frozen switch off the fast freeze function The fast freeze function automatically switches off after 36 hours The Temperature alarm may sound if a lot of new food is...

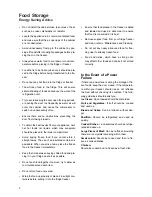
Page 8: ... frozen food in the freezer immediately Keep the time between buying chilled food and pla cing it in your fridge as short as possible Do not push food together too much try to allow air to circulate around each item Do not store food uncovered Wrap the food up properly or place it in airtight con tainers before putting it into the fridge freezer Ensure that food placed in the freezer is dated and ...

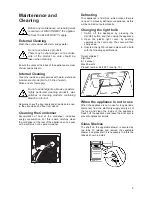
Page 9: ...etable drawer and glass shelf it is necessary to rotate the tabs as shown in detail Maintenance and Cleaning Before any maintenance or cleaning work is carried out DISCONNECT the applian ce from the ELECTRICITY supply External Cleaning Wash the outer cabinet with warm soapy water Do not use abrasive products There may be sharp edges on the under side of the product so care should be taken when cle...

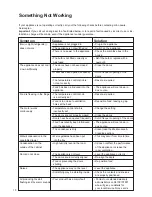
Page 10: ...ctly set Food is too close to ventilation Reposition food leaving a gap holes at the back The motor works Temperature control knob is Change the setting continuously incorrectly set The doors are not properly closed Close the doors Doors have been opened frequently Avoid frequent opening of the doors Food has recently been introduced The appliance will cool down in into the appliance due course Th...

Page 11: ...do if your Fridge Freezer breaks down In the event of a fault occurring which you cannot resolve yourself from advice given within this instruction booklet Your first step is to contact our experienced warranty administrators on 08700107887 to receive service details Service Force are the authorised repair agents for John Lewis branded domestic appliances When contacting our experienced warranty a...

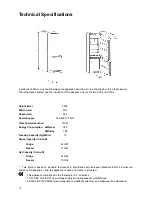
Page 12: ... day 1 08 Freezing Capacity Kg 24hrs 10 Gross Capacity ltrs cu ft Fridge 246 8 7 Freezer 130 4 6 Net Capacity ltrs cu ft Fridge 242 8 6 Freezer 103 3 4 This figure is based on standard test results in accordande with European Standard EN 153 Actual con sumption will depend on how the appliance is used and where it is located This appliance complies with the following E E C directives 73 23 CEE of ...

Page 13: ...lass Fig 1 Climate Classification Ambient Operating Temp SN 10 to 32 C N 16 to 32 C ST 18 to 38 C T 18 to 43 C If the temperature rises above or falls below the stated ambient temperature for the climate class the opera tion of the appliance may be affected Ventilation You should also ensure that air can circulate freely around the back and the top of the cabinet Assemble the spacers which you can...

Page 14: ...loured in accordance with the following code Green and Yellow Earth Blue Neutral Brown Live The wire coloured green and yellow must be connec ted to the terminal marked with the letter E or by the earth symbol or coloured green and yellow The wire coloured blue must be connected to the ter minal marked N or coloured black The wire coloured brown must be connected to the ter minal marked L or colou...

Page 15: ...er the vacant hinge holes 8 Unscrew the hinge pin 4 in the upper and lower hinge blades and refit on the opposite side 9 Change the door self closing system 5 putting the freezer door s on the fridge door and viceversa 10 Refit the spacer washers and the upper door onto the upper hinge pin and refit the centre hinge in position 11 Relocate the lower door onto the central hinge pin and refit the lo...

Page 16: ...John Lewis partnership 171 Victoria Street London SW1E 5NN www johnlewis com ...

Reviews: