

BLACK
BOX
RECORDER BBR1B
- Quick Start Guide
Page | 2
Adjusting Settings
All user definable settings are adjusted using the MENU and BACK buttons and the data wheel. Parameters are
displayed on a RED background whilst being adjusted. The MENU button takes you deeper into the MENU structure or
selects the currently highlighted item for adjustment. The BACK button takes you out of the MENU structure.
The MENU button also doubles as a CONFIRM button and the BACK button doubles as CANCEL.
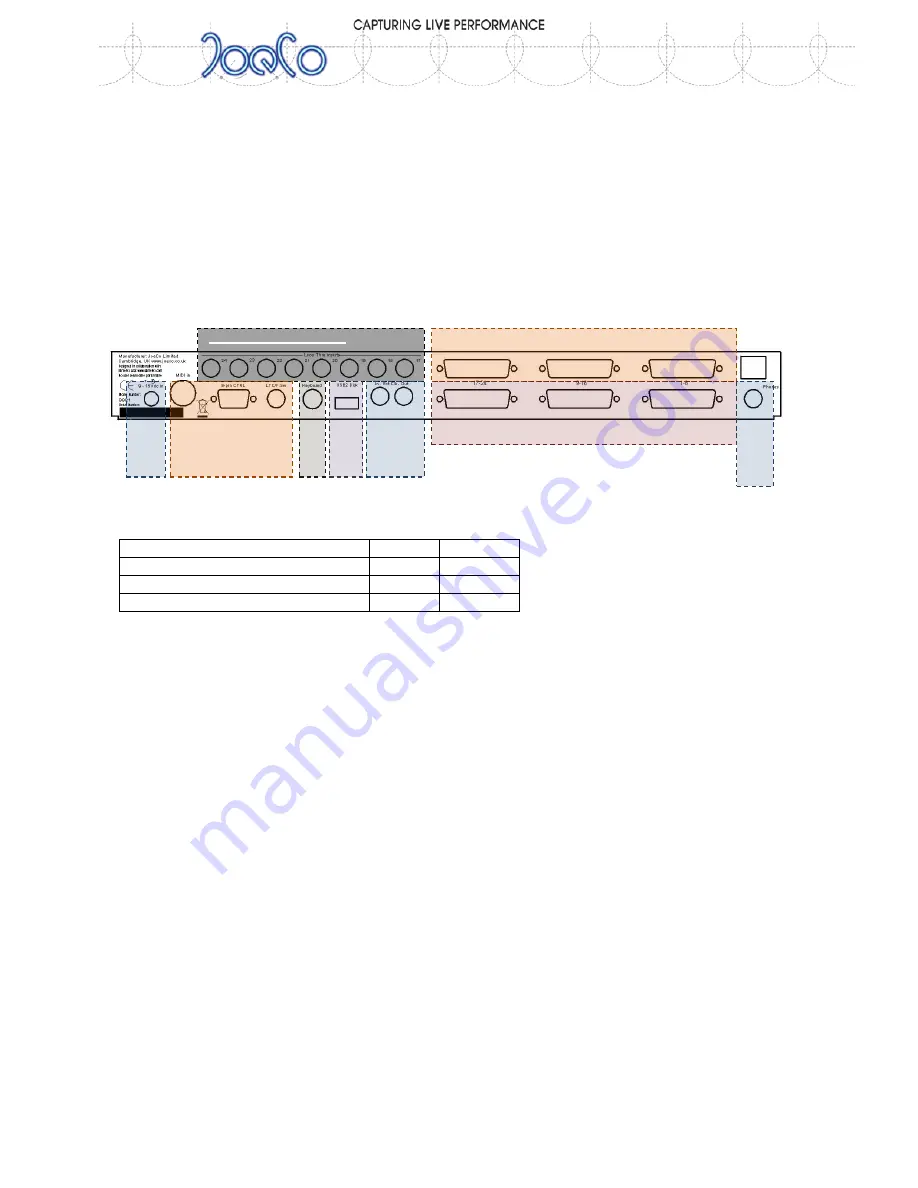
Rear Panel
The rear panel will look slightly different depending on which style of audio interface you have on your BlackBox
Recorder. The areas indicated in the diagram below are explained in more detail in the user manual.
Analogue Signal levels are as follows and can be adjusted in the Setup MENU
Setting
LOW
PRO
Nominal level
-10dBu
+4dBu
Headroom above nominal level
14dB
18dB
0dBFS (when digital clipping occurs)
+4dBu
+22dBu
The BBR1B does not provide loop through inserts as the output cables can be routed through any external effects
before returning to the console’s insert returns. The loop through inserts are therefore blanked off
You may want to plug a pair of headphones into the headphone socket. The data wheel then acts as a volume control
for the headphones only. Holding the BACK button while using the data wheel allows the headphones to be used to solo
pairs of channels. V2 software allows you to create a rough mix for the headphone output
You may need to synchronise the BBR1 to other equipment.
Linear Time Code (LTC) or MIDI Time Code (MTC) can be used to provide a timestamp for the audio files you record.
The BBR1 can also lock to an External Digital Audio Clock. It is very important that you understand about clocking digital
audio systems before you start to use external clock signals. This is explained in much more detail in the user manual.
You may want to name the songs and the tracks that you record in which case you will require a keyboard with a PS2
connector. Ctrl+S allows you to rename Songs; Ctrl-T allows you to name tracks. The keyboard can also be used as a
hardware controller for the transport controls and to operate the menu
The rest of the rear panel and other operational matters are explained in greater detail in the user manual.
(c) JoeCo Limited 2009, 2010. E&OE. All rights reserved
Balanced Analogue outputs
Loop through insert points – Not fitted
Balanced Analogue inputs
Clo
cks
Di
sk
Ke
yb
o
ard
H
ead
p
h
o
n
e
s
Sync and Control
Po
w
er


