background image

After-sales Service Guide


service department of Jinke. 
 
The warranty period for the repaired product is the 
rest time of warranty period, or 90 days starting from 
the repairing date. The longer time is counted as the 
warranty period. 
 
Under the requirement of Jinke or its licensing service 
center, customer should provide invoice (valid receipt) 
and warranty service card, or other information which 
can prove the date and place of purchasing the 
product. 
 
Any charges before the product arrives Jinke or its 
licensing service center should be the expenses of 
customer. 
 
What this Warranty Does not Cover: 
* Damage resulting from shake, collision, shedding 
and misuse; 
* Saving under improper condition; exposing in 
unsuitable environment such as humidity, higher or 
lower temperature; immerged by food, smear or liquid;
caused by force majeure and other factors. 

Summary of Contents for Hanlin eReader V5

Page 1: ...Hanlin eReader V5 Version 7 ...

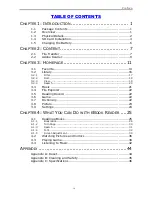
Page 2: ... On Off 9 Switch on 9 Switch off 10 Keyboard Lock 11 Search 11 Searching by page up down button 11 Search by sorting 13 Search by category 14 Recently Reading 15 Shift Bookshelves 16 Reading eBooks 17 Page Turning 17 Page turning by sequence 17 First Last Page 18 Page Jump 19 See Catalog 20 Zoom In Out 22 ...

Page 3: ...ion of Book 29 How to read hyperlink only for PDF ePub formats 30 Bookmark 31 Bookmark for PDF ePub formats 31 Bookmark for other formats 33 Adjust the contrast and brightness of pictures 35 Audio 37 Settings 38 Key Sound 39 Language Setting 40 Replace Font 41 About 42 Time Date 43 USB Connection 44 Exception 45 Specifications 46 After sales Service Guide 47 ...

Page 4: ...e the distortion of the product and damage of the electronic component and battery Do not put or use it in humidity environment Do not let liquid immerge into the product affected with water and damp will cause the malfunction of operation of the internal circuit Put the product on a stable place violently shake or fall off will cause the damage of the product and its electronic component Do not h...

Page 5: ...istilled water to erase the dirty on the screen or the cover Do not privately disassemble the product Only the qualified maintenance man of our company or authorized maintenance center can assemble the product Please pay attention to put the product or its fittings on the place which the children cannot reach Do not put the product near the magnetic field prevent it from disturbing of the magnetic...

Page 6: ...eable battery with damaged surface If battery leaks liquid please clean the product and put the new battery If the liquid drops on your body please carefully clean it Please properly dispose the old and waste batteries This product is CE approved ...

Page 7: ...Structure Structure Menu Indicator Screen Number key 1 5 Bookmark Go to Catalog 7 Zoom 8 Exit Bookmark 6 Previous Page 9 Next Page 0 Next Page Previous Page ...

Page 8: ...Structure Back View Reset Rechargeable Battery Thumbwheel Side View SD Slot Power On Off Top View USB Port Earphone Jack Bottom View ...

Page 9: ...y in the battery slot the battery should be put flatwise the side with wire of the battery should be to the left While inserting the battery pin into the battery socket the metal point of battery pin should be upward The Power supply of this product is by rechargeable battery It can be charged by USB cable Use one port of ...

Page 10: ...ately four hours to charge the battery The orange light will flash while the battery is charging and green light will shine steady when the battery is fully charged Do not remove the battery while charging Battery volume icon is on the bottom right corner when the icon shows one grid volume or system informs low battery volume please charge the battery The device can be used while charging but the...

Page 11: ...Do not constantly remove the battery Installing SD card After inserting SD card bookshelf interface will be automatically displayed To remove the SD card push in the SD card until you hear a click then release it Insert the SD card with the label facing up by the arrow directed ...

Page 12: ...Operation Switch On Off Switch on Press switch on off button to power on Automatically enter Power off LOGO Power On Off Bookshelf ...

Page 13: ...Operation Switch off Long press switch on off button for power off Any interface Power off interface Long press power on off Power off ...

Page 14: ...ck unlock keyboard Any interface Lock keyboard Power On Off Search Searching by page up down button Under the bookshelf interface each page displays eight titles Press page up down button to previous or next page Long press the page up down button to turn ...

Page 15: ...ext page Long press to turn 10 pages at one time Bookshelf 1 8 Exit Text If no music is played move up down the thumbwheel to turn page push the thumbwheel to the slot the menu is displayed If music is being played move up down the thumbwheel to adjust the sound volume push the thumbwheel to the slot the music is stopped ...

Page 16: ...Operation Search by sorting Under the bookshelf interface press Menu to display the menu press the number keys 2 4 to choose the order methods Menu Exit ...

Page 17: ...ation Search by category User can save the books of a sort in the same folder The device can support multi level folder Press the number keys 1 8 to enter into the sub folder 1 8 Main folder Sub folder Exit ...

Page 18: ...ly Reading The books which recently read can be saved in the Recent files folder In the home page of the main bookshelf press the number key 1 to enter into Recent files folder Home page of main bookshelf Number key 1 Exit Recent files ...

Page 19: ...nder the bookshelf interface press Menu to show menu press the number key 5 can shift between the bookshelves of SD card and internal bookshelves Menu Exit Menu Number key 5 Number key 5 Internal Bookshelf Exit Bookshelf in SD card ...

Page 20: ...sequence If no music is played move up down the thumbwheel to turn page push the thumbwheel to the slot the menu is displayed If music is being played move up down the thumbwheel to adjust the sound volume push the thumbwheel to the slot the music is stopped Press once to go to previous or next page Long press to turn 10 pages at one time Previous Next ...

Page 21: ...Last Page Under the text interface press Menu to display the menu then press the number key 1 to display the first page press the number key 2 to display the last page Images file don t support this function Menu Exit ...

Page 22: ...r into the jump page function Images file don t support this function Menu Exit Number key 3 Press the number keys 0 9 to enter the page number and press Menu to jump page During process of entering the page number press Exit to delete the entered number If no page number entered press Exit to quit this function ...

Page 23: ...rt multi level catalogs Press the number keys 1 8 to enter into the catalog of next level if the current catalog is the last level catalog press the number keys 1 8 go to the chapter of the book or press Exit to return to previous level catalog TXT HTML Images file don t support this function Text Catalog Go to catalog 7 Exit ...

Page 24: ...Operation Under the text interface press Menu to display the menu and select Go to catalog by pressing 4 Number key 4 Menu Exit Catalog ...

Page 25: ...earing press the number key 5 to go to the Zoom function after the sub menu appear press the number keys 1 9 to select the font size PDF file supports this function under ADOBE reading mode Under the text interface press the number key 8 it can change the font size gradually Number key 5 Menu Exit ...

Page 26: ...or other formats press the number key 8 to zoom in three levels Normal Full Screen double Under the Double mode the text will be automatically horizontal displayed Zoom in 8 Zoom out 8 Zoom in 8 Normal Full Double ...

Page 27: ... the text interface of ePub file press Menu button after the menu appearing press the number key 6 to go to the Rotate function the current text will be rotated in 90 degrees PDF file supports this function under ADOBE reading mode Menu Number key 6 ...

Page 28: ...nder the text interface of ePub file press Menu button then select Search by pressing number key 7 PDF file supports this function under ADOBE reading mode Note This function only for the search for English word and number Menu Exit Number key 7 ...

Page 29: ...tart the search Menu Number key 0 9 Press the number keys 0 9 to enter letter or number Method Enter the first letter by pressing the corresponding number key once enter second letter press it twice E g enter letter D press number key2 enter letter O press number key 5 in three times ...

Page 30: ...Operation During the search press page up down buttons to search the following lines of the article Press Exit to quit the search Page up down ...

Page 31: ...Under the text interface of PDF file press Menu button then press the number key 5 or 8 to choose ADOBE PDF reading or XPDF reading after mode shift the current file will be automatically closed and the interface will go back to bookshelf interface then please re open the file ADOBE PDF reading 1 8 XPDF Reading Menu Exit Number key 8 Menu Exit Number key 5 1 8 ...

Page 32: ...ess Menu to display the menu and select the About by pressing the number key then all the information of the book will be displayed which include author file name publisher publishing date copyright etc Different books may have different items Menu Exit About ...

Page 33: ...urrent page has hyperlink press the number key 9 or 0 to select the hyperlink and press Menu button to skip to the linked page PDF file supports this function under ADOBE reading mode Previous Hyperlink in current page Number key 0 Number key 9 Next No hyperlink in current page Next Previous Previous Next ...

Page 34: ...ext interface of ePub file press the number key 6 to add a bookmark long press the number key 6 to enter into bookmark interface Exit Long press number key 6 To clear a bookmark Under the bookmark interface long press the number keys 1 5 then the corresponding bookmark is cleared ...

Page 35: ...ress number key1 5 How to skip to the page with bookmark Under the bookmark interface press the number keys 1 5 to skip to the page with bookmark Number key 1 5 PDF file supports this function under ADOBE reading mode ...

Page 36: ... of the number key won t show in the status bar Add Bookmark 1 5 Press the number keys 1 5 to directly add bookmarks Replace Bookmark If the current number key you want to use as the bookmark is already used you may long press the current number key within 2 seconds then the previous page with bookmark will be replaced by the current page Clear Bookmark ...

Page 37: ... to clear the bookmark Check Bookmark Long press the number key 6 within 2 seconds to enter into checking bookmark status then all the details of the bookmark will be listed Press the number keys 1 5 to jump to the page with bookmark Long press Number key 6 Exit 1 5 ...

Page 38: ...Adjust the contrast and brightness of pictures When browsing pictures the contrast and brightness can be adjusted press Menu and use to switch between contrast and brightness the icon will be changed as well Menu ...

Page 39: ...s the number keys 1 8 to adjust contrast or brightness directly press the number keys 9 and 0 to configure levels press Menu to finish configuration 1 8 0 or 9 The image within 600x800 pixels is strongly recommended ...

Page 40: ... key 1 to enter into Music Play function The Music Play function will display the all information of the current MP3 including song s name baud rate playing time etc Back to Bookshelf Pause Play Number key 1 Exit Menu Cycle FF FR Previous Song Stop Volume Adjustment Next Song move up down the thumbwheel to adjust the sound volume press the thumbwheel to pause play music ...

Page 41: ...Under the bookshelf interface press Menu to display menu press the number key 6 to enter into the settings function which includes key sound setting language setting replace font about and time date Exit Number key 6 Menu ...

Page 42: ...Operation Key Sound Under the settings interface press the number key 1 to open close the sound of the key Open Close Sound ...

Page 43: ...Operation Language Setting Under the settings interface press the number key 2 to enter into language selection interface select language by pressing the opposite number key Exit Number key 2 ...

Page 44: ...t Under the settings interface press the number key 3 to enter into the replace font interface and select the opposite key to choose font The TTF files are saved in the fonts folder of the root of SD card Number key 3 Exit ...

Page 45: ...Operation About Under the settings interface press the number key 4 to check the information of system version Exit Number key 4 ...

Page 46: ...function Press 1 3 to select a Date Format and then press key to switch between Time and Date then press the number keys 0 9 to set Time and Date When finish setting press Menu to confirm to save the setting press Exit to quit this function without saving the modification Exit Number key 5 1 3 Menu Exit ...

Page 47: ...the USB cable which supports the plug and play function After connection the Removable disk will automatically display in the My Computer Note before disconnecting the USB cable the operations of book reading can not work See the following picture Exit Insert USB Cable Menu ...

Page 48: ...vice Drive J before pull out the USB cable Safely remove USB Mass Storage Device Drive J 12 12 After pull out the USB cable it will go back to the bookshelf interface Exception When the product can not normally work press the reset button to restart If the above mentioned method can not work please long press the reset button over 3 seconds then press the power on button ...

Page 49: ...H Operating System Linux OS Format Natively Support PDF EPUB TXT HTML DOC RTF MP3 WOL CHM RAR ZIP BMP JPG TIF PNG GIF PPT PDB FB2 DjVu LIT Storage NAND FLASH Memory SDRAM 32MB Internal 2MB NOR FLASH I O USB 2 0 Port SD slot support 16GB capability Weight 160g include battery Battery Li Polymer 1000mAh Working Temperature 0ºC to 40ºC Keeping Temperature 20ºC to 55ºC ...

Page 50: ... for limited repair and free maintenance not including the fault and damage caused by wear material artificial factors by customer and non quality problem etc The appearance of product in the warranty period without nick and artificial damage with invoice valid receipt warranty service card kept by customer these will be the proof for after sales service Jinke can check the warranty service card o...

Page 51: ...nvoice valid receipt and warranty service card or other information which can prove the date and place of purchasing the product Any charges before the product arrives Jinke or its licensing service center should be the expenses of customer What this Warranty Does not Cover Damage resulting from shake collision shedding and misuse Saving under improper condition exposing in unsuitable environment ...

Page 52: ...abrasion Jinke never receive notice of failure or quality problem of the product from customer within the warranty period Deleted damaged altered or forged series number of the product Any non Jinke products including those that Jinke may not procure and provide with or integrate into Jinke product Within the warranty period customer should do Product or accessories should be sent to the purchasin...

Page 53: ...roduct will enjoy the policy of after sales service for life Benefits provided by this warranty append on the all rights and compensation of the compulsory laws in any country or regions Jinke is not responsible for the responsibilities and obligations that surpass the responsibilities and obligations announced in this warranty and do not authorize its licensing service center or entity to bear No...

Reviews: