background image

FOR WARRANT Y INFORMATION, PARTS/ACCESSORIES, CALL 1-800-370-0745 

OR CONTAC T US THROUGH OUR WEB SITE, WWW.JIMMYST YKS.COM

16

Q U E S T I O N S / CO M M E N TS :

1-800-370-0745

j i m m y s t y k s . c o m

17

SECTION 7

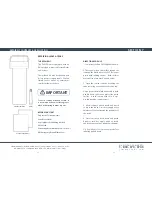
REPAIR KIT CONTENTS & APPLICATION

The  PUFFER  comes  equipped  with  an 
RK1 emergency repair kit for small leaks 
and/or tears.

The included kit may not be adequate 
for larger tears or along seams.  Contact 
Jimmy  Styks

TM

  online  at  jimmystyks.

com for further assistance.

Prepare the following items:

Latex Gloves (Pair)

Isopropyl Alcohol (Rubbing Alcohol)

Clean Cloth

Cement Applicator (Brush, Popsicle® stick, etc.) 

RK1 Emergency Repair Kit Contents

To  avoid  cement  irritation  of  skin,  it 
is recommended to wear latex gloves 
when attempting to make repairs.

1. Completely deflate PUFFER paddle board.

2. Thoroughly clean the surface around the 
leak and the matte side of the PVC/Polyester 
patch  with  rubbing  alcohol.    Both  surfaces 
must be free of moisture, oil and debris.

3.  Open  the  cement  tube  by  breaking  the 
tube seal using the outside of the tube cap.

4. Apply cement carefully and evenly to both 
paddle board surface and matte side patch 
surface.    Avoid  contact  with  skin  &  eyes.  
Avoid breathing cement vapors.

5.  Allow  cement  on  both  board  and  patch 
to dry to the touch. Once dry, reapply a very 
thin layer of cement around the perimeter of 
the patch.

6.  Once  cement  on  both  board  and  patch 
becomes  tack-free,  apply  patch  to  board 
and firmly work out any trapped air bubbles.

7. Allow 8 hours for cement to cure before 
inflating paddle board.

REPAIRING LEAKS & TEARS

THE REPAIR KIT

BEFORE YOU START

DIRECTIONS FOR USE

REPAIR KIT CONTAINER

CEMENT

PVC/POLYESTER PATCHES X 2

IMPORTANT

Summary of Contents for Puffer

Page 1: ...OWNERS GUIDE...

Page 2: ...T BEFORE DAWN OR AT ANY TIME IN POOR LIGHTING CHECK LOCAL LAWS AND REGULATIONS REGARDING PROPER AND SAFE USE OF THIS PRODUCT NEVER LEAVE BOARD EXPOSED TO DIRECT SUNLIGHT WHEN OUT OF THE WATER NEVER LE...

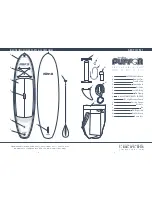
Page 3: ...745 j i m m y s t y k s c o m 5 SECTION 1 IDENTIFYING PUFFER PARTS ACCESSORIES PUFFER Paddle Board Bungee Ties Traction Pad Carry Handle Air Valve Leash D Ring Fin Clamp JS ADJUSTABLE TRAVEL PADDLE HP...

Page 4: ...up Max pressure is 12 psi If inflated cold to 12 psi pressure will increase in the sun causing potential damage to seams Damage resulting from heat is not covered by manufacturer s warranty Never leav...

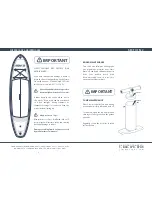
Page 5: ...alve Locate the air valve on tail section of the board deck Open valve cover Makesuretheinnervalveisdisengaged in the up position See opposite illustration Connect air hose to air valve Inflate PUFFER...

Page 6: ...front first then lower into place until flush against bottom of fin clamp Reset screw and barrel Tighten securely FIN INSTALLATION TIGHTENING VALVE Occasionally the valve on your inflatable SUP may be...

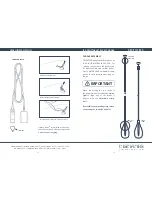
Page 7: ...nchfingertipswhen connecting the two paddle shafts The PUFFER paddle board includes our JS ADJUSTABLE TRAVEL PADDLE For carrying convenience the paddle can be separated into two smaller halves Our JS...

Page 8: ...Allow PUFFER to completely dry before tightly rolling for packing Excess moisture may cause mildew and or mold damage The board tote included with PUFFER is intended for PUFFER and PUFFER accessories...

Page 9: ...e repairs 1 Completely deflate PUFFER paddle board 2 Thoroughly clean the surface around the leak and the matte side of the PVC Polyester patch with rubbing alcohol Both surfaces must be free of moist...

Page 10: ...er along with the damaged product will need to be returned to the closest warehouse Vancouver or Huntington Beach at customer s expense Upon physical review Jimmy StyksTM will make it s final determin...

Page 11: ...1 800 370 0745 www jimmystyks com TM...

Reviews: